

DRAW
MODELING A COOKIE CUTTER FROM AN SVG FILE WITH 123D DESIGN
WE ARE ALL DESIGNERS
The democratization of digital manufacturing enables more people to prototype their ideas. What kid has not dreamed of seeing his drawing coming out of the paper and taking form? The layer-by-layer process is just a superposition of stacked 2D drawings, and even if you have no modeling skills, you can design a three-dimensional shape quickly from an extruded drawing by giving it depth.
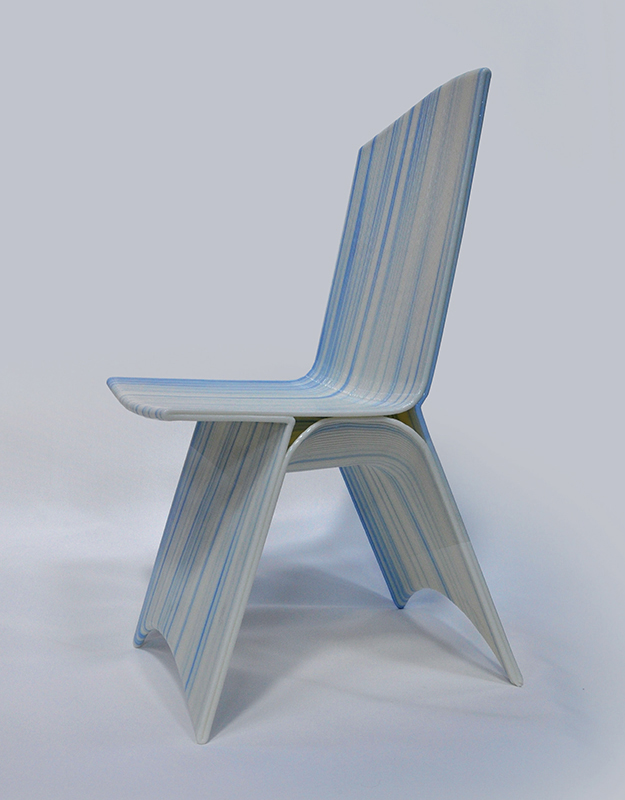
A childhood dream was brought to life in a project called Drawn, using a gigantic homemade 3D printer named Galatea. The machine can create a functional chair with minimal human intervention, in less than two hour. Galatea is actually a re-purposed assembly robot from the car industry. The tool on its end was replaced by a plastic extruder laying thick layers of ABS on a large heated bed.
In 2015, the company completed a Kickstarter campaign to launch a furniture collection, but the main mission is to spread the concept in different countries to enable customers to design their own objects and get them produced locally by the closest Galatea. Virtually, any sketch of a chair’s profile could be transformed into an actual piece of furniture with minimum effort. The machine is better at producing open profiles because filling volumes with melted plastic would cause retraction and cooling problems. Therefore, most of Drawn’s designs are extruded silhouettes, perfect for fast and material-saving 3D prints.

Galatea 3D printer
By: Drawn
Source: http://drawn.fr/
© Drawn
C2 Rounded chair
By: Drawn
3D printed on: Galatea
Source: http://drawn.fr/
© Drawn
Dawn kid rocking stool
By: Drawn
3D printed on: Galatea
Source: http://drawn.fr/
© Drawn
MODELING A COOKIE CUTTER FROM AN SVG FILE WITH 123D DESIGN
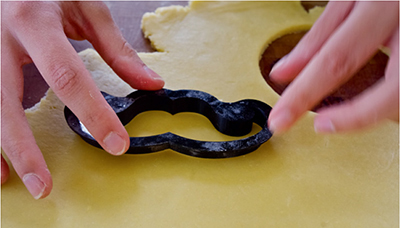
An SVG file is a vector format: you can create one in Adobe Illustrator or one of its free competitors, such as Inkscape. We’ll use it as a base to create a cookie cutter. For this cookie cutter, we chose a “mustache” shape, which you can download from thingiverse.com (http://www.thingiverse.com/thing:311668) under the file name MustacheLine_SVG.svg.
If you have another idea, draw your own design in Illustrator or Inkscape. You can also find thousands of free vector files online, such as logos, icons, and drawings. An outline is enough, the only thing to keep in mind is scale. Work in a document using millimeters as units and create a design the size of your future cookies: the original mustache drawing is 70 mm long, so about 2.75 inches.

Open the SVG file in 123D Design: click the drop down menu and chose “Import SVG » As Sketch.” Select your design: a scaled version of it will appear into your workspace. We then have to extrude the drawing to make an object: select the “Extrude” tool in “Construct” and click on the outline of the sketch. The height will define the depth of the cookie cutter: 8 mm should be enough. Press “enter” or left-click to validate.

Let’s move on to discover a new tool: “Modify » Shell”.

After selecting this option, choose the top face of the model. The volume will open, leaving only a thick outline. You can choose this thickness by pulling on the white arrow or using the gray box at the bottom of the screen.
In this case, the thickness of the “shell” should be 0.8 mm, equivalent to two layers of nozzle passage for most FDM/FFF printers. The shell should be thin enough to cut through dough easily. Make sure to create the shell toward the outside of the sketch to respect the original proportions.


Then, completely open the volume by removing the bottom of the shell. For that, select the imported sketch again and, with the “Construct » Extrude” tool, pull the white arrow through the bottom until the zone turns red. Once you accept, only the 3D outline of your drawing should remain. Do not delete the sketch base, we will need it to create a small reinforcement for our cookie cutter so that it doesn’t lose its shape. You can move the first 3D model to the side for later use.


Select the sketch and extrude it as a New Solid-with a thickness of 1 mm. Select it with the shell function, and choose 2 mm toward the outside to create a thick rim. As you did for the first part, subtract the inside material using the extrusion tool, using the original sketch.
You can now bring back the parts together using the”Snap” tool.

Select the top face of the rim and the thin thin underside of the shell. The first volume selected should then be attracted by the second one, overlapping each other perfectly. Use the “Combine » Merge” function to turn both volumes into a single mesh.
You can now export your cookie cutter as an STL or send it to Meshmixer.

Make sure to fill your FDM/FFF 3D printer with food safe filament (FDA approved). You will be able to cook your custom cookies in less than an hour.

You can now preheat the oven!