

LEARN THE BASICS
ADDITIVE FABRICATION TECHNIQUES
CHOOSING A PERSONAL 3D PRINTER
THE 3D PRINTING FILE CHECKLIST
ADDITIVE FABRICATION TECHNIQUES
These fabrication technologies all use the same technique: laying down consecutive layers of material to produce three-dimensional objects. Each of these digital prototyping techniques requires the intervention of a computer to interpret the digital models of the item to be printed. The digital model is sliced in hundreds of layers, each transformed into a path for the machine to follow while 3D printing. Certain technological solutions for the 3D printing of metal (DMSL, EBDM, DMD, SLM), of food (paste extrusion), and of body organs have not been included in this chapter. Several further techniques are also in the process of being researched, or are for industrial use only. Our selection in this list addresses the bulk of the rapid prototyping choices available to consumers right now either in the form of a service or in personal 3D printers. Pictures accompanying the text allow you to visualize the tooling and the operation of these machines. QR codes will direct you to videos that show each additive manufacturing process in action.

 FDM AND FFF
FILAMENT DEPOSITION MODELING (TRADEMARKED BY STRATASYS)
FUSED FILAMENT FABRICATION (LICENSE-FREE TERMINOLOGY USED BY THE OPEN SOURCE REPRAP PROJECT)

Inventor: S. Scott Crump (Stratasys).
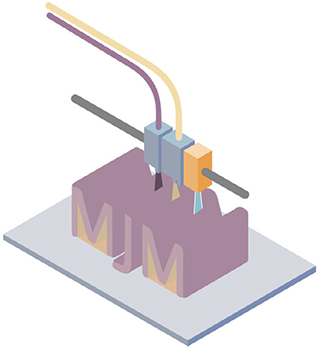
Description: Melted filament deposition is one of the most widespread 3D printing techniques. The FDM technique was invented in 1988 when a man decided to manufacture a toy for his daughter using a hot glue gun. This man was no other than Scott Crump. This idea of automating the process of fabrication by depositing successive layers was the seed of the company Stratasys, which he created the following year with the help of his wife, Lisa Crump. Since 2009, the number of 3D printer models using this technique has exploded on the market, following the entry into the public domain of certain patents, among them Crump’s. Not able to use the term FDM, trademarked by Stratasys, the creators of these new machines invented the term FFF, replacing the word “deposition” by “fusion.” With the tooling and the consumables used by this technique being relatively affordable, simplified and democratized machines have been able to appear on the market. The RepRap project, for example, has allowed thousands of users to create their own open source FFF 3D printers. From this initiative was indirectly born the now-famous American brand MakerBot, which was then bought, in 2013, by Stratasys. The FDM process uses as its primary material thermoplastic filaments (a plastic that turns liquid under a certain temperature), which come wound on spools. These filaments, which generally vary in diameter between 1.75mm and 3mm, are mechanically pulled through an extruder heated to between 180 and 300 degrees celsius. The extrusion head acts like a hot glue gun and deposits molten plastic. This cools down almost right away in the ambient air. This way, consecutive layers of plastic are deposited in layer thicknesses of an average 0.2 mm, about as thin as human hair.
Some machines use a second extrusion head also, which allows support structures to be printed out of soluble material; such structures are there to support physical overhangs in the design of the main print. After printing is complete, the workpieces must then be plunged into a dissolving bath to remove those extra supports. Single head extruders can also build support structures, but in this case, the material used is the same as the main object and has to be removed manualy or with the help of sharp tools.
Materials: ABS (acrylonitrile butadiene styrene), PLA (polylactic acid), PC (polycarbonate), Nylon, PET (polyethylene terephthalate), PVA (polyvinyl alcohol) and, some experimental ones, like SWF (Seaweed Filament).
Manufacturers: Stratasys, MakerBot, Ultimaker, UP!, 3D Systems (Cube), LeapFrog, BQ, ShareBot, Be3D, PrintrBot, Pirate 3D, Solidoodle, Zotrax, Fabbster, Tinkerine...
Advantages: Choice of colors and materials, ability to create hollow and honeycombed volumes, wide range of prices, ability to create both solid and flexible workpieces.
Applications: Early product development, functional prototypes, “goodies”, toys, robotic parts...

SLA
STEREOLITHOGRAPHY

Inventor: Chuck Hull (co-founder of 3D Systems).
Description: Stereolithography was the first 3D printing technology to be patented. This technology, attributed to Chuck Hull, founder of 3D Systems, used focussed UV light to harden a liquid photopolymer resin in order to create objects layer by layer.
Light-sensitive resin is put into a transparent tank while a laser, stationed above or below the tank, is directed using mirrors so that it follows a trajectory that tracks the shape sent from the computer. Once exposed to the strong light, the layers of resin are solidified, a phenomenon named polymerization, which causes them to stick together and produce a solid volume. Only one material may be printed at a time. The resolution of the layers that is obtained in SLA is on the order of 0.03 mm, which makes the technique highly-prized for its precision. Once finished, the workpieces must be plunged into a solvent bath, which serves to clean up the excess resin and to halt the chemical reaction. Created objects may complete their hardening in natural light, or else with the help of an ultraviolet oven. Objects made by SLA remain sensitive to the effects of UV radiation and may become damaged over time, by starting to show cracks or yellowing. However, the use of castable resins permits “lost wax” molding of some pieces. This characteristic is a major advantage for jewellers. The support structures (in the form of branches or 3D lattices) must be removed manually or with the help of tools. One evolution of this technology, DLP, uses a digital video projector in the place of a laser. This difference enables this process to cure the resin much faster and precisely by projecting light on entire layers in a single step rather than having to move the laser across the surface.
Materials: Colored and transparent photopolymer, flexible, thermofusible photopolymer.
SLA Manufacturers: FormLabs, 3D Systems, MiiCraft.
DLP Manufacturers: EnvisionTEC, Solidator, Prodways (with MOVINGLight technology), Nova 3D, Ember by Autodesk, Lightforge, The Deep Imager 5, Roland.
Advantages: Precision, transparency, fusibility, tiny workpieces.
Applications: Medical, model making, jewelry, figurine making.

POLYJET
MULTIJET MODELING OR MATERIAL JETTING (MJM)

Inventor: Objet (Stratasys)
Description: The MJM technique resembles the functioning of an inkjet printer. With this process, a printing head moves around above a platform while jetting microdroplets of a photopolymer, a light-reactive resin similar to the one used in SLA. A UV light, situated near the print head, hardens the resin in place by curing (drying using UV radiation). By repeating this process, the MJM printer constructs a 3D object, one layer at a time. This technology also allows several different materials to be printed at one time, and for the materials to be combined. It is therefore possible to create workpieces in multiple colors, with multiple properties and opacities. With a layer resolution of down to 16 microns (0.016 millimeters), MJM 3D printers are considered high-end rapid prototyping tools. Their ability to reproduce the texture, appearance and functioning of items produced by injection molding makes them one of the preferred tools of industrial designers and engineers.
The ability to combine types of resins makes MJM technology the most versatile on the market, with more than 100 droplet layouts or arrangements available. The microscopic matrix composites thus created are called “Digital Materials.” The support material for this process is gelatinous in texture and can be removed by hand or with the help of water jets.
Materials: Photopolymers which can be transparent, bio-compatible, colored, high-resolution, and/or simulate polypropylene, elastic or rubber, etc.
Manufacturers: Solidscape, 3D Systems, Stratasys (Objet).
Advantages: Large choice of materials and properties (rubberlike, transparent, etc.), colors, very high resolution (0.016mm), possibility of composite materials.
Applications: Medical, multi-material prototyping, injection molding effect, toy design, etc.
LOM
LAMINATED OBJECT MANUFACTURING

Inventor: Helisys Inc.
Description: This fabrication technique, invented in Japan, uses paper material as its primary consumable. The LOM machine unrolls a long piece of adhesive paper onto the printing platform, and then a heated roller applies pressure on the layer, which makes it adhere to the surface. Then, a blade or a laser cuts the contour of the paper to the dimensions of the platform, and traces the edges of the 3D object at that height. The unused space gets a checkered square pattern cut into it (these cuts will allow the object to be freed from the excess material around it when the fabrication process is complete). At each layer, the platform lowers itself by the thickness of one piece of paper material, and the sequence repeats itself until the workpiece is complete. At the end of the manufacturing process, you end up with a ream of glued-together paper that must be carefully pruned apart, in order to extract the object or objects that are hidden inside.
Given the volume that must be removed at the end in order to create a workpiece, LOM is more akin to subtractive, rather than to additive, manufacturing. The interiors of the pieces are full, because it is impossible to remove the support material imprisoned inside a closed cavity. This process, which had almost entirely disappeared from the market, made a stunning return with the arrival of the SDL technology (Selective Deposition Lamination), invented by the brothers MacCormack, creators of the Irish company Mcor. SDL replaces the proprietary adhesive rolls of paper with standard A4 sheets on which it is possible to print beforehand using an inkjet printer, in order to obtain objects with millions of colors. The glue is applied page by page using a robotic wheel. This is a process that uses paper to its full potential!
Materials: Paper and plastic film
LOM Manufacturers: Cubic Technologies, Solido.
SDL Manufacturers: Mcor Technologies.
Advantages: No chemical reactions, large undistorted workpieces, properties similar to wood (using paper), heat resistance, machinability.
Applications: Topographic maps or models, sculptures, structural, architecture, medical, archeological, museum, and scenery models, etc.

3DP OR BINDER JETTING OR ZPRINTING
THREE DIMENSIONAL PRINTING, INKJET HEAD

Inventor: Z Corporation.
Description: This technique, developed at MIT (Massachusetts Institute of Technology), uses powders combined with colored binding agents to produce multicolored workpieces. Fine powders are added to a receptacle using a robotic arm that sweeps across the surface at a constant speed. With each pass, the binding agent is deposited in the correct areas through a nozzle, then the platform lowers by a few tenths of a millimeter in order to allow space for the next layer to be added. This sequence repeats itself multiple times until the print volume is reached. The printed pieces are then dug up out of the excess powder which is acting as their support, and cleaned using suction tools. Finally, the colored pieces are sprayed or plunged into a cyanoacrylate bath to give them greater durability and to achieve better color rendering.
Materials: Sandstone, plaster, sugar, acrylic powder, ceramic powder, calcium carbonate.
Manufacturers: Z Corp (1995-2012), 3D Systems (2012 until today), Foschif Mechatronics Technology.
Advantages: Color and freedom of shape design.
Inconveniences: Fragility, porosity, difficulty making sloping gradients with the cheaper versions of the machine.
Applications: Sculptures, figurines, reproductions, decorations, museum pieces, education, art.

SLS
SELECTIVE LASER SINTERING

Inventor: Carl R. Deckard.
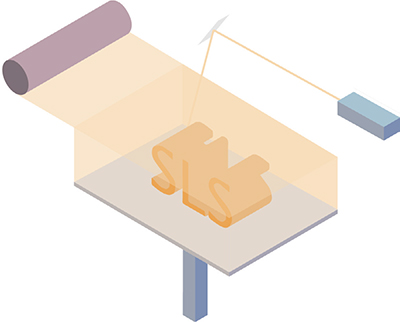
Description: SLS is a 3D printing technique invented in the 1980s, very popular for its ability to print complex and unique objects, or to produce a small batch of an innovative design. This technology uses a laser to “sinter” fine particles. Sintering consists of heating up a material to a temperature just beneath its melting point, in such a way that its particles agglomerate with the neighboring particles. Under the effects of heat, the powders targeted by the laser flow together, thus forming the cohesive piece. The grain size of the consumable is therefore very important because it will partly define the resolution that will be possible to achieve in the finished piece. The powder may have a thermoplastic or metallic base, depending on the strength of the laser that is used. While the SLM (selective laser melting) process allows powders to be used in their pure state, the SLS technique often resorts to using composite or mixed powders in order to facilitate the consolidation of the workpieces. Fabrication takes place in a tub of encapsulated powders in a controlled environment. To start a print, a robotic roller spreads a fine layer of material across the printing platform. The laser passes over the covered surface and sinters the powders according to a cross-sectional perspective of the object. The powder/laser sequence repeats itself while the tub progressively fills. The excess powder is used as a support for the printed object, and can be recycled for a future print. At the end of the fabrication cycle, the controlled-environment chamber is allowed to cool down, and the excess raw material is removed in order to reveal the pieces and clean them (often, an air jet is enough). The objects thus produced using a nylon powder base are porous and can easily be dyed in a coloring bath, or even polished in a tumbler. SLS printer vats can be optimized to print a large number of projects at a time, which makes this the preferred tool of on-demand 3D printing services. Note that laser sintered models are often hollowed to allow for a better optimization of the machine’s consumable materials. For this reason, holes have to be created on some models to enable the removal of excess powder.
Materials: Nylon (sometimes combined with other “non-sinterable” materials), polystyrene, steel, titanium, “green sand,” etc.
Manufacturers: EOS, 3D Systems, Voxeljet.
Advantages: Speed, complex workpieces without extra support, robustness and flexibility, possibility of large-format prints.
Applications: Architecture, commercial printing services, design schools, prototyping.
CHOOSING A PERSONAL 3D PRINTER
As mentioned in the previous section, there are several technologies and different price ranges involved in the field of 3D printing. FDM/FFF was the first technology to be made more accessible to the public, so we’ll list the different brands using this technology and what differentiates them in this rapidly evolving market. Therefore, we describe here the origin of some innovative companies and how they contributed to the democratization of digital manufacturing. We also list a few 3D printing brands offering relatively affordable SLA and DLP solutions.
MAKERBOT
This American 3D printing brand, created in Brooklyn in 2009, is a result of the joint effort between three makers: Bre Pettis, Adam Mayer, and Zach Smith. This group’s first machine was known as the now legendary Cupcake, a small ABS filament 3D printer with laser-cut wood structure and whose melted plastic layers would, with some difficulty, reach 0.3 mm thickness. It was very closely followed by the Thing-O-Matic, then by the Replicator, still made of wood but of much larger size. MakerBot’s true shining moment came with the launch of the Replicator 2, in September 2012. The wooden casing was replaced by a solid steel structure, PLA filament was made available instead of ABS and the heated aluminium printing bed got replaced by a thick bed made of acrylic.
From then on, MakerBot would develop its own environment, without help from the open source community, launching proprietary software known as MakerBot Software, replacing the previous Replicator G program. The Replicator 2 long held number one position at the top of a now wide range of 3D printers costing less than $3000. In 2014, right after the firm Stratasys acquired Makerbot, competition became fiercer with machines from the entire world sold at competing rates. The models following the Replicator 2 haven’t yet turned out to be as successful, whether it be the Replicator 2X (technologically reverting to the original Replicator with two extruders and a heated printing bed) or the Replicator 5th generation (providing an integrated monitoring device, a glass build plate, WiFi, extruders with an interchangeable mounting system and LCD display).
The summer of 2014 saw two new incoming products: a small size Replicator Mini Desktop 3D printer and an extra-large Z18 model. MakerBot has not yet had its final say and remains one of the main innovators in the 3D printing industry.

Name : Replicator Mini
Country : USA
Size (mm) : 295 x 310 x 381
Build volume (mm) : 100 x 100 x 125
Filament diameter (mm) : 1.75
Min. layer thickness (mm) : 0.20
Material : PLA

Name : Replicator (5th génération)
Country : USA
Size (mm) : 528 x 441 x 410
Build volume (mm) : 252 x 199 x 150
Filament diameter (mm) : 1.75
Min. layer thickness (mm) : 0.10
Material : PLA

Name : Replicator Z18
Country : USA
Size (mm) : 493 x 565 x 854
Build volume (mm) : 300 x 305 x 457
Filament diameter (mm) : 1.75
Min. layer thickness (mm) : 0.10
Material : PLA
REPRAP
In 2005, Doctor Adrien Bowyer, a professor at the University of Bath, in the United Kingdom, developed the following idea: to design a rapid prototyping machine capable of “reproducing itself”, by generating the pieces needed for the creation of a “clone”. Fused deposition modeling was a perfectly adapted technology. Several key FDM patents had fallen into the public domain and Scott Crump’s invention was about to experience an unexpected revival beyond the reach of its original creator. The RepRap project (a contraction of Replicating Rapid Prototyper) started off as a blog in March of the same year.
The open source 3D printing revolution had begun and the Maker Movement in the United States thus gained momentum. It wasn’t until 2008 that the RepRap project became an international phenomenon and that the release of the RepRap Darwin was announced. All around the world designers, engineers and hobbyists had been dreaming of an affordable additive manufacturing solution for almost two decades. They were far from imagining that it would take the form of a kit you assemble yourself. Plans for building RepRap 3D printers became available for free on the internet, and the variety of machine models grew rapidly.
Even today, despite the dozens of firms offering affordable 3D printers entering the market, RepRap continues its development. After Darwin, the Mendel and the Huxley printers were launched, but a substantial amount of derivatives also exist, coming from ingenious designers all around the world. Moreover, the term RepStrap was coined in order to define 3D printers based on the RepRap project but produced using other methods, such as laser cutting for making the frame. The first MakerBots, as well as the current Ultimakers and PrintrBots fall into this category.

Name : RepRapPro Huxley
Country : United Kingdom
Size (mm) : 260 x 280 x 280
Build volume : 140 x 140 x 110
Filament diameter : 1.75
Min. layer thickness (mm) : 0.20
Material : PLA, ABS
ULTIMAKER
This small company from the Netherlands, created in 2011 (three years after MakerBot), is iconic among 3D printing firms. Ultimaker also spawns from the RepRap open source project. In contrast to Adrian Bowyer’s project, the Ultimaker is not meant to “self replicate”. Similar to its American competitor, Ultimaker developed its trade by selling a wooden 3D printer in the form of a DIY kit (the Ultimaker Original), but in contrast with MakerBot, the firm decided to pursue an open source development. This strategy may have affected this firm’s search for investors and the subsequent growth of the company, but enabled the firm to maintain a high image. This decision’s positive commercial return has been a constant sympathy emanating from FabLabs and Makerspaces all around the world. In 2013, the Ultimaker 2 was launched. It came factory assembled. Its elegant design and professional look made this printer successful enough to become the main competitor of MakerBot’s Replicator 2. Like many others, this 3D printer has cube-shaped format, but uses a software named Cura (created by the Ultimaker community) to slice the 3D model, and uses 3 mm filament instead of the more common 1.75 mm. With its heated glass bed, it is possible to print ABS or PLA.
The Cura software offers numerous possibilities in choosing printing parameters, which experienced users find greatly appreciable. The firm has also developed a web-based platform named YouMagine, making it possible to share, download and comment on others’ 3D files.
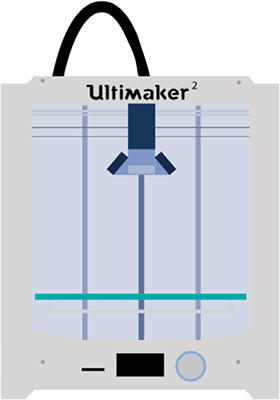
Name : Ultimaker 2
Country : Holland
Size (mm) : 350 x 350 x 400
Build volume (mm) : 230 x 225 x 205
Filament diameter (mm) : 3
Min. layer thickness (mm) : 0.05
Material : PLA, ABS
ZORTRAX
This Polish brand of 3D printers came as a surprise in 2014. When the whole world was expecting 3D Systems, Stratasys, or PP3D to develop the next machine that would combine reasonable pricing, higher resolution and elegance, this young group, then unknown to the world of 3D printing, offered a new machine that became a new market leader in Europe. Their first M200 model, with its proprietary plastic spools, metallic frame, heated printing bed and dedicated software is able to challenge the very best models. Its price, well below other printers, will help the brand develop among young professionals and hobbyists alike. The M200 creates impressively accurate ABS parts, while its software, Z-suite, generates one of the best support material an FFF 3D printer could get. Everything seems to have been thought out, in order for the firm to stand out from a market already saturated with competitors, in regard of brand image, of its well-polished communication campaigns, and even the high-end aspect of the products offered.

Name : M200
Country : Poland
Size (mm) : 345 x 360 x 430
Build volume (mm) : 200 x 200 x 185
Filament diameter (mm) : 1.75
Min. layer thickness (mm) : 0.09
Material : ABS
FORMLABS
This company was historically the first one to offer an affordable stereolithography (liquid resin) 3D printer. Its significant success on Kickstarter in October 2012, with nearly 3 million dollars raised, has turned this MIT students’ newly co-founded company into one of the symbols the third industrial revolution.
Benefiting from the expiry of certain key patents linked to the oldest rapid-prototyping technique, the Form 1+ model offers the best layer resolution in its price range. Formlabs CEO and co-founder, Maxim Lobovsky, like majority of tech company leaders, found a few bumps on his path, such as lawsuits from 3D Systems, the inventors of the SLA technology. It didn’t stop the company from releasing a remarkable little machine, perfectly adapted for jewelry designers and makers of small components. Along with an extremely simple use of proprietary software and a finishing kit which is essential for this technology, the Form 1 is a gem in the 3D Desktop printers category. Superbly designed, with an extremely silent print and incredible precision, only three limits prevent it from being the perfect prototyping tool: the high cost of resin, the low mechanical properties of printed pieces, and the small volume of production. The Form 1+, a faster and more precise version of the original Formlabs machine, is now the leading product of the brand.

Name : Form 1+
Country : USA
Size (mm) : 300 x 280 x 450
Build volume (mm) : 125 x 125 x 165
Min. layer thickness (mm) : 0.025
Material : Photopolymer resin
EMBER (A.K.A SPARK)
In May 2014, when Autodesk announced SPARK, an open platform to help create better software, materials and services dedicated to 3D printing, the maker community got very excited. But what got the media’s attention was the beautiful, cylindrical, and open source DLP (Digital Light Processing) 3D printer.
Autodesk’s first piece of hardware was intended to showcase the repair, slicing and toolpath generation of SPARK, but it became a mystical piece of equipment that everybody wants but that very few people get to even try. The machine was even nameless for a few months, which brought some people to call it SPARK, referring to the platform. Today, some lucky makerspaces, mostly in the US, can brag that they own an Ember, the unicorn of 3D printers, faster and more precise than anything you have seen before.

Name : EMBER
Country : USA
Size (mm) : 325 x 340 x 434
Build volume (mm) : 64 x 40 x 134
Min. layer thickness (mm) : 0.025
Material : Photopolymer resin
PRINTRBOT
Printrbot is a project created by Brook Drumm, a California web designer. The Kickstarter campaign for the launch of his first 3D printer model encountered immediate success in 2011. By borrowing a lot of ideas from the RepRap community, he managed to create an expandable machine at a reasonable price.
Since his first triumph, seven other models were added, slowly switching from laser cut wood frames to metal ones. The Printrbot products aim at customers of all ages who are discovering the 3D printing field. These small tools that can be assembled in a matter of hours are a perfect fit for home use (weekend projects, repairs, creating small spare parts...). Figuring among one of the least expensive ranges of printers, this brand truly contributes to widely spread the use of 3D printing at home. Printrbot, not having a proprietary software, relies on popular slicers such as Repetier-Host or Cura (for the most recent machines).
This brand, with the outstanding simplicity of its products, is perfectly in line with the Do-It-Yourself and Maker movements. This firm’s ultimate goal is to provide every home and school with a 3D printer.

Name : Printrbot Simple Metal
Country : USA
Size (mm) : 356 x 254 x 406
Build volume (mm) : 150 x 150 x 150
Filament diameter (mm) : 1.75
Min. layer thickness (mm) : 0.10
Material : PLA

Name : Printrbot Plus
Country : USA
Size (mm) : 508 x 508 x 508
Build volume (mm) : 203 x 203 x 203
Filament diameter (mm) : 1.75
Min. layer thickness (mm) : 0.10
Material : PLA, ABS
CUBIFY
Cubify is a product line developed by 3D Systems in order to enter the market of private consumers. Very shortly after its launch, the Cube desktop 3D printer could be found on the shelves of consumer electronics stores around the world. This stroke of marketing genius was an important step towards spreading the use of 3D printing, but it also left those who thought they had purchased an all-purpose machine with bitter memories.
The Cube is considered by many as a “rich person’s toy” since it isn’t precise enough for professional use, nor is it affordable for most hobbyists. Furthermore, basing its model on ink printers, the Cube can only be used with non-refillable cartridges which are far more expensive than those sold by MakerBot and other companies. The original Cube printer had a design similar to PP3DP’s Up! model with a plastic enclosure rather than metal and with more rounded edges.
Its large-sized version, named Cube Pro Trio, can use up to three colors at the same time, unfortunately, this impacts the generated pieces’ quality. However, the Cube is one of the only 3D printers that can be used without danger by a child and to offer multiple advantages, such as a magnetic printing bed and Wi-Fi connection. The tools developed by Cubify were up until now disparaged by the 3D printing community, but this trend may be reversed when their 3D scanning tools such as Sense and iSense are taken into account. Also, a special edition of the Cube, named EKOCYCLE, uses plastic partially recycled from Coca-Cola (polyethylene) bottles, an eco-friendly as well as an astute marketing approach.
With a brand image matching current tastes, and solutions avoiding past mistakes, 3D Systems, the 3D printing giant has regained some ground in today’s personal 3D printer market. The consumer market is approaching a maturity that draws a real benefit from additive manufacturing—Cubify will probably become an important partaker of this homemade revolution.
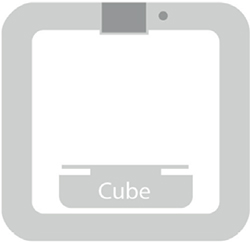
Name : Cube 3
Country : USA
Size (mm) : 335 x 338 x 280
Build volume (mm) : 152 x 152 x 152
Filament diameter (mm) : 1.75
Min. layer thickness (mm) : 0.10
Material : PLA, ABS (recycled PET)

Name : Cube Pro
Country : USA
Size (mm) : 578 x 578 x 591
Build volume (mm) : 273 x 273 x 241
Filament diameter (mm) : 1.75
Min. layer thickness (mm) : 0.07
Material : PLA, ABS
PP3DP
With its small, metallic painted and colorful frame, its aesthetic design and impressive speed, the first personal and transportable personal 3D printer from the Chinese manufacturer PP3DP had everything you could ask for. Several generations of printers later, the UP! Plus 2 has a lot in common with its “forefather”, but with even more rapidity, precision and connectivity. When it came out in 2010, the UP! 3D printer was greatly criticized for its exclusive “plug and play” mentality. Very far from the open philosophy of the RepRap project, the firm PP3DP produces machines with hardware and software that excludes all forms of improvement, configuration, or repair. It is thus extremely complicated to modify the printing bed or extruder temperature, to replace a component on the motherboard, or to adjust the speed of the machine.
Although it may annoy hackers, makers and other tinkerers, the UP! 3D printer works well and the results are sometimes impressive. It is very popular among schools whose first preoccupation isn’t to explain the mechanisms involved, but to produce pieces designed in a CAD program. An even smaller version is also available called the UP! Mini, whose mechanism is entirely covered by a shell in order to maintain the ambient heat while printing. The preferred printing material used with UP! is ABS, a capricious consumable when it comes to large prints since it tends to bend from retraction caused by the cooling process. However, ABS is unexpectedly well-handled by this machine and that’s partly why UP! is so well appreciated for the fabrication of small objects with good mechanical properties. It is possible to use 1.75 mm plastic filaments coming from brands other than PP3DP, but considering their melting temperature they might not offer the same level of finishing as the official consumable.

Name : UP ! Mini
Country : China
Size (mm) : 240 x 355 x 340
Build volume (mm) : 120 x 120 x 120
Filament diameter (mm) : 1.75
Min. layer thickness (mm) : 0.15
Material : ABS, PLA

Name : UP ! Plus 2
Country : China
Size (mm) : 300 x 260 x 350
Build volume (mm) : 140 x 140 x 135
Filament diameter (mm) : 1.75
Min. layer thickness (mm) : 0.15
Material : ABS, PLA
TINKERINE
This Canadian company has nothing to be sorry for. After the success of their wooden DITTO 3D printer, the Vancouver-based team came up with a shiny and minimalist new design to attract designers. We could say that Tinkerine is the Ultimaker of North America. Not only for its design, but also for the strong community they managed to build over the years. The Ditto has a characteristic C-frame that makes the build platform very accessible and easy to keep clean, unlike the closed box that most FFF 3D printers have. The Ditto Pro also has a hidden spool compartment, making this sophisticated machine fit on an office desk without looking awkward. The print quality is impressive and so is the Tinkerine Suite software: an intuitive interface with Cura’s power under the hood. Just like Ultimaker 2, the Ditto Pro has a glass build plate that may need to be covered with tape or glue to prevent parts from warping during the print.

Name : Ditto Pro
Country : Canada
Size (mm) : 370 x 390 x 436
Build volume (mm) : 225 x 165 x 205
Filament diameter (mm) : 1.75
Min. layer thickness (mm) : 0.05
Material : PLA
SOLIDOODLE
Solidoodle was created by an American engineer, formerly employed by Makerbot in Brooklyn as Operations Manager. With his strong experience, he was able to provide the market with a pre-assembled 3D printer at a competitive price. This firm’s immediate success which came as soon as the announcement was made that an FFF machine costing under $500, with no assembly required, would be placed on the market. At the time (2011), the only 3D printers available were sold as do-it-yourself kits that the user would find very painful to build properly.
Nevertheless, the original model was sold “bare bones,” with no enclosure and no unnecessary accessories. To “dress it up”, a small extra fee was needed. As newer printer generations came by, the price of the Solidoodle has increased little by little (and also in size and quality of print) to reach $1,000. At such a price, other brands may be preferred but the Solidoodle remains an open and relatively simple-to-use 3D printer. Some components (the same applies to most 3D printers) have to be readjusted once in a while.
While the Solidoodle is capable of printing PLA, it is originally optimized for ABS consumables, without having to buy proprietary refills. If you are not the least bit resourceful, this 3D printer is not for you. But it is a favorable option for the designer or engineer on a tight budget.
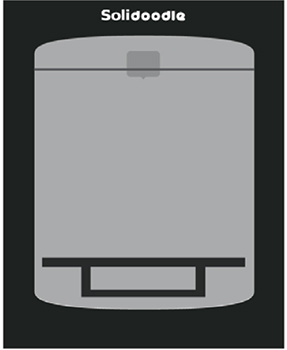
Name : Solidoodle (4th génération)
Country : USA
Size (mm) : 343 x 356 x 381
Build volume (mm) : 203 x 203 x 203
Filament diameter (mm) : 1.75
Min. layer thickness (mm) : 0.10
Material : PLA, ABS
BEEVERYCREATIVE
This brand is known for its highly portable and good looking filament 3D printer, BeeTheFirst. Based in Portugal, the company went for a “plug and play” type of machine intended for designers, schools and consumers. Awarded across the world for its clever design, the Bee may not be the best 3D printer you will find in this list, but definitely deserves to be mentioned. While in the same category as the MakerBot Replicator Mini, using small PLA spools with an average layer resolution and slow speed, the Bee also has some very interesting features such has a handle that collapses to fit perfectly with the printer’s frame, a magnetic build plate and great out-of-the-box experience. Instead of filling the machine with useless gadgets, BeeveryCreative decided to solve their problems in the most simple ways magnets, mechanical adjustments and a strong metal body. There is no LCD screen either, everything is controlled from BeeSoft, which you install directly on your computer. One downside of the smooth design is that it is difficult to clear the extruder when the nozzle gets clogged, because the filament is laborious to access once it passes into the enclosure.

Name : BEETHEFIRST
Country : Portugal
Size (mm) : 400 x 140 x 400
Build volume (mm) : 190 x 135 x 125
Filament diameter (mm) : 1.75
Min. layer thickness (mm) : 0.10
Material : PLA
DREMEL
Dremel is a company loved by makers and tinkerers for their affordable and widely-available manual tools. It only made sense that this brand, which is over eighty years old, would try to open to a more digital world. This American-born company, now owned by BOSCH, knows how to please consumers and how to keep a good brand identity. Their first 3D printer, the Idea Builder, is based on the FlashForge Dreamer, a Chinese 3D printer based itself on the MakerBot Replicator 2. Dremel brought what they do the best to their original machine: user experience, documentation, good prices and know-how. Being Dremel gives them the opportunity, more than any other, to be sold in hardware stores as the ultimate DIY tool. The Idea Builder is not targeted for professional designers but is a good start for any person looking for a new fancy toy to equip their garage. Just like most brands aimed at consumers, Dremel created a simplified software meant to facilitate the preparation of 3D files. They might have removed too many functions for their own good, but once again, the Idea Builder is meant to provide a simple and easy-to-use 3D printer to the masses at an attractive price point.

Name : DREMEL 3D Idea Builder
Country : USA
Size (mm) : 400 x 485 x 335
Build volume (mm) : 230 x 150 x 140
Filament diameter (mm) : 1.75
Min. layer thickness (mm) : 0.10
Material : PLA
IDEA SERIES (STRATASYS)
Stratasys is an unquestioned leader in the field of 3D printing. Owning multiple patents around fused deposition modeling (FDM) technology, the international corporation is also the owner of numerous companies around the world, including MakerBot.
Although it is a firm well recognized for its high-end equipment aimed at large companies and manufacturers, Stratasys is also the processor of the “Idea” series, which includes the famous Mojo printer. This small professional rapid prototyping machine holds many features usually associated with industrial additive manufacturing equipment, notably in terms of dissolvable support material, generated by a second extruding nozzle. The minimum layer thickness allowed by the Mojo printer is inferior to all other machines mentioned earlier, yet this does not excessively affect the surface of the pieces produced, due to a controlled environment and the use of proprietary consumables. The cost of use of this machine is much higher than other printers in the present list, but this does not prevent it from representing a satisfactory compromise between higher quality solutions (which can cost several tens of thousands of dollars) and entry-level printers.
The use of dissolvable support materials is one of the keys of fused deposition 3D printing. Without this removable material, certain geometries become more complex to produce, especially when it concerns moving parts. This advantage also has a price: time. Indeed, in order to dissolve the support, the piece needs to be immersed in an appropriate solution for several hours, thus extending the time needed to obtain a prototype.There is no machine currently belonging to the “prosumer” or “personal” range of printers capable of building dissolvable supports as well as the Mojo, despite the great number of 3D printers with double extruders on the market. Yet, this is not due to the lack of experimentation with the noteworthy dissolvable PVA and HIPS materials. Stratasys seems to have more than one trick to teach to the hackers belonging to the open source movement.

Name : Mojo
Country : USA
Size (mm) : 630 x 450 x 530
Build volume (mm) : 127 x 127 x 127
Filament diameter (mm) : 1,75
Min. layer thickness (mm) :0.17
Material : ABS
FILE FORMATS FOR 3D PRINTING
There are many file extensions used in the world of 3D modeling. Most 3D software uses its own proprietary format, such as SKP files for SketchUp, SLDPRT for SolidWorks, etc. Some software, like Blender, is more flexible with the file types accepted when importing, and also for exporting. In this ocean of proprietary formats, only a very few can be directly used with 3D printing software. Fortunately, some 3D file formats have distinguished themselves over time, becoming a standard for digital manufacturing. These are the “generics” of 3D, files that can be read and exported by most types of software, either by adding a plug-in, or directly supported in the software’s import or export options. The STL file format reigns supreme in the world of digital manufacturing, but other file extensions are becoming increasingly popular, especially with the arrival of multicolor 3D printing. The three-dimensional mesh of an object defines, in part, the resolution that the printed object will have. The triangles that make up this framework are the equivalent of pixels in digital images.
In order to be usable for additive manufacturing, a three-dimensional geometry must be closed. This means that each side of the object’s mesh must belong to two triangles at a time. Even though some software deliberately ignores this rule when exporting the 3D file, others will automatically prevent you from creating a file if it is not considered “watertight”. Most of the time, the mesh generated by CAD software will not be used as-is by the additive manufacturing machine. Instead, the 3D information in it will be translated into a series of 2D cuts (one for each layer of the object), either in tool path code (GCODE) or into another proprietary file incorporating the other information necessary for the machine to operate (temperature, speed, power, etc.). The following file formats act as transitional languages between the design software and the software controlling the production tool.
STL
This file format was created by the 3D Systems company as a native extension of their Stereolithography software, used for the rapid prototyping technique of the same name. Also known as Standard Tessellation Language, this format is common to most additive and subtractive manufacturing tools. It is by far the most used of all file formats for 3D printing. STL meshing represents the geometry of a three-dimensional object, without any reference to its color, material, or texture. When importing an STL file in a 3D software, it is therefore “amnesic”. It retains no memory of the functions that helped to shape it and can also lose trace of its original unit of measurement. For this reason, it is important to check carefully that the scale of the object is consistent with that of the original model. It’s common to see an STL file imported at a scale of 1:100 in modeling software or switching from a metric sizing to its imperial equivalent (inches). Some software allows you to choose which unit of measurement in which to import an STL file.
When exporting an STL file, it is possible to choose the density of the meshing. This resolution will partially define the surface state that the part will have once manufactured, but will also have a direct impact on the “size” of the file. There are two types of STL files: ASCII and Binary. The second one is the most used because it’s more compact for an equivalent resolution.
OBJ
This file format was developed by Wavefront Technologies for an animation software package. For this reason, some old-school computer specialists tend to call this type of extension a Wavefront file. As an open format, OBJ has been adopted by many 3D graphics design solutions. There are only a few 3D software programs that do not accept the exporting or importing of files in OBJ format. Just like STL, this export simply represents a geometry, without any information on the unit of measurement, or on the stages in the modeling process. However, OBJ has two great advantages, making it a popular format among graphic designers. Firstly, it accepts NURBS-type surfaces, making it possible to define complex curved surfaces without the need for an extremely dense mesh of triangles. Secondly, OBJ is supplemented by one or more MTL (Material Template Library) files, containing the information on color and texture linked to the 3D object. MTL is another standard created by Wavefront which references materials in a library of textures. This companion file makes it possible to view multicolored files and manufacture them by factoring in their chromatic complexity. Of course, transparencies and reflections will not be reproduced in 3D printing.
VRML
This graphics file format, developed for the World Wide Web, has long been superseded in the world of animation by formats like X3D, which are a lot more precise for photo-realistic renderings. However, since 3D printing only needs basic graphics information, WRL files are still being used for scanning as well as for manufacturing. Virtual Reality Modeling Language uses the file extension WRL, which refers to the word “world”. This international standard has never been aimed at additive manufacturing, but its use of three-dimensional polygons combined with UV textures is suitable for the specific use of color 3D printers, like the Mcor Iris paper 3D printer. The terms VRML97 or VRML 2 indicate the most recent version (1997) of the file, but they don’t have much to offer when it comes to manufacturing. Even though the WRL extension never had its anticipated success for the internet, it continues to be a standard in 3D file exchanging.
COLLADA
The COLLADA format was created by Sony Computer Entertainment to offer a file format that’s easily shareable between different types of 3D software and accessible to a wide audience. COLLADA is now managed by a non-profit consortium called the Khronos Group. Using the DAE (Digital Asset Exchange) extension, this file format is still considered as an intermediary, used to transport graphics information from one software program or 3D app to another. Thanks to its popularity in the world of software interchange, COLLADA has also found a niche for itself in some apps designed for 3D printing, making it possible to import a DAE in the same way as an STL.
PLY
This file format is often seen in the world of digital manufacturing because it’s mainly used to contain information captured with a 3D scanning tool. Like the other formats we mentioned, it makes it possible to describe a three-dimensional volume with polygons, and it comes in both ASCII and Binary versions, as does STL. PLY was created by students at the Stanford Graphics Lab to compensate for certain weaknesses in the OBJ format. Also known as Polygon File Format, PLY can contain information about color, transparency and texture, which means it’s a format used mainly for graphics. It can easily be transformed into a simple STL file using software like MeshLab.

In 3D printing, volumes are defined by polygons.
Here is the cloud shown on page 61.
THE 3D PRINTING FILE CHECKLIST
COMPATIBLE FILE
STL for the most 3D desktop printers, OBJ or WRL for files with texture. Some 3D printing software will also read X3D, DAE, PLY, or COLLADA file formats.

POLYGON LIMIT
Avoid files with extremely dense meshing. 1 million polygons should be your maximum threshold. Try to generate STL files that are no larger than 50 Mb. Beyond that, some printing services and software could have problems managing them.

ORIGIN
When designing your model, it is better if the XYZ origin of your model’s workspace touches a corner of the model, or is in the center of the volume. If not, you risk the object appearing outside of the virtual build area when it is imported into the slicing software (Repetier-Host, Cura, etc.). It is then situated far from the virtual space shown on the screen and you’ll have to move it with the Move tool. You can ensure that the model will import correctly by snapping your 3D model to its environment’s origin (X=0, Y=0, Z=0) before you export it as a 3D printable mesh.

COHERENT 3D MODEL
Your model should be watertight, without volume collision or double surfaces.

SUITABLE MATERIALS AND TECHNOLOGY
Some of the details of your model may vary in PLA, in paper, or in ceramic. The minimal wall thickness, shrinkage, the choice of finish and layer resolution will change depending on the material and technology used. It is essential to research the individual characteristics of each 3D printer and to choose it according to the type of objects that you need to produce.

EXHAUST PORTS
If you’re planning to use powder (SLS, 3DP) or liquid resin technology (SLA, DLP), you have to provide ports which will allow substances to be released from hollow bodies. If not, the powder or resin will be trapped between the solidified walls. This tip also saves time and materials.

SCALING
It’s better to check the scale of the model to be printed before exporting it. When you load it into other software, it may ask for the unit of measurement used. In some cases, STL files modeled in millimeters can appear in meters or even in inches when you load it into your 3d printer’s software. You’ll have to restore the correct ratio using your software’s Scale option to return them to their initial scale before manufacturing.

PRINTER SIZE
Remember the maximum sizes of your manufacturing tool before exporting your file. If your object is too big, you’ll have to cut it into several sections or choose another machine. For example, If your object exceeds a cubic meter, consider producing it using a subtractive method, like digital milling (CNC).

DETAILS
Make sure that the details, embossing, text, and textures stand out enough to be visible or readable. 2D images and letters attached to a file won’t appear on a monochrome 3D print, unless they are transformed into a “bump map”, often used to create complex 3D textures in animation and sculpture software.

TOLERANCES
If you have assemblies, sockets, or movable parts, make sure you have enough play to allow for the movement of the different bodies. Several trial runs may be necessary in the case of mechanical parts, but, in most processes, a minimum space of 0.25 mm is necessary to prevent the parts from fusing while being built.

FILE NAME
Get into the habit of naming your files according to a standard procedure. Firstly, never use special characters or accents and replace spaces by underscores. Choose a name that describes the content of the file clearly, its version, its scale, and any other information that will help you avoid having to open the file needlessly.
ORIENTATION
It is vital to choose carefully the orientation in which your part will be printed. This choice will have a great impact on the solidity, surface state, and printing time. If you are using a printing service, they will determine the orientation in which your object will be printed.

FREE 3D MODELING SOFTWARE
There is a huge number free 3D modeling software programs. It’s important to choose yours wisely according to the project you’re working on. Here is the software we recommend for your first experience of 3D modeling.
TINKERCAD
TinkerCad is the perfect 3D modeling software for beginners. Its 3D modeling method is like working with LEGO bricks. Except, those bricks can be customized and even subtracted from. It has fun tutorials to learn how to use the interface and understand the construction logic. It is ideal for family or school use. This software is only available online, so make sure you have an internet connection when you need to use it.

SKETCHUP MAKE
MAKE is the free version of SketchUp. You can use most of the tools that are in the Pro version, except the Solid tool and the Layout technical drawing tool. SketchUp Is very simple to use, has a clean interface, and comes with a big bank of objects ready to be downloaded. The basic version of the software only has a few functions, but a plethora of plugins are available to meet your needs. However, this software is mainly optimized for 3D architectural modeling. Note that the 3D models you find in the 3D Warehouse are not necessarily printable. You have to make sure that the file matches the prerequisites listed on pages 22-23.

OPENSCAD
This 3D modeling software, known to be the favorite of programmers, uses lines of code as functions. Because its interface is primarily a programmer’s text editor, it’s next to impossible to understand for someone without a basic knowledge of coding (or computer power users from the 1980s who did everything at the command line). Modeling on OpenSCAD is often basic, but it has the advantage of being usable to create customizable templates for use with other tools such as the Customizer from MakerBot Thingiverse.

3DTIN
This software by LAGOA is TinkerCad’s main competitor. It’s the “MS Paint” of the 3D world. You can import basic shapes on a plain and relatively simple interface. Just like TinkerCad, this software can only be used with an internet connection which makes it possible to save models in the Cloud. If you like Minecraft, this software is for you.

123D DESIGN
This solid modeling software for beginners can be installed on both Mac and PC and also exists as an app for iPad. It works pretty much like SketchUp, with the usual extrusion, rotation, and drawing functions, but with an interface that’s more focused on object design. It has the advantage of creating watertight solids, ready for 3D printing. 123D Design is part of a free software and app package, ranging from 3D photogrammetric scanning (123D Catch) to virtual sculpture, (123D Sculpt), and even to a laser cutting and CNC assistant (123D Make). A downloadable model library is also available, as well as a storage space for online projects, linked to a user community. This software is very useful for creating functional or decorative objects. Its repeat, “loft”, and “tweak” functions will enable you to produce complex shapes without difficulty. It is even possible to import existing 3D files or vector drawings to bridge 123D with other softwares like Meshmixer or Illustrator. If you enjoy 123D Design, consider switching to Autodesk Fusion 360, a more complete and professional version.

BLENDER
Blender is very powerful software, capable of generating surfaces of great complexity. it’s perfect for the creation of characters and photo-realistic renderings. Its interface includes a lot of functions and it’s easy to get lost in its multiple menus. Just like SketchUp, this software is not optimized for 3D printing. You have to take particular care to avoid collision between objects and to open surfaces when exporting the file.

3D SCANNING METHODS
There are several types of 3D scanners. Each has its advantages and limitations, that’s why it is important to assess your needs carefully before purchasing a 3D tool. It should also be noted that this is a rapidly evolving technology that might be integrated into some of your portable devices in the years, or even months, after this book has been published.
There are two big families of 3D scanners, those with contact (digital or manual probes) and non-contact (lasers, structured light, etc.). We will only deal with the second category, because the first one is slow, risky (contact with a fragile object) and expensive for use in digital manufacturing. We will also focus on techniques that provide solutions costing less than $10,000 since there is a wide range of architectural 3D scanners, drones, and industrial measurement tools that are definitely too specialized for the purposes of this book.
3D SCANNING BY TRIANGULATION
This type of acquisition tool uses infrared lasers with linear beams to take three-dimensional measurements. The light beam is projected onto the three-dimensional subject, then a digital camera located a few centimeters away from the laser observes the reflections in its field of view. Because we know the angle and position of the laser in relation to the camera lens, we can precisely measure the position of the object, point by point. It is this triangulation information from the laser, the object, and the lens which lends its name to this common technique. By adding a motorized turntable to this triangulation data, we can fully automate the 3D acquisition of an object. One of the most well-known 3D triangulation scanners is the Digitizer from MakerBot, a solution costing approximately $800 that can digitize objects up to 20 cm in diameter and height. With this device, vertical laser beams with filters are located on each side of the lens, to give greater precision. This tool comes with proprietary software that makes it possible to automatically convert a 3D scan to a watertight file that’s ready to be printed. The Multiscan feature lets you make multiple scans of the same object and combine them to get to maximum detail. The Matterform and NextEngine brands offer similar solutions to MakerBot.

Name : Matter and Form
By : Matter and Form
Country : USA
Size (mm) : 345 x 210x 354 (foldable)
Max scan volume (mm) : 250 (dia.) x 180
Min scan volume (mm) : 20 x 20 x 20
Resolution (mm) : 0.43
Color : No

Name : Digitizer
By : MakerBot
Country : USA
Size (mm) : 474 x 412 x 204
Max scan volume (mm) : 203 (dia.) x 203
Min scan volume (mm) : 20 x 20 x 20
Resolution (mm) : 0.5
Color : No
MANUAL SCANNER WITH INFRARED LED
These scanners use the same technique as triangulation scanners, the difference being that they are manipulated manually during 3D acquisition. These scanners use an infrared LED, whose invisible light is used to measured the distance between the device and the object. The resulting point cloud is transformed into a mesh by the software installed on the computer. This data can be combined with the textures and colors obtained from a camera that’s integrated into some scanners. This provides a three-dimensional, multicolored object. Please note that the textures resulting from these devices are often ill-defined and of low resolution because the ambient light has a direct impact on the accuracy of the colors. Among the most popular and affordable solutions are the Microsoft Kinect 1 and the ASUS Xtion Pro Live, both based on PrimeSense technology.

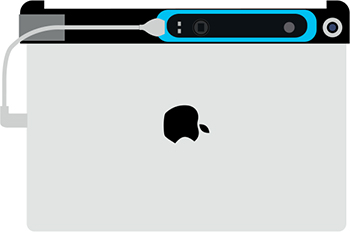
Name : Sense
By : 3D Systems
Country : USA
Size (mm) : 178 x 129 x 330
Max scan volume (mm) : 3000 x 3000 x 3000
Min scan volume (mm) : 20 x 20 x 20
Resolution (mm) : 0.5
Frequency : 30 FPS
Color : Yes
These mainstream motion sensors become very good 3D scanning tools when combined with software like Skanect or ReconstructMe. There are also “all in one” solutions, based on the same technology, such as 3D System’s Sense. Also, some infrared scanning tools integrated with touch screen tablets and smartphones (iSense, Structure Sensor) make the technique more mobile than ever by removing the need for the computer. Since Apple bought PrimeSense in November 2013 and therefore owns patents for this technology, we can foresee that some of their future devices will be equipped with it. In the meantime, Microsoft has switched to another technology for its Kinect 2, with more resolution and a wider field of vision.
Name : Structure sensor
By : Occipital
Country : USA
Size (mm) : 119.2 x 27.9 x 29
Max scan volume (mm) : 3000 x 3000 x 3000
Min scan volume (mm) : 20 x 20 x 20
Resolution (mm) : 0.5
Frequency : 30 FPS
Color : Yes
STRUCTURED LIGHT SCANNER
Structured light scanners are extremely fast and precise tools. A video projector sweeps the surface of the object while blasting it with patterns, strips, or grids. The projected sequence is observed by a camera which is calculating its deformation. The area of the object where the light is projected can be completely measured in less than a second. Some structured light scanners also include a camera and a white light source, which captures the colors of objects as it passes across them. This enables full color mapping directly on the exported 3D model. Among the most popular structured light 3D scanners are the Artec EVA and the SLS-1 from David Laser Scanner. Fuel 3D, an affordable solution for structured light scanning, was also launched in 2013 by a team from Oxford University.

Name : Eva
By : Artec
Country : Luxembourg
Size (mm) : 262 x 158 x 64
Max scan volume (mm) : 2000 x 1000 x 1000
Min scan volume (mm) : 150 x 150 x 150
Resolution (mm) : 0.5
Frequency : 16 FPS
Color : Yes

Name : DAVID SLS-2
By : DAVID Vision Systems
Country : Germany
Max scan volume (mm) : 500
Min scan volume (mm) : 60
Resolution (mm) : 0.06
Color : Yes
PHOTOGRAMMETRY (STEREOSCOPIC METHOD)
3D photogrammetry acquisition solutions are not, strictly speaking, part of the 3D scanning family. The principle is to take multiple photos of an object from every angle and accessible view. The images are then sent to a piece of software using the colors, shadows, and textures as benchmarks in order to re-attach them to a three-dimensional volume. It’s the principle of stereoscopy (as in human vision) that’s used to calculate the distance between each view. There are systems that can trigger several cameras at once to get a more precise and spontaneous result. These systems generally use SLR cameras, but some prototypes use simple cellphone cameras arranged regularly in a spherical or cylindrical structure. Some software solutions are extremely affordable because they can be used with a simple camera. Among the most popular solutions in this technology is the 123D Catch app by Autodesk. This free and fun tool, available on iPhone, iPad, and Android, is a first step towards accessible 3D. Even if it’s difficult to get a watertight model and even if files can take several hours to be calculated, this app adds another string to your bow (and it’s free). Photogrammetry is the technique that allows the most exact rendering of colors. This is important if you want to print your model using a polychrome technology, such as the Mcor Iris. 123D Catch is far from being the only solution of this kind available to you. Memento, also a free Autodesk product, is a much more powerful version, ideal for professional uses like museum conservation, architecture, and archeology.

Digital camera
Gives very good results with Autodesk Memento

iPhone or iPad
For 123D Catch App.