
1
Organizing
Results from studies about organization and creativity are all over the map. Some suggest that organization leads to clearer, more productive thinking and creating, while others claim the opposite. You likely already have your own work and organizational style and not much is going to change that. I’m basically a mildly messy person with periodic bursts of organizational energy. For years I beat myself up over my chaotic ways, but then I decided that this was my basic organizational style and that I have still been able to be productive and successful. One thing I’ve found that helps motivate me to be organized is really clever, thoughtful, and time-saving ideas. Reading a great organizational tip or about some cool organizational technology can inspire a burst of reorganizational energy. Here are a few of my favorite ideas.
 Start Your Week Organized
One of the few organizational rituals that I have is Sunday cleaning and organizing. I like to start the week with at least some semblance of organization by cleaning up my shop, organizing the papers on my desk, and thinking about what I have ahead for the week. This hour or two each week at least prevents the chaos around me from becoming too unmanageable.
Organize for First Order Retrievability
This can help reduce time to find and get your tools and materials. Arrange your workspace so that the more commonly used the tool or material is, the closer it is to you. Conversely, more occasional tools are farther away. This way, the shop is designed so that you can easily find what you need as you need it. [via Adam Savage]
Create a Gratitude Loop
This one comes from marketing guru Seth Godin by way of Cool Tools (kk.org/cooltools). If you’re speaking at a conference or meeting where a lot of people and organizations were involved in hosting, don’t waste your precious presentation time thanking them all. Make a slideshow beforehand of everyone you wish to acknowledge, including their name and title, and run it while everyone is finding their seats. Ask each contributor to send you a picture or arrange to have everyone photographed (depending on your situation). You can make this as fun and clever as you wish.
Using Equipment Dead Space to Your Advantage
Jay Bates shared this useful shop organizing tip in one of his YouTube videos. For most of us, shop space is always at a premium. When setting up a shop, you want to carefully think of the workflow around the machines and how you can optimize operational efficiency and tool and material retrievability. Jay suggests that you plan to use the dead space of each machine (the side that you never interact with) to your advantage by grouping these edges together. [JB]
Organizing with Binder Clips
Use a row of binder clips on the edge of your desk as a cable organizer.

Keeping Track of Small Parts
Use double-sided tape to hold small parts in place while you disassemble or reassemble something. Affix the tape to a piece of paper and write where the part goes.

Parachute Your Fasteners onto the Job
To organize your screws and fasteners, consider getting a parachute bag. These are circular, multi-compartment canvas bags that have a cinch-rope top. They can hold a lot, don’t take up a lot of space, and are easy to grab and go. Even a really decent, heavy-duty one costs under US$25 and they will last for many years, even with regular use. [SW]
Use See-Through Bins for Shop Organization
Make: contributor Bill Livolsi suggests using clear bins in your shop to organize your materials, tools, and supplies so that you can see at a glance what’s in them. Bill buys clear plastic shoe boxes and uses those as his storage system. He also recommends organizing items by use rather than material type. So, for instance, everything sanding-related might go into a bin, instead of sandpaper in one, sanding blocks in another, wood putties in another, and so on. [BL2]
Lay Out Your Tool Wall on Paper First
Miguel Valenzuela, of PancakeBot fame, offers his tip for laying out your tools on a tool wall. “Lay down a piece of construction paper that is the size of the board you will be mounting your tools on. Place the tools on the paper in the arrangement you want. Mark where your support pins, hooks, or screws will be, and then take a picture of your layout. Next, tack the paper to the mounting board and drill away. Before taking the paper off, screw in your mounts. Last, using the picture as a reference, mount all your tools on the wall!” [MV]
Making an Easy Fridge Magnet Battery Organizer
Make: contributor Kent Barnes sent us this idea. He uses the magnetic strip from an old fridge magnet to organize his button cell and coin cell batteries. [KB]

Color-Coding Drivers
Paint the ends of screwdriver handles either red, yellow, or blue, depending on whether they’re Phillips, pozidrive, or slotted. Do the same with Allen keys based on whether they’re metric or imperial. [AL]
Arranging Tools for Easy Retrieval
The always clever and resourceful Dave Hrynkiw of Solarbotics shared this simple gem. To organize your slotted and Phillips head screwdrivers, always make sure to orient them in the drawer with slotted handles facing in one direction and Phillips in the other. Easy. [DH]
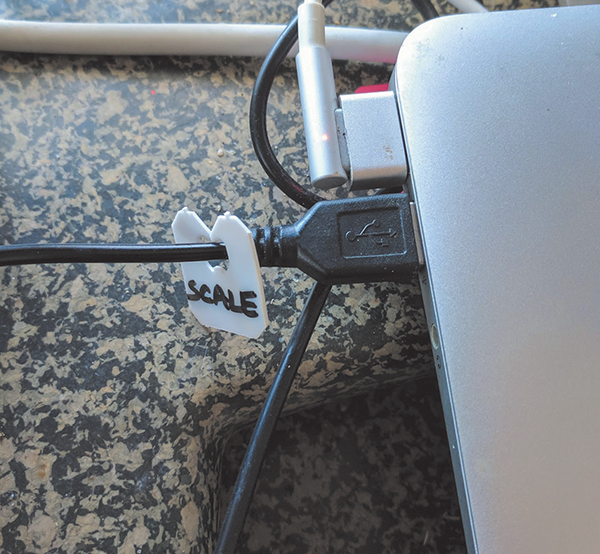
Identifying Your Cables
Since so many people have the same chargers, cables, and dongles for phones and laptops, take a second to add an identifying mark or name on your gear. It can be something as simple as colored tape, your initials, or some cool mark or personal brand that you create.
Labeling Cables with Bread Tags
Here’s a tried and true method of cable labeling that I have used for years: plastic bread bag tags as labels.

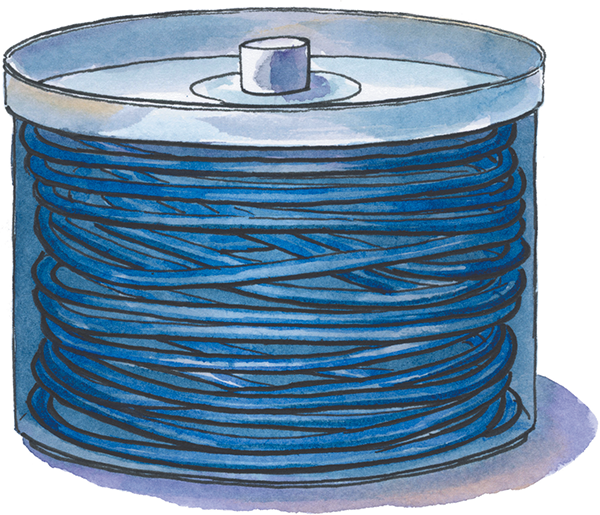
Organizing Cables with Toilet Paper Tubes
Use empty toilet paper rolls to hold bundled personal electronics cables and other cords together.

Using Magnets to Locate a Pass-Through Hole
One of my oldest maker friends, Steven Roberts, sent me this little gem for how he makes sure that the cable pass-through holes he’s cutting into the cabin of his sailboat are exactly where he wants them to be. “I use a pair of 0.75″ diameter N52 neodymium magnets to mark the perfect spot to drill through the cabin wall, since it is easy to measure incorrectly and poke a hole where, oops, damn it, you didn’t mean to. All you do is tape a magnet in place on one side of the wall, slap another onto the opposite side of the wall, draw a circle around each magnet, and go from there.” Of course, this method only works in situations where you have access to both sides of the wall. [SR]
Using Stretch Wrap for Strap Organizing
If you have toe straps and ratchet straps in your shop or in your truck, you can quickly bundle them using stretch wrap. Just use a few loops of wrap and your rolled straps are good to go. You can even reuse the wrap for multiple strap-wrappings. [JD]
Consider a Heat-Seal Organizer
One method you can use for mid- or long-term storage of parts, materials, equipment, and supplies is to bag and heat-seal them. You can get used heat-sealers on eBay for around US$50. It’s super easy to bag and tag all sorts of shop clutter, and the bags protect the contents from bumps, scratches, and corrosion. Several different-sized rolls of plastic will accommodate many shapes and sizes of objects you wish to bag, tag, and store.
Make a Simple Bulletin/Chalkboard
For complete instructions, search for “Make a Combination Blackboard/Bulletin Board” on makezine.com.


Make Your Own Pocket Notebooks
I’ve been using Moleskine Cahiers pocket notebooks every day since 2006. I have dozens of volumes of them filled with article ideas, design sketches, notes on my day, and various other scribblings. They’re fun to go back through to see where my mind has been over the years. I often find buried gems I can use today. As much as I love Cahiers, they aren’t cheap. And while I customize mine with cover art, stamps, and stickers, it’s just not the same as if I’d made them myself.
Bob Clagett of “I Like to Make Stuff” makes his own (see his “Pocket Notebooks” how-to on YouTube). When you make them yourself, you have something that’s infinitely customizable using your preference of cover paper stock and design, internal paper (or combination of paper types), pockets, size, and so on. I’ve made a few of my own over the years and they definitely hold a special “inspired object” status in my collection. [BC]
 Managing Your Cords
On his YouTube channel, homesteader Dirt Farmer Jay offers a tip for a superior, less kinky way to store your heavy-duty power cords. Starting from one end, work all of the twists out of the cord. The basic steps are:
- Plug the male end into the female end.
- Grab the doubled cord below the loop that marks the halfway point and flip it over so the loop is facing down.
- Push the doubled cord through the loop and grab it with your other hand.
4. Repeat to form a chain.
[Dirt Farmer Jay]

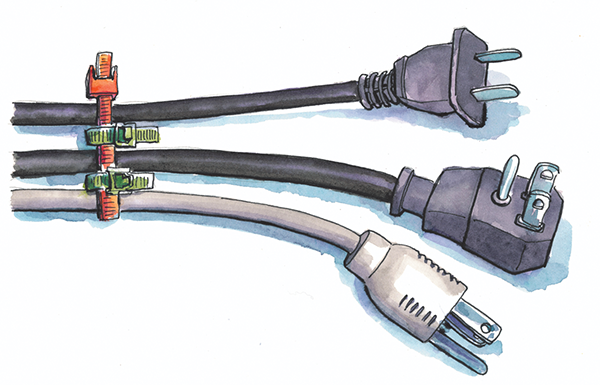
Organizing Cables in CD Spindles
If you have empty CD/DVD spindles lying around, they make decent cable organizers.
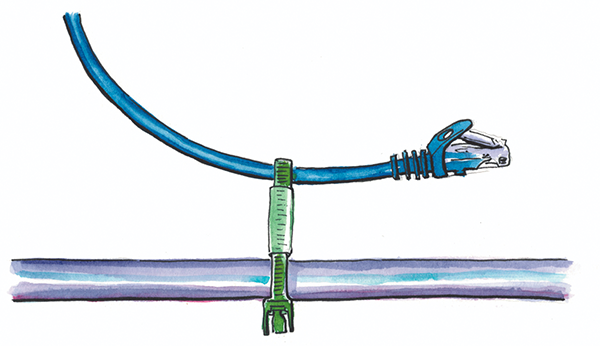
Standing-off Cables Using Zip Ties
This trick is from Donald Bell of Maker Project Lab: “This is an easy, useful way to stand-off cables across a length of conduit using zip ties and cheap vinyl tubing. It’s a way to tidy up electrical wiring, fuel lines, data cables, pneumatic tubes, and bicycle brake lines.”
- Cut off a ¾″ section of clear vinyl tubing. You can get this stuff cheap as aquarium air pump tubing.
- Run your zip tie through the small section of tube, leaving it sitting midway down the zip tie like a ring.
- Take the pointy end of the zip tie and wrap the smooth side around whatever you’re trying to wrangle.
- Shoot the pointy end back through the ring of vinyl tubing. You should now have a looped cable on one side of the tube. On the other side, you should have the two ends of your zip tie with the smooth sides facing each other.
- Cinch up the loop by adjusting the vinyl tubing ring toward the cable, creating enough length for the ends of your zip tie to be secured around whatever you’re fastening it to.
- Zip it up, trim off the extra, and repeat as needed. [DB]
Cable Weaving with Zip Ties
Also from Donald Bell: “I came across this tip as a way to harness spark plug cables in your engine. It’s a great way to gather up any group of thick cables, while simultaneously keeping them separate from one another.”
- Lay your cables down parallel to one another and count them. The number of zip ties you’ll need is equal to the number of cables.
- Loosely attach one zip tie across the entire bunch of cables like a collar, leaving plenty of slack.
- Tie loose, perpendicular rings completely around the first zip tie between each cable, parallel to the cables.
- Tighten the first zip tie, and then move on to the small rings. Now, trim the excess. [DB]
Angling Bins
In one of Bob Clagett’s I Like to Make Stuff videos, he makes a sweet little spinning shop organizer. One of the things he did that I think is worth pointing out is angling his shelves downward toward the center. This prevents things from rolling out of the cart as it’s moved or spun. [BC]

Creating PVC Pipe Spray Can Holders
On Geoff Meston’s Stuff I Made YouTube channel, he shows a really quick, simple, and I think righteous, way of creating holsters for your spray paints and other aerosol products. He simply cuts and mounts a C-shaped length of PVC pipe. The short, C-shaped pieces of pipe are flexible enough to open and hold the cans, and they will easily release the cans when you want to remove them. [GM]