PROJECTS: Musical Doorbell Drumbot
This means that a 16th note and a quarter note
will sound the same. This eliminated the need of
complicated code to handle timing.
The general idea was to create seven arrays,
one for each robot. Within the array, each piece of
data represented one step in time, and the value
determined what the robot would do. A value of
0 doesn’t play any notes, while a 1 will play the
low note, and a 2 will play the octave note on the
smaller tongue (Figure
G
).
If the start button was pressed, the robot will
play a low note, high note, or rest, as per the
first data value in each array. It will then look
ahead and reposition itself based on the next
note that needs to be played (Figure
H
). When it
is time, the next note will play, and the process
will continue until all the notes in the array are
played. The tempo is governed by a simple delay
executed after each note packet is executed.
This approach works great if you are creating
a “set it and forget it” type of device, such as a
doorbell. Filling the arrays with notes can be a
little time consuming, but once it’s populated,
you’re done. For any other application, perhaps
turning it into a MIDI instrument might be
more beneficial.
5. WIRING THE CIRCUIT
Wiring these Dynamixel servos is very easy since
they can be daisy-chained together. It’s important
to note that they are all factory assigned ID
number 1. So I used the U2D2 programmer and
Dynamixel Wizard app to assign each servo a
unique ID number. I chose to label the rotation
servos with ID’s 1–7 and the corresponding mallet
strike servos as 11–17.
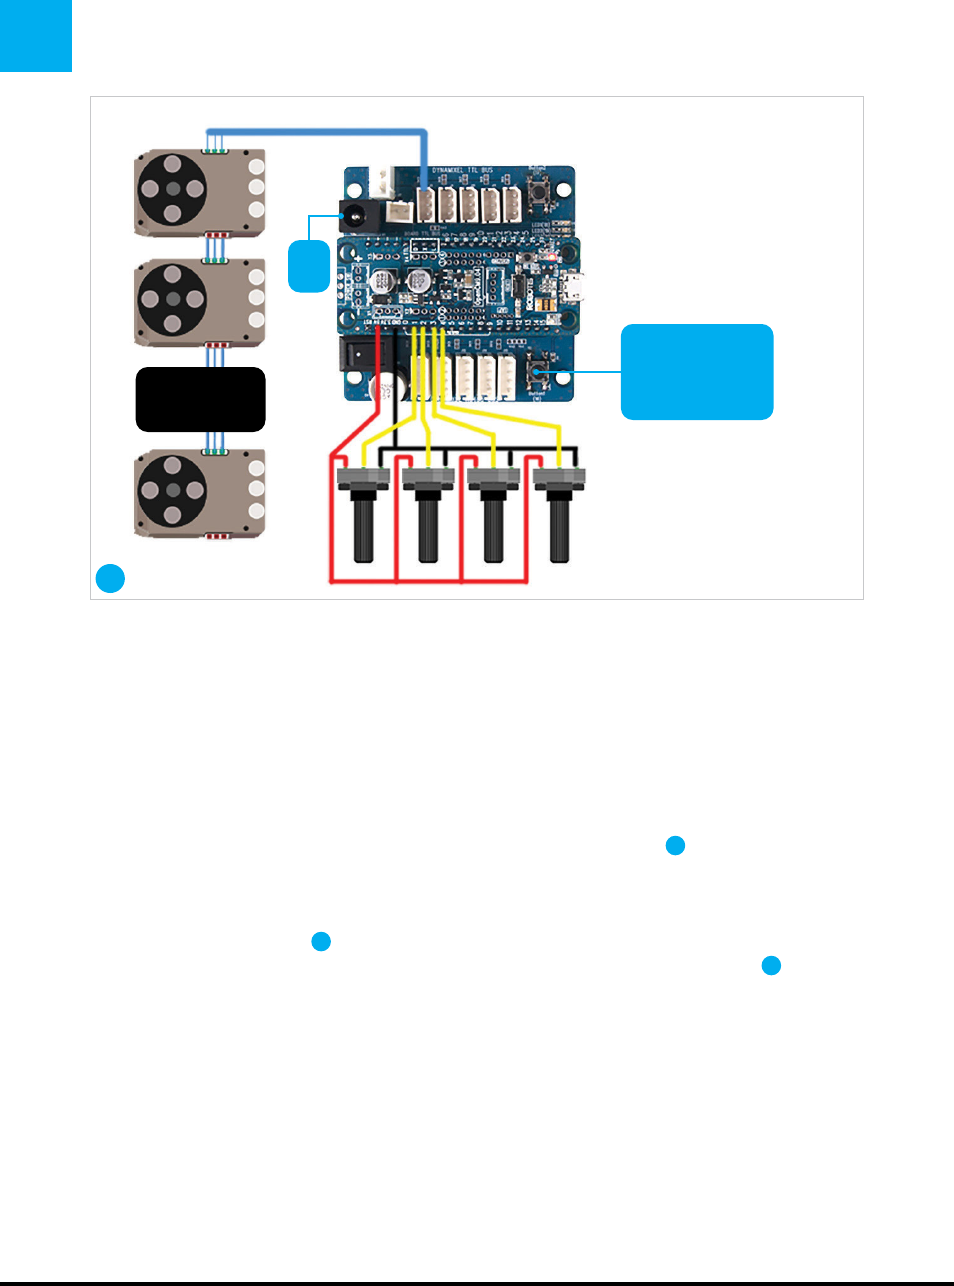
At this point I simply created a chain going
from 1 to 11, 11 to 2, 2 to 12, and so on. The last
servo got a longer extension and plugged into
the Arduino-based OpenCM 9.04 microcontroller
with expansion board (Figure
F
). The expansion
board allows for other types of Robotis servos
to be used and has a nice power switch and DC
input plug.
For this device I simply added a pushbutton
switch to represent the doorbell trigger. It is
possible to incorporate a wireless switch to
trigger the sequence, but for me a wired switch
was able to do the job just fine.
6. PROGRAMMING
I figured out early on that the drum when hit by
the mallet will just ring on, so the start of the
note matters here, but its end is not controlled.
6V
14 servos total
ZENBOT WIRING DIAGRAM
Internally wired
to pin 16. Used as
a trigger
F
68 makezine.com
M81_064-69_DoorbellBot_F1.indd 68M81_064-69_DoorbellBot_F1.indd 68 4/12/22 11:37 AM4/12/22 11:37 AM
..................Content has been hidden....................
You can't read the all page of ebook, please click here login for view all page.
