
When you will create a new project, Xcode will ask you whether you want to add Core Data to your application. If you check this checkbox, Xcode will automatically generate some boilerplate code that sets up the Core Data stack. Before iOS 10 came out, this code spanned a couple dozen of lines because you had to manually load the data model, connect to the persistent store, and then you also had to set up the managed object context.
In iOS 10, Apple introduced the NSPersistentContainer. When you initialize an NSPersistentContainer, all these works are done for you. This results in much less boilerplate code to obtain a managed object context for your application. Let's get started with setting up your Core Data stack. Open AppDelegate.swift and add the following import statement:
import CoreData
Next, add the following lazy variable to the implementation of AppDelegate:
private lazy var persistentContainer:
  NSPersistentContainer = {
    let container = NSPersistentContainer(name:
      "FamilyMovies")
container.loadPersistentStores(completionHandler: {
  (storeDescription, error) in
        if let error = error {
fatalError("Unresolved error (error), (error.userInfo)")
        }
    })
    return container
}()
The preceding snippet does all the work required to load the data model we'll create shortly. It also connects this data model to a persistent store and initializes our managed object context.
If you let Xcode generate the Core Data code for your, a method called saveContext is added to AppDelegate as well. This method is used in applicationWillTerminate(_:) to perform a last-minute save of changes and updates when the application is about to terminate. We will add this behavior also, but instead of placing the saveContext method in AppDelegate, we will add this method as an extension to the NSPersistentContainer. This will make it easier for other parts of our code to use this method as well, without relying on AppDelegate. Create a new folder in the Project navigator and name it Extensions. Also, create a new Swift file and name it NSPersistentContainer.swift. Add the following implementation to this file:
import CoreData

extension NSPersistentContainer {
    func saveContextIfNeeded() {
        if viewContext.hasChanges {
            do {
                try viewContext.save()
            } catch {
                let nserror = error as NSError
                  fatalError("Unresolved error (nserror),
                  (nserror.userInfo)")
            }
        }
    }
}
The preceding code adds a custom method to the NSPersistentContainer that we can call on instances of the NSPersistentContainer. This is really convenient because it decouples this method from AppDelegate entirely. Add the following implementation of applicationWillTerminate(_:) to AppDelegate to save the context right before the app terminates:
func applicationWillTerminate(_ application: UIApplication) {
    persistentContainer.saveContextIfNeeded()
}
Now, whenever the application terminates, the persistent store will check whether there are any changes to the managed object context that the viewContext property points to. If there are any changes, we'll attempt to save them. If this fails, we crash the app using fatalError. In your own app, you might want to handle this scenario a bit more gracefully. It could very well be that saving before termination isn't something that you want to crash your app on if it fails. You can modify the error handling implementation of saveContextIfNeeded if you think a different behavior is more appropriate for your app.
Now that we have our Core Data stack set up, we will need to make it available to our view controllers. We will make this happen by using dependency injection. This means that our AppDelegate will pass the managed object context to our initial view controller. It will then be this view controller's job to pass the context on to other view controllers that might need the managed object context as well. First, add a property to FamilyMembersViewController that will hold the managed object context. Don't forget to import Core Data at the top of this view controller:
var managedObjectContext: NSManagedObjectContext?
Now, in AppDelegate, modify the application(_:, didFinishLaunchingWithOptions:) method as follows:
func application(_ application: UIApplication,
  didFinishLaunchingWithOptions launchOptions:
  [UIApplicationLaunchOptionsKey : Any]? = nil) -> Bool {

    if let navVC = window?.rootViewController as?
      UINavigationController,
        var initialVC = navVC.viewControllers[0] as?
          MOCViewControllerType {

        initialVC.managedObjectContext =
          persistentContainer.viewContext
    }

    return true
}
Even though this code does exactly what it should, we can still make one major improvement. We know that there will be more view controllers that will hold on to a managed object context, and checking for classes is something we'd rather not do. As an exercise, attempt to fix this issue by adding a protocol called MOCViewControllerType. This protocol should add a requirement for an optional managedObjectContext property. Make sure that FamilyMembersViewController conforms to this protocol and fix the implementation of application(_:, didFinishLaunchingWithOptions:) as well.
We have now put down the groundwork for our application's Core Data stack. We initialized the stack, and the managed object context is injected into our view controller through a protocol. Let's see how we can define and set up our models.
So far, we looked at the bottom part of the Core Data stack: the persistence layer. We created an NSPersistentContainer to create and manage all of the layers, but there is one key element that we haven't looked at: the models. In Core Data, models are represented by the NSManagedObject subclasses. The instances of your models are instantiated by the NSManagedObjectContext whenever you query them. The first thing we will do is to create our models. Once the models are defined, you can set up relationships between the models. Relationships are great for our application, so we can have separate entities for our family members and their favorite movies.
In order for Core Data to understand which models your application uses, you define them in Xcode's model editor. Let's create a new model file so we can add our own models to the FamilyMovies application. Create a new file, and from the file template selection screen, pick Data Model. Name your model file FamilyMovies. First, we'll create the basic models and then see how we can define a relationship between family members and their favorite movies. Finally, we'll create the NSManagedObject subclasses:
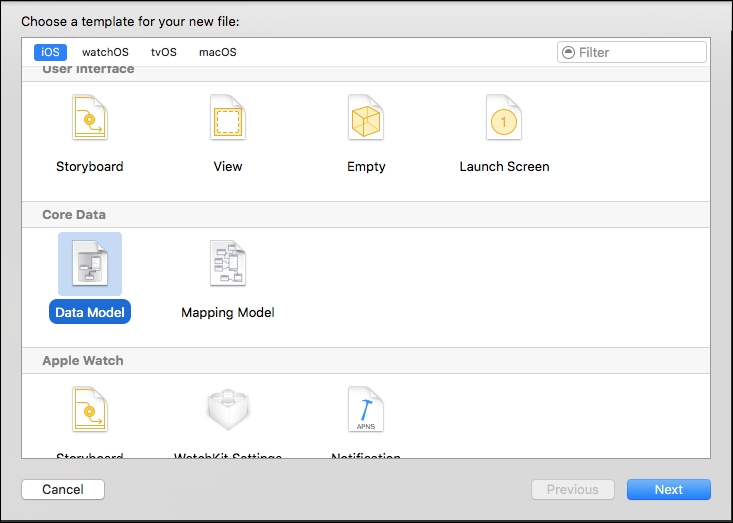
Your project now contains a file called FamilyMovies.xcdatamodeld. Open this file to go to the model editor. In the bottom-right corner of the editor, you'll find a button labeled Add Entity, and clicking on this will create our first model, FamilyMember. After doing this, a new entity is added to the list of entities. Rename this new entity to FamilyMember and select it.
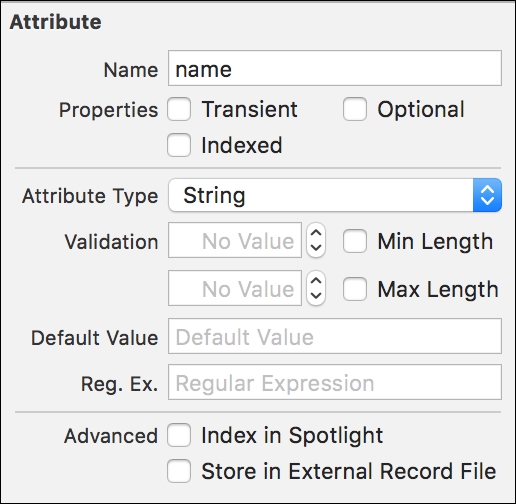
After selecting an entity, you can see all of its attributes, relationships, and fetched properties. Let's add a name property to our family member. Click on the plus icon at the bottom of the empty attributes list and add a new attribute called name. Make sure that you select String as the type for this attribute:

Click on this new property to select it. In the sidebar on the right, select the third tab to open the Data Model inspector. This is where can you can see a more detailed information on this attribute. For instance, you can configure a property to be indexed for faster lookups or if you want the attribute to be optional. For now, we don't care too much about indexing since we're not performing lookups by family members' names and even if we were, a family doesn't tend to have hundreds or thousands of members. By default, the Optional checkbox is checked. Make sure that you uncheck this box because we don't want to store family members without a name.
Some other options you have for attributes are adding validation, adding a default value, and enabling indexing in spotlight. For now, leave all options as they are by default:
We also need to have a Movie entity. Create this entity using the same steps as before and give it a single property: title. This property should be a string and it shouldn't be optional. Once you've done this, we can set up a relationship between our family members and their favorite movies.
A relationship in Core Data adds a related object as a property to another object. In our case, we want to define a relationship between FamilyMember and Movie. The relationship we're looking for is a one-to-many relationship. This means that every movie will have only one family member associated with it and every family member can have multiple favorite movies.
This setup is not the most efficient one since a many-to-many relationship would allow us to reuse a single movie for multiple family members. By using a one-to-many relationship, we're forcing ourselves to create a duplicate movie instance if multiple family members would want to add the same movie. For the sake of keeping our setup simple, this is okay. However, if you're building your own application, it might be worth considering a many-to-many relationship.
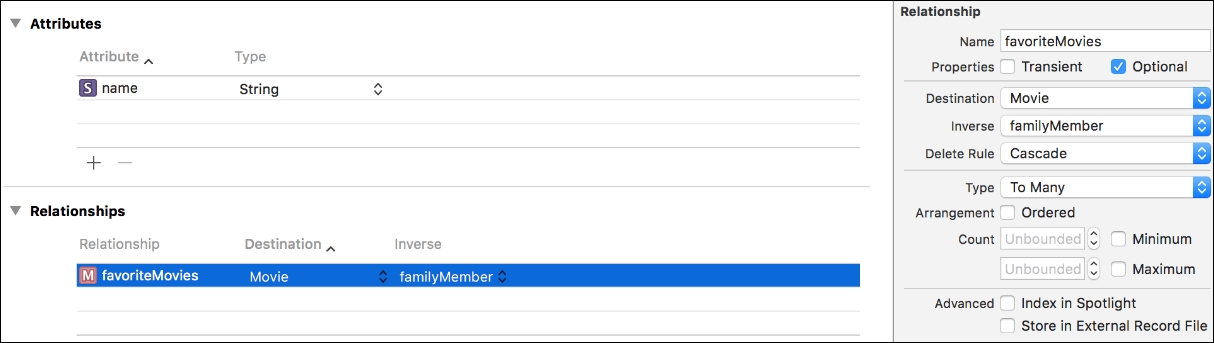
Select the FamilyMember entity and click on the plus icon at the bottom of the Relationships list. Name the relationship favoriteMovies and select Movie as the destination. Don't select an inverse relationship yet because we haven't defined it yet. The inverse relationship will tell the model that Movie has a property that points back to the FamilyMember. In the Data Model inspector, make sure you select To Many as the type for this relationship. Also, select Cascade as the value for the delete rule.
The delete rule is a very important property to be set correctly. Not paying attention to this property could result in a lot of orphaned data in your database. For instance, setting this property to nullify simply sets the inverse of the relationship to nil. This is the behavior we'd like to see when we delete a movie. Deleting a movie shouldn't delete the entire family members who added this movie as their favorite. It should simply be removed from the list of favorites.
However, if we delete a family member and nullify the relationship, we end up with a bunch of movies that don't have a family member associated with them. In our application, these movies are worthless; we won't use them anymore. For our app, it's desirable that if we delete a family member, we also delete their favorite movies because we won't need them anymore. This is exactly what the cascade option does; it cascades the deletion over to the relationship's inverse.
After setting the delete rule to cascade, select the Movie entity and define a relationship called familyMember. The destination should be FamilyMember, and the inverse for this relationship is favoriteMovies. After adding this relationship, the inverse will be automatically set on our FamilyMember entity:
With the data models in place, we can start creating our NSManagedObject subclasses.
There are a couple of ways to create or generate NSManagedObject subclasses. In the simplest of setups, an NSManagedObject subclass contains just the properties for a certain managed object and nothing else. If this is the case, then you can let Xcode generate your model classes for you.
This is actually what Xcode does by default. Build your project and try to write some code, such as the following:
let fam = FamilyMember(entity: FamilyMember.entity(),
  insertInto: managedObjectContext)
It will work automatically; you don't have to write any code yourself. Don't worry about what the preceding code does just yet, we'll get into that very soon.
If this default doesn't suit the approach you want to take( for example, if you want to prevent your code from modifying your models by defining your variables as private(set),) you may want to create a custom subclass instead of allowing Xcode to generate one for you. A custom NSManagedObject subclass for FamilyMember would look like this:
class FamilyMember: NSManagedObject {
    @NSManaged private(set) var name: String
    @NSManaged private(set) varfavoriteMovies: [Movie]?
}
This custom FamilyMember subclass makes sure that external code can't modify our instances. Depending on your application, this might be a good idea to implement since it will ensure that your models can't accidentally change.
One final option you have is to let Xcode generate the properties for your NSManagedObject as an extension on a class you will define. This is particularly useful if you have some custom-stored properties that you'd like to define on your model or if you have a customized NSManagedObject subclass that you can use as the base for all of your models.
Note
All code that Xcode generates for your Core Data models are added to the Build folder in Xcode's Derived Data. You shouldn't modify them, or access them directly. These files will be automatically regenerated by Xcode whenever you perform a build, so any functionality you add inside of the generated files will be overwritten.
For our FamilyMovies app, we'll make Xcode generate the entire model definition classes since we don't have any custom properties that we'd like to add. In the model editor, select each entity and make sure that the Codegen field is set to Class Definition; you can find this field in the Data Model inspector panel: