
Azure ATP is used to detect and investigate advanced attacks, compromised identities, and insider threats. Thanks to behavioral analytics in the backend, it provides very fast threat detection and also reduces the fatigue of false positives. Furthermore, it provides focused essential information using the Azure ATP attack timeline. Azure ATP is simple to work with, and the architecture is quite easy to understand because there are only two components per service and a downloadable sensor, which monitors local traffic, that is installed directly on your Domain Controllers. The sensors use dynamic resource limitation based on the domain controller's load.
There is another, more complex deployment method available, however, which uses a standalone sensor on a dedicated server and requires the configuration of port-mirroring from the Domain Controllers in order to receive network traffic. The service integrates directly with the Microsoft Intelligent Security Graph. You can find more information about this functionality at https://www.microsoft.com/en-us/security/operations/intelligence.
Azure ATP helps you to detect the following advanced attacks:
- Reconnaissance attacks, such as:
- Account enumeration
- User group membership enumeration
- User and IP enumeration
- Host and server name enumeration (DNS)
- Compromised credentials, such as:
- Brute force attempts
- Suspicious VPN connections
- Suspicious group membership modifications
- Honey Token account suspicious activity
- Lateral movements, such as:
- Pass-the-Ticket
- Pass-the-Hash
- Overpass-the-Hash
- Domain dominance, such as:
- Golden Ticket attacks
- DC shadowing
- Skeleton Key attacks
- Remote code execution on Domain Controllers
- Service creation on Domain Controllers
The on-premises product with the most basic features available is Microsoft Advanced Threat Analytics (ATA), which is still supported and in development. The cloud service, on the other hand, provides the functionality to protect your environment, so we recommend Azure ATP over ATA.
We will now see how to configure Azure ATP in your environment.
So, let us get started! To configure Azure ATP, you need to follow the below steps:
- Open the link, https://portal.atp.azure.com/, in a browser and log on as a global administrator.
- Next, create your instance of Azure Advanced Threat Protection, as shown in the following screenshot:

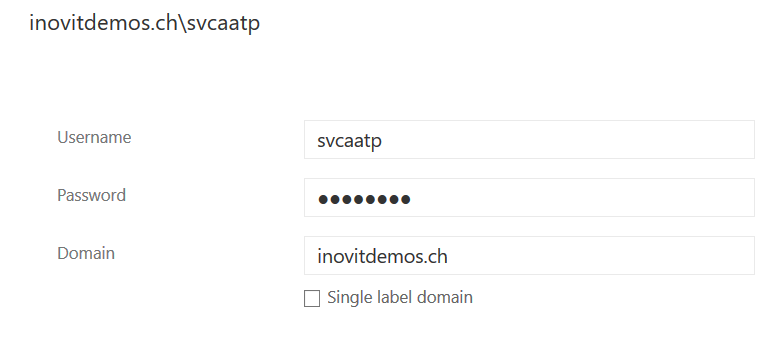
- Before configuring Azure ATP, you need to create a service account in your local active directory. Log on to your Domain Controller and open an elevated PowerShell and execute the following cmdlet:
New-ADUser -Name "Azure ATP Service Account" -SamAccountName svcaatp -UserPrincipalName [email protected] -path "OU=Users,OU=AAD,OU=Managed Service Objects,DC=inovitdemos,DC=ch" -AccountPassword (ConvertTo-SecureString "YourPassword" -AsPlainText -Force) -Enabled $True
- Jump back to the Azure AD portal and follow the configuration instructions.
- Now, use the newly-created service account, as shown in the following screenshot:
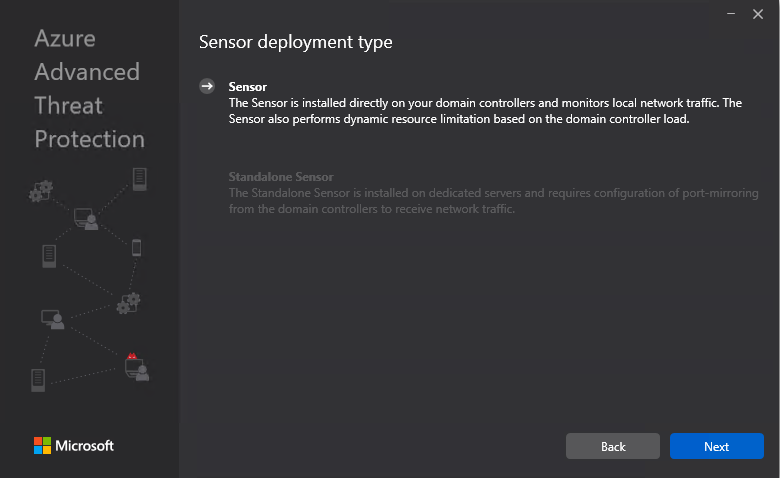
- Afterward, directly deploy your first Azure ATP sensor on your Domain Controller, as shown in the following screenshot:

- Download the setup executable to your Domain Controller and start the installation.
- Choose your preferred language and choose the Sensor-only deployment method, as shown in the following screenshot:
- Click Next and Configure the Sensor with the Access key of the portal, as shown in the following screenshot:

- Finish the installation and open the services.msc management console to view the newly-installed services, which should include the following two services:
![]()
- Next, enable the sensor as a Domain synchronizer to gather the related information for Active Directory, as shown in the following screenshot:

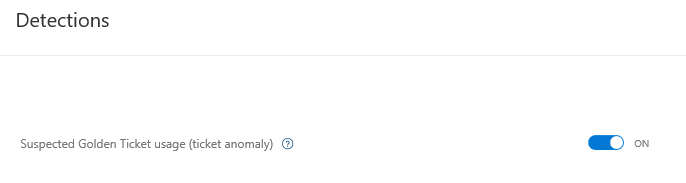
- The next configuration task is the activation of the Suspected Golden Ticket usage detection, which can be found under the Preview section, as shown in the following screenshot:
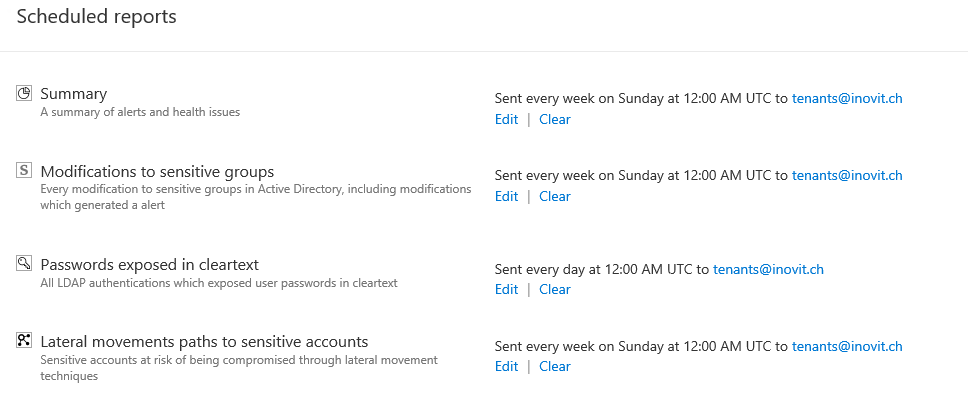
- Configure all of the relevant Scheduled reports and notification settings for testing its capability, as shown in the following screenshot:
- The Notifications settings page looks like the following screenshot:

Now that you have configured your Azure ATP service, you can use the guidance available at https://gallery.technet.microsoft.com/ATA-Playbook-ef0a8e38 to create attacks and test your environment in realistic scenarios. The document is written for Microsoft ATA, but you can still use it for testing purposes. You can also use the following Azure ATP security alert guide to validate your results: https://docs.microsoft.com/en-us/azure-advanced-threat-protection/suspicious-activity-guide. In the next section, we will dive into the features of Azure AD Identity Protection.