
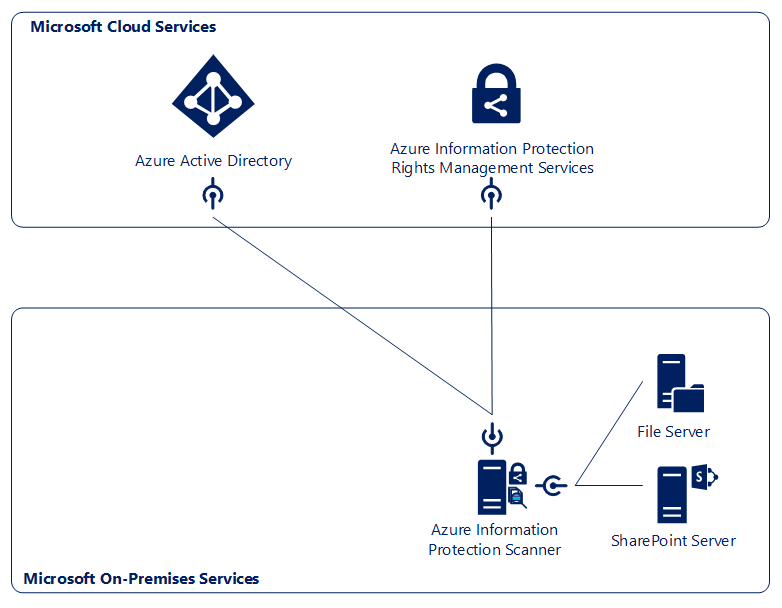
The identification and detection of sensitive information that isn't actively moved is a very important component inside an information-protection solution. For this reason, Microsoft provides the Azure Information Protection scanner, which allows you to scan two typical file locations, File Shares and SharePoint Document libraries, as you can see in the following diagram:
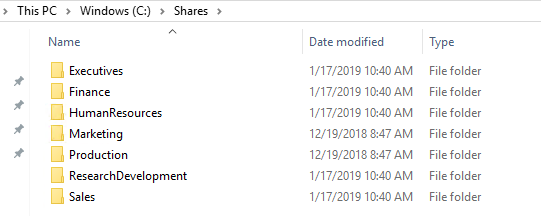
To explore the functionality of the AIP Scanner, we need to distribute some of our example documents to the following file locations:
- Move the example contents from the code package to the YD1INF01 server where we created the following test shares:
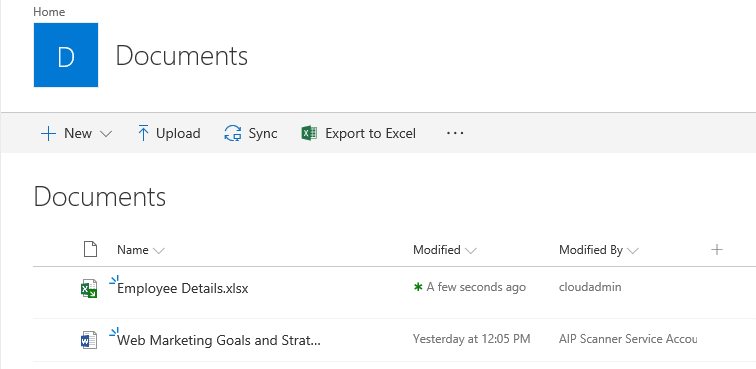
- Upload some of the test files to your document library on SharePoint:
We need to install and configure the AIP Scanner on our YD1APP01 server where, in Chapter 7, Deploying Solutions on Azure AD and ADFS, we installed the SQL server:
- Use the following command to create the service account with which the AIP Scanner service runs and scans:
New-ADUser -Name "svcaipscanner" -SamAccountName svcaipscanner -UserPrincipalName [email protected] -path "OU=Users,OU=AIP,OU=Managed Service Objects,DC=inovitdemos,DC=ch" -AccountPassword (ConvertTo-SecureString "YourPassword" -AsPlainText -Force) -Enabled $True
If you want to work with a cloud-only account, use the following command:
Connect-AzureAD
$PasswordProfile = New-Object -TypeName Microsoft.Open.AzureAD.Model.PasswordProfile $PasswordProfile.ForceChangePasswordNextLogin = $false $Password = Read-Host -assecurestring "Please enter password for cloud service account" $Password = [System.Runtime.InteropServices.Marshal]::PtrToStringAuto([System.Runtime.InteropServices.Marshal]::SecureStringToBSTR($Password)) $PasswordProfile.Password = $Password
$Tenant = Read-Host "Please enter tenant name for UserPrincipalName (e.g. inovitdemos.ch)" New-AzureADUser -AccountEnabled $True -DisplayName "AIP Scanner Cloud Service" -PasswordProfile $PasswordProfile -MailNickName "AIPScannerCloud" -UserPrincipalName "AIPScannerCloud@$Tenant"
- Synchronize the service account to your Azure AD:

- The service account needs the following rights on different services:
- Log on locally (need to be assigned) and Log on as service right (accomplished by the installation):

-
- Read (Discovery) or Contribute rights on the document library for classification/protection:

The following list shows the needed permissions:
-
- Read permissions to each file share repository for discovery, and Read/Write permissions for classification/protection
- Local administrator of the server and permissions to write to the SQL Server master database, SQL specific permissions if you can't grant the Sysadmin rights for the installation
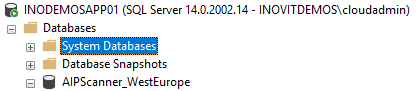
- AzInfoProtectionScanner database needs to be created manually
The following accounts need to be db_owner:
-
- Service account for the scanner
- User account for scanner installation
- User account for scanner configuration
- For labels that re-protect or remove protection, the account needs to be part of the super users group
- Install the Azure RMS PowerShell module with the following command:
Install-Module AADRM
- Connect to Azure RMS with the following cmdlet and global administrator credentials:
Connect-AadrmService
- Enable the Azure RMS Super User feature, which is disabled by default:
Enable-AadrmSuperUserFeature
- Create a mail-enabled group called in your Azure AD and assign the group as SuperUserGroup:
Set-AadrmSuperUserGroup -GroupEmailAddress "[email protected]"
- Download the AzInfoProtection.exe binary from https://bit.ly/2ccqSu0.
- Run the binary installation on the YD1APP01 server.
- Install the AIP Scanner on the server:
$cred = Get-Credential
Install-AIPScanner -SqlServerInstance YD1APP01 -ServiceUserCredentials $cred
- To run the configuration tasks, install the AzureADPreview PowerShell Module:
Install-Module AzureADPreview
- Run the following command to connect to your Azure AD and provide global administrator credentials:
Connect-AzureAD
- Create the WebApp and the associated Service Principle:
New-AzureADApplication -DisplayName AIPOnBehalfOf -ReplyUrls 'http://localhost'
$WebApp = Get-AzureADApplication -Filter "DisplayName eq 'AIPOnBehalfOf'"
New-AzureADServicePrincipal -AppId $WebApp.AppId
$WebAppKey = New-Guid
$Date = Get-Date
New-AzureADApplicationPasswordCredential -ObjectId $WebApp.ObjectID -startDate $Date -endDate $Date.AddYears(1) -Value $WebAppKey.Guid -CustomKeyIdentifier "AIPClient"
- Build the RequiredResourceAccess object that's needed to automate delegation of permissions for the native application:
$AIPServicePrincipal = Get-AzureADServicePrincipal -All $true | ? {$_.DisplayName -eq 'AIPOnBehalfOf'}
 $AIPPermissions = $AIPServicePrincipal | select -expand Oauth2Permissions
 $Scope = New-Object -TypeName "Microsoft.Open.AzureAD.Model.ResourceAccess" -ArgumentList $AIPPermissions.Id,"Scope"
 $Access = New-Object -TypeName "Microsoft.Open.AzureAD.Model.RequiredResourceAccess"
 $Access.ResourceAppId = $WebApp.AppId
 $Access.ResourceAccess = $Scope
- Run the following command to create the Native App and associated Service Principle:
New-AzureADApplication -DisplayName AIPClient -ReplyURLs http://localhost -RequiredResourceAccess $Access -PublicClient $true
 $NativeApp = Get-AzureADApplication -Filter "DisplayName eq 'AIPClient'"
 New-AzureADServicePrincipal -AppId $NativeApp.AppId
- Build the Set-AIPAuthentication command, to run it under the AIP Scanner service account:
"Set-AIPAuthentication -WebAppID " + $WebApp.AppId + " -WebAppKey " + $WebAppKey.Guid + " -NativeAppID " + $NativeApp.AppId | Out-File ~DesktopSet-AIPAuthentication.txt
 Start ~DesktopSet-AIPAuthentication.txt
- Open a PowerShell (Run as different user) and provide the on-premises AIP Scanner Service account credentials.
- Run the command from the Set-AIPAuthentication.txt file, as follows:
Set-AIPAuthentication -WebAppID 10fea33d-a6c0-44cb-88ea-eca3cf673d4d -WebAppKey f84ec310-cb36-44f9-ab7f-4edeecf099d0 -NativeAppID 4f478966-0930-4fc3-b1e4-a3acb92d4932
- Accept to acquire an authentication token.
- Restart the AIP Scanner.
In the next procedure, we will provide the steps to upgrade the AIP Scanner from a GA version to the newest preview version, AzInfoProtection_PREVIEW_1.45.32.0.exe:
- Download the newest preview from https://bit.ly/2ccqSu0 and install the binaries.
- Update the scanner with the Profile parameter:
Update-AIPScanner -Profile WestEurope
- To check that the scanner successfully restarts, create the profile in the Azure Information Protection blade:

- The database will also be renamed to the profile name:
- Open the newly-created profile and configure the AIP Scanner settings
- Configure the following repositories (replace the server name):

- Use the following configuration for all the file-share repositories and the SharePoint document library:

- Use the following settings for the Profile:

- Navigate to the Policies settings under the Classifications section.
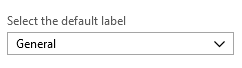
- Click the Global policy and change the default label to General:
- Navigate to the Scanner | Nodes section, mark the scanner server, and click Scan now:

- Navigate to Dashboards | Data discovery (Preview) to view the first results:

You can also use all the discussed technologies to gather information about data at rest. But, it's very important to understand that everything depends on the quality of your detection rules that you can get from the data in motion and the associated processes. We will follow up on this rule in Chapter 15, Configuring Azure Information Protection Solutions.