
In this section, we will build applications for our users and work through the different authentication mechanisms provided by Azure AD. All the configurations we do in this section will be done with global administrator rights and on the Azure portal, https://portal.azure.com. We will start with Salesforce configuration:
- Launch the Azure Active Directory blade and click Enterprise applications.
- Under All applications, click New application:

- Type Salesforce in the search field:

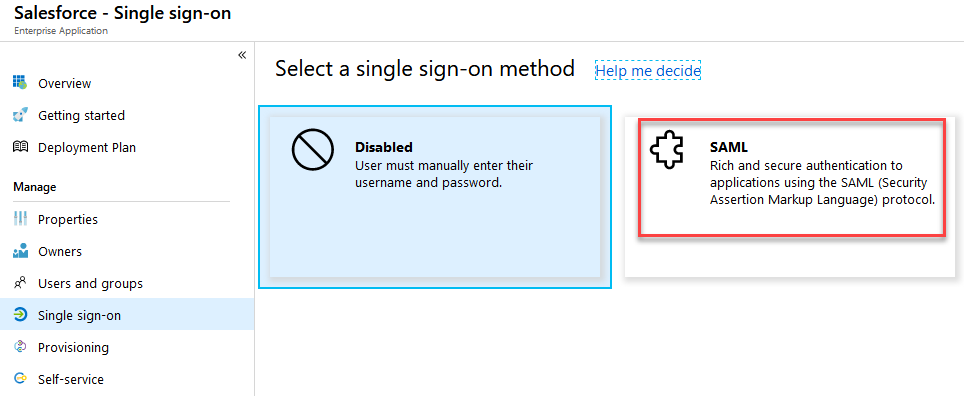
- Under Single sing-on, change to SAML authentication:
- Go to the SAML Signing Certificate section and click Download on Certificate (RAW):

- Now, log in to your Salesforce account and navigate to Identity | Single Sign-On Settings.
- Edit the SAML settings and click SAML Enabled:

- Next, we will create new SAML Single Sign-On Settings; click New:

- To gather the values for the configuration, you need to jump back to your Azure portal and copy the three links to Notepad:

- Fill in the following information on the Salesforce configuration page:

- Next, we need to configure our Salesforce domain name under SETTINGS | Company Settings | My Domain.
- Use your tenant name and click Check Availability and Register Domain:

- Refresh the page and Edit the Authentication Configuration:
![]()
- Click Open and Upload a logo from Chapter 1, Building and Managing Azure Active Directory.
- Check AzureADSSO and Save:

- Click on login and if you are prompted to register your phone, click I Don't want ....
- If you are prompted, log in with your Salesforce administrator account.
- Next, under the My Domain section, click Deploy to Users and OK.
- Now, we switch back to our Azure AD configuration.
- Set the Sign on URL and Identifier (Entity ID) text box values to your value, https://<TENANT>-dev-ed.my.salesforce.com:

Now that we have configured SAML authentication, we can activate user provisioning with Salesforce by following these steps:
- Under the Manage section, click Provisioning.
- Provisioning Mode drop-down list, set Automatic.
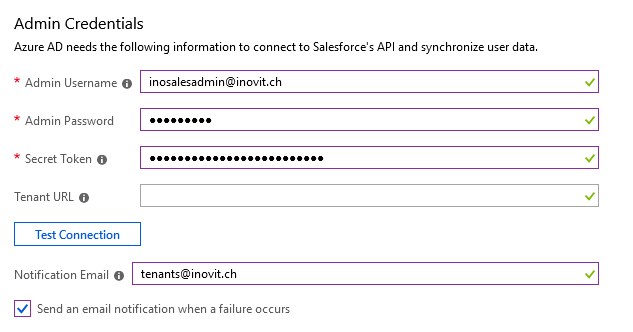
- Under Admin Credentials, type in the admin username and password for accessing Salesforce.
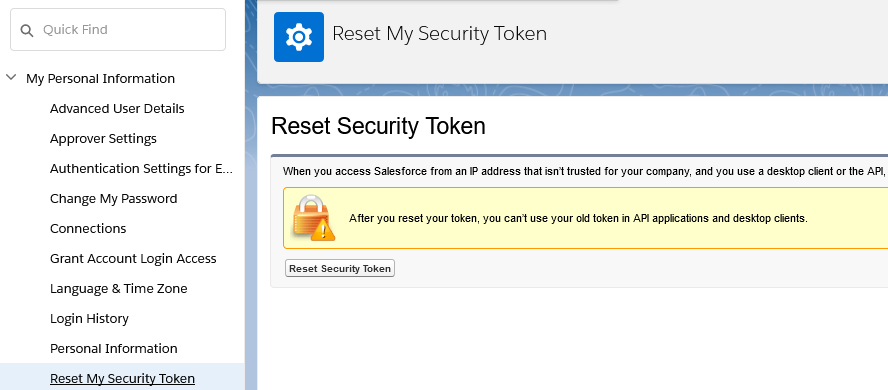
- Obtain a secret token by switching to the Salesforce administration:

- Click Reset Security Token and you will receive a new security token by mail:
- Next, we configure the provisioning settings in the Azure portal. Use the token from your mailbox and configure a notification email address:
The following message is expected:

- To use the newly deployed application, we need to create and assign a group to the Salesforce application.
- Create the following group and assign a licensed user from the Sales department:

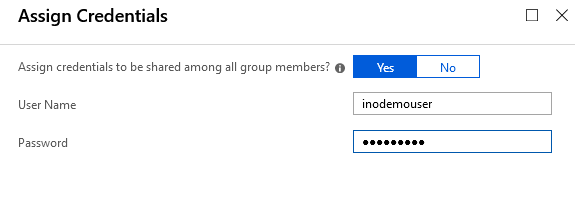
- Assign this group with the following values:

- Under Manage | Provisioning | Settings, set Provisioning Status to On and leave the default Scope.
- Click the checkbox for Clear current state and restart synchronization and click Save.
- In the Restart Synchronization window, click Yes:

- Test the application with your assigned test user at https://myapps.microsoft.com.
- The following result is expected, a successful logon:

We successfully deployed Salesforce, including SAML and provisioning capabilities, to our Azure AD.
Now, we will use another feature in Azure AD with Twitter. For this, we use the password-based Sign-In option:
- First, we need to add the Twitter app from the application gallery. You already know the process from Salesforce:

- Next, we choose Password-based Single Sign-on mode from the Single Sign-On section.
- The wizard automatically sets the correct URL to Twitter:

- We assign the sales and marketing application access group to the application, and the provide the credentials we want to use and hide from the user:
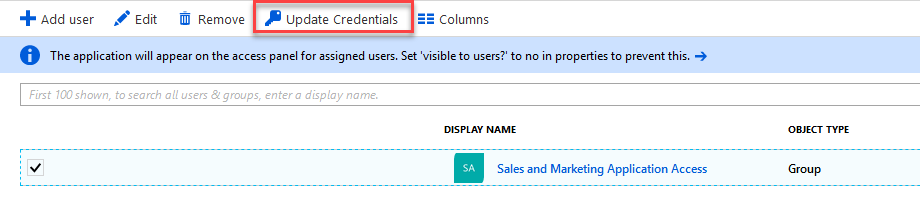
- You are also able to Update Credentials on the assigned groups:
- Now that we have configured the Twitter app for our sales and marketing users, you can test the functionality with the user over at https://myapps.microsoft.com.
- You should have a Single Sign-On experience.
Some applications require access to the application's access panel (https://myapps.microsoft.com). In this case, the website requires a browser extension:
- To configure Microsoft Edge for the access panel extension, launch your browser and navigate to https://myapps.microsoft.com
- Log in as a test user
- Click on Twitter
- Click Install Now
- Complete the installation wizard to install the My Apps Secure Sign-In Extension
- You get a new extension notification; click Turn it on
- Relaunch the browser and navigate to https://myapps.microsoft.com
- Log in as a test user
This is our first impression of Azure AD's capabilities. We will dive deeper in the next Chapter 8, Using Azure AD App Proxy and Web Application Proxy, and now start to configure our first applications in our ADFS infrastructure.