
In this section, we will first configure the system to use MorphX VCS, and then reconfigure it to use Team Foundation Services.
If we are using MorphX VCS, which was designed for one to five developers, we will all be working on the same environment. This is called shared development.
MorphX VCS is set up within the MorphX IDE, as follows:
- Navigate to the IDE (Ctrl + D).
- From the main menu, go to Version Control | Version Control Parameters (or press Ctrl + Shift + V).
- Configure the form as shown in the following screenshot:
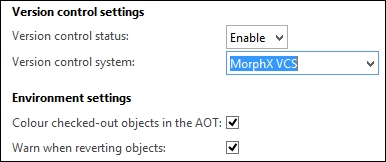
- Press OK.
We can then configure the system settings for additional control over the VCS settings. This is covered towards the end of this section.
In order to use TFS, we need access to a TFS server. This can be installed on premise, or we can use Visual Studio Online. For more information on Visual Studio Online, refer to http://www.visualstudio.com/en-us/products/what-is-visual-studio-online-vs.aspx.
If AX is cumulative update 8 or later, you will need Visual Studio 2013 professional or a higher edition. Ensure that you have started Visual Studio once and signed in with your Microsoft account.
If you are using cumulative update 7 (CU7) or prior versions, AX will not support Visual Studio 2013, which makes it incompatible with Visual Studio Online as this always uses the latest release. If we try to use Visual Studio Online, it will not be able to authenticate and we will be denied access to the online service.
In order to solve this, we need to install Microsoft Visual Studio Team Explorer 2013, which is a free download available at http://www.visualstudio.com/downloads/download-visual-studio-vs. Once this is installed, you need to start Visual Studio and log in with your Microsoft account. Team Explorer installs the Visual Studio 2013 shell in order to make it available for use with AX. This is where you manage the connection to Visual Studio Online.
Prior to Visual Studio 2010, we had to install Microsoft Visual Studio Team Foundation Server 2013 MSSCCI provider (MSSCCI). Further information on this is available at http://msdn.microsoft.com/en-us/library/dd997788.aspx#msscci. This needs to be installed in order for AX (prior to CU8) to connect to the latest TFS release.
In this example, we will use Visual Studio Online. Registration is free but a Microsoft account is required to access the service. You will be given a portal URL that reads something such as https://<yourorganisation>.visualstudio.com.
Once the required steps have been done, we can create our new TFS project, as described in the following steps:
- Open your Visual Studio Online portal.
- Under Recent projects and teams, select New. This opens the following form:
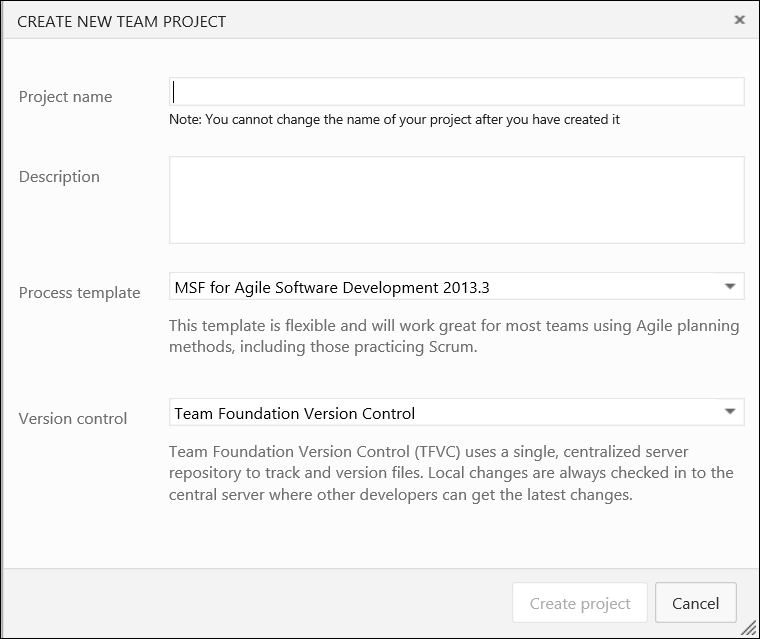
- Configure the form as required. In our example, we will use
6015GettingStartedas the project name. - Press Create project. After a short time, this message will be displayed:
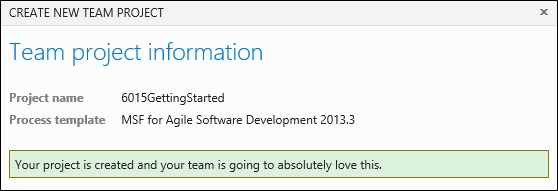
- Click on Navigate to project.
- This opens the new project. In this form, we should add the team members using their Microsoft account.
- Once the team members are added, we can move on to configuring AX. The next step is done by each developer.
- Create a folder in your local hard drive for the local files. For example,
C:ProjectsVCSAX6015GettingStarted.
The following steps complete the configuration:
- Open the AX IDE and then the Version Control Parameters form.
- Configure the General tab, as follows:
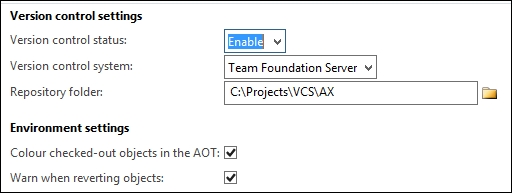
- When Version control system is changed to Team Foundation Server, a Team Foundation Server tab appears on the left table of contents pane. Select this tab.
- Configure Team Foundation Server options as follows:
Team Foundation Server URL
This is your local TFS address or your Visual Studio Online URL, for example,
https://<yourorganisation>.visualstudio.com/DefaultCollection.Team Foundation project name
This is the project name we created in TFS; in this case,
6015GettingStarted.Branch folder
We do not recommend branching at this stage. Enter
Trunkin this case.Application root folder
This is the folder name we created for the project, for example,
6015GettingStarted. - Press OK.
- AX will show the Sign-In to Team Foundation Services dialog, as shown here:
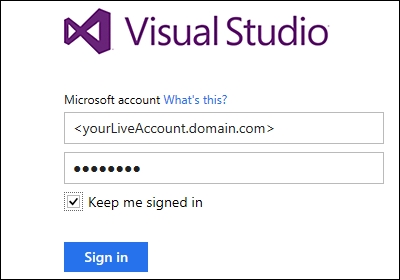
- Complete the form with the same account details that you use to access the portal.
- If successful, AX will show the following message:
Pending add on C:ProjectsVCSAX6015GettingStartedDefinitionVCSDef.xml with status Getting
The most common error is as follows:

This has the following possible reasons:
- The URL was entered incorrectly; most likely,
DefaultCollectionwas misspelt or missing - MSSCCI was not installed—CU7 or prior releases of AX
- You do not actually have permission
If the URL is incorrect or you have no access to the Internet, the following message is displayed: Team Foundation services are not available from server https://badnameurl.visualstudio.com/defaultcollection.
The best way to debug this is to open the URL (copied from the settings form) to a browser. If this works, try connecting to TFS through Visual Studio 2013, as shown in the following steps:
- Open Visual Studio 2013 (or Team Explorer if using CU7 or prior releases).
- Navigate to TEAM | Connect to Team Foundation Server.
- In the Connect to Team Project dialog, click on Servers….
- In the Add/Remove Team Foundation Server dialog, click on Add….
- Configure the Add Team Foundation Server dialog, as shown in the following screenshot:
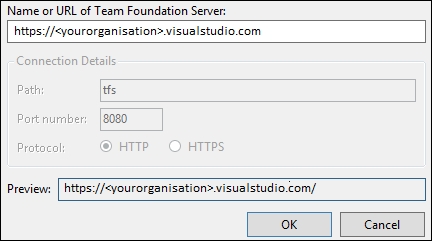
- Press OK.
- Visual Studio will now ask you to log in. Sign in using the credentials you used to access the Visual Studio portal.
- Close the Add/Remove Team Foundation Server dialog.
- The Connect to Team Project will now show the team project collections, but we can simply close this as we have completed the required authentication to Visual Studio Online.
- Open the AX client again, and try the configuration again.
We can now add the elements we create or modify to source control. Refer to Appendix B, Using Version Control, for more information on using source control.