
Sometimes, we need to have more control of the form's design when data needs to be presented in a certain way. For example, when we want fields to be displayed in a vertical list and need two fields to be side by side (for example, a name for an ID field).
A good example is the form SalesCreateOrder where the design has the address information presented as follows:

When we add controls to a group control, they appear according to the following properties on the group control:
|
Property |
Value |
|---|---|
|
Style |
This controls the general settings such as margins, colors, and framing. |
|
TopMargin, BottomMargin, LeftMargin, RightMargin |
These are rarely set as the Style property is usually used. To set a value, click on the ellipses, and to revert back to Auto, click it again. |
|
ArrangeMethod |
This is usually |
|
Columns |
This sets the number of columns that controls are placed in. |
|
ColumnSpace |
The default is usually fine, but you can use this to change the spacing between columns. |
|
AlignChildren |
This controls whether the controls should be aligned after the longer label. In the preceding screenshot, the controls Address and Delivery contact are aligned in this way. |
The properties we will usually use for layout control are Style and Columns. Continuing with the SalesCreateOrder form example, this was done by creating a set of nested group controls, as shown in the following screenshot:
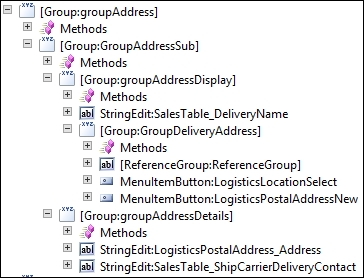
The structure was created by setting the properties as follows:
|
Control |
Properties set |
|---|---|
|
|
|
|
|
|
|
|
|
|
|
|
The top level group is used to simply apply a caption, but why do we need groupAddressSub? In this case, we actually don't, but it can help when we want to make a group not to take part in the general form alignment. The property AlignControl can be used so that the controls in the group are not aligned with controls in other groups. This is a special case, so we would use this nesting technique so that the effect of the property only affects a limited set of controls.
We don't create forms using a graphical editor, and since MorphX is doing a great job of layout on the forms, we don't actually want that much manual control. We want the fields that are hidden by the user or through security rights to not leave holes in the form layout. We may also deploy AX to different counties, and the labels may have a different length.
So, even though we may need to design forms with a little trial and error, this is a small price to pay for the rewards we get. The best way to learn here is by trying it yourself, and looking for examples in the standard forms. It is very important that we follow the design patterns provided to us by Microsoft—we want our forms to look professional, and having forms that look and feel like the forms created by Microsoft, helps with user acceptance of our solutions.