
1. UIKit Dynamics
Apple introduced UIKit Dynamics with iOS 7, which enables developers to easily provide realistic physics simulations that can be applied to UIViews. For many years, developers have incorporated realistic-feeling effects into sections of their apps, such as swipeable cells and pull-to-refresh animations. Apple has taken a big steps in iOS 7 and iOS 8 to bring these animations into the core OS, as well as to encourage developers to implement them at an aggressive rate.
The UIDynamicItem protocol, along with the dynamic items that support it, is a giant leap forward in user experience. It is incredibly easy to add effects such as gravity, collisions, springs, and snaps to interfaces to provide a polished feel to an app. The APIs introduced for dynamic items are simple and easy to implement, providing very low-hanging fruit to increase the user experience of an app.
The Sample App
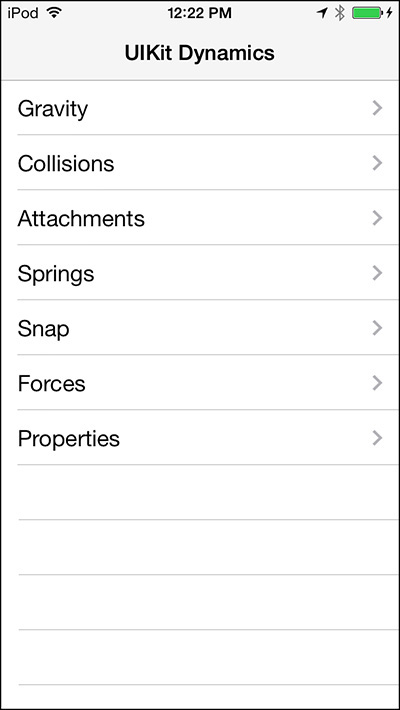
The sample app (shown in Figure 1.1) is a basic table demoing the various functions of UIKit Dynamics. Seven demos are presented in the app, from gravity to properties. Each demo is covered in order with a dedicated section. Besides the table view and basic navigation, the sample app does not contain any functionality not specific to UIKit Dynamics.
Although the sample app will run and perform in the iOS Simulator running iOS 8, the best performance is seen on physical devices. It is recommended that UIKit Dynamic code be thoroughly tested on physical devices before shipping.
Note
Having UIKit Dynamics and autolayout enabled on the same view can cause layout issues. Often this is presented as autolayout and UIKit Dynamics fighting over the correct position of a view and causing it to jump around wildly and unpredictably. If the view is not behaving as expected, check the autolayout settings to ensure that they are not in conflict.
Introduction to UIKit Dynamics
UIKit Dynamics is a new set of classes and methods that was first introduced to iDevices starting with iOS 7. In short, it provides an easy-to-implement method to improve the user experience of apps by incorporating real-world behaviors and characteristics attached to UIViews. UIKit Dynamics is, in the simplest terms, a basic physics engine for UIKit; however, it is not designed for game development like most traditional physics engines. Apple provides several game frameworks, such as SpriteKit, that include a build in the physics engine.
Dynamic behavior becomes active when a new UIDynamicAnimator is created and added to a UIView. Each animator item can be customized with various properties and behaviors, such as gravity, collision detection, density, friction, and additional properties detailed in the following sections.
There are six additional classes that support the customization of a UIDynamicAnimator item: UIAttachmentBehavior, UICollisionBehavior, UIDynamicItemBehavior, UIGravityBehavior, UIPushBehavior, and UISnapBehavior. Each of these items allows for specific customization and will result in realistic behavior and animation of the UIView to which they are attached.
Implementing UIKit Dynamics
Creating a new animation and attaching it to a view is accomplished using two lines of code. In this example self.view is now set up to use UIKit Dynamic behavior. Each specific dynamic item must be added to the animator using the addBehavior: method.
UIDynamicAnimator *animator = [[UIDynamicAnimator alloc]
initWithReferenceView:self.view];
[animator addBehavior:aDynamicBehavior];
Each UIDynamicAnimator is independent and multiple animators can be run at the same time. For an animator to continue to run, a reference to it must be kept valid. When all items associated with an animator are at rest, the animator is not executing any calculations and will pause; however, best practices recommend removing unused animators.
Gravity
Gravity is arguably the easiest UIDynamicItem to implement, as well as one of the most practical. Apple makes heavy use of the gravity item in iOS 8, and a user does not need to go further than the lock screen to interact with gravity. Dragging up on the camera icon from the iOS 8 lock screen and releasing it under the halfway point will drop the home screen back into place using UIGravityBehavior. This functionality, even before the introduction of UIKit Dynamics in iOS 7, was often cloned and implemented by hand using timers and traditional animations.
The following code snippet will set up a gravity effect on frogImageView that is a subview of self.view. First a new UIDynamicAnimator is created for the enclosing view that the animated view will appear in, in this example self.view. A new UIGravityBehavior object is created and initialized with an array of views that should have the gravity effect applied to them. The gravity behavior is then set; the example will apply a downward y-axis force of 0.1. When the behavior is configured, it is added to the UIDynamicAnimator using the addBehavior: method.
animator = [[UIDynamicAnimator alloc] initWithReferenceView:self.view];
UIGravityBehavior* gravityBehavior = [[UIGravityBehavior alloc] initWithItems:@[frogImageView]];
[gravityBeahvior setXComponent:0.0f yComponent:0.1f];
[animator addBehavior:gravityBehavior];
Note
The dynamic item must be a subview of the reference view; if the item is not a subview, the animator will simply not provide any movement.
UIKit Dynamics uses their own physics system, jokingly referred to by Apple Engineers as UIKit Newtons. Although there is no direct correlation to standard formulas, Apple does provide a close approximation. A force of 1.0 equals roughly 9.80655 m/s2, which is the force of gravity on earth. To apply gravity roughly one-tenth of that found on earth, 0.1 would be used. Gravity in UIKit Dynamics does not need to be specified as only a downward force; if a negative value is provided for the yComponent, gravity will pull up. Likewise, gravity can be specified for the x-axis in the same fashion. Items also have a density property, which is discussed in more detail in the “Item Properties” section.
Running the sample code for gravity results in the imageView simply falling at roughly one-tenth the rate of earth gravity (shown in Figure 1.2) and completely sliding off the screen. Because no boundaries or collisions are set, the object isn’t aware that it hit something that should cause it to stop falling, so it falls in essence forever.
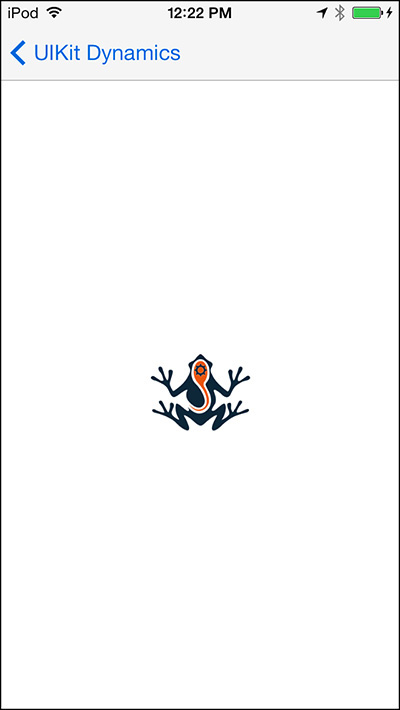
Figure 1.2 An image view with the force of gravity applied to it falling down the screen in the gravity example from the sample app.
Collisions
In the preceding section, gravity was covered; however, the object that the gravity was applied to fell through the bottom of the screen and continued on its way into infinity. This is because no collision points were defined and the object had nothing to stop its descent.
The previous example will be modified to add collision boundaries to the enclosing view, as well as adding a secondary image object. The collision example begins the same way as gravity; however, two image views are now used.
Creating a UICollisionBehavior object is very similar to creating a UIGravityBehavior object. The object is initialized with the UIViews that should be affected, in this case two UIImageViews. In addition to the views, collision behavior also needs to be specified with one of three possible values. UICollisionBehaviorModeItems will cause the items to collide with each other. UICollisionBehaviorModeBoundaries will cause the items not to collide with each other but to collide with boundaries. Finally, UICollisionBehaviorModeEverything will cause the items to collide both with each other and with the boundaries.
For objects to interact with boundaries, those boundaries first need to be defined. The easiest boundary to define is set through a Boolean property on the UICollisionBehavior object called translatesReferenceBoundsIntoBoundary. In the example this will use the bounds of self.view. Boundaries can also be set to follow an NSBezierPath using the method addBoundaryWithIdentifier:forPath: or based on two points using addBoundaryWithIdentifier:fromPoint:toPoint:.
animator = [[UIDynamicAnimator alloc] initWithReferenceView:self.view];
UIGravityBehavior* gravityBehavior = [[UIGravityBehavior alloc] initWithItems:@[frogImageView, dragonImageView]];
[gravityBehavior setXComponent:0.0f yComponent:1.0f];
UICollisionBehavior* collisionBehavior = [[UICollisionBehavior alloc] initWithItems:@[frogImageView, dragonImageView]];
[collisionBehavior setCollisionMode: UICollisionBehaviorModeBoundaries];
collisionBehavior.translatesReferenceBoundsIntoBoundary = YES;
[animator addBehavior:gravityBehavior];
[animator addBehavior:collisionBehavior];
UICollisionBehavior also provides a delegate callback that conforms to the UICollisionBehaviorDelegate protocol.
collisionBehavior.collisionDelegate = self;
The UICollisionBehaviorDelegate has four callback methods, two for beginning collisions and two for ended collisions. Each set of callbacks has one method that will identify the boundary hit and one that will not. All methods provide a reference to the object that has caused the callback method to fire. The collision begun methods also provide a CGPoint to reference the exact area of contact. The sample code will update a label after it has detected that an object has been hit.
-(void)collisionBehavior:(UICollisionBehavior *)behavior beganContactForItem:(id<UIDynamicItem>)item withBoundaryIdentifier:(id<NSCopying>)identifier atPoint:(CGPoint)p
{
if([item isEqual:frogImageView])
collisionOneLabel.text = @"Frog Collided";
if([item isEqual:dragonImageView])
collisionTwoLabel.text = @"Dragon Collided";
}
-(void)collisionBehavior:(UICollisionBehavior *)behavior endedContactForItem:(id<UIDynamicItem>)item withBoundaryIdentifier:(id<NSCopying>)identifier
{
NSLog(@"Collision did end");
}
Attachments
An attachment specifies a dynamic connection between two objects. This allows for the behavior and movement of one object to be tied to the movement of another object. By default, UIAttachmentBehaviors are fixed to the center of an object, although any point can be defined as the attachment point.
The sample app builds on the work done in the “Collisions” section. Once again, two image views are used. A boundary collision is created and applied to the UIDynamicAnimator. A new CGPoint is created and set to the reference point of the center of the frog image view. A new UIAttachmentBehavior object is created and initialized using initWithItem:attachedToAnchor:. There are also additional initialization methods on UICollisionBehavior that allow specification of points or other objects. The collision and the attachment behavior are both added to the animator object.
animator = [[UIDynamicAnimator alloc] initWithReferenceView:self.view];
UICollisionBehavior* collisionBehavior = [[UICollisionBehavior alloc] initWithItems:@[dragonImageView, frogImageView]];
[collisionBehavior setCollisionMode: UICollisionBehaviorModeBoundaries];
collisionBehavior.translatesReferenceBoundsIntoBoundary = YES;
CGPoint frogCenter = CGPointMake(frogImageView.center.x, frogImageView.center.y);
self.attachmentBehavior = [[UIAttachmentBehavior alloc] initWithItem:dragonImageView attachedToAnchor:frogCenter];
[animator addBehavior:collisionBehavior];
[animator addBehavior:self.attachmentBehavior];
These objects are now bound by an invisible connector the length equal to their initial distance. If the frog image view moves, the dragon image view will move with it holding onto the center point. However, the frog image view has no capability to move; to solve this, the sample app implements a simple pan gesture. As the frog image view is moved around the view, the center point is updated and the updated anchor point is set.
-(IBAction)handleAttachmentGesture:(UIPanGestureRecognizer*)gesture
{
CGPoint gesturePoint = [gesture locationInView:self.view];
frogImageView.center = gesturePoint;
[self.attachmentBehavior setAnchorPoint:gesturePoint];
}
During the movement, the collision boundaries are still in effect and override the desired behavior of the attachment. This can be demonstrated by pushing the dragon image into the boundaries of the view.
It is also possible to update the length property of the attachment view in order to change the distance the attachment gives to the two objects. The attachment point itself does not need to be the center of the attached object and can be updated to any offset desired using the setAnchorPoint call.
Springs
Springs (shown in Figure 1.3) are an extension of the behavior of attachments. UIKit Dynamics allows for additional properties to be set on UIAttachmentBehavior, frequency and damping.

Figure 1.3 A spring effect attaching the dragon image to the frog, which demonstrates using the effects of gravity as well as UIAttachmentBehavior damping and frequency.
The following section of the sample app adds three new UIKit Dynamic properties after creating the UIAttachmentBehavior. The first, setFrequency, sets the oscillation or swing for the object. Next, setDamping evens out the animation peaks. The length is also adjusted for this example from its initial position. To better demonstrate these behaviors, gravity is added to this example.
animator = [[UIDynamicAnimator alloc] initWithReferenceView:self.view];
UICollisionBehavior* collisionBehavior = [[UICollisionBehavior alloc] initWithItems:@[dragonImageView, frogImageView]];
UIGravityBehavior* gravityBeahvior = [[UIGravityBehavior alloc] initWithItems:@[dragonImageView]];
CGPoint frogCenter = CGPointMake(frogImageView.center.x, frogImageView.center.y);
self.attachmentBehavior = [[UIAttachmentBehavior alloc] initWithItem:dragonImageView attachedToAnchor:frogCenter];
[self.attachmentBehavior setFrequency:1.0f];
[self.attachmentBehavior setDamping:0.1f];
[self.attachmentBehavior setLength: 100.0f];
[collisionBehavior setCollisionMode: UICollisionBehaviorModeBoundaries];
collisionBehavior.translatesReferenceBoundsIntoBoundary = YES;
[animator addBehavior:gravityBeahvior];
[animator addBehavior:collisionBehavior];
[animator addBehavior:self.attachmentBehavior];
Moving the frog around the screen now results in the dragon hanging 100 points from the bottom and swinging from the effect of the attachment and gravity combined.
Snap
An item can be dynamically moved to another point in a view with a snapping motion. Snapping is a very simple behavior to implement. In the sample app the action is tied to a tap gesture, and tapping anywhere on the screen causes the image to jump to that spot. Each UISnapBehavior is linked to a single item at a time, and during initialization an end point where the item should end up is specified. A damping property can also be specified to affect the amount of bounce in the snap.
CGPoint point = [gesture locationInView:self.view];
animator = [[UIDynamicAnimator alloc] initWithReferenceView:self.view];
UISnapBehavior* snapBehavior = [[UISnapBehavior alloc] initWithItem:frogImageView snapToPoint:point];
snapBehavior.damping = 0.75f;
[animator addBehavior:snapBehavior];
Push Forces
UIKit Dynamics also allows for the application of force, referred to as pushing. UIPushBehavior is slightly more complex to use than the previously covered behaviors, but it remains fairly easy compared to other physics engines. The sample also uses a UICollisionBehavior object seen in the previous demos. This ensures that the image view stays on the screen while push effects are applied.
A new UIPushBehavior behavior is created and initialized with a reference to an image view. For the time being, the properties for angle and magnitude are set to 0.0.
The sample app also features a reference in the form of a small black square in the center of the screen.
animator = [[UIDynamicAnimator alloc] initWithReferenceView:self.view];
UICollisionBehavior* collisionBehavior = [[UICollisionBehavior alloc] initWithItems:@[dragonImageView]];
collisionBehavior.translatesReferenceBoundsIntoBoundary = YES;
[animator addBehavior:collisionBehavior];
UIPushBehavior *pushBehavior = [[UIPushBehavior alloc] initWithItems:@[dragonImageView] mode:UIPushBehaviorModeInstantaneous];
pushBehavior.angle = 0.0;
pushBehavior.magnitude = 0.0;
self.pushBehavior = pushBehavior;
[animator addBehavior:self.pushBehavior];
If the project were to be run now, the image view would stay fixed on the screen since the push effect has no values associated with it. A new pan gesture is created and in its associated action a new value for magnitude and angle are calculated and applied. In the example an angle is calculated to determine where the push force is coming from. This is based on the angle from the center reference point. A distance is also calculated to apply increasing force. The result is that tapping outside of the black square will apply an amount of force in that direction to the image view. The farther away from the square, the more force is applied.
CGPoint point = [gesture locationInView:self.view];
CGPoint origin = CGPointMake(CGRectGetMidX(self.view.bounds), CGRectGetMidY(self.view.bounds));
CGFloat distance = sqrtf(powf(point.x-origin.x, 2.0)+powf(point.y- origin.y, 2.0));
CGFloat angle = atan2(point.y-origin.y, point.x-origin.x);
distance = MIN(distance, 100.0f);
[self.pushBehavior setMagnitude:distance / 100.0];
[self.pushBehavior setAngle:angle];
[self.pushBehavior setActive:YES];
In addition to setting an angle and a magnitude by hand, you can have them be calculated and applied automatically by using setTargetPoint:forItem: to specify a target point. It might also become necessary to apply force to a part of the view that is not the center, in which case setXComponent:yComponent: can be used to specify a CGPoint to which the focus of the force will be applied.
There are two types of push force that can be applied, UIPushBehaviorModeContinuous and UIPushBehaviorModeInstantaneous. With continuous push the object accelerates under the force, whereas with instantaneous the force is immediately applied.
Item Properties
Dynamic items have a number of default properties preset on, and these properties can be heavily configured to customize their reactions to the physics engine. The sample app (shown in Figure 1.4) demonstrates modifying these properties for one image view while leaving the defaults in place for the other image view.
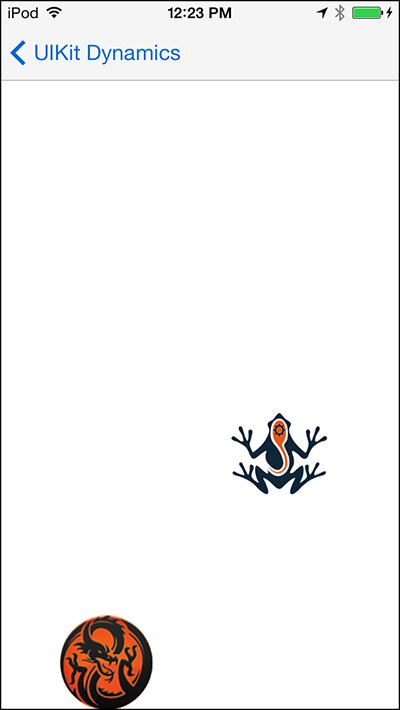
Figure 1.4 Modifying properties on dynamic items to create a unique physics reaction applied under identical forces.
To modify the properties on an object, create a new UIDynamicItemBehavior initialized with the views that the properties should be applied to. The result is that one object acts like a rubber ball and becomes much more prone to bounce when gravity and collisions are applied to it. The properties and their descriptions are presented in Table 1.1.
animator = [[UIDynamicAnimator alloc] initWithReferenceView:self.view];
UIGravityBehavior* gravityBeahvior = [[UIGravityBehavior alloc] initWithItems:@[dragonImageView, frogImageView]];
UICollisionBehavior* collisionBehavior = [[UICollisionBehavior alloc] initWithItems:@[dragonImageView, frogImageView]];
collisionBehavior.translatesReferenceBoundsIntoBoundary = YES;
UIDynamicItemBehavior* propertiesBehavior = [[UIDynamicItemBehavior alloc] initWithItems:@[frogImageView]];
propertiesBehavior.elasticity = 1.0f;
propertiesBehavior.allowsRotation = NO;
propertiesBehavior.angularResistance = 0.0f;
propertiesBehavior.density = 3.0f;
propertiesBehavior.friction = 0.5f;
propertiesBehavior.resistance = 0.5f;
[animator addBehavior:propertiesBehavior];
[animator addBehavior:gravityBehavior];
[animator addBehavior:collisionBehavior];

In-Depth UIDynamicAnimator and UIDynamicAnimatorDelegate
The beginning of this chapter introduced UIDynamicAnimator, and the samples have all used addBehavior; however, this class has much more power that can be leveraged. In addition to dynamic effects being added, they can also be removed either one at a time or as a group using removeBehavior: and removeAllBehaviors. To get a list of all behaviors currently attached to a UIDynamicAnimator, the behaviors property can be used to return an array of behaviors.
It is also possible not only to poll whether the animator is running using the running property but also to determine the length of time using elapsedTime. The UIDynamicAnimator also has an associated delegate, UIDynamicAnimatorDelegate. The delegate provides two methods to handle pausing and resuming. UIDynamicAnimator cannot be explicitly paused by the developer. The animation effects are automatically paused when all items have come to a rest and are no longer moving. Any new effect that is applied will cause the items to begin moving and they will be moved back into the active state.
- (void)dynamicAnimatorDidPause:(UIDynamicAnimator *)animator
{
NSLog(@"Animator did pause");
}
- (void)dynamicAnimatorWillResume:(UIDynamicAnimator *)animator
{
NSLog(@"Animator will resume");
}
Summary
UIKit Dynamics is an interesting topic not only from a development standpoint but also as to what it means for the direction of iOS. Apple is making a strong push to bring software into the real world. Interacting with an app should feel like interacting with the physical world. Users expect to see apps respond in the same way the world around them does. This is not new for Apple; one of the main selling features of the original iPhone was momentum scrolling, and they are now giving the tools to add that type of functionality to developers.
This chapter covered the basics of UIKit Dynamics and its basic components; however, the real power of these methods will be in what developers create with them. There are endless possibilities and combinations for the effects that have been described, and what developers will create with these tools will surprise even Apple. The one definite in the redefined mobile user experience world, though, is that realistic physical reactions in software are no longer optional, and users will be expecting them.