
14. AirPrint
Without a doubt, printing is going the way of the dodo bird and the Tasmanian tiger, but it will not happen overnight. Plenty of solid autumn years remain for physical printing. Print will most likely cling to life for a long time, along with the fax. Apple has provided an SDK feature, aptly named AirPrint, since iOS 4, which allows for physical printing to compatible wireless printers.
With the expansion and trust of mobile software into more established traditional fields over the past few years, AirPrint is becoming more popular. Point-of-sales apps and medical-processing apps both have a strong need for being able to print physical documents.
AirPrint Printers
There is a limited selection of AirPrint-enabled printers, even more than four years after the release of AirPrint. Most major printer manufacturers now have at least a few models that support AirPrint. Apple also maintains a list of compatible printers through a tech note (http://support.apple.com/kb/HT4356). In addition, some third-party Mac applications enable AirPrint for any existing printer, such as Printopia ($19.95 at www.ecamm.com/mac/printopia).
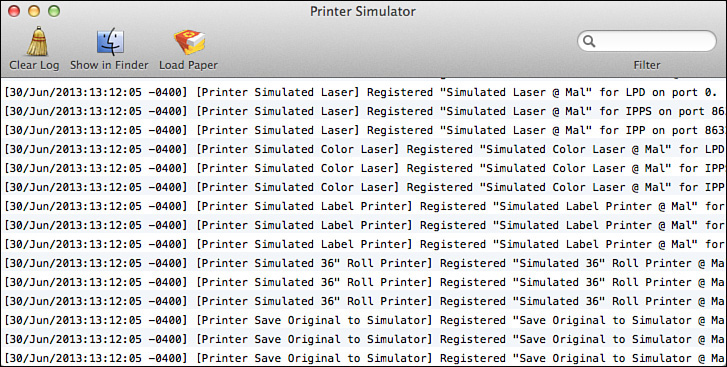
Since the release of AirPrint, there have been numerous blogs, articles, and how-tos written on testing AirPrint. Apple seems to have taken notice of the need and has started to bundle an app with the developer tools called Printer Simulator (Developer/Platforms/iPhoneOS.platform/Developer/Applications), as shown in Figure 14.1. Printer Simulator enables your Mac to host several printer configurations for the iOS Simulator to print to; using this tool, you can test a wide range of compatibility.
The sample app for this chapter is a simple iPhone app that provides the user with two views, as shown in Figure 14.2. The first view is a simple text editor, which will demo how to position pages and text. The second view is a Web browser, which will demo how to print rendered HTML as well as PDF screen grabs.
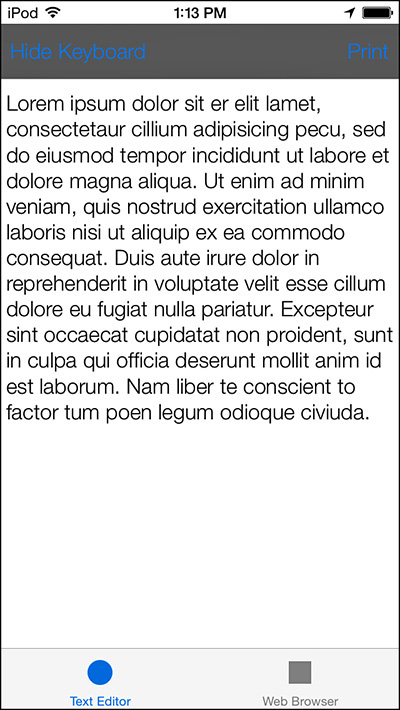
The Print app is simple and does not contain a significant amount of overhead code. It is based on the Apple TabBarController default project, containing two tabs. The text editor contains a UITextView as well as two buttons: one to hide the keyboard, the other to begin the print process. The Web browser view contains a Print button but also needs a URL entry text field.
Testing for AirPrint
It is important to test for AirPrint support in your software before enabling the functionality to users, because some of your users might be running an iOS version that does not support AirPrint. In the sample app, this is performed as part of the application:didFinishLaunchingWithOptions: method using the following code snippet:
if (![UIPrintInteractionController isPrintingAvailable])
{
UIAlertView *alert = [[UIAlertView alloc] initWithTitle:@"Error" message:@"This device does not support printing!" delegate:nil cancelButtonTitle:@"Dismiss" otherButtonTitles:nil];
[alert show];
}
Note
AirPrint is defined as part of UIKit so there are no additional headers or frameworks that need to be imported.
Printing Text
Printing text is probably the most common use case for not just AirPrint but any kind of print job. Using AirPrint to print text can be complex if you aren’t familiar with printing terminology. The following code is from the ICFFirstViewController.m class of the sample app. Look at it as a whole first; later in this section, it will be broken down by each line and discussed.
- (IBAction)print:(id)sender
{
UIPrintInteractionController *print = [UIPrintInteractionController sharedPrintController];
print.delegate = self;
UIPrintInfo *printInfo = [UIPrintInfo printInfo];
printInfo.outputType = UIPrintInfoOutputGeneral;
printInfo.jobName = @"Print for iOS";
printInfo.duplex = UIPrintInfoDuplexLongEdge;
print.printInfo = printInfo;
print.showsPageRange = YES;
UISimpleTextPrintFormatter *textFormatter = [[UISimpleTextPrintFormatter alloc] initWithText:[theTextView text]];
textFormatter.startPage = 0;
textFormatter.contentInsets = UIEdgeInsetsMake(36.0, 36.0,36.0, 36.0);
textFormatter.maximumContentWidth = 540;
print.printFormatter = textFormatter
}
The preceding code takes the contents of a text view and prints it formatted for 8 1/2- by 11-inch paper with 1/2-inch margins on all sides. The first thing you need to do whenever you want to prepare for a print operation is create a reference to the sharedPrintController using the following code snippet:
UIPrintInteractionController *print = [UIPrintInteractionController sharedPrintController];
In the next line of the sample app, a delegate is set. The delegate methods for printing are defined in the upcoming section “UIPrintInteractionControllerDelegate.”
Print Info
The next step is to configure the print info. This specifies a number of controls and modifiers for how the print job is set up. You can obtain a new default UIPrintInfo object using the provided UIPrintInfo singleton.
The first property that is set on the print info in the sample app is outputType. In the example, the output is set as UIPrintInfoOutputGeneral. This specifies that the print job can be a mix of text, graphics, and images, as well as setting the default paper size to letter. Other options for outputType include UIPrintInfoOutputPhoto and UIPrintInfoOutputGrayscale.
The next property that is set is the jobName. This is an optional field that is used to identify the print job in the print center app. If you do not set a jobName, it is defaulted to the app’s name.
Duplexing in the printer world refers to how the printer handles double-sided printing. If the printer does not support double-sided printing, these properties are ignored. You can supply UIPrintInfoDuplexNone if you would like to prevent double-sided printing. To use double-sided printing, you have two options: UIPrintInfoDuplexLongEdge, which will flip the back page along the long edge of the paper, and UIPrintInfoDuplexShortEdge, which, as the name implies, flips the back page along the short side of the paper.
In addition to the printInfo properties that are used in the sample code, there are two additional properties. The first, orientation, enables you to specify printing in either landscape or portrait. The second is printerID, which enables you to specify a hint on which printer to use. PrinterID is often used to automatically select the last used printer, which can be obtained using the UIPrintInteractionControllerDelegate.
After you configure the printInfo for the print job, you need to set the associated property on the UIPrintInteractionController. An example is shown in the next code snippet:
print.printInfo = printInfo;
Setting Page Range
In many cases, a print job will consist of multiple pages, and occasionally you will want to provide the user with the option of selecting which of those pages is printed. You can do this through the showsPageRange property. When set to YES, it will allow the user to select pages during the printer selection stage.
print.showsPageRange = YES;
UISimpleTextPrintFormatter
After configuring the printInfo, the UIPrintInteractionController has a good idea of what type of print job is coming but doesn’t yet have any information on what to print. This data is set using a print formatter; this section discusses the print formatter for text. In following sections, additional print formatters are discussed in depth.
UISimpleTextPrintFormatter *textFormatter = [[UISimpleTextPrintFormatter alloc] initWithText:[theTextView text]];
textFormatter.startPage = 0;
textFormatter.contentInsets = UIEdgeInsetsMake(36.0, 36.0, 36.0, 36.0);
textFormatter.maximumContentWidth = 540;
print.printFormatter = textFormatter;
When you create a new instance of the UISimpleTextPrintFormatter, it is allocated and initialized with the text you will be printing. The sample app will print any text that appears in the UITextView.
The first property that is set in the sample app is for the startPage. This is a zero-based index of the first page to be printed. The sample app will begin printing from page one (index 0).
On the following line contentInserts are set. A value of 72.0 equals one inch on printed paper. The sample app will be providing half-inch values on all sides; this will print the text with half-inch margins on the top, bottom, left, and right. Additionally, the maximum width is set to 504, which specifies a 7 1/2-inch printing width (72.0×7.0).
There are two additional properties that were not used in the sample app. The font property enables you to specify a UIFont that the text is to be printed in. font is an optional property; if you do not specify a font, the system font at 12-point is used. You can also specify a text color using the color property. If you do not provide a color, [UIColor blackColor] is used.
When you finish configuring the textFormatter, you will need to set it to the printFormatter property of the UIPrintInteractionController object.
Error Handling
It is always important to gracefully handle errors, even more so while printing. With printing, there are any number of things that can go wrong outside of the developer’s control, from out-of-paper issues to the printer not even being on.
The sample app defines a new block called completionHandler. This is used to handle any errors that are returned from the print job. In the next section, you will begin a new print job with the completionHandler block as one of the arguments.
void (^completionHandler)(UIPrintInteractionController *,BOOL, NSError *) = ^(UIPrintInteractionController *print,BOOL completed, NSError *error)
{
if (!completed && error)
{
NSLog(@"Error!");
}
};
Starting the Print Job
After you have created a new UIPrintInteractionController, specified the printInfo and the printFormatter, and created a block to handle any errors that are returned, you can finally print something. Call the method presentAnimated:completionHandler: on the UIPrintInteractionController object using the completion block that was created in the preceding section. This will present the user with the Printer Options view, as shown in Figure 14.3.
[print presentAnimated:YES completionHandler:completionHandler];
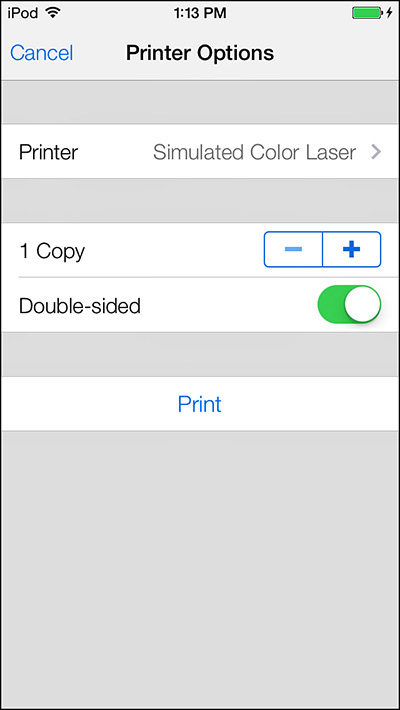
Figure 14.3 Print options for printing text with multiple pages on a printer that supports double-sided printing.
Depending on the selected printer and the amount of text being printed, the options will vary. For example, if the print job is only one page, the user will not be presented with a range option; likewise, if the printer does not support double-sided printing, this option will be disabled.
Printer Simulator Feedback
If you printed to the Printer Simulator app as discussed in the “AirPrint Printers” section, after the print job is finished, a new page will be opened in preview (or your default PDF viewing application) showing how the final page will look. An example using the print info and print formatter information from this section is shown in Figure 14.4.
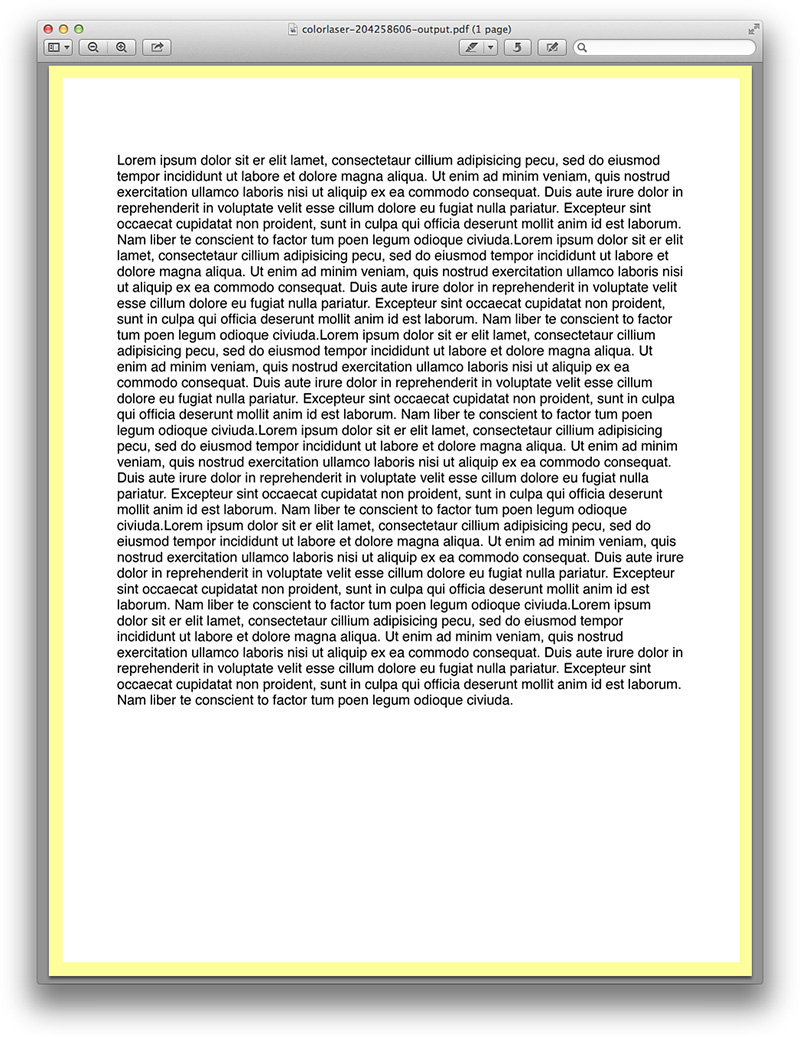
Figure 14.4 A print preview shown when the Printer Simulator is used; notice the highlighted margins.
Print Center
Just as on desktop computers, iOS provides users a way to interact with the current print queue. Although any print job is active on an iOS device, a new app appears in the active app area. The Print Center app itself is shown in Figure 14.5. The Print Center was removed in iOS 7 and printing feedback is now handled during the print process.

UIPrintInteractionControllerDelegate
As shown earlier in the “Printing Text” section, you can optionally provide a delegate for a UIPrintInteractionController object. The possible delegate callbacks are used in both views of the sample app. Table 14.1 describes these delegate methods.

Printing Rendered HTML
Printing rendered HTML is handled automatically through a print formatter in an almost identical manner as printing plain text. The following method handles printing an HTML string, which is retrieved from the UIWebView in the sample app. You might notice that this is similar to how text was printed in the previous example. Take a look at the method as a whole; it is discussed in detail later in this section.
- (IBAction)print:(id)sender
{
UIPrintInteractionController *print = [UIPrintInteractionController sharedPrintController];
print.delegate = self;
UIPrintInfo *printInfo = [UIPrintInfo printInfo];
printInfo.outputType = UIPrintInfoOutputGeneral;
printInfo.jobName = @"Print for iOS";
printInfo.duplex = UIPrintInfoDuplexLongEdge;
print.printInfo = printInfo;
print.showsPageRange = YES;
NSURL *requestURL = [[theWebView request] URL];
NSError *error;
NSString *contentHTML = [NSString
stringWithContentsOfURL:requestURL
encoding:NSASCIIStringEncoding
error:&error];
UIMarkupTextPrintFormatter *textFormatter = [[UIMarkupTextPrintFormatter alloc] initWithMarkupText:contentHTML];
textFormatter.startPage = 0;
textFormatter.contentInsets = UIEdgeInsetsMake(36.0, 36.0, 36.0, 36.0);
textFormatter.maximumContentWidth = 540;
print.printFormatter = textFormatter;
void (^completionHandler)(UIPrintInteractionController *,BOOL, NSError *) = ^(UIPrintInteractionController *print,BOOL completed, NSError *error)
{
if (!completed && error)
{
NSLog(@"Error!");
}
};
[print presentAnimated:YES completionHandler:completionHandler];
}
The first thing that needs to be done as it was in the text printing is to create a new reference to a UIPrintInteractionController. The next step is to set the printInfo for the upcoming print job. Nothing in this code block dealing with printing differs from the printing text example; refer to that section for details on these properties.
Printing PDFs
AirPrint has built-in support for printing PDF files. PDF is arguably the easiest type of file to print when you have the PDF data. Before a PDF file can be printed, first the UIPrintInteractionController and associated UIPrintInfo need to be set up. This setup is done exactly the same as in the preceding example in the section “Printing Rendered HTML.” In the sample app, the PDF is generated from the UIWebView from the preceding section; however, you can specify any source for the PDF data. After the data has been created using the renderInContext method, you can assign that image value to printingItem. This method can also be used to print any UIImage data.
Note
The sample app does not currently have an action hooked up to the print PDF method. You will have to assign a button to that method in order to use it.
- (IBAction)printPDF:(id)sender
{
UIPrintInteractionController *print =
[UIPrintInteractionController sharedPrintController];
print.delegate = self;
UIPrintInfo *printInfo = [UIPrintInfo printInfo];
printInfo.outputType = UIPrintInfoOutputGeneral;
printInfo.jobName = @"Print for iOS";
printInfo.duplex = UIPrintInfoDuplexLongEdge;
print.printInfo = printInfo;
print.showsPageRange = YES;
UIGraphicsBeginImageContext(theWebView.bounds.size);
[theWebView.layer
renderInContext:UIGraphicsGetCurrentContext()];
UIImage *image = UIGraphicsGetImageFromCurrentImageContext();
UIGraphicsEndImageContext();
print.printingItem = image;
void (^completionHandler)(UIPrintInteractionController *,BOOL, NSError *) = ^(UIPrintInteractionController *print,BOOL completed,NSError *error)
{
if (!completed && error)
{
NSLog(@"Error!");
}
};
[print presentAnimated:YES completionHandler:completionHandler];
}
Summary
In this chapter, you learned how to print documents, images, and HTML from an iOS device using AirPrint. You should have a firm grasp of the knowledge required to create new print jobs, provide the materials to be printed, format the output, handle errors, and interact with various printers. The sample app provided for this chapter walked you through the process of printing plain text, HTML, and PDF data. You should feel confident adding AirPrint support into any of your existing or future iOS projects.