
Chapter at a Glance
To work efficiently with Microsoft Office PowerPoint 2007, you must be able to decide the best way to start a presentation. The New Presentation window provides several options for creating a new presentation:
If you need help with both the presentation’s content and its look, you can download a complete presentation from Microsoft Office Online and then customize it to meet your needs.
If you have already created a presentation that is close enough in content and design to be a good starting point, you can use that presentation as the basis for the new one.
If you have content ready but need help with the look of the presentation, you can base your presentation on one of the design templates that comes with PowerPoint. These templates include graphics, colors, fonts, and styles. You can also base your presentations on your own custom templates.
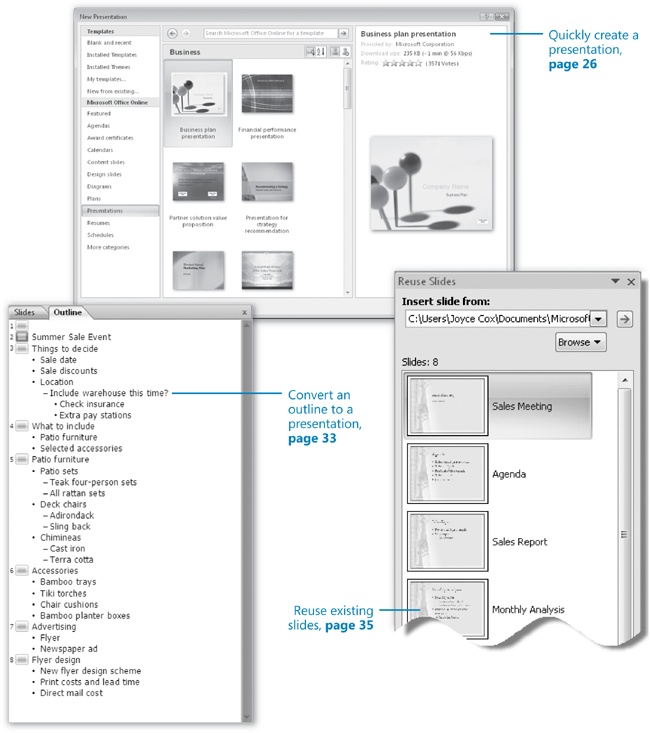
If you have created an outline of a presentation in Microsoft Office Word, you can import the outline into PowerPoint to create an instant slide show.
If you know what your content and design will be and you want to build the presentation from scratch, you can start with a blank presentation.
This chapter will help you become familiar with these methods so that you can decide the best approach for each new presentation you create.
In this chapter, you will create several new presentations: one based on an example from Office Online, one based on a practice file stored on your hard disk, one based on a design template, and one based on a Word outline. You will also add slides to a presentation and insert slides from one presentation into another.
Note
See Also Do you need only a quick refresher on the topics in this chapter? See the Quick Reference section at the beginning of this book.
Warning
Important Before you can use the practice files in this chapter, you need to install them from the book’s companion CD to their default location. See Using the Book’s CD at the beginning of this book for more information.
Note
Troubleshooting Graphics and operating system–related instructions in this book reflect the Windows Vista user interface. If your computer is running Windows XP and you experience trouble following the instructions as written, please refer to the Information for Readers Running Windows XP section at the beginning of this book.
When you first start PowerPoint, a blank presentation is displayed in the presentation window, ready for you to enter text and design elements. If you want to create a presentation from scratch, this is the place to start.
Tip
If you are already working in PowerPoint, you can open a new blank presentation by clicking the Microsoft Office Button, clicking New, and then in the New Presentation window, double-clicking Blank Presentation.
However, creating presentations from scratch is time-consuming and requires quite a bit of skill and knowledge about PowerPoint. Even people with intermediate and advanced PowerPoint skills can save time by capitalizing on the work someone else has already done. In the New Presentation window, you can preview and download presentations that are available from Office Online and then customize these templates to meet your needs. You can also use any presentation that you have already created and saved on your hard disk as the basis for the new presentation.
When you create a new presentation based on a template, you are not opening the template; instead you are creating a new file that has all the characteristics of the template. The new file is temporary until you save it.
In this exercise, you will create two new presentations: one based on an example from Office Online, and the other based on a practice file stored on your hard disk.
Note
USE the Creating presentation. This practice file is located in the DocumentsMicrosoft PressPowerPoint2007SBSStarting folder.
BE SURE TO start PowerPoint, and have an active Internet connection, before beginning this exercise.
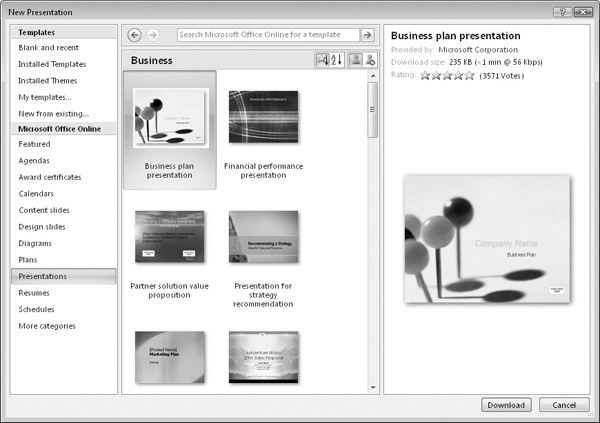
In the left pane, below Microsoft Office Online, click Presentations.
The center pane now lists categories of presentations that are available from Office Online.
In the center pane, click Business.
The center pane now displays images of all the ready-made business presentations that are available from Office Online. The selected presentation is indicated by an orange frame, and information about that presentation appears in the right pane.
Scroll the center pane, noticing the wide variety of presentations available.
About half way down the pane, click the Company meeting presentation image, and then in the lower-right corner of the window, click Download.
A message box tells you that you can download templates from Office Online only if you are running a genuine version of PowerPoint.
Click Continue.
Tip
If you don’t want this message box to appear every time you download a template, select the Do Not Show This Message Again check box before you click Continue.
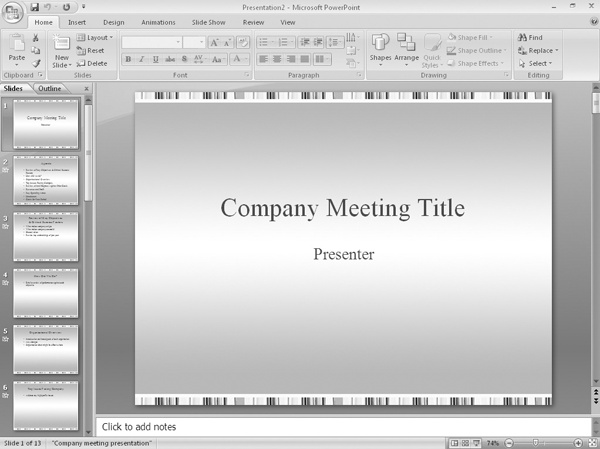
After your version of PowerPoint is validated, a presentation based on the selected template opens on your screen in Normal view. The Slides tab shows thumbnails of the slides, and the title slide appears in the Slide pane.
Below the scroll bar on the right side of the screen, click the Next Slide button repeatedly to display each slide of the presentation in turn.
The slides contain generic instructions about the sort of information that you might want to include in a presentation for a company meeting. You can replace these instructions with your own text.
On the Quick Access Toolbar, click the Save button.
PowerPoint suggests the title of the first slide as the name of the file.
Navigate to your DocumentsMicrosoft PressPowerPoint2007SBSStarting folder, and save the presentation with the name My Company Meeting.
The title bar now displays My Company Meeting as the name of the open presentation.
Display the New Presentation window again, and then in the left pane, below Templates, click New from existing.
With the contents of the Starting folder displayed, double-click the Creating file.
A quick glance at the title bar tells you that instead of opening the Creating presentation, PowerPoint has opened a new presentation based on Creating.
On the Quick Access Toolbar, click the Save button.
Because this presentation is a new file, PowerPoint displays the Save As dialog box so that you can name the presentation.
Save the file in the Starting folder with the name My Sales Meeting.
The title bar now displays My Sales Meeting as the name of the active presentation.
When you don’t need help with the content of a presentation but you do need help with its design, you can start a new presentation based on a design template. A design template is a blank presentation with formatting, a color scheme, and sometimes graphics already applied to it. You can base a presentation on a design template from Office Online, or you can design your own presentation and save it as a template.
When you create a presentation based on a design template, PowerPoint supplies a title slide and leaves it to you to add the other slides you need. You add a slide by clicking the Add Slide button in the Slides group on the Home tab. This technique adds a new slide with the default layout immediately after the current slide. If you want to add a slide with a different layout, you can select the layout you want from the Add Slide list.
Tip
You can also add new slides by pressing keyboard shortcuts while you are entering text on the Outline tab. For more information, see Entering Text in Chapter 3.
In this exercise, you will start a new presentation based on a design template, add a new slide with the default layout, add slides with other layouts, and then delete a slide. There are no practice files for this exercise.
Click the Microsoft Office Button, and then click New.
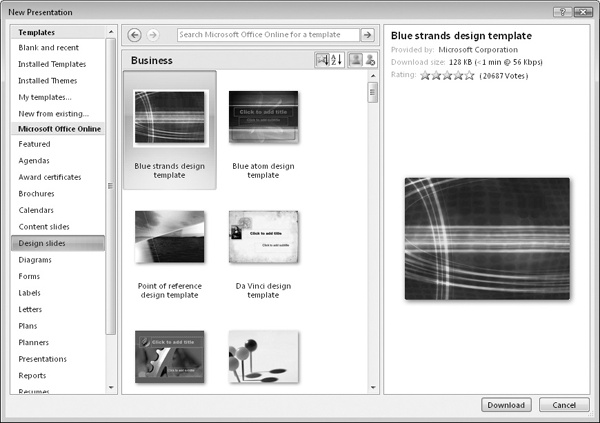
In the left pane of the New Presentation window, below Microsoft Office Online, click Design slides.
The center pane now displays categories of ready-made designs.
In the center pane, click each category in turn, scroll through the thumbnails of the various design collections, and click the Back button at the top of the center pane to return to the list of categories.
In the center pane, click the Business category.
Scroll about a third of the way down the list of templates, and click the Trust design template. Then in the lower-right corner of the window, click Download, and if the Microsoft Office Genuine Advantage message box appears, click Continue.
A new presentation with one title slide opens on your screen in Normal view. The Slides tab shows a thumbnail of the slide, and the slide itself appears in the Slide pane.
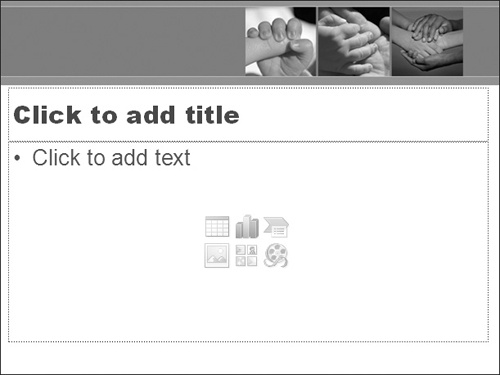
On the Home tab, in the Slides group, click the New Slide button (not its arrow).
PowerPoint adds Slide 2 to the presentation with the default Title And Content layout. This layout is designed to accommodate a title and either text or graphic content—a table, chart, diagram, picture, clip art image, or movie clip.
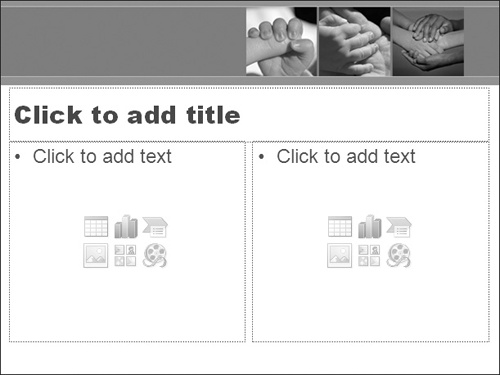
In the Slides group, click the New Slide arrow, and then in the list, click Two Content.
In the Slides group, click the New Slide button.
PowerPoint adds another slide with the Two Content layout. For all but the title slide, simply clicking the New Slide button adds a slide with the layout of the active slide.
Continue adding slides, selecting a different layout each time so that you can see what each one looks like.
At the top of the Overview pane, on the Slides tab, click Slide 2. Then in the Slides group, click the Delete button.
PowerPoint removes the slide from the presentation and renumbers all the subsequent slides.

You can insert an outline created in another program into a PowerPoint presentation. The text can be a Word document (.doc or .docx) or a Rich Text Format (RTF) file (.rtf). PowerPoint uses the heading styles in the inserted document to create slide titles and bullet points.
In this exercise, you will convert a Word outline into a presentation.
Note
USE the Converting document. This practice file is located in the DocumentsMicrosoft PressPowerPoint2007SBSStarting folder.
OPEN a new blank presentation.
On the Home tab, in the Slides group, click the New Slide arrow, and then below the slide thumbnails, click Slides from Outline.
Navigate to your DocumentsMicrosoft PressPowerPoint2007SBSStarting folder, and then double-click the Converting file.
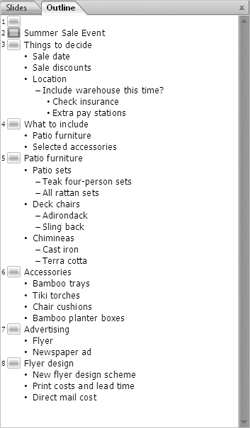
After the outline is converted, in the Overview pane, click the Outline tab to get an idea of the content of the presentation.
PowerPoint has converted each level-1 heading into a slide title, each level-2 heading into a bullet point, and each level-3 heading into a subpoint.
On the Outline tab, right-click the empty title of Slide 1, which is blank, and then click Delete Slide.
Tip
You can start a new presentation from a Word outline by using the Open command. Click the Microsoft Office Button, and then click Open. In the Open dialog box, click the All PowerPoint Presentations setting, and in the list of file types, click All Files. Then locate and double-click the outline document you want to use.
If your presentations often include one or more slides that provide the same basic information, you don’t have to recreate the slides for each presentation. For example, if you create a slide that shows your company’s product development cycle for one new product presentation, you might want to use variations of that same slide in all new product presentations. You can easily tell PowerPoint to copy a slide and insert in a specific location in a different presentation. The slide will assume the formatting of its new presentation.
Note
See Also For information about storing slides for reuse in a slide library, see the sidebar Working with a Slide Library later in this chapter.
In this exercise, you will insert slides from a presentation stored on your hard disk into the active presentation.
Note
USE the Reusing1 and Reusing2 presentations. These practice files are located in the DocumentsMicrosoft PressPowerPoint2007SBSStarting folder.
OPEN the Reusing1 presentation.
On the Slides tab of the Overview pane, click Slide 3.
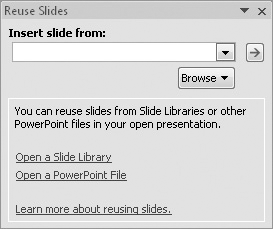
On the Home tab, in the Slides group, click the New Slide arrow, and then in the list, click Reuse Slides.
In the Reuse Slides task pane, click the Open a PowerPoint File link.
PowerPoint displays the Browse dialog box with the contents of your Documents folder displayed.
Navigate to your DocumentsMicrosoft PressPowerPoint2007SBSStarting folder, and then double-click the Reusing2 presentation.
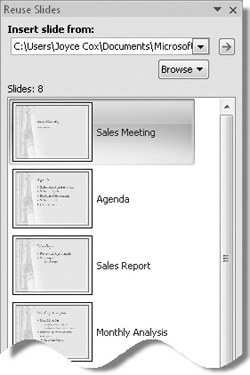
Thumbnails of all the slides in the presentation appear in the Reuse Slides task pane.
Scroll the task pane, and click the seventh thumbnail, titled Bamboo Product Line.
PowerPoint inserts the selected slide from the Reusing2 presentation as Slide 4 in the Reusing1 presentation. The slide takes on the design of the presentation in which it is inserted.
Click the task pane’s Close button.

How you create a new presentation depends on whether you need help developing the content or the design.
Office Online provides many presentation templates that you can customize to meet your needs.
If you are required to use a particular design for a presentation, such as one with corporate colors and branding, it is often simpler to start with the design and then add your own content.
Repurposing an existing presentation to fit the needs of a different audience is a useful technique that saves development time.
Repurposing materials developed in other programs, such as Word, capitalizes on the compatibility of the 2007 Office system.
Repurposing existing slides is another way to save time and ensure consistency.