
In this section
We all know that to work productively, with minimal stress and frustration, we must get organized! That’s where Microsoft Windows XP comes in. It supplies the framework—a basic file structure of drives and some ready-made folders, which you can use as is if it works for you. If not, you can create your own file- and folder-management system. Organize the files within the folders—alphabetically or by size, type, date, and so on. Move, copy, and rename files or groups of files. If you delete a file or folder by mistake, you can easily recover it. If you want the people who share the computer with you to have access to certain files and folders, you can put those items in folders that are designed to be shared. You can change the appearance of the windows in which you view your documents and folders, and, depending on the information you need, you can view them in any of six different views.
The Desktop is the place to put the files, folders, and other items you use every day, just as you do on a real desktop. To have immediate access to a report you’re preparing or a performance review you’re struggling with, put either the document itself or a shortcut to it on the Desktop.
You can transfer files or back up crucial information by copying the material onto removable disks—floppy disks or ZIP-type disks, for example. If you have a CD recorder installed on your computer, you can put the material on CDs—the CD Writing Wizard walks you helpfully through the process. Finally, we’ll talk about the toolbars, which you use to navigate your way through the information on your computer, your intranet if you have one, and the Internet.
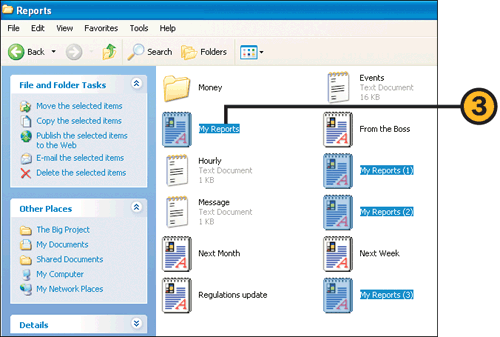
If you have a limited number of files, you can easily keep them all in a single folder, such as the My Documents folder. However, if you have many files, or files dealing with different projects, you’ll probably want to organize them by placing them in individual folders. If a file doesn’t have a suitably descriptive name, you can change it to one that’s more useful, and if there’s a group of related files, you can rename each file in the group with the same group name followed by consecutive numbering—for example, stories, stories(1), stories(2), and so on.
Tip
In previous versions of Windows, you moved or copied files either by dragging them into a different window, or by using the Folders button in a folder window to show all the folders on the computer or in a network location and then dragging the files into one of those folders. You can still use either of these methods to move or copy files, but it’s much easier to click the Move or Copy task.

![]() Open the window containing the file or files you want to move or copy.
Open the window containing the file or files you want to move or copy.
![]() Select the file or files to be moved or copied.
Select the file or files to be moved or copied.
![]() Click Move The Selected Items or Copy The Selected Items (or Move This File or Copy This File if you’ve selected only one file).
Click Move The Selected Items or Copy The Selected Items (or Move This File or Copy This File if you’ve selected only one file).
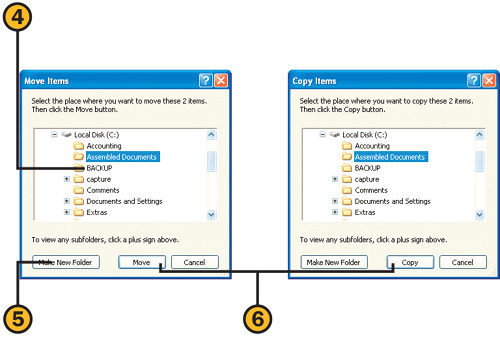
![]() In the Move Items or the Copy Items dialog box, expand the listing by clicking plus signs until the destination folder is displayed. Click the destination folder.
In the Move Items or the Copy Items dialog box, expand the listing by clicking plus signs until the destination folder is displayed. Click the destination folder.
![]() If you want to create a new folder for the file or files, click Make New Folder.
If you want to create a new folder for the file or files, click Make New Folder.
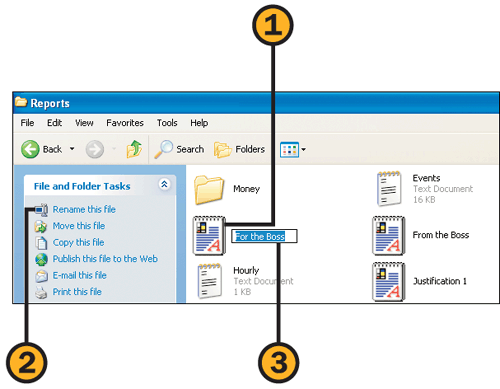
![]() With the file name selected, type a new name, or click to position the insertion point, and then edit the name. Press Enter when the name is correct.
With the file name selected, type a new name, or click to position the insertion point, and then edit the name. Press Enter when the name is correct.
Caution
File names (or folder names) can be as long as 255 characters, but, because a long name is often truncated by a program, a descriptive short name is a better choice. You can use spaces and underscores in names, but you can’t use the * : < > | ? " or / characters. If there’s a file extension (up to three characters following the period at the end of the file name), don’t change or delete it. Windows XP uses that extension to identify the type of file.

If you accidentally delete a file, folder, or shortcut from your computer’s hard disk, you can quickly recover the item either by undoing your action immediately or by restoring the deleted item from the Recycle Bin. The Recycle Bin holds all the files you’ve deleted from your hard disk(s) until you empty the bin or until it gets so full that the oldest files are deleted automatically.
Tip
When you’ve deleted a folder, you have to restore the entire folder. You can’t open a deleted folder in the Recycle Bin and restore selected files.


You can change the appearance of the windows that contain your files and folders so that the information is presented in the way that’s the most useful for you.

![]() In the window whose view you want to change, click the Views button.
In the window whose view you want to change, click the Views button.
![]() Click the view you want to use.
Click the view you want to use.
See Also
For information about the different views, see "Windows Views".
For information about changing the look and type of information displayed, see "Customizing Your Folders".

![]() Point to Arrange Icons By on the View menu, and choose the type of item by which you want to sort the listing.
Point to Arrange Icons By on the View menu, and choose the type of item by which you want to sort the listing.
![]() Point to Arrange Icons By on the View menu again, and choose one of the following options from the submenu:
Point to Arrange Icons By on the View menu again, and choose one of the following options from the submenu:
Show In Groups to group items (folders, files, and so on) under classifications based on the item by which the list is sorted
Auto Arrange to have icons automatically repositioned to fill any gaps in the arrangement
Align To Grid to have icons snap to an invisible grid so that they line up with each other even though the alignment might leave gaps in the arrangement
![]() If you want to use an additional option, point to Arrange Icons By again, and choose the additional option. (Note that not all options are available for all views.)
If you want to use an additional option, point to Arrange Icons By again, and choose the additional option. (Note that not all options are available for all views.)
Windows Views
Windows XP can display the contents of a folder window in one of six available views, and you can modify each view in several ways. You can choose the view you want from the View menu, or you can click the Views button on the Standard Buttons toolbar. Then you use the View menu to change the way the items are arranged. You’ll probably want to experiment to see which view is best suited for your work and for the contents of the folder. For example, you might want to use Icons view in a folder that contains only a few files of different types, Details view when you’re looking for files that were created on a specific date, Thumbnails view when you’re managing pictures, and Filmstrip view when you’re reviewing the pictures.
The six views are described on these two pages.
Filmstrip: Displays a large preview of the selected picture file, together with thumbnail views of all the files and subfolders in the folder. This view is available only for folders that have been set up for pictures.

Thumbnails: Displays a miniature representation of the file or folder. If the file is a picture, the picture is displayed. If you’ve saved a preview of the file, the preview is usually displayed. For a folder that has been customized to use an identifying picture, or for a folder that contains multiple pictures, the identifying picture or the first few pictures contained in the folder are displayed. If no picture or preview is available for the file or folder, an icon is displayed.

Tiles: Displays large icons with information about the file next to each icon. The information that’s displayed changes depending on which property (date or size, for example) you’ve used to arrange the icons.

Icons: Displays icons that indicate whether each item represented is a folder or a file. The name of the item is listed below the icon.

List: Displays small icons representing folders and files in a vertical listing that can snake through multiple columns. The name of the item is listed next to the icon. Note that in List view you can’t arrange the items in groups.

Details: Displays small icons in a single-column list that shows the name of the item and includes details such as size, type, and date.
Once you’ve chosen the view you want, Windows XP offers more options. In each view, you can arrange the way the files are sorted—for example, you can arrange them in order by name, size, file type, or date. If you prefer, you can arrange the files in groups, based on the way they were sorted—for example, if you’ve sorted the files by size, you can then group them according to their relative sizes in subgroups of tiny, small, medium, or large files. In all views, you choose the arrangement you want from the View menu. In Details view, you can also click the title of a column to sort by that column.
Windows XP doesn’t stop there, of course. You can change the look of each icon in the folder, or add a picture to the folder itself. By defining the types of files that will be stored in a folder, you can customize the way the folder is set up and what tools you’ll have available. You’ll find more information about customizing folders in "Customizing Your Folders".
Compressed folders are special folders that use compression software to decrease the sizes of the files they contain. Compressed folders are useful for reducing the file size of standard documents and programs, but they’re invaluable when you’re storing large graphics files such as bitmaps or when you’re transferring large files by e-mail.
See Also
For information about encrypting compressed folders for increased security, see "Protecting Your Files with a Password".
For more information about compressing an entire drive, or compressing an existing folder using the NTFS file system, see "Compressing a Drive or a Folder".

![]() Select the file or files to be copied to a compressed folder.
Select the file or files to be copied to a compressed folder.
![]() Right-click one of the selected files, point to Send To on the shortcut menu, and choose Compressed (Zipped) Folder from the submenu. Rename the compressed folder if necessary.
Right-click one of the selected files, point to Send To on the shortcut menu, and choose Compressed (Zipped) Folder from the submenu. Rename the compressed folder if necessary.

![]() Drag any other files onto the compressed folder icon to copy those files to the compressed folder.
Drag any other files onto the compressed folder icon to copy those files to the compressed folder.

![]() Double-click the compressed folder to open it.
Double-click the compressed folder to open it.
![]() Double-click an item in the folder to open it in its associated program. If the item is a program, double-click it to run it. (Note, though, that not all files and programs will function properly from the compressed folder.)
Double-click an item in the folder to open it in its associated program. If the item is a program, double-click it to run it. (Note, though, that not all files and programs will function properly from the compressed folder.)
![]() To decompress a single file, select it, click Copy This File, and specify which folder you want the file to be copied to.
To decompress a single file, select it, click Copy This File, and specify which folder you want the file to be copied to.
![]() To decompress all the files in the folder and copy them to another folder, click Extract All Files.
To decompress all the files in the folder and copy them to another folder, click Extract All Files.

![]() Step through the Extraction Wizard, specifying where the files are to be extracted, or copied, to.
Step through the Extraction Wizard, specifying where the files are to be extracted, or copied, to.
Try This
Compress a large file (or a group of files) by placing it in a compressed folder. Click the compressed-folder icon, and click E-Mail This File in the File And Folder Tasks list. Send the folder, which is now listed as a ZIP-type file, to the person who needs it. If the recipient’s operating system isn’t equipped with the compressed-folders feature, he or she will need to use a third-party compression program that uses ZIP-type compressed files to open the files.
The Windows XP Desktop is more than just a place for pictures and icons. You can use the Desktop to store frequently used files and folders for quick access, or to store parts of files for later use.

![]() Open the folder window that contains the file you want to put on the Desktop.
Open the folder window that contains the file you want to put on the Desktop.
![]() Hold down the right mouse button and drag the document onto the Desktop.
Hold down the right mouse button and drag the document onto the Desktop.
![]() From the shortcut menu that appears, choose either to copy or move the file onto the Desktop, or to create a shortcut to the document.
From the shortcut menu that appears, choose either to copy or move the file onto the Desktop, or to create a shortcut to the document.
See Also
For information about accessing documents from a toolbar, see "Navigating with Toolbars".
For information about displaying or hiding the standard icons (such as My Computer) on the Desktop, see "Customizing the Desktop".

![]() Right-click a blank spot on the Desktop.
Right-click a blank spot on the Desktop.
![]() Point to New on the shortcut menu, and choose Folder from the submenu.
Point to New on the shortcut menu, and choose Folder from the submenu.

![]() Create a file in your program.
Create a file in your program.
![]() Choose Save from the File menu to display the Save As dialog box.
Choose Save from the File menu to display the Save As dialog box.
![]() Click Desktop. If Desktop isn’t listed in the program’s Save As dialog box, click Desktop in the Save In drop-down list.
Click Desktop. If Desktop isn’t listed in the program’s Save As dialog box, click Desktop in the Save In drop-down list.

![]() Select the part of the file you want to save.
Select the part of the file you want to save.
![]() Drag the selection onto the Desktop. (You’ll notice that Windows XP puts a "scrap" icon on the Desktop.)
Drag the selection onto the Desktop. (You’ll notice that Windows XP puts a "scrap" icon on the Desktop.)
Each user of your computer has his or her own set of folders in which to keep documents, music, and so on. If you want the other people who use your computer to have access to certain files, you can place those files in special folders that are designed specifically for sharing. If you’re connected to a network, the files in these folders are also available to other people on the network.
Tip
If you open a folder that doesn’t show a Shared Documents item in the Other Places list, but you want to copy a file from the folder to the Shared Documents folder, click the Folders button on the Standard Buttons toolbar, and drag the file onto the Shared Documents folder shown in that list.

![]() Open the folder that contains the file or files you want to share.
Open the folder that contains the file or files you want to share.
![]() Select the file. If you want to share several files, select all of them.
Select the file. If you want to share several files, select all of them.
![]() Drag the file or files onto the Shared Documents item. Anyone who uses the computer can now access the file or files in the Shared Documents folder.
Drag the file or files onto the Shared Documents item. Anyone who uses the computer can now access the file or files in the Shared Documents folder.
Try This
Select a file, click the Copy This File task in the File And Folder Tasks list, select the Shared Documents folder in the Copy Items dialog box, and click Copy. The file has now been copied instead of moved.
See Also
For information about making your folders private so that other users of your computer can’t access them, see "Keeping Your Files Private".
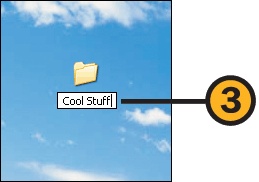
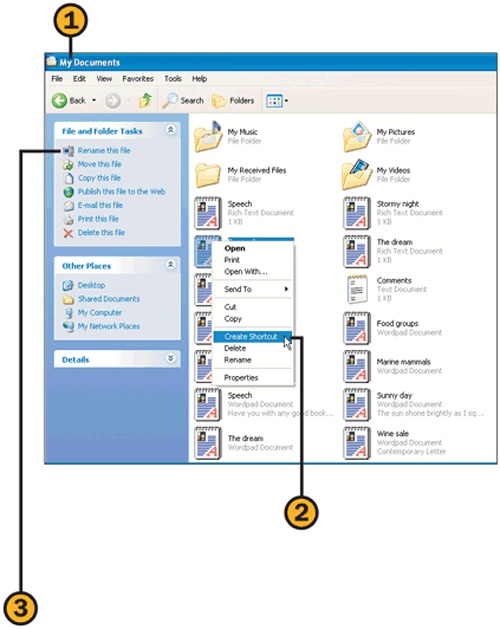
If you use a particular file or folder frequently, you can access it quickly by placing a shortcut to it on the Desktop, on the Start menu, or just about anywhere you want. A shortcut to a document opens the document in its default program; a shortcut to a program file starts the program; a shortcut to a folder opens the folder in a window.
![]() Open a window that contains the file or folder.
Open a window that contains the file or folder.
![]() Right-click the file or folder, and choose Create Shortcut from the shortcut menu.
Right-click the file or folder, and choose Create Shortcut from the shortcut menu.
![]() If you don’t like the shortcut’s name, with the shortcut still selected, click Rename This File, and type a new name for the shortcut. Press Enter when you’ve finished.
If you don’t like the shortcut’s name, with the shortcut still selected, click Rename This File, and type a new name for the shortcut. Press Enter when you’ve finished.

![]() Drag the shortcut to a destination in the Other Places list, or click the Copy This File item in the File And Folder Tasks list to move the shortcut to the location you want.
Drag the shortcut to a destination in the Other Places list, or click the Copy This File item in the File And Folder Tasks list to move the shortcut to the location you want.
See Also
For information about displaying the Quick Launch toolbar, see "Navigating with Toolbars".
For information about adding items to the Start menu, see "Customizing the Start Menu".
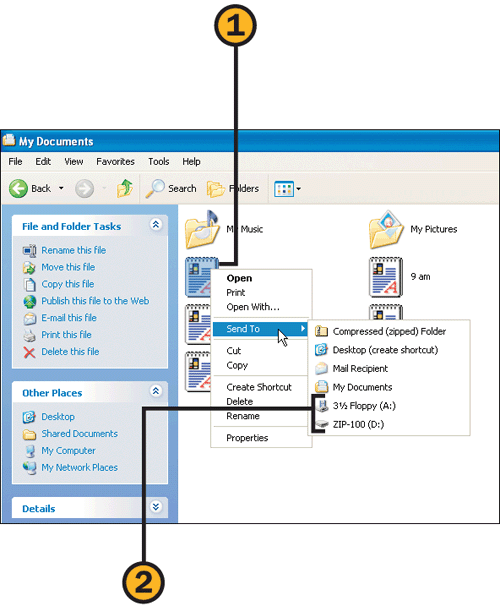
A quick and easy way to transfer files is to put them on a floppy disk, a USB storage device, or some other type of removable disk. When you receive a removable disk, you can copy the files from it to your computer. When you want to give some files to a friend or coworker, you can copy the files onto a disk for that person. You can also use a removable disk to back up and save your critical files in case you accidentally delete a file from your computer, or to safeguard against losing files because of a power failure or some other problem with your computer.

![]() Insert the disk into the drive. If a window displaying the disk contents doesn’t open, choose My Computer from the Start menu to display the My Computer window, and then double-click the drive to open a folder window for the drive.
Insert the disk into the drive. If a window displaying the disk contents doesn’t open, choose My Computer from the Start menu to display the My Computer window, and then double-click the drive to open a folder window for the drive.
![]() Select a file (or a group of files).
Select a file (or a group of files).
![]() Drag the selection to a destination in the Other Places list to copy the file or files to that destination. If the destination you want isn’t listed, click Copy The Selected Items to copy the file to the destination you want.
Drag the selection to a destination in the Other Places list to copy the file or files to that destination. If the destination you want isn’t listed, click Copy The Selected Items to copy the file to the destination you want.
Removable disks are invaluable items, but they do require some management. When you want to copy several items onto a disk, you need to monitor how much space is available on the disk, especially if you use the small-capacity 3½-inch disks. If you frequently reuse your removable disks, you might also find it necessary to occasionally format a disk. (Formatting a disk removes all the files from the disk and resets the disk’s filing system so that it’s prepared for new content.)

![]() With the disk in the drive, choose My Computer from the Start menu to display the My Computer folder window.
With the disk in the drive, choose My Computer from the Start menu to display the My Computer folder window.
![]() Right-click the drive, and choose Properties from the shortcut menu to display the disk’s Properties dialog box.
Right-click the drive, and choose Properties from the shortcut menu to display the disk’s Properties dialog box.
![]() On the General tab of the Properties dialog box, note the amount of free space on the disk.
On the General tab of the Properties dialog box, note the amount of free space on the disk.
![]() Click OK when you’ve finished.
Click OK when you’ve finished.
Caution
When you either format a removable disk or delete files from it, the files are permanently deleted and can’t be recovered from the Recycle Bin.
See Also
For information about safely removing a USB disk-storage device, see "Preventing Hardware Problems".

![]() If you’re certain the disk doesn’t contain any files that you’ll need again, in the My Computer folder window, right-click the drive, and choose Format from the shortcut menu to display the Format dialog box.
If you’re certain the disk doesn’t contain any files that you’ll need again, in the My Computer folder window, right-click the drive, and choose Format from the shortcut menu to display the Format dialog box.
![]() Select this check box to quickly remove the listings of files (but not the content of the files, which is overwritten by the new files) from the disk and to free up the entire disk for new files. Clear the check box to fully remove all the old files for added security or if you run into a problem with the current disk formatting—for example, if you can’t format the disk using quick formatting.
Select this check box to quickly remove the listings of files (but not the content of the files, which is overwritten by the new files) from the disk and to free up the entire disk for new files. Clear the check box to fully remove all the old files for added security or if you run into a problem with the current disk formatting—for example, if you can’t format the disk using quick formatting.
![]() Select this check box if you want to use a floppy disk to start up your computer and to run it using MS-DOS. (This option applies to floppy disks only.)
Select this check box if you want to use a floppy disk to start up your computer and to run it using MS-DOS. (This option applies to floppy disks only.)
![]() Click Start, and then click OK when you’re warned about erasing all items on the disk. Wait for the disk to be formatted. Click OK when the formatting has been completed.
Click Start, and then click OK when you’re warned about erasing all items on the disk. Wait for the disk to be formatted. Click OK when the formatting has been completed.
If you have a CD recorder (sometimes called a CD burner) installed on your computer, you can copy your files to a CD for safe storage or easy distribution. To do so, you copy all the files you want to include on the CD into a temporary storage area, and then, after all the files are assembled, you copy them from the temporary storage area to the CD. You can continue copying files to the CD until it’s full.
Tip
If you’re copying pictures from the My Pictures folder (or from any folder that’s been set up to store pictures), click Copy To CD in the Picture Tasks list to copy the files you want to copy to the CD. To copy the entire folder, make sure that no pictures are selected, and then click Copy All Items To CD in the Picture Tasks list.

![]() Using My Computer, My Documents, or any other folder window, locate and select the file or files and/or the folder or folders you want to copy.
Using My Computer, My Documents, or any other folder window, locate and select the file or files and/or the folder or folders you want to copy.
![]() Right-click one of the selected items, point to Send To on the shortcut menu, and choose your CD drive. Repeat for other files and folders from different locations to gather all the items you want to copy into one temporary storage area.
Right-click one of the selected items, point to Send To on the shortcut menu, and choose your CD drive. Repeat for other files and folders from different locations to gather all the items you want to copy into one temporary storage area.

![]() In the My Computer folder window, double-click your CD drive to display the folder window for the drive.
In the My Computer folder window, double-click your CD drive to display the folder window for the drive.
![]() Review the files that you’ve gathered to be copied to the CD.
Review the files that you’ve gathered to be copied to the CD.
![]() If you want to organize some of the files by placing them in a folder, click Make A New Folder, name the folder, and then drag the files into the folder.
If you want to organize some of the files by placing them in a folder, click Make A New Folder, name the folder, and then drag the files into the folder.

![]() When you’ve assembled and organized all the files, click Write These Files To CD in the CD Writing Tasks list to start the CD Writing Wizard.
When you’ve assembled and organized all the files, click Write These Files To CD in the CD Writing Tasks list to start the CD Writing Wizard.
![]() Type a name for the CD, and click Next. Wait for the files to be written.
Type a name for the CD, and click Next. Wait for the files to be written.

![]() After all the files have been written to the CD, select this check box if you want to make another copy of the CD. Insert a new, blank CD into the CD drive, click Next, and repeat the wizard.
After all the files have been written to the CD, select this check box if you want to make another copy of the CD. Insert a new, blank CD into the CD drive, click Next, and repeat the wizard.
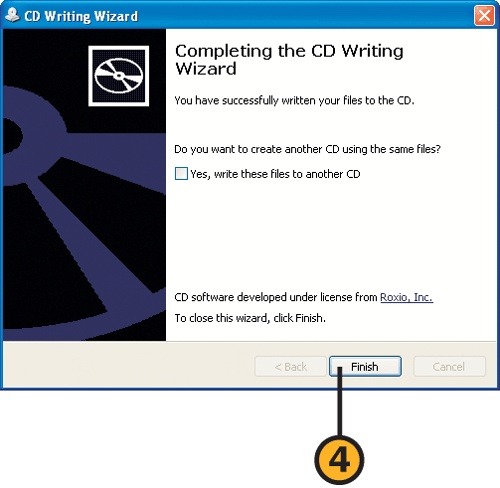
![]() If you don’t want to make any additional copies, make sure the Yes check box is cleared, and click Finish.
If you don’t want to make any additional copies, make sure the Yes check box is cleared, and click Finish.
See Also
For information about creating music CDs, see "Copying CD Music".
For information about creating labels for your CD, see "Labeling Your CDs".
Try This
In the CD Drive window, press Ctrl+A to select everything. Right-click any of the selected items, and choose Properties from the shortcut menu. Note the number of files and folders, and especially the size of all the items on the disk. Click OK. The combined size of all the files should give you a good idea as to whether or not all your files will fit on the CD.
If you don’t remember the exact name or location of a file, tell Windows XP what you do remember—for example, the document type, all or part of its name, when it was last modified, the drive or the computer where it resides—and then let Windows XP do the searching for you.
Tip
You can also search for a document by clicking the Search button in any folder window. Unless you change the search area, the search will be limited to the current folder and any subfolders it contains.
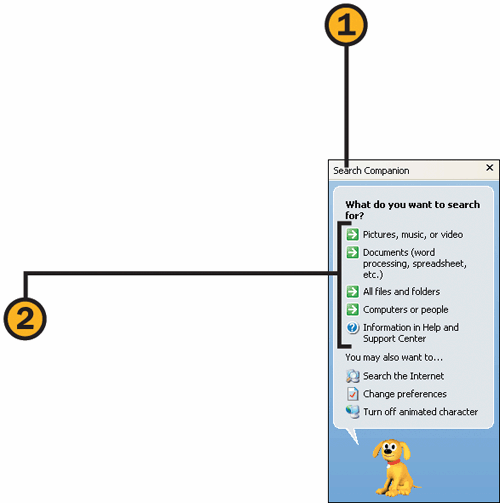
![]() Choose Search from the Start menu to display the Search Companion in the Search Results window.
Choose Search from the Start menu to display the Search Companion in the Search Results window.
![]() Select the type of file you’re looking for. Each type of file has different search parameters.
Select the type of file you’re looking for. Each type of file has different search parameters.


![]() Review the results of the search.
Review the results of the search.
![]() If there are too many files listed to easily find the file or folder you want, or if the file you want wasn’t found, select one of the items to refine the search.
If there are too many files listed to easily find the file or folder you want, or if the file you want wasn’t found, select one of the items to refine the search.
![]() If the file you want is listed, right-click it, and choose the action you want from the shortcut menu.
If the file you want is listed, right-click it, and choose the action you want from the shortcut menu.
Tip
If you find yourself searching frequently, you can have Windows XP conduct a faster and more extensive search by using the Indexing Services. To enable the Indexing Services, instead of choosing the type of file in the Search Companion area, click Change Preferences, and then click With Indexing Services. The Indexing Services feature speeds up a search, but, because it frequently needs to update the index of all your files whenever you make changes to the contents of the hard disk, it might slow down your computer’s normal operating speed.
There are six toolbars associated with the Windows XP taskbar, and they provide access to programs, folders, and documents as well as to Internet and intranet sites.
 Point to Toolbars on the shortcut menu, and choose the toolbar you want to display. (A toolbar with a check mark next to its name is one that’s already displayed.)
 If the toolbar doesn’t expand, right-click a blank spot on the taskbar, choose Lock The Taskbar from the shortcut menu, and repeat step 3.
See Also
For information about creating your own toolbars and modifying the toolbars in folder windows, see "Displaying and Arranging the Toolbars".

![]() If an entire toolbar or taskbar isn’t displayed, double-click the small vertical bar on the toolbar.
If an entire toolbar or taskbar isn’t displayed, double-click the small vertical bar on the toolbar.
![]() If any of the buttons on a toolbar are still not visible, click the right-facing chevrons to display the hidden items.
If any of the buttons on a toolbar are still not visible, click the right-facing chevrons to display the hidden items.
![]() If all the buttons on the taskbar are still not visible, use the up or down arrow to scroll through all the items.
If all the buttons on the taskbar are still not visible, use the up or down arrow to scroll through all the items.
The Taskbar’s Toolbars | |
|---|---|
Toolbar | Function |
Address | Opens the item when you specify its address. The address can be the path and the file or folder name, a program name, a computer on the network, or even the Internet address of a Web page. |
Desktop | Provides quick access to the icons, files, folders, and shortcuts on the Desktop. |
Language Bar | Switches input languages if Windows has been configured to use more than one language. |
Links | Links you to the same locations that are shown on the Internet Explorer Links toolbar. |
Quick Launch | Launches Internet Explorer, Outlook Express, and Windows Media Player, or minimizes all the windows on the Desktop. |
Windows Media Player | Provides control for operating Windows Media Player when Media Player is minimized. |