
In this section
Getting to know the programs that come with Microsoft Windows XP is a bit like moving into new living quarters. Just as your new abode has the basics—stove, refrigerator, and (dare we say it?) windows—the Windows XP operating system comes with many basic accessories and tools. And just as you’ll add all the accoutrements that transform empty rooms into a cozy home, you’ll add programs to Windows XP to utilize its full potential as you work (and play).
But let’s cover the basics first. There’s WordPad, a handy little word processor; and Calculator, for scientific calculations as well as quick basic arithmetic. In this section, we’ll concentrate on some everyday tasks: composing, saving, and printing a document; creating and editing text; copying items between documents that were created in different programs; and inserting characters such as © and é that don’t exist on your keyboard. We’ll also take a look at the Calculator and try out some different types of calculations. Finally, we’ll discuss working at the command prompt, running MS-DOS programs, and what you can do to get out of trouble when a program isn’t working properly.
This section wouldn’t be complete without some information about the games that come with Windows XP and with the Windows XP Plus! packs. Whether you want to take a few minutes to work off some energy with a quick game of Pinball, lose yourself for an hour or two in a game of Solitaire, or go further afield and seek out players from around the world to join you in an international game of Backgammon or Checkers, Windows is ready to play!
WordPad is a powerful little word processor with which you can create documents in Rich Text format, or as plain text or Unicode text documents. In most cases you’ll want to create a document with formatting for a well-designed, professional look. Save the document as you create it, and print it when you’ve finished.
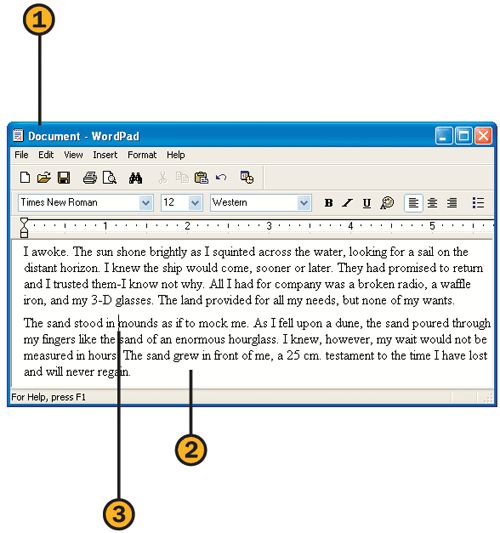
![]() Start WordPad from the Accessories submenu of the Start menu. If WordPad is already running, click the New button on the toolbar, click Rich Text Document in the list, and click OK.
Start WordPad from the Accessories submenu of the Start menu. If WordPad is already running, click the New button on the toolbar, click Rich Text Document in the list, and click OK.
![]() Type your text. Press Enter only when you want to start a new paragraph.
Type your text. Press Enter only when you want to start a new paragraph.
![]() To edit the text, click in the document where you want to make the change. An insertion point indicates where your edit will be placed.
To edit the text, click in the document where you want to make the change. An insertion point indicates where your edit will be placed.

![]() To insert additional text into a paragraph you’ve already typed, click where you want to insert the new text, and type it. If the text you want to insert is stored on the Clipboard, click the Paste button on the toolbar instead of typing the text.
To insert additional text into a paragraph you’ve already typed, click where you want to insert the new text, and type it. If the text you want to insert is stored on the Clipboard, click the Paste button on the toolbar instead of typing the text.

![]() To delete text, select it, and press Delete. To save the text for later use instead of deleting it, place it on the Clipboard by clicking the Cut button on the toolbar.
To delete text, select it, and press Delete. To save the text for later use instead of deleting it, place it on the Clipboard by clicking the Cut button on the toolbar.
![]() To replace existing text with different text, select the text, and then type the new text.
To replace existing text with different text, select the text, and then type the new text.
![]() Select the text to be formatted.
Select the text to be formatted.
![]() Specify the font, font size, and font script (the locale or type of font). Apply bold, italic, underlined, or color emphasis as desired.
Specify the font, font size, and font script (the locale or type of font). Apply bold, italic, underlined, or color emphasis as desired.

![]() Click in the paragraph you want to format, or select all the paragraphs to which you want to apply the same formatting.
Click in the paragraph you want to format, or select all the paragraphs to which you want to apply the same formatting.
![]() Use the Alignment buttons to align your text, or use the Bullets button to create a bulleted list.
Use the Alignment buttons to align your text, or use the Bullets button to create a bulleted list.
![]() Drag the indent markers to set the left, right, and first-line indents. Click in the ruler to set a tab stop.
Drag the indent markers to set the left, right, and first-line indents. Click in the ruler to set a tab stop.
Caution
If you’re planning to save your document as a Text Document (plain text), don’t apply any formatting to it. If you do, all the formatting will be lost when you save the document.
Try This
Select some text in a document, and choose Font from the Format menu. In the Font dialog box, specify a font, a font size, and any emphasis you want, and click OK. Now click in a paragraph, choose Paragraph from the Format menu, and use the Paragraph dialog box to set exact measurements for the paragraph indents you want. Click OK. Choose Tabs from the Format menu, and use the Tabs dialog box to set the exact position of any tabs you want in the paragraph. Click OK. Now move to the end of the paragraph, press Enter, and type some text. You’ll see that all the paragraph formatting from the previous paragraph has been copied and applied to the new paragraph.
After you’ve created a document, you’ll probably want to save it for later use. When you’ve finished using the program in which you created the document, close the program so that it isn’t using space or taking power from your computer. Then, when you’re ready to work on your document again, you can easily restart the program and open the document directly from the running program.

![]() Click the Save button on the toolbar, or, if the toolbar isn’t visible, choose Save from the File menu.
Click the Save button on the toolbar, or, if the toolbar isn’t visible, choose Save from the File menu.
![]() If you don’t want to save the document to the default folder, specify a different drive or folder.
If you don’t want to save the document to the default folder, specify a different drive or folder.
![]() Type a name for the document. The name can be up to 255 characters long; it can contain spaces but can’t contain the * : < > | " or / characters.
Type a name for the document. The name can be up to 255 characters long; it can contain spaces but can’t contain the * : < > | " or / characters.
![]() If you want to save the document in a different format from that of the default file format, select the format.
If you want to save the document in a different format from that of the default file format, select the format.
![]() As you work with the document, click Save frequently. Windows will now save the file without displaying the Save As dialog box.
As you work with the document, click Save frequently. Windows will now save the file without displaying the Save As dialog box.


![]() With the program you want to use running, choose Open from the File menu to display the Open dialog box.
With the program you want to use running, choose Open from the File menu to display the Open dialog box.
![]() If necessary, specify the location of the document.
If necessary, specify the location of the document.
![]() If necessary, double-click a folder to navigate to the document. Continue double-clicking folders until you locate the document.
If necessary, double-click a folder to navigate to the document. Continue double-clicking folders until you locate the document.
![]() Specify the file type of the document you want to open. Only documents of the specified file type will be displayed in the list of files.
Specify the file type of the document you want to open. Only documents of the specified file type will be displayed in the list of files.
![]() Double-click the document to open it.
Double-click the document to open it.
Try This
Many programs can stay open for additional work even after you close the document you’re working on. Open the File menu and look at the commands. If there’s a Close command, click it to close the document without closing the program. If there’s a New command but no Close command, choose New to see whether it closes the open document.
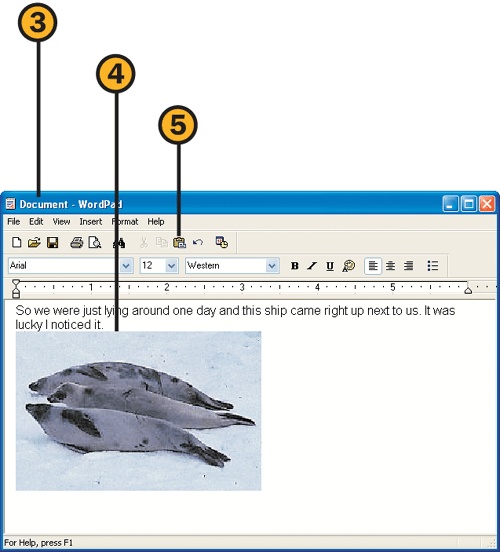
It’s easy to copy material from a document that was created in one program to a document that was created in another program. The way you insert the material depends on what it is. If it’s similar to and compatible with the receiving document—text that’s being copied into a WordPad document, for example—you can usually insert it as is and can edit it in the receiving document’s program. If the item is dissimilar—a sound clip, say, inserted into a WordPad document—either it’s encapsulated, or isolated, as an object and can be edited in the originating program only, or you simply are not able to paste that item into your document.

![]() In the source document, select the material you want to copy.
In the source document, select the material you want to copy.
![]() Choose Copy from the Edit menu. Windows places copied items on the Windows Clipboard. (You can copy only one item at a time, so always paste the Clipboard contents into your document before you copy anything else, or you’ll lose whatever was on the Clipboard.)
Choose Copy from the Edit menu. Windows places copied items on the Windows Clipboard. (You can copy only one item at a time, so always paste the Clipboard contents into your document before you copy anything else, or you’ll lose whatever was on the Clipboard.)
![]() Switch to the destination document.
Switch to the destination document.
![]() Click where you want to insert the material.
Click where you want to insert the material.
![]() Click the Paste button or choose Paste from the Edit menu.
Click the Paste button or choose Paste from the Edit menu.
Tip
To insert the copied material in a different format, or as an icon for an online document, choose Paste Special from the Edit menu instead of choosing the Paste command, provided the command is available on the menu.
Tip
Some programs—those that are part of Microsoft Office, for example—have their own Clipboard, which allows you to store and retrieve multiple copied items from Office programs.
Dialog Box Decisions
You’re going to be seeing a lot of dialog boxes as you use Windows XP, and if you’re not familiar with them now, you soon will be. Dialog boxes appear when Windows XP or a program—WordPad, let’s say—needs you to make one or more decisions about what you want to do. Sometimes all you have to do is click a Yes, a No, or an OK button; at other times, there’ll be quite a few decisions to make in one dialog box. The Print dialog box, shown below, is typical of many dialog boxes and is one you’ll probably be seeing frequently, so take a look at its components and the way they work.

Windows XP provides a special accessory program called Character Map that lets you insert into your programs the characters and symbols that aren’t available on your keyboard. Character Map displays all the characters that are available for each of the fonts on your computer.
Caution
The Windows Clipboard is a temporary "holding area" for items you want to cut or copy and paste. The Clipboard can hold only one item at a time, so do your pasting immediately after you’ve done your copying.

![]() Start Character Map from the System Tools submenu of the Start menu.
Start Character Map from the System Tools submenu of the Start menu.
![]() Double-click the character you want to insert. Double-click any other characters that you want to insert at the same time.
Double-click the character you want to insert. Double-click any other characters that you want to insert at the same time.
![]() Click Copy to place the character or characters on the Clipboard.
Click Copy to place the character or characters on the Clipboard.

![]() Switch to your program, click where you want to insert the character or characters, and press Ctrl+V (or choose Paste from the Edit menu) to paste the character or characters from the Clipboard into your document. Format and edit the inserted text as desired.
Switch to your program, click where you want to insert the character or characters, and press Ctrl+V (or choose Paste from the Edit menu) to paste the character or characters from the Clipboard into your document. Format and edit the inserted text as desired.
Tip
Click a character to see an enlarged view of it to ensure that you’re selecting the correct character.
See Also
For information about installing Character Map if it isn’t already installed, see "Adding or Removing Windows Components".
Try This
In Character Map, select a character you insert frequently, and note the keyboard shortcut for the character in the bottom right corner of the Character Map dialog box. Switch to the program into which you want to insert the character, hold down the Alt key, and use the numeric keypad to enter the numbers. Format the inserted character with a different font or font size if desired.
Need to do a quick calculation but don’t have enough fingers? Want to convert a decimal number into a hexadecimal or binary number? You can do these procedures, and even a few complex geometric and statistical calculations, with the Calculator.

![]() Start the Calculator from the Accessories submenu of the Start menu.
Start the Calculator from the Accessories submenu of the Start menu.
![]() Either click the number buttons or type the numerals you want. Continue until you’ve entered the entire number.
Either click the number buttons or type the numerals you want. Continue until you’ve entered the entire number.
![]() When you’ve entered all the numbers, click the equal (=) button. Press Ctrl+C to copy the result if you want to paste it into your document.
When you’ve entered all the numbers, click the equal (=) button. Press Ctrl+C to copy the result if you want to paste it into your document.

Is your work at the computer putting you to sleep? Or do you need an alarm at various times throughout the day to remind you that it’s lunchtime, time for a meeting, or time to escape and go home? Either way, you can set your computer to wake you up or to alert you that it’s time to do something specific. With the Microsoft Plus! Digital Media Edition installed on your computer, you can use the Plus! Alarm Clock to play your choice of music or sounds to wake you from your slumbers or daydreams.
Try This
Set an alarm for the time you come home. Set the alarm to sound every day at a specific time if you arrive home at the same time each day, or create separate alarms if you return at variable times. Select a playlist you’ve created as the alarm sound. Now, provided your computer is running, you’ll be welcomed home with your favorite music.

![]() Choose Plus! Alarm Clock from the Microsoft Plus! Digital Media submenu, and click the Create Alarm button to start the Create New Alarm Wizard.
Choose Plus! Alarm Clock from the Microsoft Plus! Digital Media submenu, and click the Create Alarm button to start the Create New Alarm Wizard.
![]() Type a descriptive name for the alarm if you don’t want to use the default name.
Type a descriptive name for the alarm if you don’t want to use the default name.
![]() Specify at what intervals you want the alarm to sound.
Specify at what intervals you want the alarm to sound.
![]() Under Start Time, click the hour that’s displayed to select it, and then use the scroll arrows to specify the hour you want. Then click the minutes, and use the scroll arrows to specify the minutes you want. Finally, click AM or PM, and use the scroll arrows to specify which one you want.
Under Start Time, click the hour that’s displayed to select it, and then use the scroll arrows to specify the hour you want. Then click the minutes, and use the scroll arrows to specify the minutes you want. Finally, click AM or PM, and use the scroll arrows to specify which one you want.
![]() Select the setting you want for the alarm interval you chose. Each type of interval has different settings.
Select the setting you want for the alarm interval you chose. Each type of interval has different settings.
![]() Under Start Date, click the down arrow, and choose the date for the first time the alarm will sound.
Under Start Date, click the down arrow, and choose the date for the first time the alarm will sound.
![]() Specify how you want to display your media files, and then choose the media file you want as your alarm.
Specify how you want to display your media files, and then choose the media file you want as your alarm.
![]() Click Next, verify that the settings are correct, and then click Finish to set the alarm.
Click Next, verify that the settings are correct, and then click Finish to set the alarm.

![]() When the alarm starts and the Plus! Alarm Clock window appears, do any of the following:
When the alarm starts and the Plus! Alarm Clock window appears, do any of the following:
Click Snooze to temporarily turn off the alarm.
Click Turn Off Ring to cancel the alarm until the next time it’s scheduled to start.
Click Change to start the Change Alarm Wizard if you want to modify any or all of the alarm settings.
Close the window to use the snooze feature or turn off the alarm, depending on your settings.

![]() In the Plus! Alarm Clock window, choose Options from the Tools menu to display the Plus! Alarm Clock Options dialog box. If the Plus! Alarm Clock window isn’t displayed, double-click the clock icon in the notification area of the taskbar to display it.
In the Plus! Alarm Clock window, choose Options from the Tools menu to display the Plus! Alarm Clock Options dialog box. If the Plus! Alarm Clock window isn’t displayed, double-click the clock icon in the notification area of the taskbar to display it.
![]() On the Alarm tab of the Options dialog box, modify the way the alarm works.
On the Alarm tab of the Options dialog box, modify the way the alarm works.
![]() On the Sound tab, specify the options you want for the sound:
On the Sound tab, specify the options you want for the sound:
Specify a default alarm sound if your chosen sound isn’t available.
Specify whether you want an hourly chime to play, and, if so, the sound you want for the chime.
![]() Choose Close from the File menu to run the alarm clock in the background.
Choose Close from the File menu to run the alarm clock in the background.
In Windows XP, the command prompt is the place where you can execute command-line instructions. Most of the commands are the old standard MS-DOS commands, some are enhancements of the MS-DOS commands, and others are commands that are unique to Windows XP. When you want or need to work from the command prompt, you can open a command prompt window and execute all your tasks there, including using the basic commands, starting a program, and even starting a program in a new window.
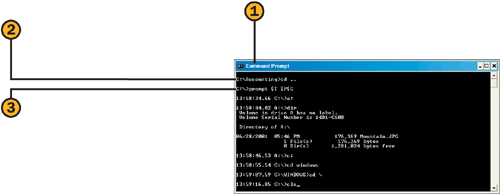
![]() Open a command prompt window by choosing Command Prompt from the Accessories submenu of the Start menu.
Open a command prompt window by choosing Command Prompt from the Accessories submenu of the Start menu.
![]() At the prompt, type a command, including any switches and extra parameters, and press Enter.
At the prompt, type a command, including any switches and extra parameters, and press Enter.
![]() Enter any additional commands you want to run.
Enter any additional commands you want to run.
Caution
The command prompt is a powerful weapon that can disrupt your system, delete files, and create general havoc. Don’t execute commands unless you know what they’re designed for.
Tip
Many commands have switches that allow the use of extra parameters, giving you greater control of the command. A switch is the part of the command with the forward slash (/), followed by a letter, a number, or another instruction. A parameter is an additional instruction you provide, such as the file name or drive letter.
The Top 10 Command Prompt Commands | |
|---|---|
Command | Function |
cd | Switches to the specified folder (or directory). |
cls | Clears the screen. |
copy | Copies the specified files or folders. |
dir | Shows the contents of the current directory. |
drive: | Switches to the specified drive (type the drive letter and a colon). |
exit | Ends the session. |
mem | Displays memory configuration. |
path | Displays or sets the path the command searches. |
prompt | Changes the information displayed at the prompt. |
rename | Renames the specified file or files if the wildcard characters ? or * are used. |

![]() At the command prompt, type help and press Enter.
At the command prompt, type help and press Enter.
![]() If the information scrolls off the screen, use the scroll bar or the scroll arrows so that you can see the entire list.
If the information scrolls off the screen, use the scroll bar or the scroll arrows so that you can see the entire list.
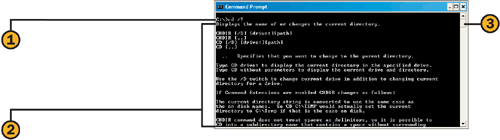
![]() Type a command followed by a space and /? and then press Enter to get information about the command.
Type a command followed by a space and /? and then press Enter to get information about the command.
![]() If the information scrolls off the screen, use the scroll bar or the scroll arrows so that you can see the entire text.
If the information scrolls off the screen, use the scroll bar or the scroll arrows so that you can see the entire text.
Tip
To change some of the settings for the command prompt window—the font, the cursor size, or the colors, for example—right-click the window’s title bar, and choose Properties from the shortcut menu.
Try This
At the command prompt, type help > dosref.txt and press Enter. Now use Notepad or WordPad to open the file dosref.txt that’s stored on your hard disk (it’s the folder that was active when you typed the command). The > symbol redirected the output from the screen to the file. You now have a reference for the commands, which you can easily print out.
The Microsoft Plus! Packs
There are two versions of Microsoft Plus! for Windows XP: the Microsoft Plus! Standard Pack, which provides additional features for Windows Media Player and digital recording, games, themes, and screen savers; and the Plus! Digital Media Edition, which provides new tools for enjoying and working with your digital media, and generally making your computer come alive for parties and entertainment. The Plus! packs are separate products that you purchase in addition to Windows XP, so you’ll need to decide whether you want one or both Plus! packs.
Microsoft Plus! Standard Pack
This pack includes:
Voice control for Windows Media Player
A converter to change MP3-format music files into the more compact Windows Media Audio (WMA) format
A CD label maker to create labels, inserts, and booklets for the CDs you create
Speaker profiles to enhance sound on certain brands of speakers
A personal DJ program to create custom playlists from multiple sources
Twelve Media Player skins to customize the look of Windows Media Player
Three new 3-D visualizations that can be displayed while your music plays
Three new games: Russian Squares, Labyrinth, and HyperBowl
Four Themes to modify the look of your Windows environment
Eight three-dimensional screen savers
Microsoft Plus! Digital Media Edition
This pack includes:
An alarm clock that plays your music at preset times
An analog recorder to capture music from records and tapes as digital music
A converter to convert MP3, WAV, and WMA formats into the Windows Media format of your choice
A CD label maker to create labels, inserts, and booklets for the CDs you create
Electronic dancers who dance on your screen while your music plays
A Windows Media skin that lets you quickly choose individual music files while limiting access to the rest of your computer
Photo Story, which lets you assemble a photo show with narration, background music, and panning across the pictures
A program for downloading and organizing your digital media and Internet files on a Pocket PC portable device
Note that the two products work a bit differently from each other. In the standard Plus! pack, you access all the programs from a window that opens. In the Digital Media Edition, you start all the programs from a submenu of the Start menu. The two Plus! packages do have some similarities, however: For example, any items that are additions to Media Player are integrated directly into Media Player, which means that if you have Plus! on your computer, the new skins will appear in the Skin Chooser section of Media Player. You can also download many more enhancements to both of the Plus! packs from the Microsoft Plus! Web site. Note, however, that without having either or both of the Plus! packs installed on your computer, you won’t be able to install any of these downloads.
FreeCell—a modified version of Solitaire—is a game you play by yourself. The entire deck is dealt, and, as in Solitaire, you arrange the cards by stacking them in descending order, alternating the red and black cards. Unlike the way you play Solitaire, the sequence of cards can begin anywhere in the stack. You can move a single card onto another card to add to the sequence of cards, or into one of the free cells at the top, or into a blank column after the column has been emptied of cards. You win by stacking all the cards by suit in ascending order.
Tip
If there are enough available free cells, you can move an entire series of cards from one column into another.
Tip
Try to free the Ace cards early in the game and to keep as many free cells and empty columns as possible.

![]() Start FreeCell from the Games submenu of the Start menu, and choose New Game from the Game menu to start your game.
Start FreeCell from the Games submenu of the Start menu, and choose New Game from the Game menu to start your game.
![]() When possible, move an Ace to the top of the window and stack the cards by suit in ascending order (FreeCell might do this for you automatically).
When possible, move an Ace to the top of the window and stack the cards by suit in ascending order (FreeCell might do this for you automatically).
![]() Click to select the card you want to move.
Click to select the card you want to move.
![]() Click another card to move the selected card on top of it. (The cards must be stacked in alternating colors in descending numeric order.)
Click another card to move the selected card on top of it. (The cards must be stacked in alternating colors in descending numeric order.)
![]() Continue stacking the cards, including moving cards into or from a free cell. You can also move one card or a series of cards into an empty column.
Continue stacking the cards, including moving cards into or from a free cell. You can also move one card or a series of cards into an empty column.
![]() Repeat steps 2 through 5 until all the cards are stacked by suit.
Repeat steps 2 through 5 until all the cards are stacked by suit.
You play Hearts against three hands controlled by the computer. The objective is to score the fewest points. For each trick you win, you’re awarded one point for each heart and 13 points for the Queen of Spades. You must use the same suit that’s played first unless you’re void of that suit. You take the trick if you’ve played the highest card of the suit played.

![]() Start Hearts from the Games submenu of the Start menu.
Start Hearts from the Games submenu of the Start menu.
![]() Enter your playing name, and click OK.
Enter your playing name, and click OK.

![]() Click the cards to be passed, and click the Pass button. Click the OK button after you’ve received your cards.
Click the cards to be passed, and click the Pass button. Click the OK button after you’ve received your cards.
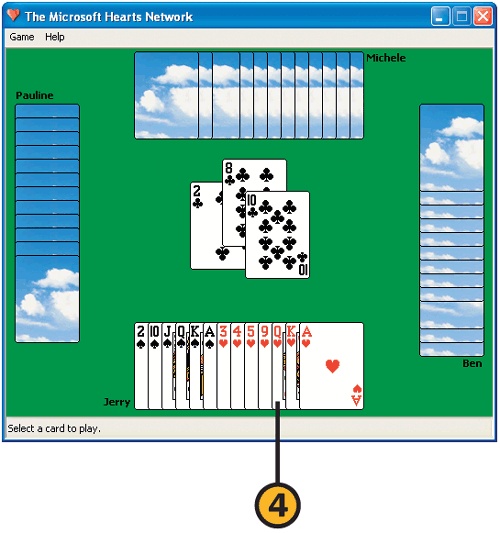
![]() The Two of Clubs is automatically played to start the game. If you don’t have the Two of Clubs, wait for your turn, and then click the card you want to play. Continue playing until the first player scores 100 or more points. The lowest score wins.
The Two of Clubs is automatically played to start the game. If you don’t have the Two of Clubs, wait for your turn, and then click the card you want to play. Continue playing until the first player scores 100 or more points. The lowest score wins.
HyperBowl is a bowling game that comes with Microsoft Plus! You can play the game on a Classic bowling lane or on the Pins Of Rome lane, a winding and bumpy lane full of obstacles. The objective is to roll the ball down the lane and knock over as many pins as possible before your time limit expires. Scoring is done in the same way as in standard bowling.

![]() Start the HyperBowl Plus! Edition game from the Games submenu of the Start menu. Wait for the game to fully load, and then move the mouse to start the game.
Start the HyperBowl Plus! Edition game from the Games submenu of the Start menu. Wait for the game to fully load, and then move the mouse to start the game.
![]() Select a lane by rolling the ball down the alley you want. To roll the ball, do the following:
Select a lane by rolling the ball down the alley you want. To roll the ball, do the following:
Move the mouse (or trackball) forward (away from you) to roll the ball forward. The farther forward you push the mouse, the faster the ball rolls.
Move the mouse to the left to move the ball to the left, or to the right to move the ball to the right.
Move the mouse backward to slow the ball down.
![]() Bowl your game, using the mouse to roll the ball and making sure the ball strikes the pins before your time runs out. Scoring is automatic.
Bowl your game, using the mouse to roll the ball and making sure the ball strikes the pins before your time runs out. Scoring is automatic.
In the Classic lane, bowl as you would in a regular bowling alley.
In the Pins Of Rome lane, navigate along the curvy and undulating lane, avoiding the urns to reach the pins.
![]() After you’ve completed the game, wait for the final score to be displayed. You can then start a new game or press the Esc key and choose to quit HyperBowl.
After you’ve completed the game, wait for the final score to be displayed. You can then start a new game or press the Esc key and choose to quit HyperBowl.
The Labyrinth Plus! Edition game that comes with Microsoft Plus! is a digital adaptation of the old wooden Labyrinth game that frustrated so many of us when we were younger. The digital version, of course, has many different options and designs, and it incorporates features that couldn’t have been used in the old game. The object of the game is to move the ball though the maze by tilting the playing surface and trying to prevent the ball from falling into a hole. Not all the levels and mazes are available in the Plus! Edition. You can, however, download additional mazes. See Labyrinth Help for a link to upgrading the game.
Try This
Choose Options from the Main menu, and use the Options menu to customize the game: Change the theme, the appearance of the ball, the mouse sensitivity, the sound volume, and several other settings. Then play a game to see whether you like your settings.
Caution
Labyrinth sometimes freezes if you use the Alt+Tab key combination to switch windows. To avoid this problem, end your game before you switch windows.

![]() Start The Labyrinth Plus! Edition game from the Games submenu of the Start menu. Step through the menus to specify the game you want to play:
Start The Labyrinth Plus! Edition game from the Games submenu of the Start menu. Step through the menus to specify the game you want to play:
From the Main menu that appears, choose Play.
From the Play menu, choose to play the Arcade or the Race The Clock version of the game.
On the Level menu, double-click the game level at which you want to play.
![]() Use the mouse to tilt the game board and thus move the ball so that you can navigate through the maze, avoiding the holes and collecting points from hitting the other items displayed in the maze.
Use the mouse to tilt the game board and thus move the ball so that you can navigate through the maze, avoiding the holes and collecting points from hitting the other items displayed in the maze.
Move the mouse to the left to raise the right side of the maze and move the ball to the left.
Move the mouse to the right to raise the left side of the maze and move the ball to the right.
Move the mouse forward to raise the near side of the maze and move the ball toward the back of the maze.
Move the mouse backward to raise the far side of the maze and move the ball toward the front of the maze.
![]() After you’ve completed the game, click a mouse button, and, from the menu that appears, choose a command to continue playing or to exit the game.
After you’ve completed the game, click a mouse button, and, from the menu that appears, choose a command to continue playing or to exit the game.
Minesweeper is a game you play against the computer. The goal is to uncover, in the shortest possible time, all the squares that don’t contain mines. If you uncover a square that contains a mine, you lose. The key is to use the numbers in the uncovered squares to determine which adjacent squares contain the mines.
Tip
The number in a square represents the total number of mines in adjacent squares—directly above, below, diagonal to, or to the left or right of the numbered square. Use several exposed numbers to figure out where the mines are.
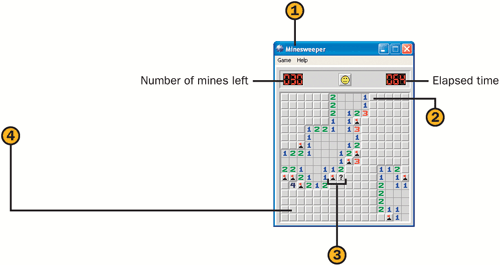
![]() Start Minesweeper from the Games submenu of the Start menu.
Start Minesweeper from the Games submenu of the Start menu.
![]() Click a square to uncover it. You might need to click more squares before you can use the numbers of adjacent mines to determine mine locations.
Click a square to uncover it. You might need to click more squares before you can use the numbers of adjacent mines to determine mine locations.
![]() Right-click to mark a square that you believe contains a mine. If you’re not sure, right-click the square a second time to mark it as a possible mine.
Right-click to mark a square that you believe contains a mine. If you’re not sure, right-click the square a second time to mark it as a possible mine.
![]() Click a square that you believe doesn’t contain a mine. Continue finding unmined squares and marking squares that contain mines until you’ve revealed all the unmined squares.
Click a square that you believe doesn’t contain a mine. Continue finding unmined squares and marking squares that contain mines until you’ve revealed all the unmined squares.
Pinball is a dazzling game with extensive sound effects. The object of the game is to keep each ball in play as long as possible while scoring the greatest number of points. Unlike most computer games, Pinball is played using the keyboard exclusively. You have three balls for the game unless you win extra balls, and you can advance through nine steps, or ranks, with each rank being more difficult to achieve and awarding a greater number of points.
Tip
We’d never endorse goofing off, but if you should just happen to be taking a little break and playing games instead of working, press the Esc key to mute the sounds and minimize the game if the wrong person gets too close to your computer.

![]() Start Pinball from the Games submenu of the Start menu.
Start Pinball from the Games submenu of the Start menu.
![]() On the Options menu, specify how many players are in the game, and whether you want to hear the pinball sounds or play background music.
On the Options menu, specify how many players are in the game, and whether you want to hear the pinball sounds or play background music.
![]() Hold down the Spacebar and then release it to shoot the ball into play.
Hold down the Spacebar and then release it to shoot the ball into play.
![]() Use the keys as shown in the table to control the play.
Use the keys as shown in the table to control the play.
Pinball Control Keys | |
|---|---|
Key | Function |
Z | Left flipper and reentry lane lights |
/ (forward slash) | Right flipper |
X | Nudge from left |
. (period) | Nudge from right |
Up arrow key | Nudge from bottom |
F2 | New game |
F3 | Pause/resume |
F4 | Full screen/window |
Russian Squares Plus! Edition is a game that comes with Microsoft Plus! It’s a fast-moving matching game in which you move squares around so that whole rows or columns contain matching squares. Once a row or column matches, it disappears, and you get points. The catch is that you have very little time to accomplish your goal, and, if you run out of time, the game adds a new row or column, which messes up your almost completed row or column. After you’ve removed all the squares, you advance to a higher level where it’s even more difficult to remove squares.
Tip
You can use the arrow keys on your keyboard to move the squares, but, once you get the feel of it, using the mouse is much quicker. If the mouse doesn’t move the squares, choose Mouse from the Options menu.
Tip
If you have difficulty discerning the differences between squares, point to Themes on the Options menu, and choose Shapes from the submenu that appears.

![]() Start the Russian Squares Plus! Edition game from the Games submenu of the Start menu.
Start the Russian Squares Plus! Edition game from the Games submenu of the Start menu.
![]() From the Game menu, choose the level of difficulty you want to try.
From the Game menu, choose the level of difficulty you want to try.
![]() Drag the mouse to move the squares so that you can arrange the identical squares in a row or a column. You don’t need to click the mouse.
Drag the mouse to move the squares so that you can arrange the identical squares in a row or a column. You don’t need to click the mouse.
![]() Continue moving the squares until they’ve all been removed, and then continue playing at the next level.
Continue moving the squares until they’ve all been removed, and then continue playing at the next level.
![]() When you’ve had enough, press the Esc key, and confirm that you want to quit the game.
When you’ve had enough, press the Esc key, and confirm that you want to quit the game.
Solitaire is a classic card game that, as its name implies, you play by yourself. The object is to reveal all the cards that are turned face down and eventually to arrange all the cards in four piles, with each pile being a single suit stacked in ascending order from Ace through King.
Tip
To change the way a game is played—the number of cards drawn at one time, whether or not the game is timed, or the method of scoring—choose Options from the Game menu.

![]() Start Solitaire from the Games submenu of the Start menu.
Start Solitaire from the Games submenu of the Start menu.
![]() Use the mouse to drag one card on top of another card. (The cards must be stacked in descending numeric order, alternating the red and black cards.)
Use the mouse to drag one card on top of another card. (The cards must be stacked in descending numeric order, alternating the red and black cards.)
![]() Drag any Ace cards into the top row. If there are any other cards for that suit in the pile, stack them in ascending numeric order.
Drag any Ace cards into the top row. If there are any other cards for that suit in the pile, stack them in ascending numeric order.
![]() If one or more face-up cards are moved to expose a face-down card, click the face-down card to display its face.
If one or more face-up cards are moved to expose a face-down card, click the face-down card to display its face.
![]() When you can’t make a play, click the stack of cards to turn the cards over. Drag the top card on top of a face-up card if the top card has the correct number and suit.
When you can’t make a play, click the stack of cards to turn the cards over. Drag the top card on top of a face-up card if the top card has the correct number and suit.
![]() If all the cards have been moved from a row, move a King, if one is available, and any cards that are stacked on it, into the empty spot.
If all the cards have been moved from a row, move a King, if one is available, and any cards that are stacked on it, into the empty spot.
See Also
For information about other Solitaire card games, see "Playing FreeCell" and "Playing Spider Solitaire".
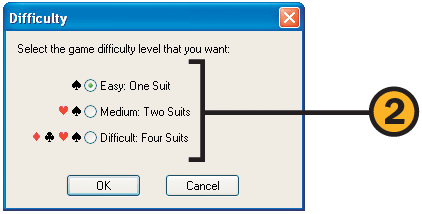
Spider Solitaire is yet another version of Solitaire. Unlike the way you play other Solitaire games, the object is to stack the cards by suit in one column in descending order. When a series from King to Ace is complete, the cards are removed. The level of difficulty is determined by how many suits are used (one, two, or four).

![]() Start Spider Solitaire from the Games submenu of the Start menu.
Start Spider Solitaire from the Games submenu of the Start menu.
![]() Use the mouse to drag one card on top of another card. You can stack the cards in descending numeric order regardless of suit, but it’s best to stack by suit.
Use the mouse to drag one card on top of another card. You can stack the cards in descending numeric order regardless of suit, but it’s best to stack by suit.
![]() Drag a group of sequential cards of the same suit onto another card. (Only cards of the same suit can be moved as a group.)
Drag a group of sequential cards of the same suit onto another card. (Only cards of the same suit can be moved as a group.)
![]() If there’s an empty column, move a card or a sequence of cards into the column.
If there’s an empty column, move a card or a sequence of cards into the column.
![]() If no moves are available, click the stacked cards to deal another round. (You can’t deal if there’s an empty column.) Continue playing until all the cards have been removed or until all the cards have been dealt and there are no longer any moves available.
If no moves are available, click the stacked cards to deal another round. (You can’t deal if there’s an empty column.) Continue playing until all the cards have been removed or until all the cards have been dealt and there are no longer any moves available.
Windows XP provides five games—Backgammon, Checkers, Hearts, Reversi, and Spades—that are designed to be played against other players over the Internet. When you start a game and connect to the Internet, the game server will try to find players matched to your skill level and language. (You can’t select the players or the locations of your opponents.) You can communicate with the other players by using the Chat feature.
Tip
To play additional types of games and to select specific individuals to be your opponents, connect to the Gaming Zone. You’ll see the MSN Gaming Zone item on the Contents tab of the Help program in the game you’re currently playing.

![]() Start an Internet game from the Games submenu of the Start menu.
Start an Internet game from the Games submenu of the Start menu.
![]() Click Play. If you’re not already connected to the Internet, connect when prompted.
Click Play. If you’re not already connected to the Internet, connect when prompted.

![]() Click a message to send to your opponent.
Click a message to send to your opponent.
![]() Play the game and make your moves as prompted.
Play the game and make your moves as prompted.
![]() At the conclusion of the game, use the Game menu to start a new game with the same players, to start a game with different players, or to quit playing.
At the conclusion of the game, use the Game menu to start a new game with the same players, to start a game with different players, or to quit playing.
Tip
You can also play certain games over the Internet using Windows Messenger, provided you and your opponent both have the games installed.
See Also
For information about playing games over the Internet using Windows Messenger, see "Sending Instant Messages".
Most programs work well with Windows XP. Some older ones, however, are designed exclusively for earlier versions of Windows, and don’t work properly in Windows XP. However, Windows XP can get those programs to run by cleverly acting as though it were an earlier version of Windows.
Tip
If changing the compatibility mode or the display settings doesn’t fix the problem, check with the manufacturer for updated drivers or other fixes.

![]() Open the Start menu, right-click the program you want to run, and choose Properties from the shortcut menu.
Open the Start menu, right-click the program you want to run, and choose Properties from the shortcut menu.

![]() Select this check box to run the program in compatibility mode.
Select this check box to run the program in compatibility mode.
![]() Specify the version of Windows the program was designed for.
Specify the version of Windows the program was designed for.
![]() Select the check boxes for applying the appropriate restrictions to the display and text services, based on the program’s documentation and updated notes from the manufacturer.
Select the check boxes for applying the appropriate restrictions to the display and text services, based on the program’s documentation and updated notes from the manufacturer.
![]() Click OK. Try running the program. If it still doesn’t run, open the Properties dialog box again and change the settings. Continue experimenting until you get the program to work.
Click OK. Try running the program. If it still doesn’t run, open the Properties dialog box again and change the settings. Continue experimenting until you get the program to work.
If you always start your workday using the same program, you can have that program start when Windows XP starts. And if you use the same document each day, you can have that document start automatically in the program. Windows XP might take a little longer to load, but your program will be ready for you right away.
See Also
For information about adding programs or documents to the Start menu, see "Customizing the Start Menu".

![]() Point to All Programs on the Start menu, and move through the folders until you locate the program you want.
Point to All Programs on the Start menu, and move through the folders until you locate the program you want.
![]() Hold down the Ctrl key and drag the program on top of the Startup item on the Programs submenu.
Hold down the Ctrl key and drag the program on top of the Startup item on the Programs submenu.
![]() When the Startup submenu opens, drag the program onto the submenu. Release the mouse button and then the Ctrl key.
When the Startup submenu opens, drag the program onto the submenu. Release the mouse button and then the Ctrl key.
![]() Open the Startup folder and verify that the program is on the Startup submenu. The next time Windows XP starts, the program will start.
Open the Startup folder and verify that the program is on the Startup submenu. The next time Windows XP starts, the program will start.
Tip
The Startup folder isn’t the only place from which a program starts automatically when Windows XP starts; some programs use the Registry settings to start automatically. The Startup folder, however, is the only location that you can easily modify.
Caution
Some programs are automatically placed in the Startup folder when they’re installed, so they always start when Windows XP starts. You can remove many of these programs if you don’t want them to start automatically; however, some programs won’t function properly without certain items in the Startup folder. If you want to remove a program from the Startup folder, drag it to the All Programs submenu, restart the computer, use the program, and check to verify that everything is working properly. If not, drag the program back to the Startup folder.
Many programs have special command switches that you can use to start the program or to modify the way it starts or runs. You can add these commands to the shortcut that starts the program, as well as specify the size of the window and even specify a keyboard shortcut that quickly switches to the program.
Try This
Click the Start button, point to All Programs, right-click Outlook Express on the menu that appears, and choose Properties from the shortcut menu. In the Target box on the Shortcut tab, type a space and then the command switch /newsonly after the closing quotation marks, and click OK. Open the Start menu, point to All Programs, and choose Outlook Express to open Outlook Express as a news reader only. This is a useful way to connect to newsgroups if you use a program other than Outlook Express—Microsoft Outlook, for example—for your e-mail.

![]() Locate the shortcut to the program (on the Start menu, on the Desktop, or in a folder). If there is no shortcut to the program or if you’re not permitted to modify the existing shortcut, create a new one. Right-click the shortcut, and choose Properties from the shortcut menu.
Locate the shortcut to the program (on the Start menu, on the Desktop, or in a folder). If there is no shortcut to the program or if you’re not permitted to modify the existing shortcut, create a new one. Right-click the shortcut, and choose Properties from the shortcut menu.

![]() Add any special command switches, as specified in the program’s documentation.
Add any special command switches, as specified in the program’s documentation.
![]() If you want to use a keyboard shortcut that switches to the running program, click in the box and press the key combination.
If you want to use a keyboard shortcut that switches to the running program, click in the box and press the key combination.
![]() Specify whether you want to run the program in a normal, a maximized, or a minimized window.
Specify whether you want to run the program in a normal, a maximized, or a minimized window.
![]() Modify the comment to change the text shown in the pop-up description when you point to the shortcut.
Modify the comment to change the text shown in the pop-up description when you point to the shortcut.
If a program isn’t working properly and doesn’t respond when you try to close it, Windows XP isolates the program so that it doesn’t affect your other programs. Provided you’re sure that the program really isn’t working—as opposed to just taking a long time to do something—you can "end the task." When you use this option, you’ll probably lose any unsaved work in the misbehaving program, and, if the problem persists, you might need to reinstall the program.
Tip
If you can’t end a specific program, press Ctrl+Alt+Delete to display the Task Manager. On the Applications tab of the Task Manager dialog box, click the offending program, and then click End Task. If that doesn’t work, close all your other running programs, and choose Turn Off from the Shut Down menu in the Task Manager dialog box. If Windows XP is really misbehaving and still doesn’t respond, your last resort is to turn off your computer.

![]() When you’re sure that the program has stopped working, click the Close button on the program’s title bar. You might need to try this several times before you can get the program to respond to your click. Be patient!
When you’re sure that the program has stopped working, click the Close button on the program’s title bar. You might need to try this several times before you can get the program to respond to your click. Be patient!

![]() If you see a dialog box telling you the program isn’t responding, click End Now.
If you see a dialog box telling you the program isn’t responding, click End Now.

![]() When a message appears, click Send Error Report to send technical data about the error over the Internet to Microsoft, or click Don’t Send if you want to keep the problem to yourself.
When a message appears, click Send Error Report to send technical data about the error over the Internet to Microsoft, or click Don’t Send if you want to keep the problem to yourself.
See Also
For information about fixing configuration problems when you restart your computer, see "Starting Up When There’s a Problem".