Microsoft Dynamics CRM 2011 has changed the client-side programming model. It introduces a new object model for programming, and adds some new capabilities for showing and hiding user interface elements, supporting multiple forms per entity, and provides new controls for attributes. It also introduces a new file depository called Web Resources. Web Resources changes the way that we associate events to our forms and attributes. In addition to the SOAP end-point in Microsoft Dynamics CRM 4.0, Microsoft CRM 2011 introduces a new architectural style in which every resource is addressed by using a unique URI. This is called REST. In this chapter, we are going to give you an overview of the new client-side programming features that have been added to the product. We are going to cover the following topics:
- What is new in CRM 2011?
- The Xrm.Page Namespace
- SOAP and REST Endpoint
- Advanced Client-Side Programming
Client-side programming offers ways for us to interact with the entity forms by using JScript, through different events provided in Microsoft Dynamics CRM. We often use client-side programming to perform data validation, automation, and process enhancement, because it can provide an immediate response back to the users. Let's walk through the new features.
Web Resources is new in CRM 2011. Web Resources provides a way to store files virtually in the Microsoft Dynamics CRM database, so that we can retrieve them by using a URL address. You may think of Web Resources as a folder on your local computer, and you can create folders within this folder in order to organize your files.
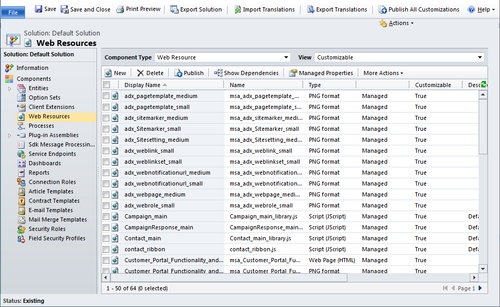
Web Resources, as shown in the following screenshot, contains files that can be used to customize and extend the Microsoft CRM Web application. This includes HTML files, Script, and Silverlight applications. All files in the Web Resources repository can be referenced by using URL syntax. Therefore, you can leverage these files (individual 'web resources') in form customizations, a Sitemap, and/or the ribbon. We will take a deep dive into web resources in details later in this chapter:
Web resources are stored in a solution. Because web resources are solution components, you can easily export and install them on any Microsoft Dynamics CRM deployment.
Microsoft Dynamics CRM 2011 supports ten file formats. The following table lists each type and the allowed file extensions:
|
File |
File Extensions |
|---|---|
|
| |
|
| |
|
| |
|
| |
|
| |
|
| |
|
|
To access the Web Resources repository, follow these steps:
- Navigate to the Settings area.
- Select Customizations from the left-hand navigation menu.
- Click Customize the system.
- Click on Web Resources on the left navigation menu.
We will be creating multiple web resources to support the ACM system. To create a new Web Resources, follow these steps:
- Click New on the grid menu.
- Enter the Name.
- Enter the Display Name (optional).
- Select the Type of your Web Resource.
- Select the Language from the drop-down list (optional).
- Click Save on the ribbon to save the web resource.
Consider organizing your web resources in a folder structure using the type of resource that is driving the Web Resource name that you give it. For example you might use the "/scripts" folder structure to store .js files. This will help to group the web resources, making them easier to find when you need to manage them, and will also help to make sure that you do not duplicate resources. You may consider using the following folder structure for the project.
- Image:
/images/ - Script:
/scripts/ - Style Sheet:
/styles/ - Icon:
/icons/ - Data:
/data/ - Web Page:
/ - Silverlight:
/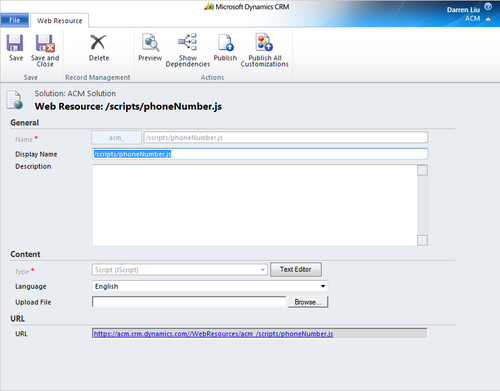
As you can see from the previous screenshot, a URL is generated automatically, so you can access this web resource using the URL.
Once the web resource is created in the Web Resources library, we often need to reference that web resource on a form, ribbon, or Sitemap. There are three approaches that we can leverage: $webresource Directive, Relative URL, and Full URL. Let us walkthrough the steps of inserting a web resource on a form and also take a look at the different approaches to referencing web resources.
To insert a web resource onto a form, following these steps:
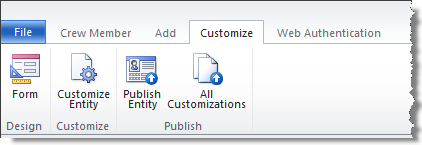
- Navigate to the form designer.
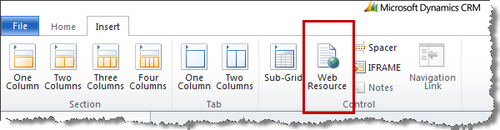
- Click on the Insert tab on the ribbon.
- Click on the Web Resource button in the Control group, as shown in the following screenshot:
- In the Add Web Resource dialog box, click the Web source lookup button to select the web resource in the Web Resource library, and then click the OK button:

- Enter the Name and the Label for the web resource.
- Click the OK button to insert the web resource onto the form.
Now we know how to insert a web resource onto a form, let's take a look at the different ways for referencing the web resource in the SiteMap, ribbon, and our JScript code.
You should always use the $webresource directive when referencing a web resource from a subarea in the SiteMap or control in the ribbon. To use the $webresource directive, use the following syntax:
$webresource: <name of Web Resource>
When referencing a web resource from areas that do not support using the $webresource directive, you can use a relative URL to reference the web resource. You should always use relative URLs to reference one web resource from another. For example, for the web page web resource acm_/mypage.htm to reference the CSS Web resource acm_/styles/myStyles.css, you create the link as shown:
<link rel="stylesheet" type="text/css" href="../styles/myStyles.css" />
CRM 2011 has all of the form events that CRM 4.0 supports and also has extra events to deal with tabs and IFRAMEs, because CRM 2011 has added tabs to the form and improved the IFRAME capability. In addition, how we usually associate JScript to the form has been changed. Let's take a look at each of the events in detail, and also examine the changes that have been made in Dynamics CRM 2011.
To launch the Form Designer, follow these steps:
- Navigate to your solution and expand Entities.
- Expand the Crew Member entity.
- Click on Forms.
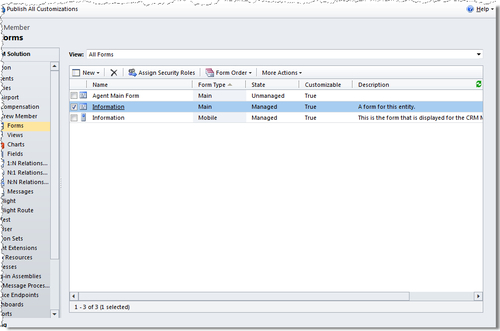
- Double-click the
Mainform to open up the form for editing.
The OnLoad event occurs after the form has been loaded. You can use the OnLoad event to apply logic about how the form should be displayed, to set properties on fields, and to interact with other page elements. Let us walk through an example of how to apply an OnLoad event to the Crew Member entity in the ACM system. Please follow these steps:
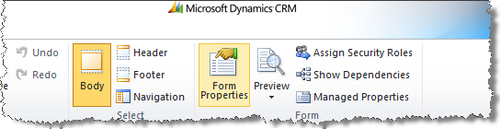
- Click on Form Properties on the ribbon to bring up the Form Properties window; please refer to the following screenshots:
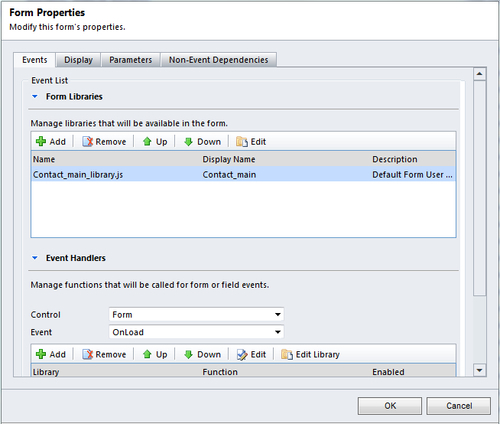
- Click the Add button on the grid menu in the Form Libraries section to add the Form Libraries that you are going to use with this form. Form Libraries are the files that are stored in Web Resources, and contain commonly-used JScript functions—for phone number formatting, validation, and so on—that we use across multiple forms.
- Select Form from the Control drop-down list.
- Select OnLoad from the Event drop-down list.
- Click on the Add button on the grid menu in the Event Handler section, and the Handler Properties window opens, as shown in the following screenshot:
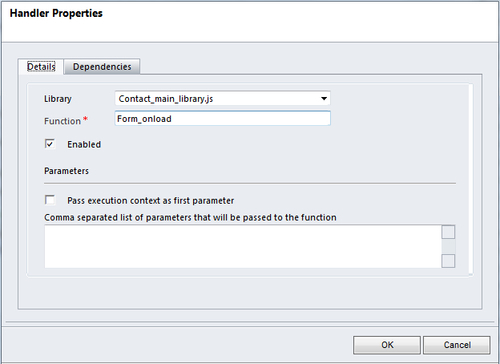
- Select the Library that contains the function that you want to apply to the OnLoad event.
- Enter the name of the function in the Function field.
Note
Note: If you want to pass the execution context and parameters to the function, then you can select the Pass execution context as first parameter option and then enter the parameters, separated by commas in the Parameters textbox, We often use the execution context to re-use JScript functions for different events.
- Click the OK button to close the Handler Properties window.
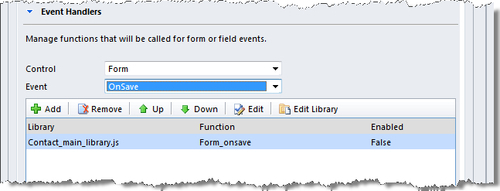
The OnSave event occurs when you press the Save button or the Save and Close buttons. To add an OnSave event follow the steps shown in the OnSave section, but in the Form Properties, select OnSave from the Event drop-down list, as shown in the following screenshot:
The OnChange event is available for every field on the form. The OnChange event requires two conditions to be true in order for the event to trigger:
- The data in the field must change.
- The field must lose focus.
OnChange actions are usually used to change the formatting of fields, such as telephone numbers, validating e-mail addresses, and performing calculations to change other fields based on changing values in one field.
To apply an OnChange event to a field, follow these steps:
- Double-click on the field on the form to open the Field Properties window.
- Click on the Events tab.
- Add the associated file(s) to the Form Libraries section.
- Select OnChange from the Event drop-down list, as shown in the next screenshot.
- Add the Event Handler that you would like to associate to the field.

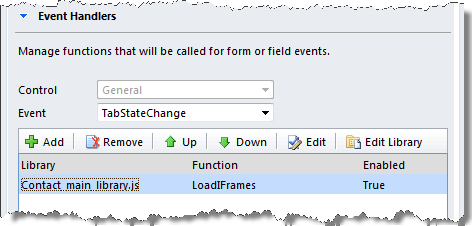
The
TabStateChange event occurs when a tab is expanded or collapsed. To apply an event to the tab, follow these steps:
- Double-click on the Tab on the form to open up the Tab Properties window.
- Click on the Events tab.
- Add the associated file(s) to the Form Libraries section.
- Select TabStateChange from the Event drop-down list, as shown in the next screenshot.
- Add the Event Handler that you would like to associate to the tab.
Tip
Tip: This event is important if you are using a script to modify the
srcproperty of an IFRAME control. An IFRAME will be refreshed when the tab is expanded. Any changes to thesrcproperty will be removed. If you interact with thesrcproperty of an IFRAME, you should always include this code in theTabStateChangeevent instead of theOnloadevent.
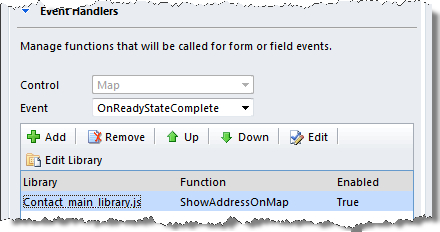
The
OnReadyStateComplete event is used to detect the content of an IFRAME when it has loaded, and you can access the content using your code. This event provides a location to include a script that will execute as soon as the content of the IFRAME has completed loading. To apply an event to an IFRAME, follow these steps:
- Double-click on the IFRAME on the form, to open the IFRAME Properties window.
- Click on the Events tab.
- Add the associated file(s) to the Form Libraries section.
- Select OnReadyStateComplete from the Event drop-down list, as shown in the following screenshot.
- Add the Event Handler that you would like to associate to the IFRAME.