
15. Site Management and Reporting
Site Settings
Although Expression Web 3 can certainly be used to create and edit single pages, it really shines when used to create and manage entire sites.
Several configuration settings in Expression Web 3 are designed to affect an entire site. These settings are available in the Site Settings dialog shown in Figure 15.1.
Figure 15.1 The Site Settings dialog contains all the settings that apply to an entire site.
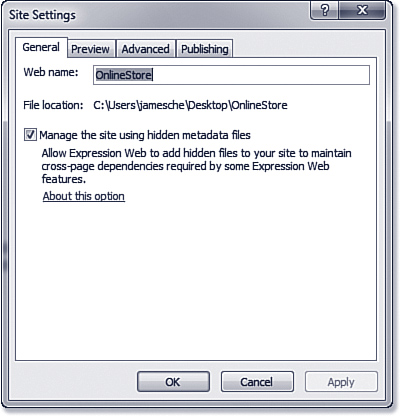
To access the Site Settings dialog, select Site, Site Settings. There are four tabs in the Site Settings dialog.
General Tab
The General tab displays general information about the site and allows you to change the name of the site and configure the use of metadata.
![]() For more information on metadata, see Chapter 2, “Creating, Opening, and Importing Sites.”
For more information on metadata, see Chapter 2, “Creating, Opening, and Importing Sites.”
When you change a site’s name in the General tab, the folder name changes as well. If the site is server-based, the URL for the site will change, too.
Preview Tab
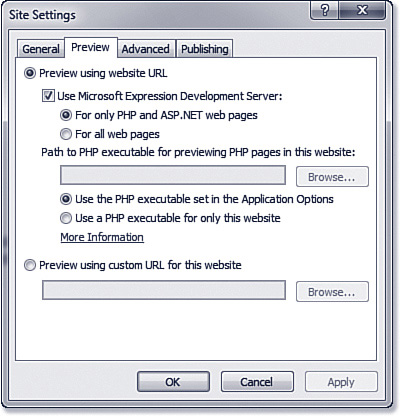
The Preview tab configures how pages should be previewed, as shown in Figure 15.2. You can choose to preview using a site’s path (including using the Microsoft Expression Development Server for ASP.NET or PHP pages) or a custom URL.
Figure 15.2 The Preview tab configures how a site is previewed in your browser.
![]() For more information on using and configuring the Microsoft Expression Development Server, see Chapter 33, “Using the Microsoft Expression Development Server.”
For more information on using and configuring the Microsoft Expression Development Server, see Chapter 33, “Using the Microsoft Expression Development Server.”
Note
![]()
If a remote site open in Expression Web 3 is using the FrontPage Server Extensions, you might experience a delay of several seconds before the Site Settings dialog appears. The FrontPage Server Extensions must read the site’s entire configuration before the dialog is displayed.
This delay is not experienced with sites that aren’t using the FrontPage Server Extensions.
If you are using the Microsoft Expression Development Server to serve PHP pages, you can also use the Preview tab to configure the version of PHP that should be used. You should make sure you are using the same version of PHP here that you will be using on the production server.
![]() For more information on using PHP with Expression Web 3, see Chapter 32, “Using PHP.”
For more information on using PHP with Expression Web 3, see Chapter 32, “Using PHP.”
Tip
![]()
If you are using PHP on a Windows server, use IIS 7 if possible because it provides much better PHP performance than other versions of IIS.
Using a custom URL is convenient when you need to use a different URL for previewing than the URL used to open the site in Expression Web 3. For example, if you are using a disk path in Expression Web 3 for a site located on a web server, you can enter an HTTP path for the custom URL that maps to the disk location used by Expression Web 3. When pages are previewed in Expression Web 3, they will be opened using the URL you specify.
Advanced Tab
The Advanced tab determines whether files and folders that begin with an underscore are displayed in Expression Web 3, configures the language settings for your site, and allows for the deletion of temporary files (shown in Figure 15.3).
Figure 15.3 The Advanced tab enables you to specify whether files and folders that begin with an underscore are visible, change language settings for your site, and clean up temporary files.
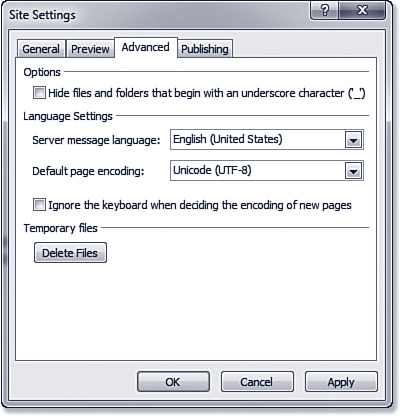
By default, files and folders that begin with an underscore are visible in the Folder List and other Expression Web 3 views. (This does not include metadata in _vti folders. They are never visible in Expression Web 3.) If you’d like to hide these files and folders (often done to prevent accidental changes to them), check the Hide Files and Folders that Begin with an Underscore Character (‘_’) check box and click OK. When you do, Expression Web 3 will ask whether you want to refresh the site. Click Yes, and files and folders that begin with an underscore will be hidden in Expression Web 3.
The setting in the Server Message Language drop-down applies only to FrontPage Server Extensions messages. If the site opened in Expression Web 3 is not a FrontPage Server Extensions–based site, the Server Message Language drop-down will contain only English as an option.
![]() If you make a change to page encoding and it’s not reflected in your pages, see the “Page Encoding Doesn’t Affect Pages” Troubleshooting note, p. 267.
If you make a change to page encoding and it’s not reflected in your pages, see the “Page Encoding Doesn’t Affect Pages” Troubleshooting note, p. 267.
The Default Page Encoding drop-down configures the character set specified in the content-type META tag added to pages. The browser uses page encoding to determine which character set to use. When the character set is incorrect, the page does not display correctly.
Expression Web 3 uses a default setting of utf-8 (Unicode), which supports all languages and is the correct encoding for XHTML documents.
![]() For more information on XHTML, see Chapter 12, “Maintaining Compatibility and Accessibility.”
For more information on XHTML, see Chapter 12, “Maintaining Compatibility and Accessibility.”
The Delete Files button will delete temporary files that are created for Expression Web 3 to keep track of your site. Although these files don’t take up much room on your hard drive, they can become corrupted and cause strange behavior. Deleting them periodically is a good idea for this reason.
Tip
![]()
One of the symptoms of corrupt temporary files is a site that won’t open. Many times, this kind of problem results in constant disk activity until the Windows swap file fills up and you run out of disk space.
If you run into a problem like this and can’t open a site to delete temporary files, you can manually delete the files. They are located in C:Users<user>AppDataRoamingMicrosoftWeb Server ExtensionsCache on Windows Vista, Windows 7, and Windows Server 2008 and in Documents and Settings<user>Application DataMicrosoftWeb Server ExtensionsCache on Windows XP and Windows Server 2003. Make sure Expression Web 3 is closed; then delete all files with a .web file extension.
Publishing Tab
The Publishing tab configures the destinations for publishing and settings used when publishing your site (see Figure 15.4).
Figure 15.4 The Publishing tab configures all the settings used when you publish a site in Expression Web 3.
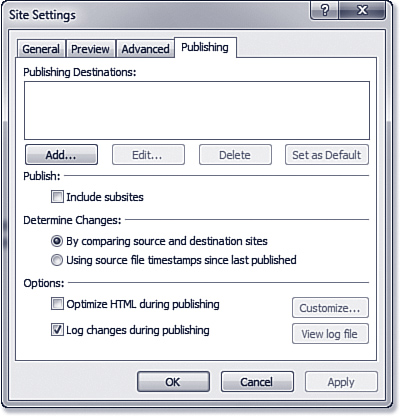
The Publishing Destinations section enables you to configure publishing connections that are available in Publishing view. You can add, edit, delete, and set the default publishing destination here.
![]() For more information on publishing connections in Expression Web 3, see Chapter 14, “Publishing a Site.”
For more information on publishing connections in Expression Web 3, see Chapter 14, “Publishing a Site.”
By default, Expression Web 3 does not publish subsites. If you would like to publish subsites along with your site, check the Include Subsites check box.
Two settings are available for configuring how Expression Web 3 determines files to publish:
• By Comparing Source and Destination Sites—Expression Web 3 stores information on the files and folders in your site. When this option is selected, Expression Web 3 uses this information to determine which files should be published.
• Using Source File Timestamps Since Last Published—If you’d prefer Expression Web 3 to compare the timestamps on the source files when deciding what to publish, select this option.
Expression Web 3 can also optimize your code when publishing; enable this by checking the Optimize HTML During Publishing check box. To customize how Expression Web 3 optimizes HTML, click the Customize button.
![]() For more information on customizing HTML optimization settings, see Chapter 14, “Publishing a Site.”
For more information on customizing HTML optimization settings, see Chapter 14, “Publishing a Site.”
Finally, you can choose to have changes that are made during publishing logged to a log file by checking the Log Changes During Publishing check box. You can then view the log file by clicking the View Log File button.
Site Reports
One of Expression Web 3’s greatest strengths is in the area of site management. The large array of reports available makes managing a site easier by providing indicators of problems and giving details on other aspects of your site.
The Site Summary view provides a link to some of the reports in Expression Web 3 and also summarizes information about the site. To view the Site Summary (shown in Figure 15.5), select View, Site, Site Summary.
Figure 15.5 The Site Summary provides a summary of a site and links to run more detailed reports.
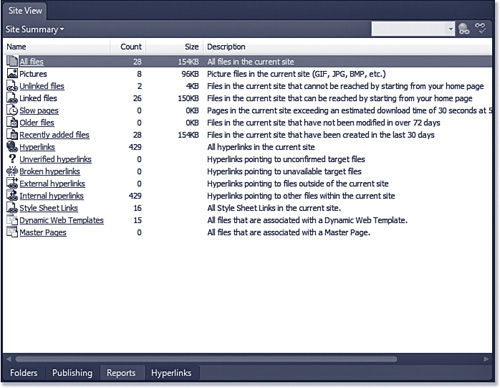
To access all the reports in Expression Web 3, select View, Site and select the desired report. The following reports are available in Expression Web 3:
• All Files—Displays all files in the site in a single view. This report also shows the title, location, and other properties of each file.
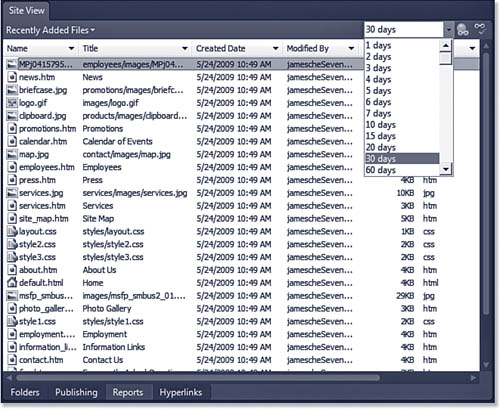
• Recently Added Files—Displays all files recently added to the site. As shown in Figure 15.6, you can select a specific number of days to display files added within that number of days.
Figure 15.6 The Recently Added Files report is configurable using the Report Settings drop-down.
• Recently Changed Files—Displays all files that have recently changed. Just as with the Recently Added Files report, you can select a specific number of days to display files that have changed within that number of days.
• Older Files—Displays all files older than 72 days by default. You can adjust the number of days using the Report Setting drop-down.
• Dynamic Web Templates—Shows all Dynamic Web Templates and their file connections.
![]() For more information on Dynamic Web Templates, see Chapter 19, “Using Dynamic Web Templates.”
For more information on Dynamic Web Templates, see Chapter 19, “Using Dynamic Web Templates.”
• Master Pages—Displays all files and any master pages used by each file.
![]() For more information on Master Pages, see Chapter 27, “Using ASP.NET Master Pages and User Controls.”
For more information on Master Pages, see Chapter 27, “Using ASP.NET Master Pages and User Controls.”
• Style Sheet Links—Displays all pages and any style sheets linked to them.
![]() For more information on using style sheet links, see Chapter 18, “Managing CSS Styles.”
For more information on using style sheet links, see Chapter 18, “Managing CSS Styles.”
Caution
![]()
Expression Web 3 can get confused with links in scripts and style sheets. Always investigate any files that show up in the Unlinked Files report to ensure that Expression Web 3 isn’t showing incorrect data.
• Unlinked Files—Shows all files that are not linked to by links that can be followed from the home page.
• Slow Pages—Displays all pages that will take longer than 30 seconds to load by default. The time threshold can be adjusted using the Report Setting drop-down.
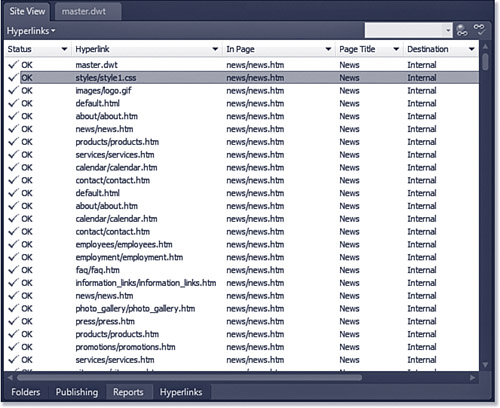
• Hyperlinks—Displays the Verify Hyperlink, as shown in Figure 15.7.
Figure 15.7 Hyperlinks can be verified or edited using the Hyperlinks report.
Using these comprehensive reports, you can maintain tight control over the files in your site.
Configuring Reports
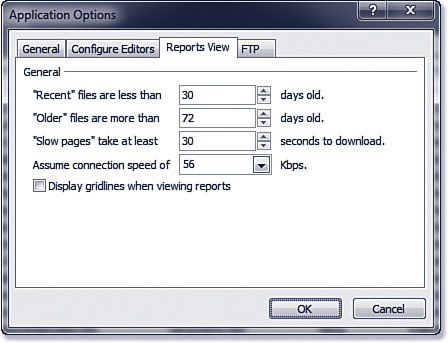
The reports in Expression Web 3 are generated using some preset defaults. For example, the download speed of a page assumes a 56k connection by default, and the Recent Files report lists files that are fewer than 30 days old by default. You can configure these defaults by selecting Tools, Application Options to access the Application Options dialog shown in Figure 15.8.
Figure 15.8 The Application Options dialog contains options for configuring the default presets for Expression Web 3 reports.
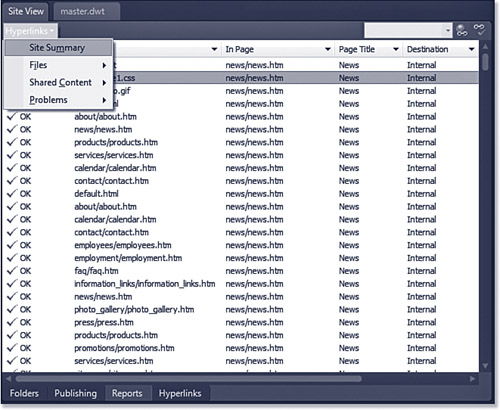
After viewing a specific report, you can return to the Site Summary view by clicking the name of the current report in the upper-left corner of the main window and selecting Site Summary, as shown in Figure 15.9.
Figure 15.9 The drop-down button in the upper-left of the main screen provides quick access to any report.
Saving Reports
To share an Expression Web 3 report with another designer, you can easily save any report as an HTML file. Simply display the report and then select File, Save to save it as an HTML file.
Expression Web 3 defaults to saving the report in the current site, but you can specify any location.
Page Encoding Doesn’t Affect Pages
![]()
If you have set the page encoding to something other than the default, but it doesn’t seem to affect the content-type META tag in your pages, note that the page encoding setting only affects new pages that are created in Expression Web 3. It will not affect existing pages.
Lagniappe (lan yap’) n., a gift or bonus
Better Site Reporting
Expression Web 3’s reporting features are great for giving you a broad overview of your site. However, if you want verbose data on your site, you should use a different method.
Your web host most likely provides logging features that you can take advantage of. Some hosting companies charge an extra sum for access to logging information via a web interface, but many offer access to log information at no charge.
If you want a great method of tracking site traffic that’s free, Google offers a service called Google Analytics. By placing a small bit of hidden code on your site, you can enable Google to keep detailed tracking information of your site, how people are finding you, and how many visitors you’re seeing, in addition to much more valuable information.
Google Analytics is available free from www.google.com/analytics.