
Chapter 13
Getting to Know the Teams Admin Center
IN THIS CHAPTER
![]() Finding the Teams Admin Center
Finding the Teams Admin Center
![]() Adding users to Microsoft 365 and Teams
Adding users to Microsoft 365 and Teams
![]() Discovering the tasks to perform as a Teams administrator
Discovering the tasks to perform as a Teams administrator
The Microsoft Teams Admin Center is where all the behind-the-scenes action happens. It is where you make decisions about what apps are available to the rest of the Teams users, configure settings for external access and guest access, add new teams and configure existing teams, configure meetings and voice settings, and set policies for individual users, among a whole host of other actions. Large organizations generally have dedicated IT departments that handle the configuration; however, if your organization doesn’t have a specialized IT department, you just might find yourself working in the Teams Admin Center regardless of your job title. Fortunately, Microsoft seems to have recognized that most Teams administrators are not dedicated IT personnel by making its Admin Centers straightforward and easy to use. The Teams Admin Center is no different.
In this chapter, you discover where to find the Teams Admin Center and how to log in. Next, you take a quick peek around the Admin Center to become familiar with the layout and the settings you can control. You then learn how to add new users to Teams. In the next chapter, you dive into the nitty-gritty details of using the Admin Center to configure Teams to your liking.
Finding and Signing In to the Teams Admin Center
In Chapter 1, you find out how to sign up for a Microsoft 365 subscription. Microsoft provides an administrative website, or Admin Center, for each of the services included in Microsoft 365. For example, Teams has its own Admin Center, as do Exchange and SharePoint.
To find the Teams Admin Center via the Microsoft 365 administrative site, follow these steps:
- Open your web browser and navigate to
www.office.com. Sign in with your Microsoft 365 credentials.
These are the same credentials you created in Chapter 1 when you signed up for Microsoft 365.
Select the Admin app from the app launcher, as shown in Figure 13-1.
The primary Microsoft 365 administration site opens. The Microsoft 365 administrative site, also known as the Microsoft 365 Admin Center, is where you manage your overall Teams subscription including adding users and assigning licenses for all the available services.
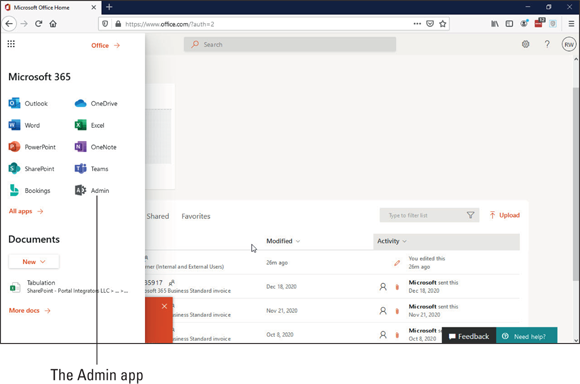
FIGURE 13-1: Opening the Microsoft 365 Admin Center from the app launcher.
 If you don’t have administrative privileges for your organization, you won’t see the Admin option listed in the app launcher.
To open the Teams Admin Center, click Teams in the left navigation pane, as shown in Figure 13-2.
When you click the Teams link, a new tab opens in your web browser and the Teams Admin Center loads, as shown in Figure 13-3. The default page that is loaded is the Dashboard, which provides a view into your Teams setup for your organization.
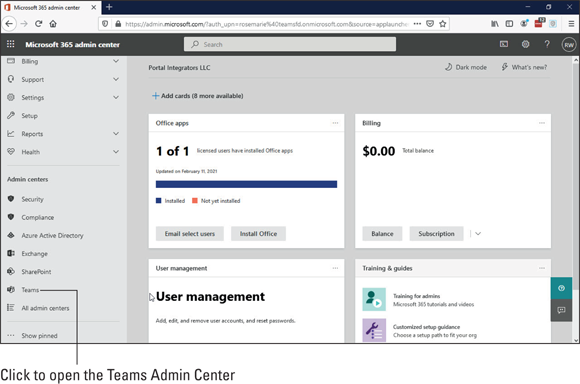
FIGURE 13-2: Opening the Teams Admin Center from the Microsoft 365 Admin Center.
 As a shortcut, you can also enter the address for the Teams Admin Center directly into your web browser to access the Dashboard:
Open your web browser and enter
https://admin.teams.microsoft.comin the address field.If you are already logged in to Microsoft 365, the Teams Admin Center Dashboard loads immediately.
If you are not already logged in, enter your Microsoft 365 credentials to log in and be taken to the Teams Admin Center Dashboard.
Microsoft has made progress in keeping track of authentication. If you have logged in to one Microsoft property, such as
https://www.office.com, and then go to another one, such ashttps://admin.teams.microsoft.com, you will automatically be logged in to the site.
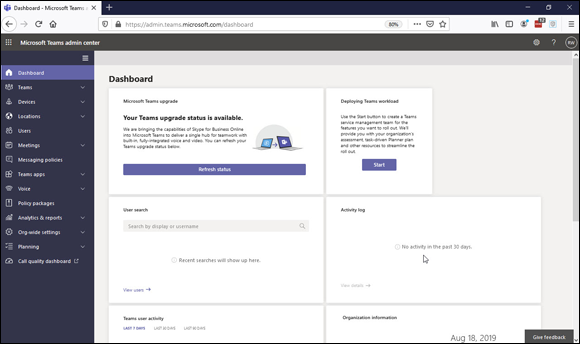
FIGURE 13-3: The Teams Admin Center.
Getting Familiar with the Teams Admin Center
Microsoft Admin Centers generally follow the same layout: Settings options appear in the navigation pane along the left side of the page, and the details of the currently selected option appear in the center. As I mention in the previous section, the Teams Dashboard screen opens by default when you first access the Teams Admin Center, and you can always return to the Dashboard from wherever you are in the Admin Center by selecting it from the left navigation pane. Following is a high-level overview of each of the options available in the Teams Admin Center.
Underneath the Dashboard option, the Teams Admin Center includes the following settings options:
- Teams: Use these settings to manage teams and team policies. You can add new teams and configure existing teams. (Chapter 3 covers the process of creating a new team.) You can also set up policies that define which features and settings a team can use. The management page for the teams in your organization is shown in Figure 13-4.
- Devices: These settings are used to set up and manage the devices on your network. You can set up configuration files that are used for devices you have approved for your organization.

FIGURE 13-4: The management page for all the teams in your Teams service.
- Locations: Use these settings to set up physical geographic locations of your Teams members. You can set labels so that you can report on specific offices and set up 911 locations that are used by emergency services. These locations can be used for things like users and also for offices and buildings.
- Users: In this section you can view information about Teams users and configure and set policies for individual users. The list of Teams users is shown in Figure 13-5, and setting a policy for an individual user is shown in Figure 13-6. Adding new users to Microsoft 365 and Teams is discussed later in this chapter.
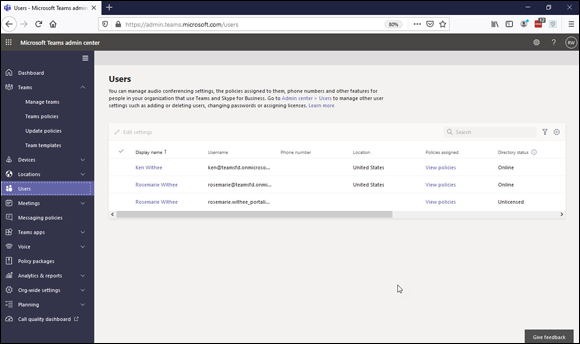
FIGURE 13-5: The management page for all the users in your Teams service.
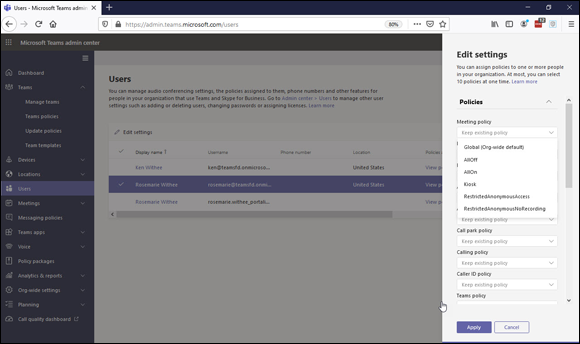
FIGURE 13-6: Setting a policy for a user.
- Meetings: These settings are used to configure meetings in Teams. Here you can set up and configure conference bridges, meeting policies, meeting settings, live event policies, and live event settings. Figure 13-7 shows the settings page for meetings.
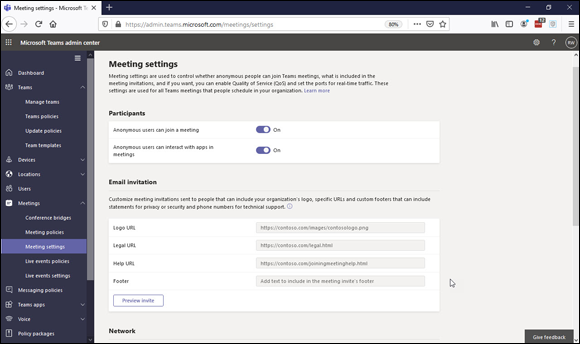
FIGURE 13-7: The settings page for meetings.
- Messaging policies: Here you can set which features are available in chat and channels. A default org-wide policy is set by default, and you can add others.
- Teams apps: These settings are used to set up policies and permissions for how Teams users can use apps. For example, Teams includes a default policy for people that have first contact with customers such as cashiers behind the checkout counter (often known as firstline workers). The Firstline Worker policy ensures that the Shifts app, which is used for tracking time for shift work, is pinned and available to everyone that has the policy assigned. The Firstline Worker app policy is shown in Figure 13-8.

FIGURE 13-8: An app policy for firstline workers.
- Voice: Voice call settings are configured with these settings. Chapter 12 covers the process of adding phone numbers and setting up auto attendants and call queues.
- Policy packages: With these settings you can package up a group of predefined policies and apply them to groups of users. For example, for educational use, there are predefined policy packages for teachers and another policy package for students.
- Analytics & reports: Here you can view and download reports about Teams usage. There are reports about user activity and usage. You will find usage reports for the Teams app, devices, live events, voice and text messages, and blocked users. I find these reports incredibly valuable for planning network capacity and understanding how an organization is adopting Teams. A user activity report is shown in Figure 13-9.
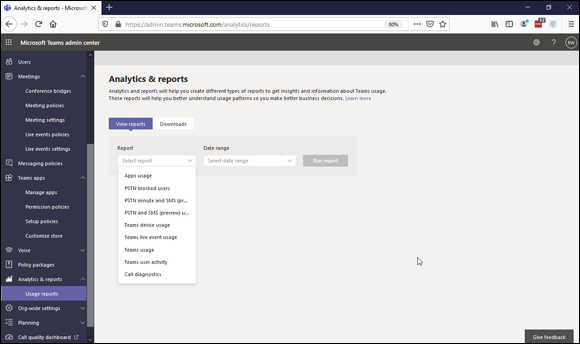
FIGURE 13-9: A user activity report.
- Org-wide settings: These settings affect your entire organization. You can configure settings for external access and guest access as well as general Teams settings. You can also configure holidays and set up resource accounts that are used for voice features like auto attendants. (See Chapter 12 for more information about auto attendants.)
- Planning: Here is where you find tools to help with planning your Teams deployment. You will find a Teams advisor tool and a network planning tool. I expect Microsoft to continue adding tools to this section to help larger organizations with deployment and adoption.
Refer to Chapter 14 for specific information on working with each of these settings in the Teams Admin Center.
Adding New Users to Microsoft 365 and Teams
To add new users to Teams, you must first add them to Microsoft 365 and assign them a license that includes the Microsoft Teams service.
You can add guest users to your teams for free; however, guests have limited functionality. To learn more about the limitations of guest users, see Chapter 7.
To add new users to Microsoft 365 and assign them a Teams license, follow these steps:
- Log in to the Microsoft 365 Admin Center by navigating to
www.office.comand signing in with your Microsoft 365 credentials. - Select the Admin app from the app launcher to open the Microsoft 365 Admin Center.
In the left navigation pane, select Licenses from the Billing option and confirm that you have licenses available that include Teams, as shown in Figure 13-10.
To determine which Microsoft product licenses include the Teams service, use your favorite search engine and search for “Microsoft 365 licensing for Microsoft Teams” to access an article on the Microsoft documentation site that includes a nice table that lists the licenses that include Teams.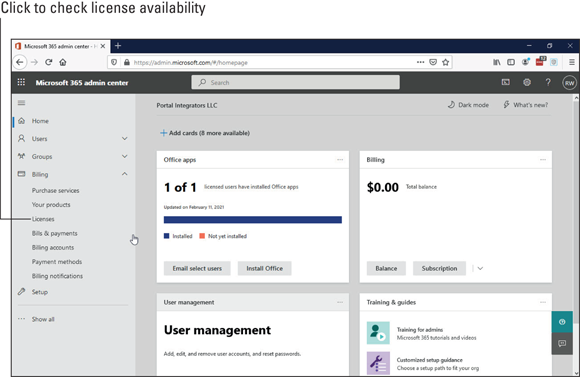
FIGURE 13-10: Checking license availability in the Microsoft 365 Admin Center.
- In the left navigation pane, select Active Users from the Users option and then select Add a User.
Follow the wizard to create a new user, as shown in Figure 13-11.
When you get to the screen to assign a license to the user, make sure you select a license that includes Teams. If you want to also assign the user a phone number, you should assign a calling plan to the account too. Refer to Chapter 12 for more information about phone numbers.
Once the user has been created, he or she can sign in to any of the Microsoft 365 services for which the license is valid.
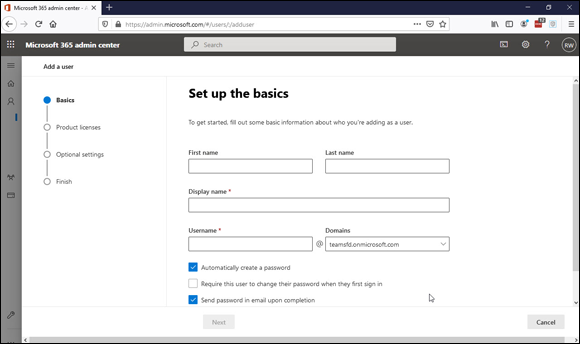
FIGURE 13-11: Creating a new user.
I have noticed that it can take some time from when you add a user until that user shows up in the list of options when adding a person to a channel or chat in Teams, sometimes as long as 24 hours.
The Microsoft 365 Admin Center is where you manage users for all your Microsoft services. If you handle any type of administrator duties for your organization, you will likely spend a good deal of time in the Admin Center. For smaller organizations, it is often the person who happened to purchase Microsoft 365 who becomes the administrator. Microsoft has designed the Admin Centers to be user-friendly, and for the most part, you won’t have any trouble figuring out what you need to get done.
Managing Teams Users
Once you have added a user to Microsoft 365, you will find Teams-specific settings for that user in the Teams Admin Center, as shown earlier in Figure 13-5. You can open the settings for a user by selecting his or her name in the list and then selecting the Edit Settings option, or you can click the user’s name in the list. Once you select a user, you can configure that user’s Teams settings. The settings for each user include account information, voice, call history, and policies. A user’s account settings are shown in Figure 13-12.
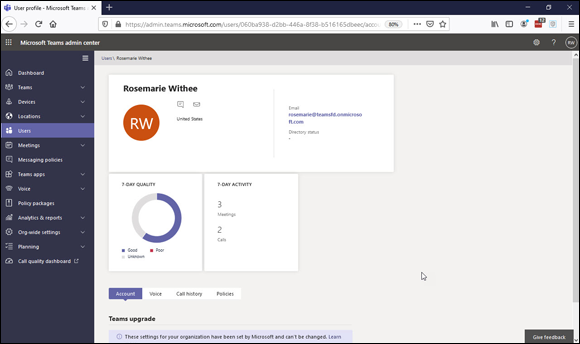
FIGURE 13-12: The account settings for a user in Teams.
In addition, at the top of the user settings page is a dashboard that shows the user’s phone number, address, and email address. You will also find information about the call quality a user has been experiencing in Teams and that user’s activity.
You will find Teams-specific settings in the Teams Admin Center and general settings about the user in the Microsoft 365 Admin Center.
The Account tab includes information about a user’s coexistence. Coexistence refers to moving users from Skype for Business to Teams. If you are new to Teams, you don’t need to worry about this. If you are a veteran of Office 365 (now Microsoft 365) and have people using Skype for Business, then you can use this setting to transition your organization to Teams in an orderly fashion.
The Voice tab is where you configure a user’s call-related settings. You can configure where people can dial out of your organization and set up group calls, call delays, and call delegation. Restricting a user to only being able to dial out to the same country is shown in Figure 13-13.
You can view the call history of a person on the Call History tab. The call history includes some very valuable information such as when the call was made, the people who were called, the duration of the call, the type of call, and how the call was made (see Figure 13-14).
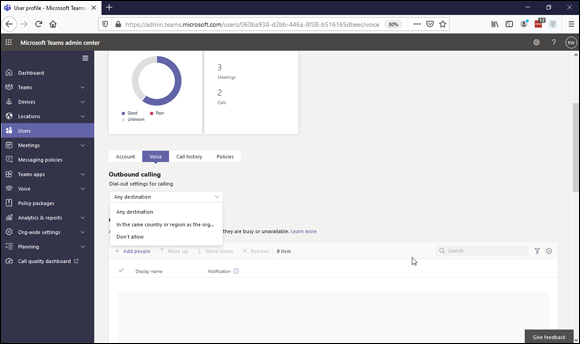
FIGURE 13-13: The voice settings for configuring how someone uses call features.
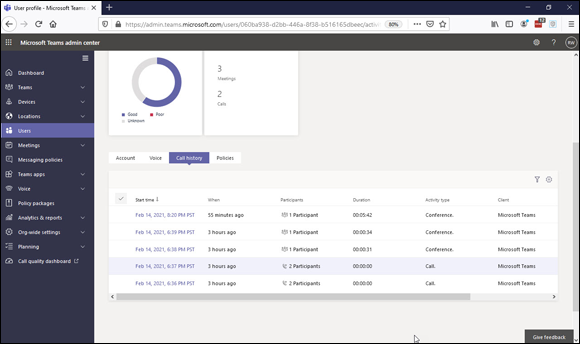
FIGURE 13-14: Viewing a user’s call history information.
Finally, the Policies tab is where you configure policies for the user. There are many types of policies in Teams. There are policies for the navigation that appears on the left side of a user’s Teams client, policies for how messaging and channels work, policies apps, and policies for calling, just to name a few. I cover setting up a policy for apps in Chapter 14.