Chapter 2
Navigating Microsoft Teams
IN THIS CHAPTER
![]() Understanding options for using Teams
Understanding options for using Teams
![]() Installing the Teams app
Installing the Teams app
![]() Becoming familiar with the Teams interface
Becoming familiar with the Teams interface
![]() Learning how Teams can be used across devices
Learning how Teams can be used across devices
Opening Microsoft Teams for the first time can feel overwhelming. The reason for this is that Microsoft has added a jaw-dropping number of features to Teams over the last couple of years, bringing Teams to feature parity with Skype and Skype for Business. All this useful stuff is nice when you need it but can be overwhelming when you first start to use it.
In this chapter, you discover how to navigate the Teams app. You download, install, and open the app on your computer and then get a feel for the layout and how to navigate through the interface. You also look at how Teams can be used across multiple devices.
Downloading, Installing, and Opening Teams
You can use Teams in three primary ways: You can use the web-based app, you can install the client on your laptop or desktop computer, or you can install the Teams mobile app on your smartphone or tablet. Regardless of how you use Teams, the concepts remain the same. Let’s first log in to the web-based app and then install the client on your desktop. (I walk you through signing up for the free version of Teams in Chapter 1, and I cover installing Teams on your mobile device in Chapter 6.)
To log in to the web-based version of Teams, follow these steps:
- Open your favorite web browser and navigate to
https://teams.microsoft.com. Log in using the account credentials you created when you signed up for the Microsoft 365 trial in Chapter 1.
Refer to “Getting Started with the Teams App” in Chapter 1 if you need to sign up for the Microsoft 365 trial and a Teams account.
When presented with the option to download Teams or use the web app, click the Use the Web App Instead link.
After logging in, you are presented with the main Teams app running inside your web browser, as shown in Figure 2-1.
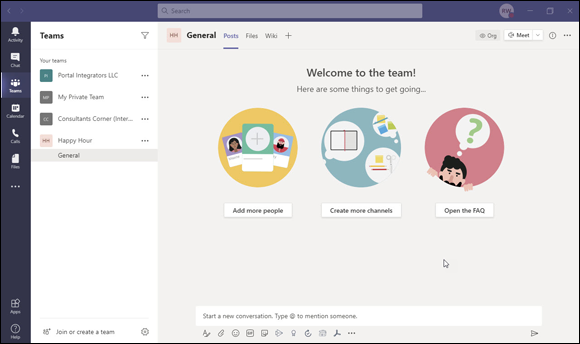
FIGURE 2-1: Microsoft Teams running in a web browser.
To install the Teams client on your Windows laptop or desktop computer, follow these steps:
Open your web browser and navigate to
https://teams.microsoft.com.If you have not yet logged in to the web app from the previous set of steps, you will be asked to log in. If you have already logged in, you will see the Teams web app displayed in your browser (shown in Figure 2-1).
Log in to the Teams site by entering the credentials you set up in Chapter 1, if you aren’t already logged in.
 When you first log in to the Teams site (
https://teams.microsoft.com), you are presented with an option of installing the Teams client or continuing to the web app. In the previous set of steps, we continued to the web app. Here, we will install the desktop client.- Click your profile icon that appears in the top-right corner and choose Download the Desktop App as shown in Figure 2-2.
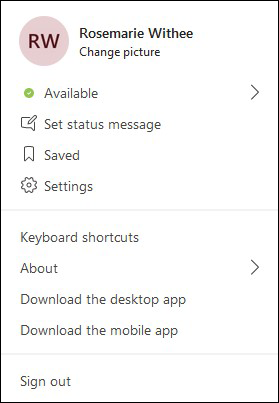
FIGURE 2-2: Your profile drop-down menu has options to install the desktop and mobile apps.
Save the file to your computer.
 You can set the location on your computer’s hard drive where your web browser downloads files. By default, files are usually set to download to a Downloads folder, which is where all downloads are stored. If you can’t find the file you downloaded, check the configuration for your web browser to see where it places files it has downloaded.
Once the Teams setup file has downloaded, open and run the file (see Figure 2-3).
After a few moments, a dialog box appears asking you to sign in, as shown in Figure 2-4.
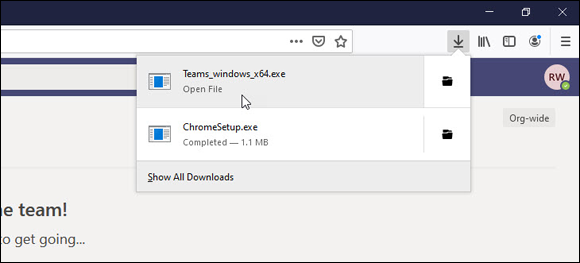
FIGURE 2-3: Open and run the Teams setup file.
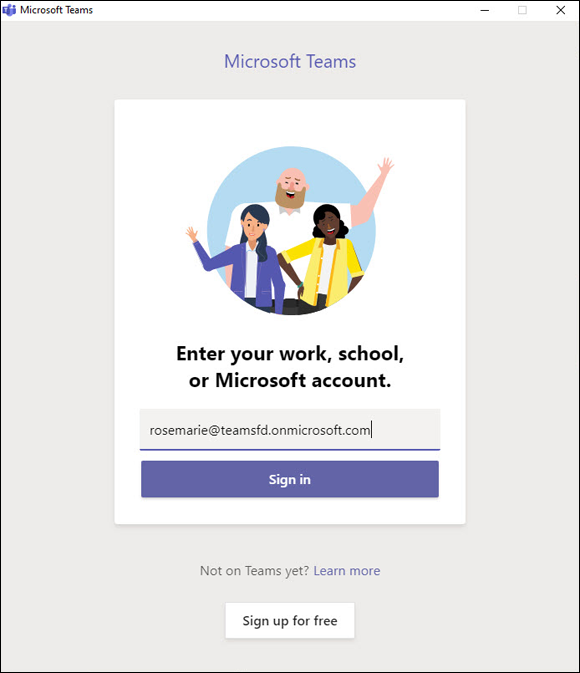
FIGURE 2-4: A sign-in dialog box appears when Teams first installs.
Enter your username and click Sign In.
If you have already signed in to Teams using your web browser, you won’t be asked for your password again.
The Teams client loads and lets you know that there is one last step to get Teams set up and connected to Office, as shown in Figure 2-5.

FIGURE 2-5: A dialog box lets you know Teams will now be connected to Office.
Click Let’s Do It to continue and then click Yes to allow Teams to make changes to your computer.
Teams works in the background to connect with Office on your computer and then loads the Teams application, as shown in Figure 2-6.
Congratulations! You now have Teams running on your local computer.
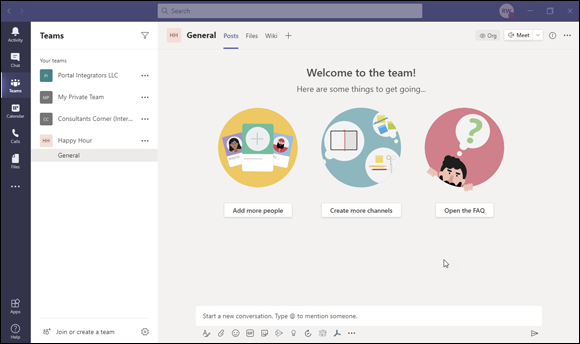
FIGURE 2-6: The Teams client running on your local computer.
Taking a Quick Spin Around Teams
If you have been following along in this chapter, you may notice that Teams running in the client on your computer (Figure 2-6) looks a lot like Teams running from within your web browser (Figure 2-1). Microsoft did this on purpose. The design thinking is best practice, and I was glad to see Microsoft adopt it. This way, if you usually use Teams on your desktop computer at work and find yourself logging in to Teams using a web browser on your computer at home, you don’t have to worry about learning a different interface.
Primary navigation appears on the left side of the screen and includes the following icons: Activity, Chat, Teams, Calendar, Calls, and Files, as shown earlier in Figure 2-6. Clicking one of these main options opens that associated screen in the main part of the app.
Activity
If you click the Activity icon in the navigation pane, you will see your feed as shown in Figure 2-7. In the Activity feed you will find your notifications about things going on around Teams that you might find interesting. For example, if there is an unread message in a channel or someone sends you a chat message, you will see it appear in your Activity feed. Think of it as your one-stop-shop for everything that has happened in Teams since you were last there.
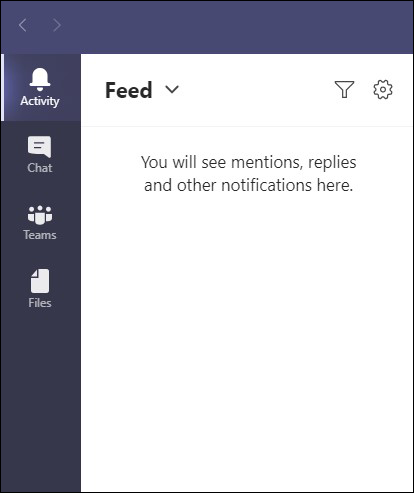
FIGURE 2-7: The Activity feed in Teams.
One thing you will find is that Teams can get very noisy very quickly. Just a handful of people chatting and carrying on is enough to tempt you to ignore it entirely. Using the Activity feed, you can tune-in to only the things that are important to you. I cover the Activity feed in more detail in Chapter 8.
Chat
The Chat area is where you will find all of your personal and group chats. There is a subtle difference between conversations in chats and conversations in channels. I like to think of chats as ad hoc messages to one other person or a few other people. Chats come and go and are spontaneous, whereas a channel is a dedicated area that persists and where people can communicate about a particular topic.
Teams
The navigational area where I seem to spend all my time, and likely you will too, is the Teams area. Yes, the product is called Teams and the navigation component is also called Teams (see the left side of Figure 2-6). And within the Teams navigation component you have individual teams called a team. Confused yet? I don’t blame you! But don’t worry; it will become clear shortly.
Clicking the Teams icon in the left navigation pane opens all the Teams you are a member of. In Figure 2-6 you can see that I am only a member of one team: Portal Integrators LLC. This is the team that showed up by default when I created the Microsoft 365 subscription in Chapter 1. Within the Portal Integrators team is a channel called General, which is the default channel that is created automatically when a new Team is created. If I click the General channel, I can see all of the chats going on in the channel. Right now, it is empty because I am the only person in the team and in the channel. (I cover working with teams in Chapter 3 and working with channels in Chapter 4.)
Calendar
The Calendar area is focused on your calendar of events and meetings, as shown in Figure 2-8. If you have ever scheduled a meeting in Microsoft Outlook, then you will be familiar with working with your calendar in Teams. The calendar area is where you can have real-time meetings, and I cover how to do this in Chapters 9 and 10.
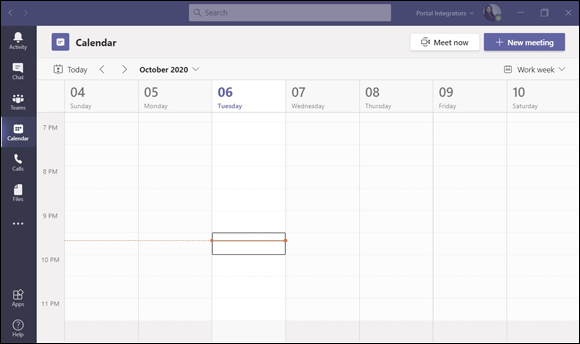
FIGURE 2-8: The Calendar in Teams.
Calls
The Calls area is where you can make and receive phone calls, as shown in Figure 2-9. If you have ever used Skype, then this area will feel familiar to you. I cover the calling and voice functionality of Teams in Chapters 11 and 12.
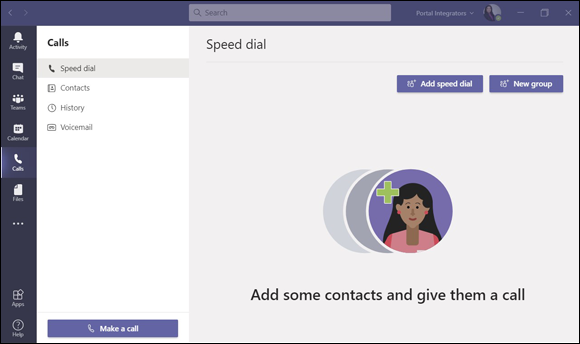
FIGURE 2-9: The Calls area of Teams.
Files
The Files area is where you can save and share digital files. If you have ever used SharePoint or OneDrive, then you will be happy to learn that you are already ahead of the game. Teams uses SharePoint and OneDrive behind the scenes of Teams, and at any point you can jump out of Teams and open the same files in the SharePoint or OneDrive applications.
In addition to SharePoint and OneDrive, you can also set up other cloud-based locations for your files and access them all from within Teams. Currently Teams supports Box, Dropbox, Egnyte, Google Drive, and ShareFile, and I am sure others will follow in the coming days.
Using Teams Across Many Devices and Platforms
One of the things I really enjoy about using Teams is that it doesn’t matter what device I am using; I can instantly pick up where I left off. For example, this morning I was on my desktop in my home office working on this chapter inside of Teams on my Windows desktop computer (Microsoft Word files open right within Teams) and chatting with some of my clients.
I had a meeting in Teams and then walked down the street to my favorite coffee shop to pick up some coffee and a muffin. One of the clients I was chatting with in Teams had a question and sent me a follow-up message. The message appeared in Teams on my smartphone, and I responded while I was waiting for my coffee.
Now, it is evening, and I am working on this chapter and writing this paragraph using the Teams web app running on my Apple MacBook Air. Tomorrow, I will be back in my home office and taking some screenshots and putting some polish on this chapter before calling it ready for review by my editors.
I did all this using Teams across many different devices and places, and since Teams is synced through the cloud (the Internet), I didn’t lose my train of thought and work that was in progress. Teams on all my devices are always in sync. It is one of the things I love the most about working with an app born in the cloud like Teams. Figure 2-10 illustrates the various ways I can use Teams throughout the day. I cover using devices with Teams in Chapter 6.
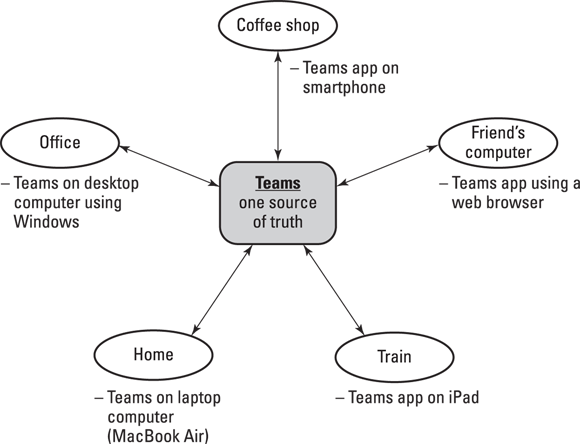
FIGURE 2-10: Using Teams on multiple devices throughout the day.
Using Teams to Organize Your Life
Toggling between several apps for work and home can sometimes be confusing. I use Teams for work and use Viber and WhatsApp to message family and friends. Both work for messaging and sending photos and videos, but not for sharing files, to-do lists, and so on. So, I find myself toggling between the messaging apps and my email. Teams recently released a new feature to keep things more organized when making plans with friends and family. The best part is, it’s the same app you are already using for work. I discuss how to do this in Chapter 6.

 Teams is available around the world and localized in 53 different languages. People all over the world have jumped into the Teams ecosystem, especially since 2020, when the coronavirus pandemic forced many to work from and stay at home.
 The Calendar is integrated with Microsoft Outlook. If you don’t have Outlook installed on your desktop computer or laptop, then you won’t see the Calendar in Teams. This type of integration empowers my view that Teams has quickly become the “face” of all of the Office products and services, which also explains why it has seen such explosive growth.