
3. It’s All Yours! Customizing Your iPad
There are many ways to change how your iPad looks to make it more your own. From how you arrange your apps to the pictures you use for your wallpaper to the sounds your iPad makes, you have lots of options for customization. In this chapter, you learn about:
• Changing the wallpaper and lock screen
• Arranging apps and making folders
• Customizing your iPad’s sounds
• Getting new tones
If you have your own room, what’s one of the first things you did when you got it? You decided where your bed and dresser would go, where you’d store your toys or dolls or books, and what you’d put on the walls. Your choices make you feel at home in your room. You made it yours. By customizing its look and sounds, you can do the same thing for your iPad.
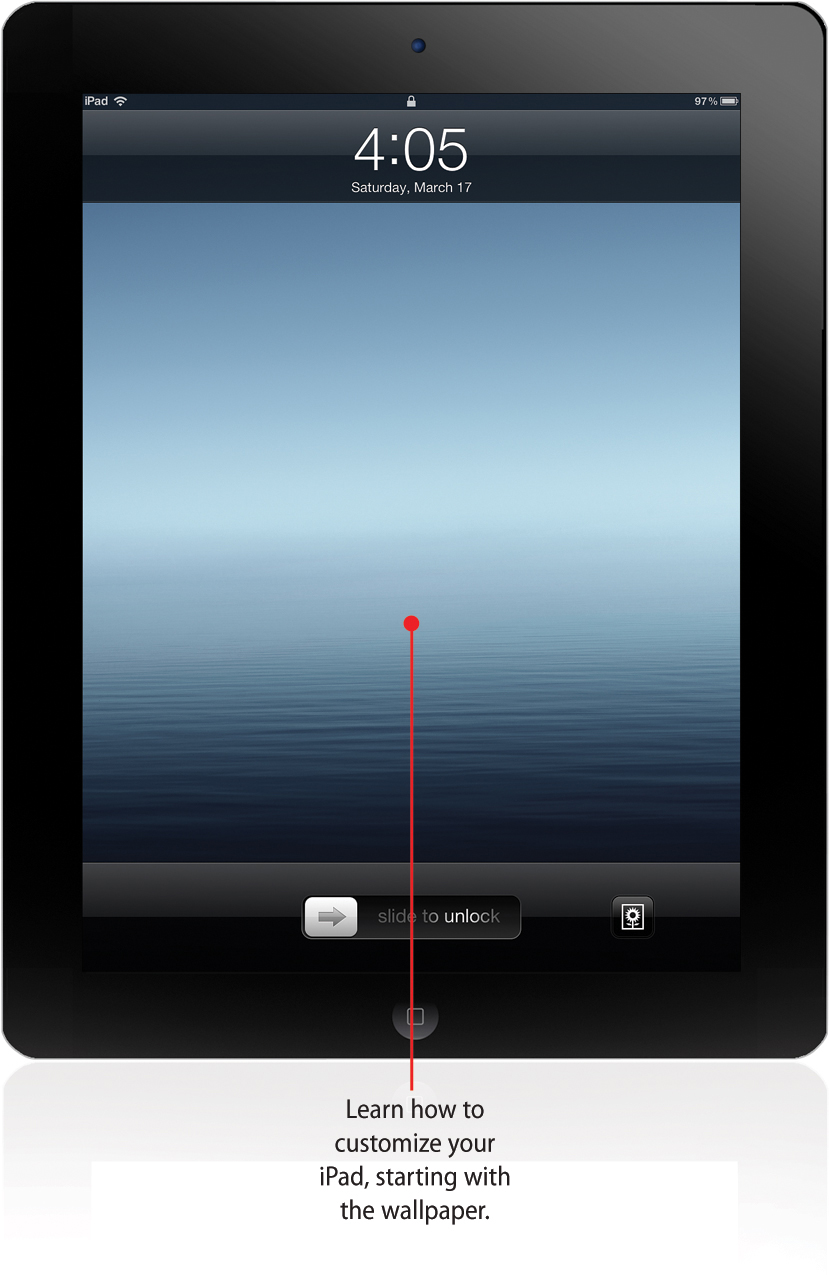
Changing the Wallpaper and Lock Screen
Just like on a desktop or laptop computer, you use a picture as the background on your iPad’s screen. Think of that background as being like the paint or wallpaper in your room. Everything else—pictures, posters, shelves—sits in front of it. On your iPad, the background picture is the wallpaper and your apps are like posters floating on top of it. When you press the power button to wake your iPad up, you’ll see the same picture used as your background. Even though they’re the same picture, they’re not actually the same thing. The image in the background is the wallpaper. The image shown when the iPad wakes up is the lock screen. They’re often the same picture, but they don’t have to be. You can choose different pictures for each one.
Setting Your Wallpaper and Lock Screen
Your iPad comes preloaded with pictures for you to choose from for your wallpaper and lock screen. To change the wallpaper, lock screen, or both, start on the home screen by tapping Settings and then follow these steps:
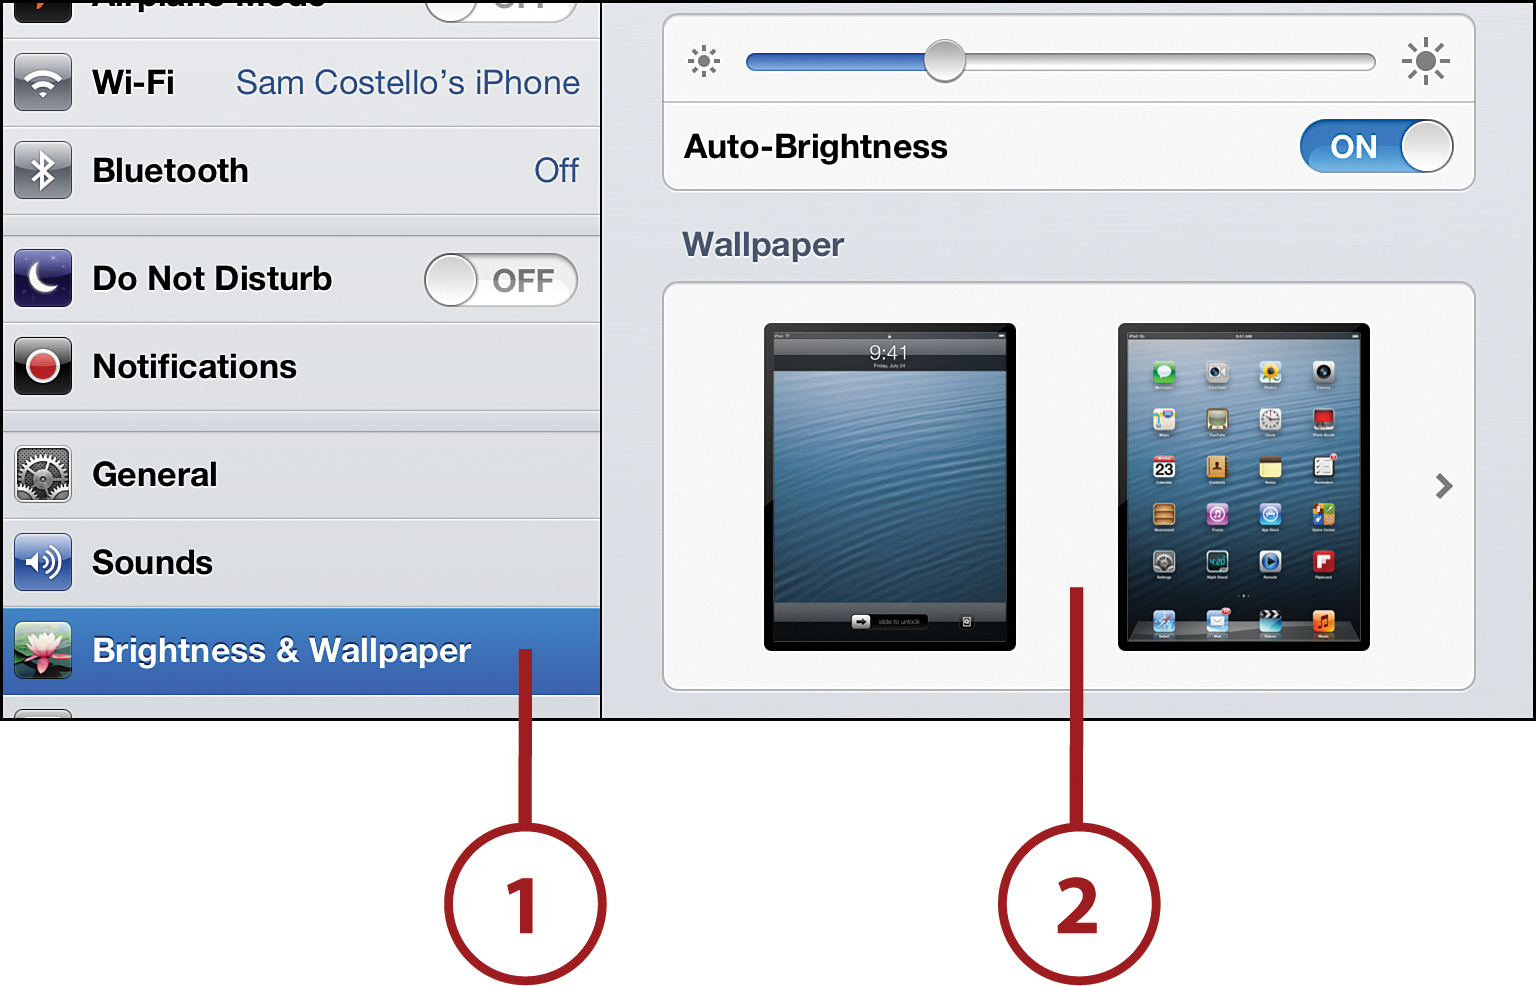
1. Tap Brightness & Wallpaper to access these options.
2. Tap Wallpaper.
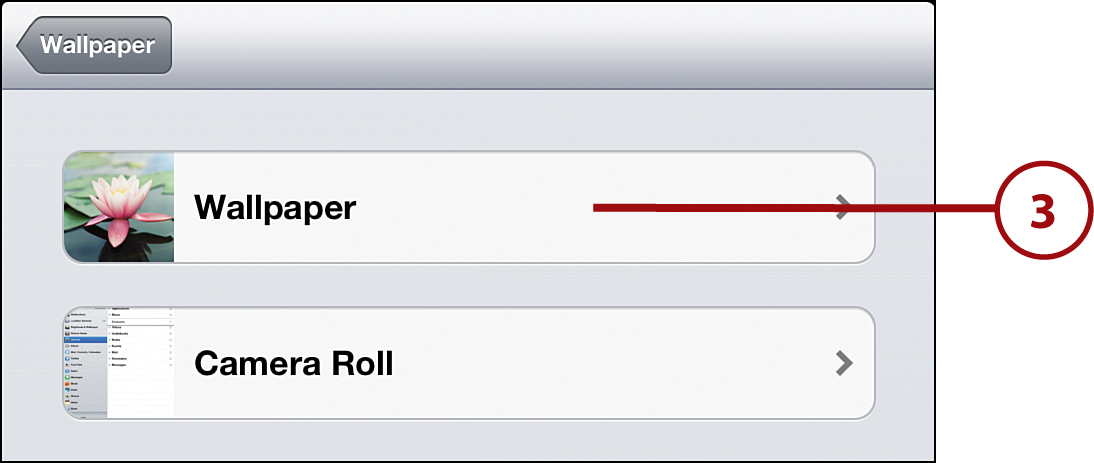
3. Choose the collection of images you want to pick the wallpaper from. Unless you add your own images to your iPad (or use Photo Stream; more on that in a minute), your only choice is Wallpaper. Tap that.
4. Tap the image you want to see in full size.

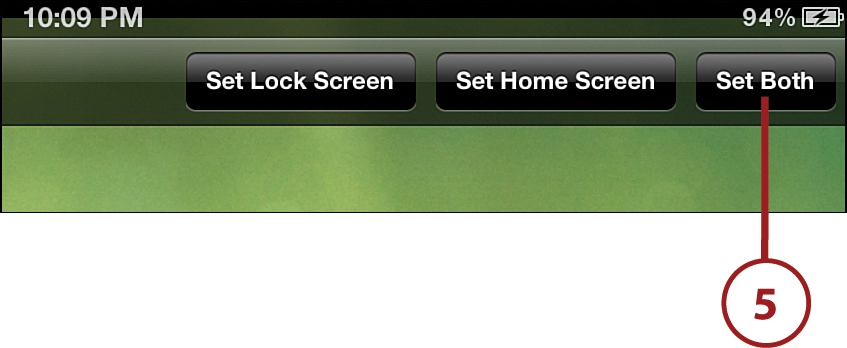
5. At the top of the screen, you see options for how you want to use the image. To use it for both the wallpaper and lock screen, tap Set Both. You can also choose either Set Lock Screen or Set Home Screen to use it in just one of those locations. Tap Cancel if you’ve changed your mind and want to use something else entirely. After you’ve chosen an image, press the Home button to go back to your home screen and, if you picked an image for the wallpaper, you see it underneath your apps.
When you’re on the main wallpaper screen, you see one other option: Brightness. That’s another setting that controls how your iPad looks when you use it. Check out “Changing Screen Brightness” at the end of this chapter to learn more about it.
Putting Pictures on Your iPad
Even though your iPad comes with pictures to use as wallpaper or on the lock screen, you may want to add your own. There are a few places you can get them.
• The iPad cameras—You can take pictures with the iPad’s cameras and use one as your wallpaper (read more about taking pictures with the iPad in Chapter 15, “Lights, Camera, Action: Videos and Photos”). When you’ve taken a picture that you want to use, follow the steps in the “Setting Your Wallpaper and Lock Screen” section, up to step 4.
When you’re looking at the Wallpaper option, choose Camera Roll. This is where your pictures are saved. Choose the picture you want and set it as your wallpaper or lock screen using the earlier instructions.
• Photo Stream—One neat feature of iCloud that puts pictures on your iPad is called Photo Stream. With it, your friends and family can share photos with you that automatically appear in your Photos app. You and your friends need iCloud accounts to use Photo Stream.
• The Internet—You can use the iPad’s Safari web browser to save pictures you find on the Internet and use them as your wallpaper or lock screen.
• Apps—There are both free and paid apps in the App Store that offer collections of pictures. If you get one of these apps, you often just choose the picture from within the app, rather than following the other steps, to use it as your wallpaper.
• Your Computer—You can also use the pictures synced from your computer to your iPad as wallpapers. For tips on how to sync photos from your computer, check out Chapter 2, “Getting Started: Set Up and Sync Your iPad.”
Saving Pictures from the Internet
If you want, you can use the Safari browser to get pictures from the Internet and use them as your wallpaper (learn more about getting online in Chapter 4, “Surf’s Up! Using the Internet”). To do that, tap the Safari icon to launch it and follow these steps:
1. Go to a web page that has the picture you want to use.
2. Tap and hold on the picture until a menu pops up. From the pop-up menu, tap Save Image.
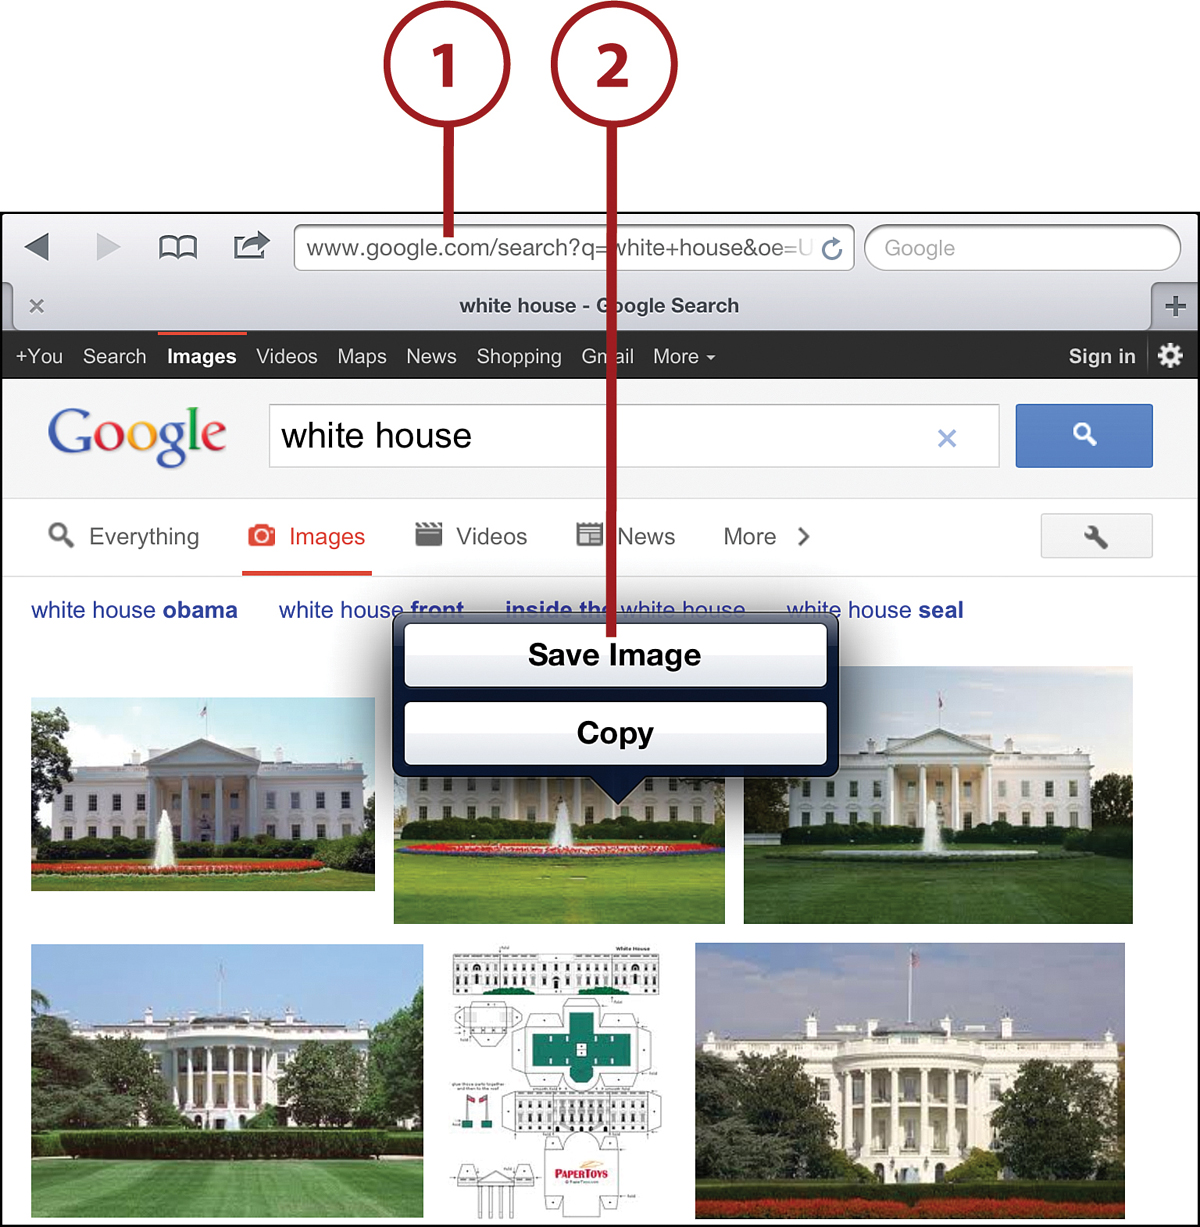
3. The picture is saved to your Camera Roll. Follow the steps from “Setting Your Wallpaper and Lock Screen,” but choose Camera Roll instead of Wallpaper in step 2, to use the picture for either or both of those screens. Pick a picture close to the same size as the iPad’s screen; otherwise, it looks blurry when it gets enlarged to fit the iPad screen.
Arranging Your Apps and Making Folders
Even though your apps come arranged one way, they don’t have to stay that way. You can move them around however you want or even put similar apps together into folders to keep things neat and tidy.
Although you can arrange your apps however you want, there is one set of them that has to stay sort of the same: the Dock. The Dock, the bar across the bottom of the iPad’s home screen, starts with four apps in it, but you can change them up so that it features the apps you use the most. About the only thing you can’t do with it is get rid of it. Your iPad’s home screen always has the Dock.
Arranging Apps
Almost everyone rearranges their apps, but different people do it different ways. Some people put the apps they use the most near each other. Other people like to put similar apps together. Some order them alphabetically. You can pick whichever method you like the best and then arrange them using these steps:
1. Tap the app you want to move and hold it until all your apps start jiggling. When this happens, you can move any of the apps—not just the one you started with.
2. Drag the app to the new location where you want it. The other apps move to make room for it. Take your finger off the screen and let the app drop into the new place.
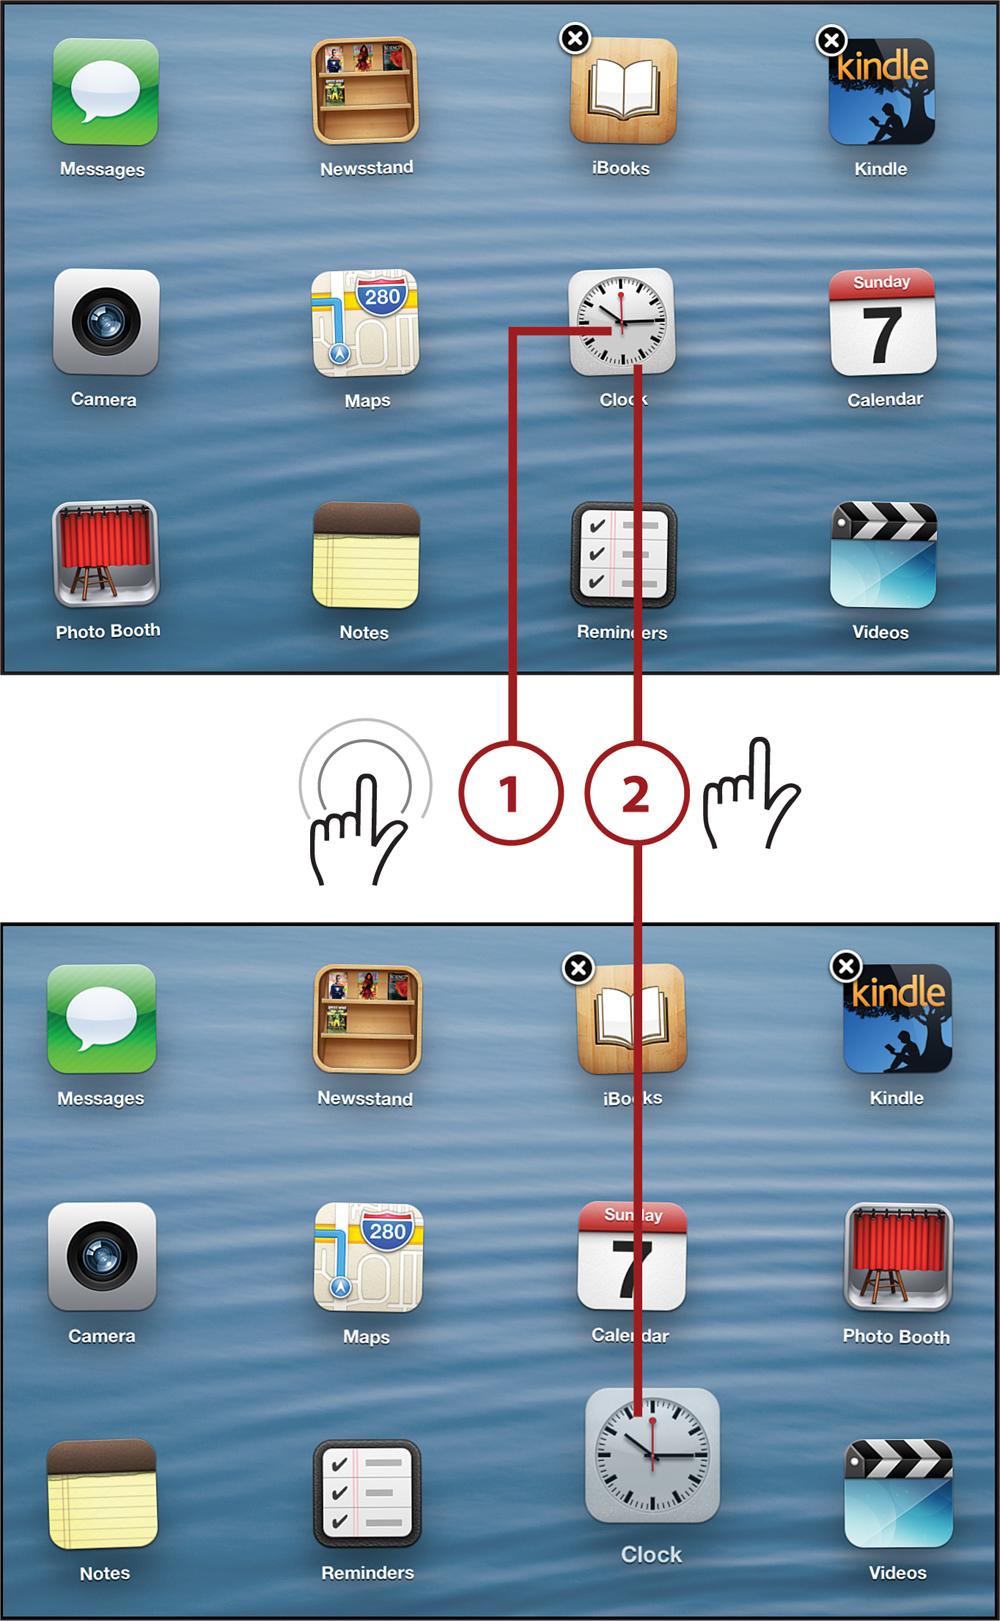
3. Press the Home button to save the new arrangement.
Moving Apps to New Screens
Your iPad comes with all your apps on a single screen, but if you install more apps on your iPad than the 20 apps each screen can hold, they automatically start bumping over to another screen. You can also move apps to new screens yourself to either make room or to group similar apps together.
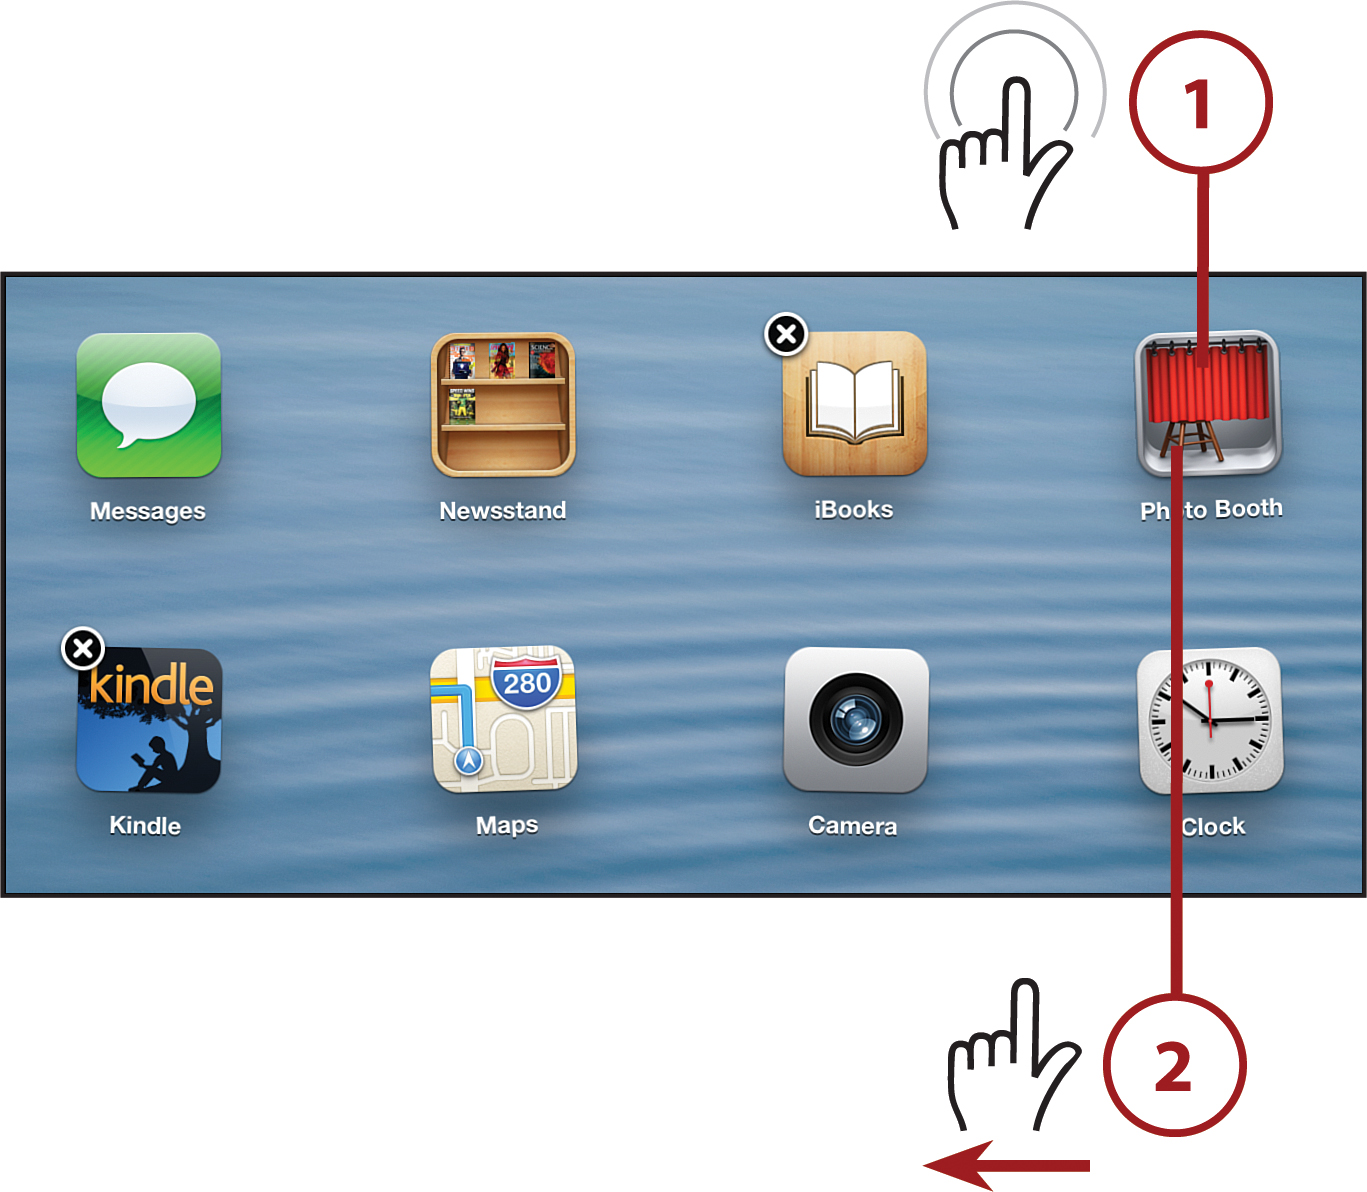
1. Tap and hold an app until they all start jiggling, just like you’re going to move the app.
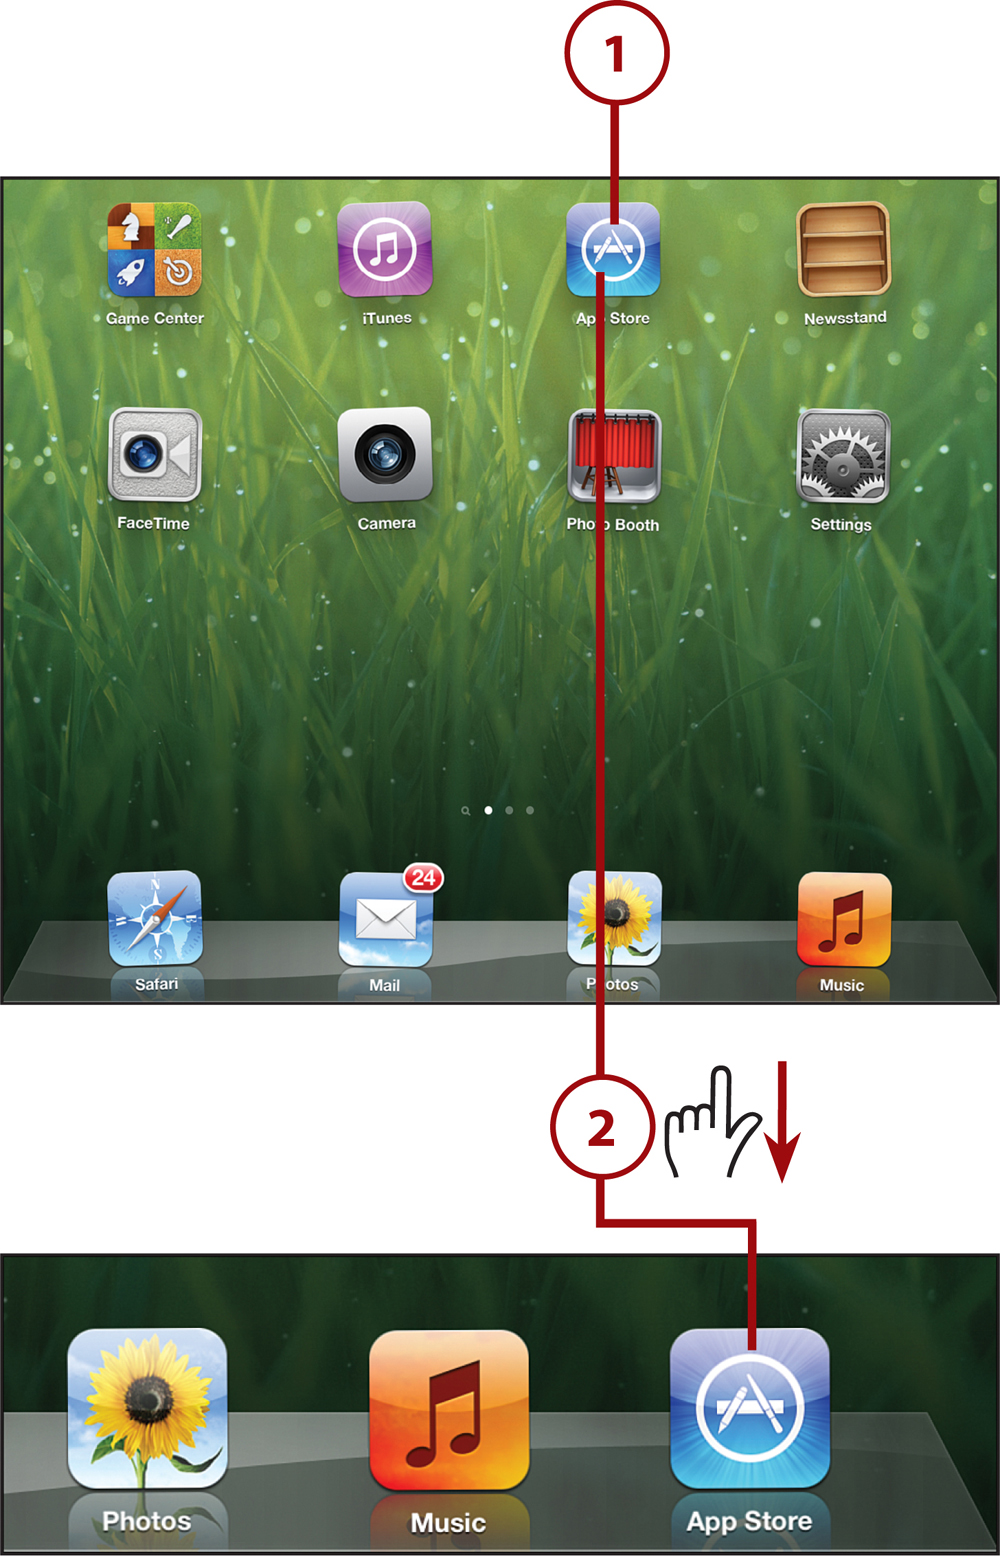
2. Drag the app you want to put on a new screen to the far-right edge of the screen, so that about half of the app is hidden. When you do this, the screen should move to the left and show you a new, blank screen. Let go of the app to drop it into place.
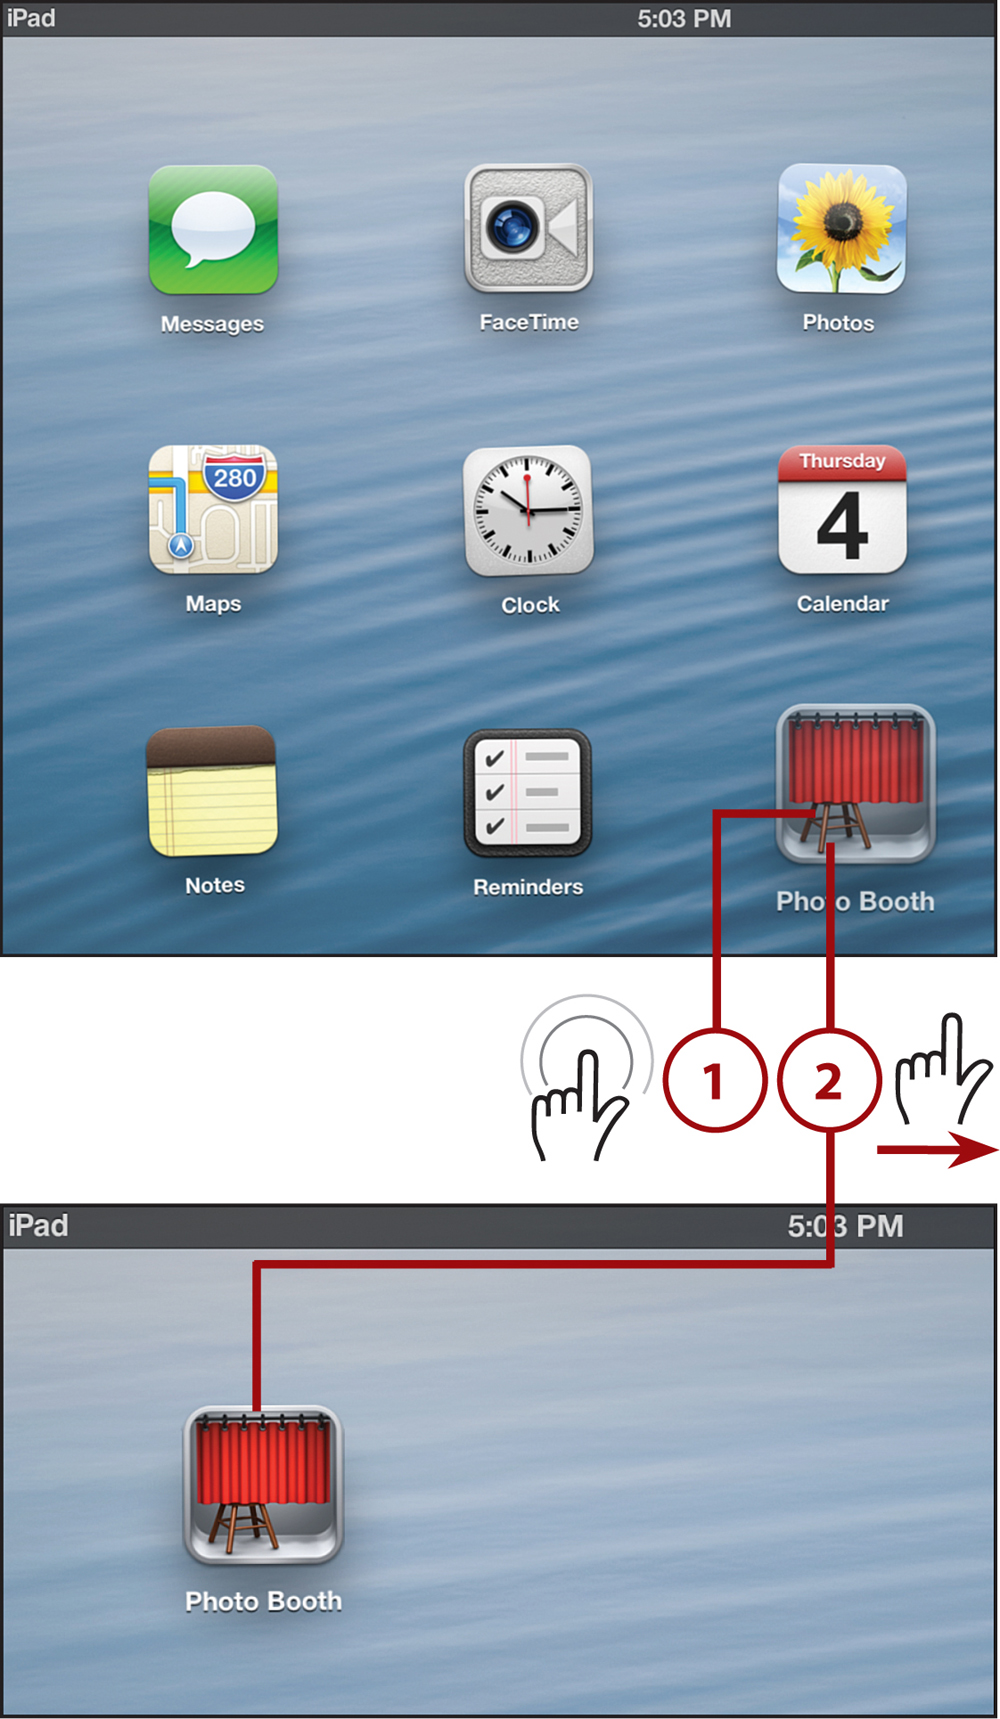
3. Press the Home button to save the arrangement. Now you have two screens for apps. Just swipe left and right to go from one screen to the other. You can create up to 11 screens on your iPad.
Making Folders
Besides moving your apps around, another great way to customize your iPad and keep everything organized is to create folders to put your apps in. All your music apps could go in one folder and all your school apps in another, for example. Folders have to have at least two apps in them and can have up to 20.
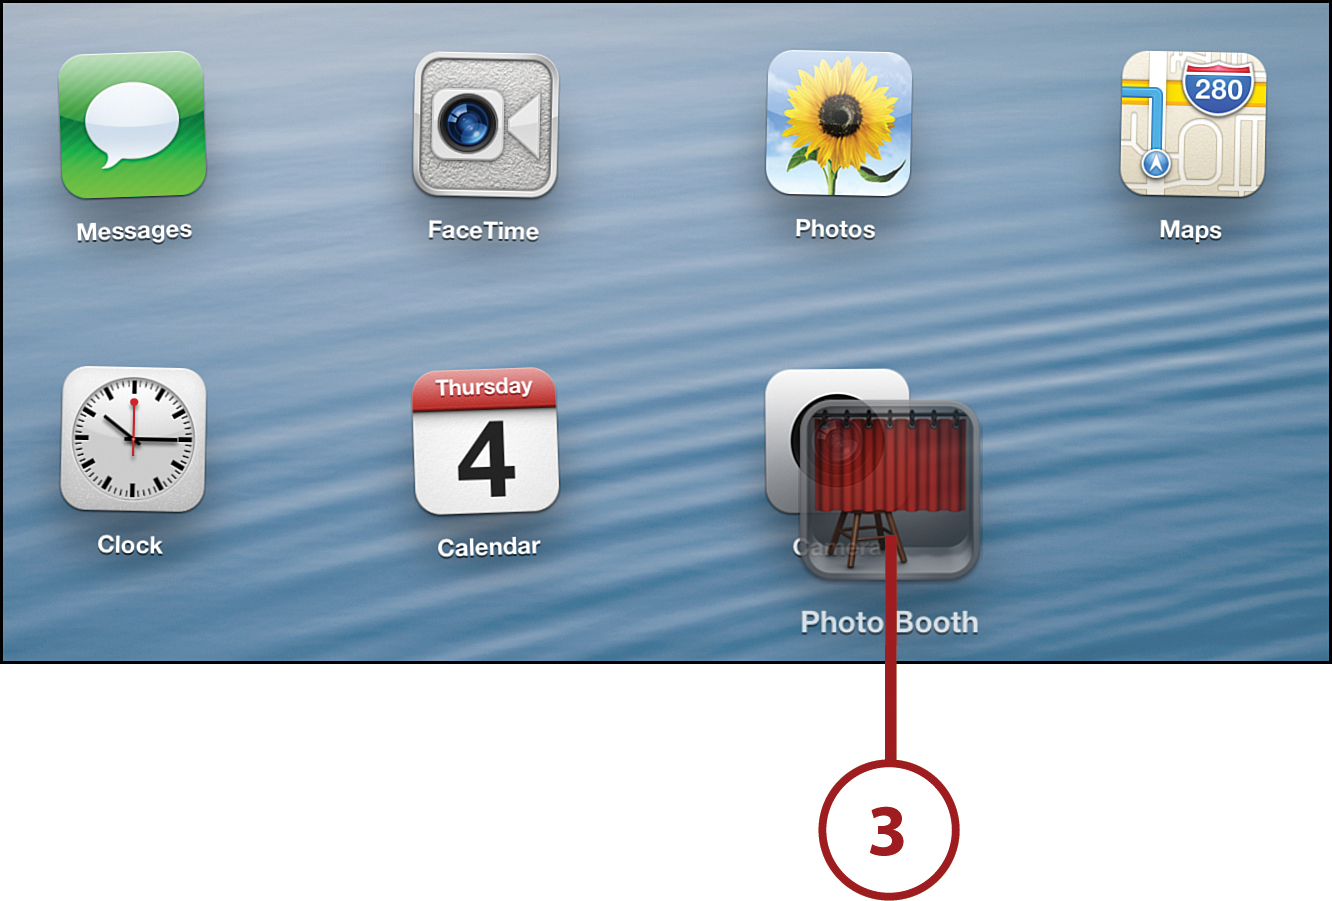
1. Tap and hold the app you want to put into a folder until it’s jiggling.
2. Drag the app toward a second app you want to be in the same folder.
3. Drop the first app onto the second app. It kind of sinks into the second app and a folder is created.
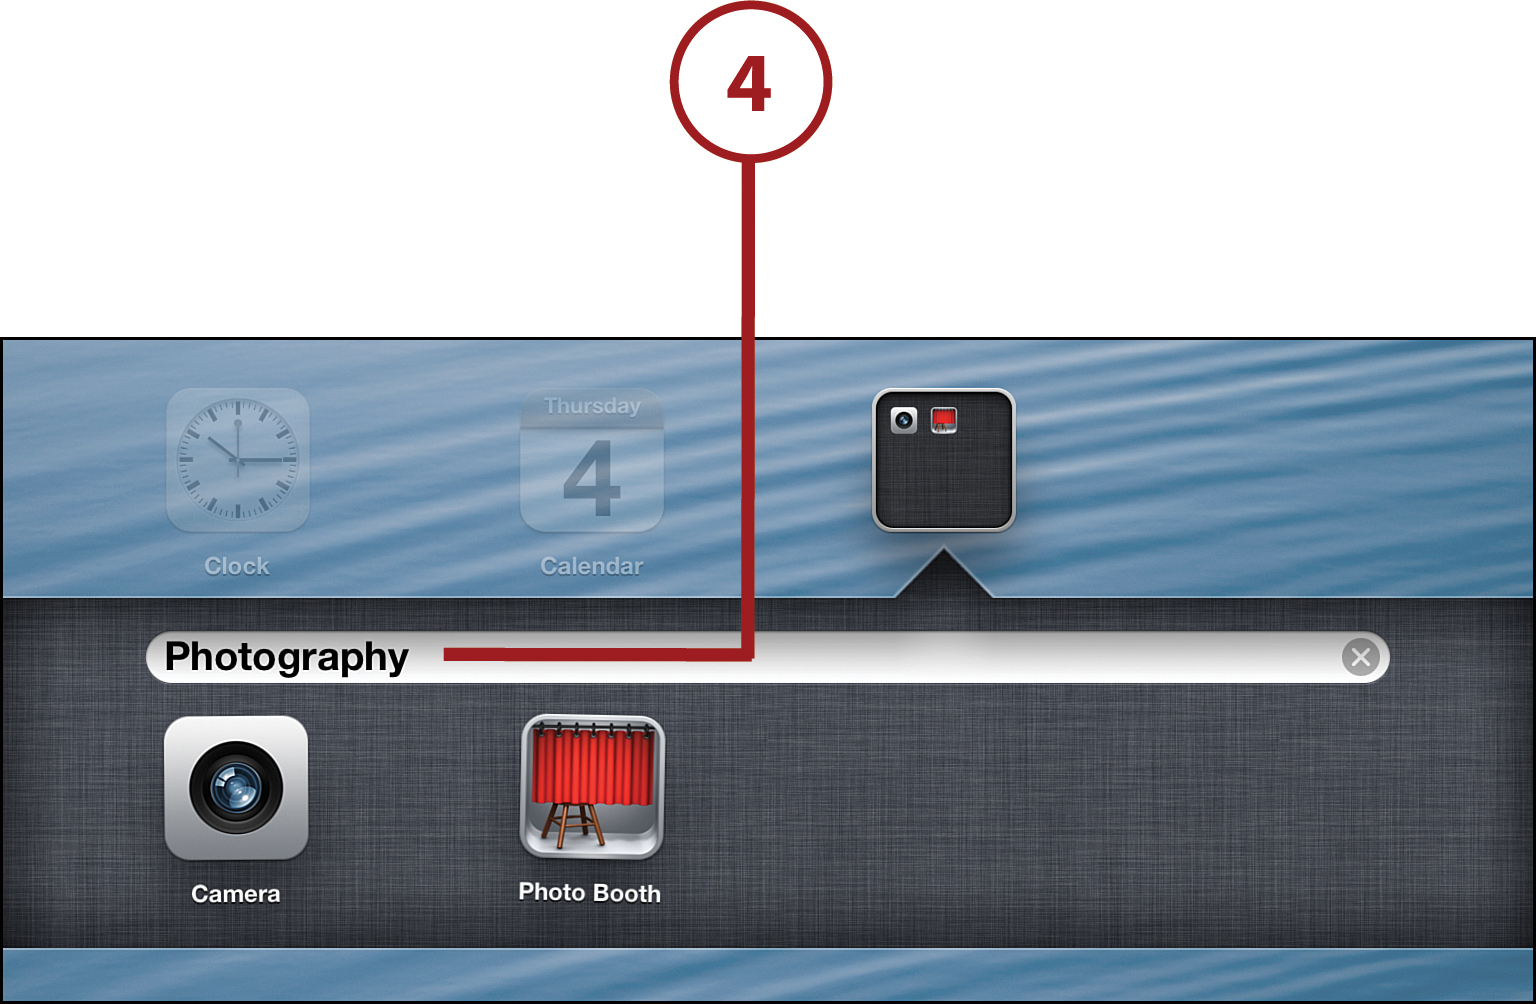
4. Your iPad automatically gives the folder a name. If you want to change the folder’s name, tap the X at the end of the bar and type in a new one. When you’re done and want to save the folder, press the Home button.
Editing and Deleting Folders
After you’ve created a folder, you’re not necessarily done. There are a lot of other things you can do with folders:
• To add more apps to them, just drag and drop other apps onto them in the same way that you created the folder in the first place.
• To change the name of a folder, tap and hold the folder until it starts jiggling. Then tap the folder again. Tap the X in the name bar and then type in a new name. Press the Home button to save it.
• To move a folder, do it the same way you move an app: Tap it and drag it to a new place, and then press the Home button.
• To delete a folder, tap and hold it until it jiggles. Then drag the apps out of it. When there’s just one app left, the folder disappears.
Adding Extra Apps to Your Dock
Even though the iPad comes with four apps in the Dock, you’re not limited to four—and those don’t have to be the four you have in there. You can have up to six apps, whichever ones you want, in your Dock.
1. Tap and hold the app you want to add to the Dock until it starts jiggling.
2. Drag the app to the Dock and drop it there.
You can move the apps around the Dock so that they’re in the order you want, and you can drag apps off the Dock to remove them from it. You can even add folders to your Dock to store even more apps there.
3. Press the Home button to save your changes.
You can also arrange apps, make folders, and add new screens to your iPad using iTunes. To do this, your iPad needs to be synced to your computer. For more tips on doing this, check out “Syncing with iTunes” in Chapter 2.
Customizing Your iPad’s Sounds
Your iPad makes a lot of noises. Some of the sounds are fun, like the sound that comes from playing music or games or videos. Some of the sounds are helpful, like the ones that let you know when you send or receive email, get tweets, and remind you of things on your calendar. Others are just part of the iPad experience, such as the typewriter sounds when you type on the onscreen keyboard. You can even turn them all off and use your iPad in silence. Controlling all its sounds is an important part of how you customize your iPad.
Choosing Your Sounds
To control what causes a sound and what sounds you hear, tap Settings and then Sounds.
On this screen are all the different kinds of sounds you can control. For each one, tap the menu to see a list of options. Tap a sound to hear it play.
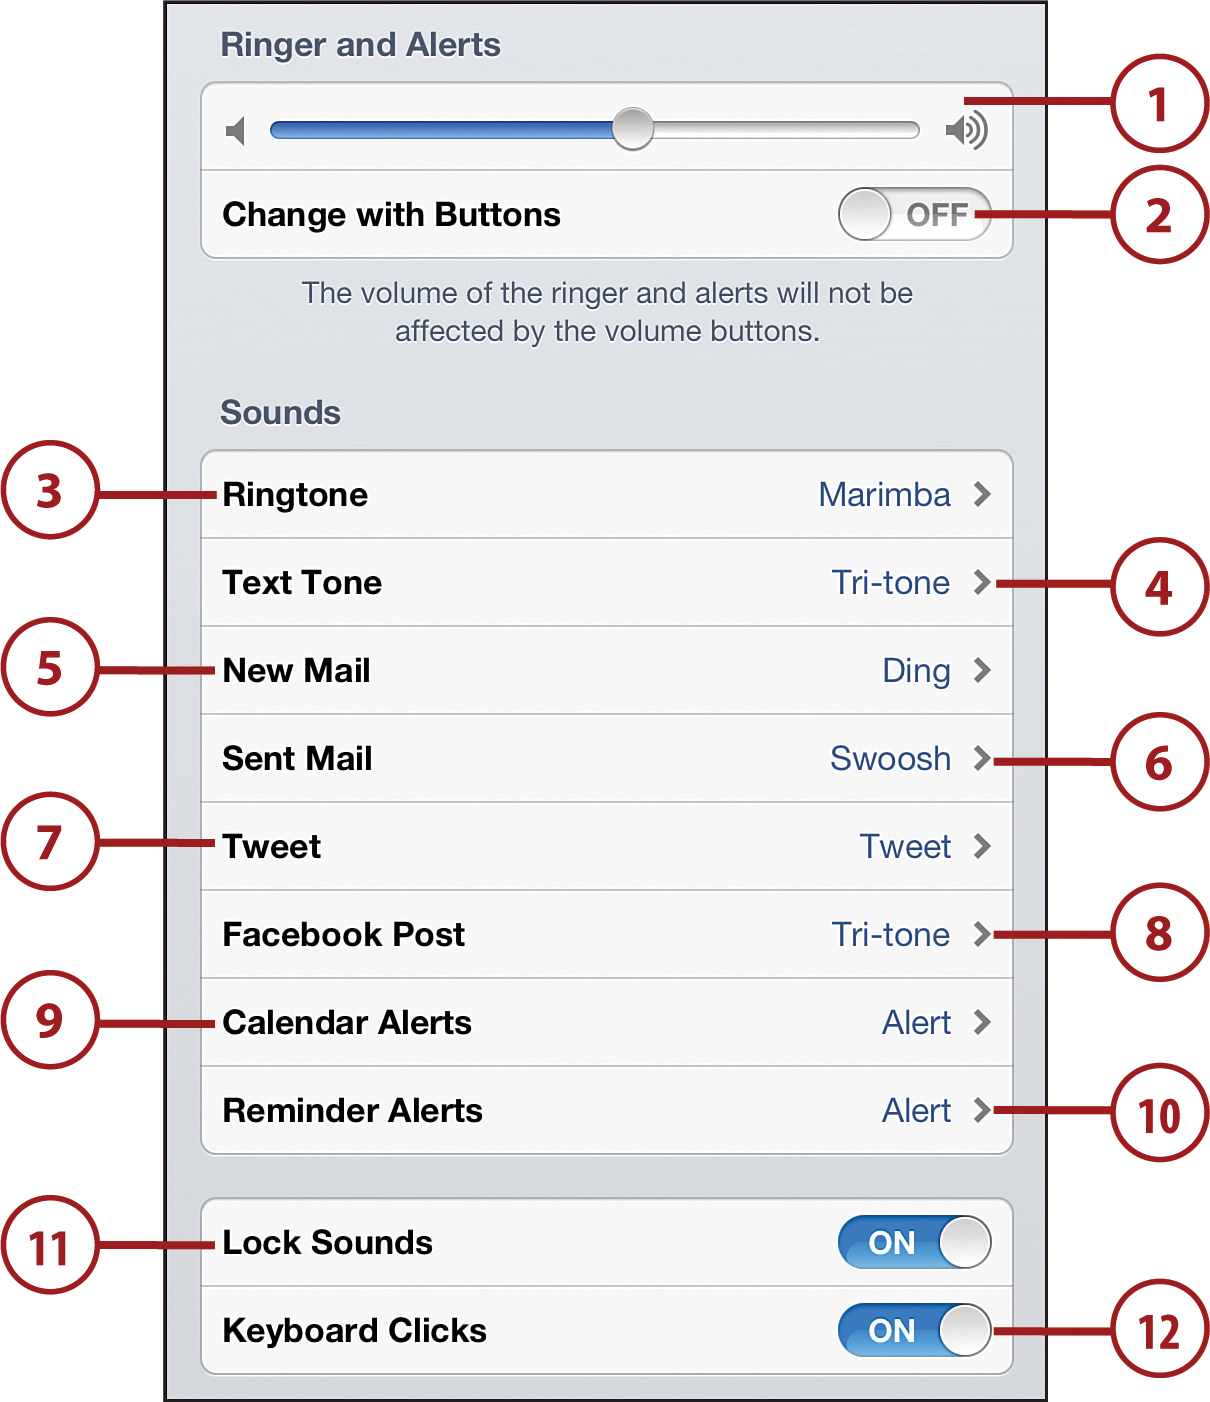
1. Ringer and Alerts—This slider controls the overall volume of the sounds played on your iPad. You can also raise or lower the volume at any time by clicking the volume buttons on the side of the iPad.
2. Change with Buttons—When this is Off, the volume buttons on the side of the iPad can’t control the volume of ringers and alerts. I recommend keeping it turned On so they keep working.
3. Ringtone—This is the sound that lets you know when you’re getting a FaceTime video call (you can learn more about this in Chapter 6, “Get Ready for Your Close Up! It’s FaceTime!”).
4. Text Tone—The sound that plays when someone sends you a text using Messages.
5. New Mail—The sound that plays when new email shows up on your iPad.
6. Sent Mail—The sound that plays when you send an email from your iPad.
7. Tweet—This sound plays when you receive a new tweet that mentions you.
8. Facebook Post—If you use the Facebook app and sign in, you hear this sound whenever things happen in your Facebook account, such as a friend posting on your wall.
9. Calendar Alerts—If you’ve created an alert to remind you of an appointment in your calendar, this sound plays when the reminder comes up.
10. Reminder Alerts—This sound works the same as the Calendar Alerts, but it’s for the Reminders app.
11. Lock Sounds—Don’t want your iPad to make that locking sound when you put it to sleep? Slide this to Off.
12. Keyboard Clicks—Sick of hearing your iPad make noise whenever you type? Slide this to Off.
Even though all of these items can have sounds, they don’t have to. You can decide not to have any sound play for everything except Ringtone. If that’s what you want, tap the item you want to be silent and choose None.
This is also important because it’s the only way to be completely sure your iPad will be silent. Turning down the volume using the buttons on the side or using the Mute switch doesn’t keep all the different sounds from making noise. Only setting each one to None can do that.
Screen Brightness
Have you ever tried to read a book or magazine in a dark room? You need a light to brighten things up and make it easier to read. But sometimes too much light doesn’t help either—think about what it’s like to go outdoors on a really sunny day. It can be hard to see then, too. You can change the brightness of your iPad’s screen to fit the situation you’re in and make it comfortable on your eyes.
Changing Screen Brightness
To change how bright your iPad’s screen is, start by tapping Settings and then follow these steps:
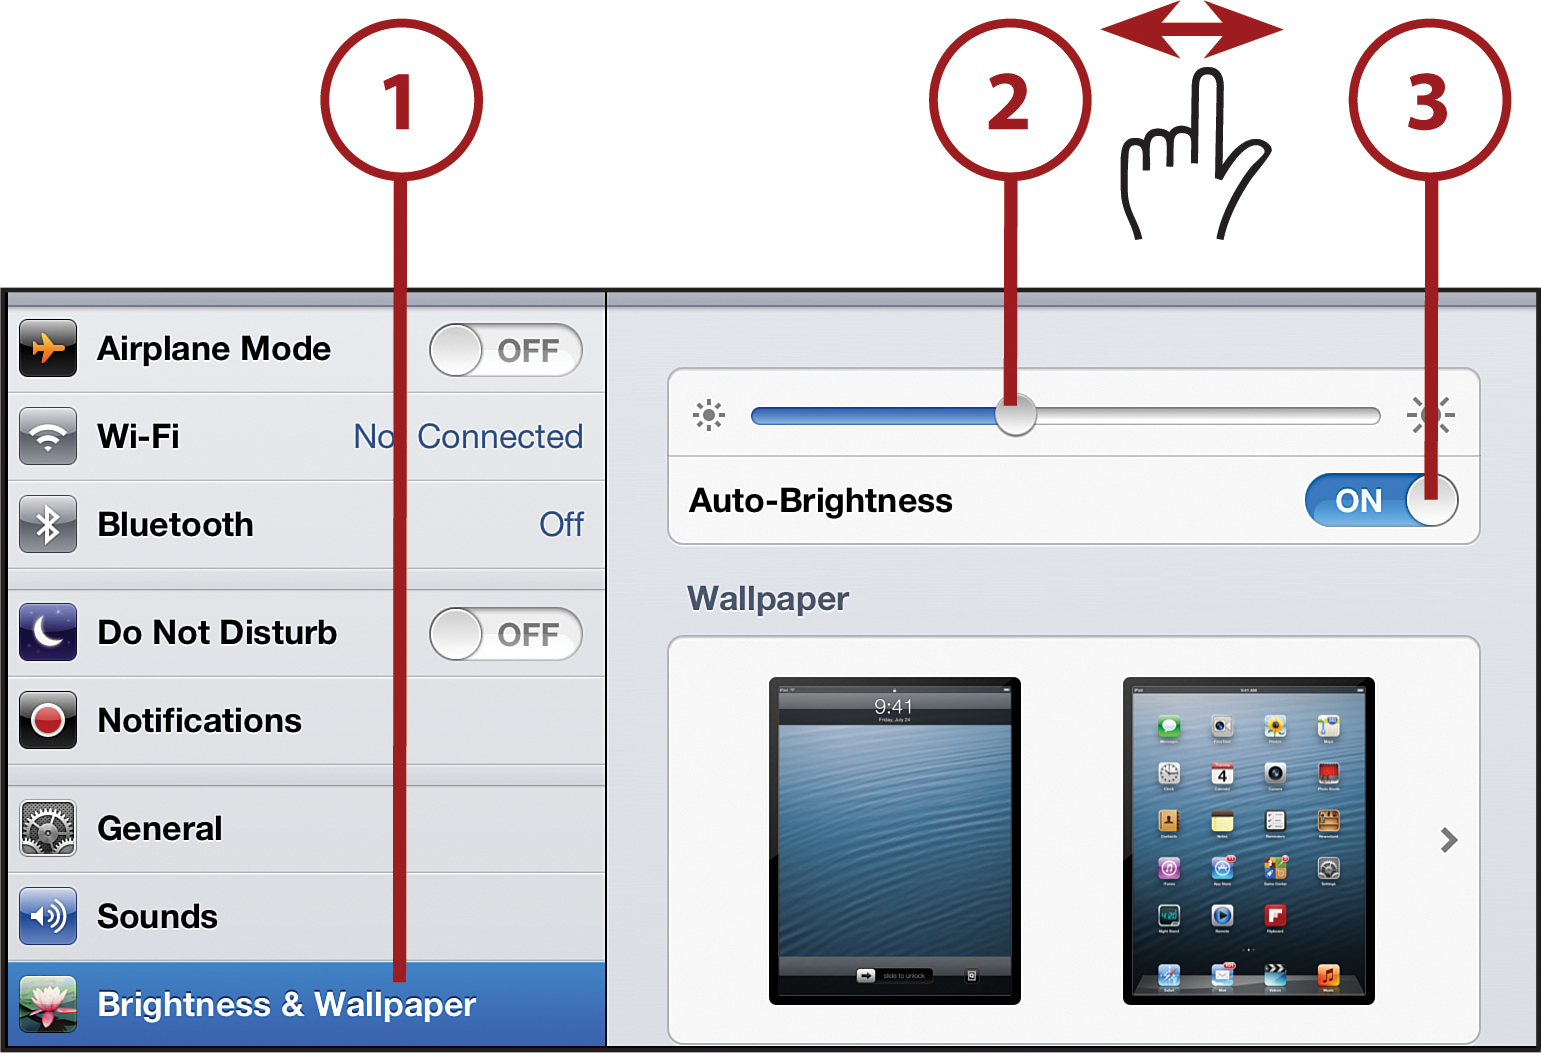
1. Tap Brightness & Wallpaper.
2. Move the slider to the left to make the screen dimmer and to the right to make it brighter. Move the slider around until you’re happy with how your iPad looks.
3. You can also have your iPad automatically adjust for whatever amount of light is around you. Just slide the Auto-Brightness slider to On.
Your iPad has a sensor in it that can detect how much light there is in the room. Using that sensor, the iPad can adjust the brightness of its screen automatically. Thanks to that sensor, Auto-Brightness makes the screen brighter or dimmer to adjust for the ideal condition for your eyes. As an added bonus, using Auto-Brightness also helps make your battery last longer!