Creating a Portal v3.0 Application
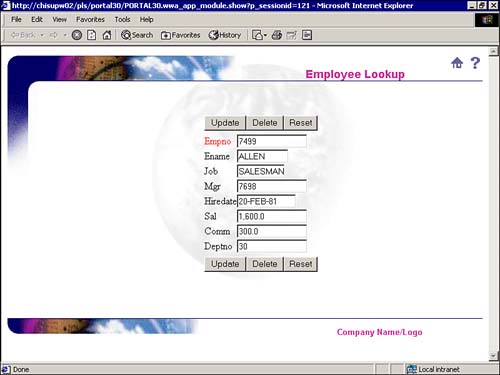
Select Create a New Application from the Portal Main Menu Build tab. On the next screen, click Create New…Form from the Applications tab. Notice all the different kinds of things that can be built using Portal (see Figure 12.6). Select Form based on table or view and this will begin a seven-step wizard that will build a basic but functional forms-based application. Give this application a name and click Next>. Step 2 of 7 and the wizard asks you to choose a table or view. Continue through the wizard, selecting the table/view (SCOTT.EMP in this example), select a tabular form layout, accept the forms and validation options defaults, on Form Text select PUBLIC.SKY_TEMPLATE and a display name of Employee Lookup. There is no PL/SQL code to add at this time so click to continue and you should now see that the application has been build and its options in Figure 12.7. Notice that any primary keys appear in red.
Figure 12.6. Portal v3.0 form building.
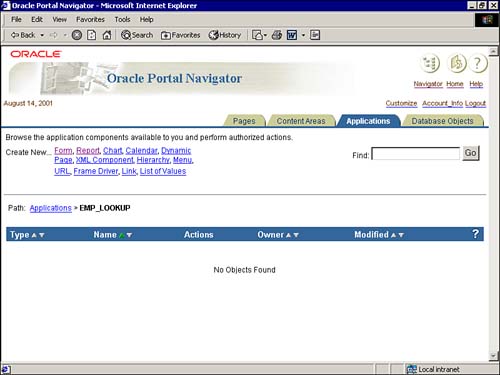
Figure 12.7. Portal v3.0 tabular form on Table SCOTT.EMP.

By default, there are three buttons that allow you to insert new records, look up existing records, or reset the form to its default options. To lookup rows in the database, fill in any search criteria (see Figure 12.8) and click the Query button. This searches for the record and changes the button options, as illustrated in Figure 12.9.
Figure 12.8. Form Row Lookup.
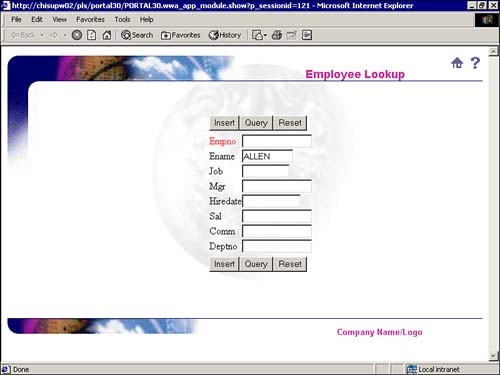
Figure 12.9. Form Query Mode.
NOTE
This application is actually a PL/SQL routine in the database. The URL to access this new application is //http:/<host name or IP address/pls/portal30/<application name>.
Creating a Portal v3.0 Web Site
Portal v3.0 allows for the easy building and maintenance of content Web sites, or Web pages that do not directly access the database. To begin, start at the Portal Main Menu Build tab and select Create Page (see Figure 12.10). This begins a four-step wizard. Give the page a name and click Next' to continue. Notice that Portal v3.0 can build a basic Web page with just this little bit of information (the Finish button). The next screen, Figure 12.11, allows you to create the layout template and select a style. Portal builds column style pages, or regions and in the next step, you will select Portlets or items to place in these columns. This is about the only selectivity you have in where things will appear on the Web page.
Figure 12.10. Portal v3.0 Create Page Wizard.
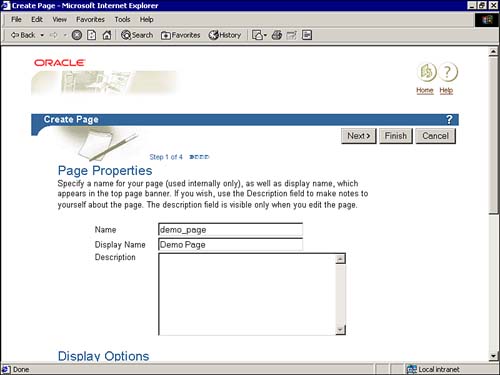
Figure 12.11. Page Layout and Style.

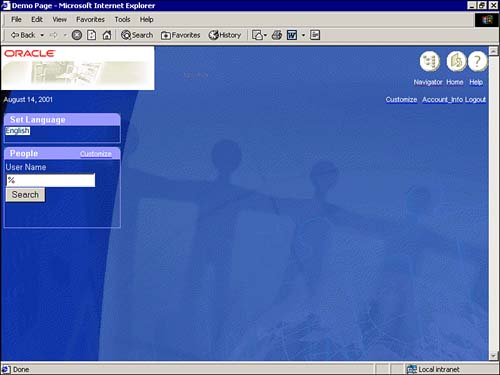
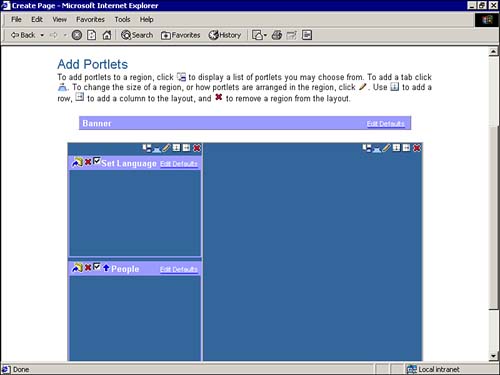
Click Next> when you're ready to continue. This brings up the Add Portlets page. Click the button to display a list of portlets (shown in Figure 12.12). A region is one of the columns previously created. Select Set Language and People portlets. Your portal page should look something like Figure 12.13. Click Next> when you're ready to continue.
Figure 12.12. Portlet selection page.
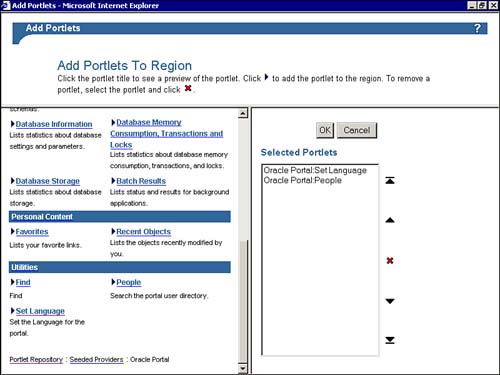
Figure 12.13. Portal page with selected portlets.
Select Expose Page To Everyone on the final screen and select Finish. Notice one of the options is to create this page as a portlet. This is one way of creating portlets. Portlets can then be included in other Portal Web Pages. Figure 12.14 shows the finished portal page.
Figure 12.14. Completed portal page.