In Chapter 2, Getting Started with Python and IoT, we created a networked IoT application based on dweet.io where you controlled an LED connected to your Raspberry Pi over the internet. Our first IoT application was driven purely by making API requests.
In this chapter, we will turn our attention to alternative approaches to creating networked services in Python that can be accessed by both Python and non-Python clients. We will be looking at how to build a RESTful API server and a Web Socket server in Python and applying the electronic interfacing techniques we learned in the previous chapter to make them interact with our LED.
After completing this chapter, you will have an understanding of two different approaches to building servers with Python, complete with accompanying web pages that interact with the servers. These two servers will provide you with an end-to-end reference implementation that you can use as a starting point for your own network-connected IoT projects.
Since this chapter is about networking techniques, we will continue with our GPIOZero-based LED from the preceding chapter merely for simplicity and abstraction so that our examples are to-the-point and network-focused and not cluttered by GPIO-related code.
In this chapter, we will cover the following topics:
- Introducing the Flask microservices framework
- Creating a RESTful API service with Flask
- Adding a RESTful API client web page
- Creating a Web Socket service with Flask-SocketIO
- Adding Web Socket client web page
- Comparing the RESTful API and Web Socket servers
Technical requirements
To perform the exercises in this chapter, you will need the following:
- Raspberry Pi 4 Model B
- Raspbian OS Buster (with desktop and recommended software)
- A minimum of Python version 3.5
These requirements are what the code examples in this book are based on. It's reasonable to expect that the code examples should work without modification on a Raspberry Pi 3 Model B or a different version of Raspbian OS as long as your Python version is 3.5 or higher.
You will find this chapter's source code in the chapter03 folder in the GitHub repository available here: https://github.com/PacktPublishing/Practical-Python-Programming-for-IoT.
You will need to execute the following commands in a Terminal to set up a virtual environment and install Python libraries required for the code in this chapter:
$ cd chapter03              # Change into this chapter's folder
$ python3 -m venv venv      # Create Python Virtual Environment
$ source venv/bin/activate  # Activate Python Virtual Environment
(venv) $ pip install pip --upgrade        # Upgrade pip
(venv) $ pip install -r requirements.txt  # Install dependent packages
The following dependencies are installed from requirements.txt:
- GPIOZero: The GPIOZero GPIO library (https://pypi.org/project/gpiozero)
- PiGPIO: The PiGPIO GPIO library (https://pypi.org/project/pigpio)
- Flask: The core Flask microservices framework (https://pypi.org/project/Flask)
- Flask-RESTful: A Flask extension for creating RESTful API services (https://pypi.org/project/Flask-RESTful)
- Flask-SocketIO: A Flask extension for creating Web Socket services (https://pypi.org/project/Flask-SocketIO)
We will be working with the breadboard circuit we created in Chapter 2, Getting Started with Python and IoT, Figure 2.7.
Introducing the Flask microservices framework
Flask is a popular and mature microservices framework for Python that you can use for creating APIs, websites, and just about any other networked service you can imagine. Flask is certainly not the only option available for Python, even though its maturity, range of add-ons, and extensions plus the availability of quality documentation and tutorials make it an excellent choice.
We could conceivably do all of the following coding exercises in this chapter using just the core Flask framework; however, there are quality extensions that will make our life much easier. These extensions are Flask-RESTful for creating RESTful API services and Flask-SocketIO for building Web Socket services.
Let's commence and create a RESTful API service in Python using Flask-RESTful.
Creating a RESTful API service with Flask-RESTful
In this section, we will explore our first Python-based server, which will be a RESTful API server implemented using the Flask-RESTful framework for Python.
A RESTful API (REST stands for Representational State Transfer) is a software design pattern used for building web service APIs. It's a flexible pattern that is both technology- and protocol-independent. Its technology independence helps to promote interoperability between different technologies and systems, including different programming languages. And although it does promote protocol independence, it's frequently and almost always by default (or, at the least, assumed to be) built on top of the HTTP protocol used by web servers and web browsers.
RESTful APIs are the most common technique used today for building web services and APIs. In fact, it's so common that many people learn about them and use the design pattern without ever understanding what they are! If you are new to RESTful APIs, you will a link in the Further reading section, which I encourage you to review as a primer before proceeding.
Our focus in this section will be on controlling an LED with a RESTful API and understanding how this is implemented using Python and the Flask-RESTful framework. After completing this section, you will be able to leverage this RESTful API server a starting point for your own IoT projects and integrate it with other electronics, especially as learn more about electronic actuators and sensors in part 3 of this book, IoT Playground.
We will start by running and using our RESTful API to interact with the LED before proceeding to review the server's source code.
Running and testing the Python server
You will find the code in the chapter03/flask_api_server.py file. Please review this file before proceeding to get an overall idea about what it contains before you proceed.
To test the Python server perform the following steps:
- Run our RESTful API server with the following command:
(venv) $ python flask_api_server.py
... truncated ...
NFO:werkzeug: * Running on http://0.0.0.0:5000/ (Press CTRL+C to quit)
... truncated ...
The second to last line in the preceding code block indicates that our server has started successfully. Our server is running in debug mode by default, so its log output will be verbose and if you make any changes to flask_api_server.py or other resource files, the server will restart automatically.
$ chmod -x flask_api_server.py
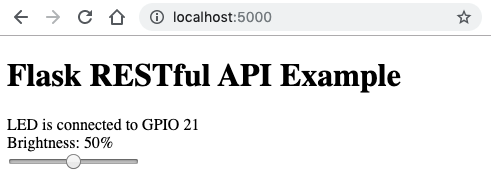
- We will create a web page to interact without API shortly; however, for now, browse to http://localhost:5000 in a web browser and verify that you can use the slider on the web page to change the brightness of the LED.
The following screenshot is an example of the web page you will see:
- We can also use the curl command-line tool to interact with the API. We will do this now to observe the input and output JSON from our API server requests.
Our first curl command in the following makes an HTTP GET request and we see the LED's brightness level (a number between 0 and 100) printed on the Terminal in JSON (line 1). The default LED brightness when the server is started is 50 (that is, 50% brightness):
$ curl -X GET http://localhost:5000/led
{
  "level": 50          # (1)
}
The options for curl are as follows:
-
- -X GET: The HTTP method used to make the request
- <url>: The URL to request
- This next command performs an HTTP POST request, and we are setting the brightness level to its maximum of 100 (line 2), which is returned as JSON and printed back to the Terminal (line 3):
$ curl -X POST -d '{"level": 100}'     # (2)
 -H "Content-Type: application/json"
 http://localhost:5000/led
{
  "level": 100                            # (3)
}
The options for curl are as follows:
-
- -X POST: This is the HTTP method; this time, we're making a POST request.
- -d <data>: This is the data we want to POST to the server. We're posting a JSON string.
- -H <HTTP headers>: These are the HTTP headers to send with the request. Here, we're letting the server know that our data, (-d), is JSON.
- <url>: This is the URL to request.
Try altering the level value in the preceding curl POST example to a number outside of the range 0-100 and observe the error message you receive. We will see shortly how this validation logic is implemented with Flask-RESTful.
Let's now proceed to look at our server source code.
Understanding the server code
In this section, we will walk through our RESTful API server's source code and discuss the core parts to help you to understand how the server is coded and operates. Please keep in mind that we're about to cover many code-level artifacts that are specific to the Flask and Flask-RESTful frameworks, so don't get worried if, at first, some concepts do not make immediate sense.
Once you have an understanding of the foundations and an overall idea of how our sever works, you'll be in an excellent position to deepen your understanding of Flask and Flask-RESTful by consulting their respective websites (you will find links in the Further reading section). Furthermore, you will have a solid reference RESTful API server that you can rework and use as a starting point for your own future projects.
Please note that as we discuss the code, we will skip over any code and concepts that we covered in earlier chapters, such as GPIOZero.
We will start by looking at the imports.
Imports
At the top of the source code file, we see the following imports:
import logging
from flask import Flask, request, render_template           # (1)
from flask_restful import Resource, Api, reqparse, inputs   # (2)
from gpiozero import PWMLED, Device                         # (3)
from gpiozero.pins.pigpio import PiGPIOFactory
The Flask-related imports we see on lines (1) and (2) are all of the classes and functions of Flask and Flask-RESTful that we will require in our server. You will notice on line (3), we're importing PWMLED not LED as we have done in previous chapters. In this example, we're going to change the brightness of our LED rather than just turning it on and off. We'll cover more about PWM and PWMLED as we proceed with this chapter.
Next, in our source code, we start to work with Flask and the Flask-RESTful extension.
Flask and Flask-RESTful API instance variables
In the following, on line (4), we create an instance of our core Flask app and assign it to the app variable. The parameter is the name of our Flask application, and it's a common convention to use __name__ for the root Flask app (we only have a root Flask app in our example). Anytime we need to work with the core Flask framework, we will use the app variable:
app = Flask(__name__) # Core Flask app.            # (4)
api = Api(app) # Flask-RESTful extension wrapper   # (5)
On line (5), we wrap the core Flask app with the Flask-RESTful extension and assign it to the api variable, and as we will see shortly, we use this variable anytime we are working with the Flask-RESTful extension. Following our app and api variables, we define additional global variables.
Global variables
The following global variables are used throughout our server. First, we have the GPIO pin and an led variable, which will later be assigned a GPIOZero PWMLED instance for controlling our LED:
# Global variables
LED_GPIO_PIN = 21
led = None # PWMLED Instance. See init_led()
state = {                                     # (6)
    'level': 50 # % brightness of LED.
}
On line (6), we have a state dictionary structure that we will use to track the brightness level of our LED. We could have used a simple variable instead but have opted for a dictionary structure since it's a more versatile option because it will be marshaled into JSON to send back to a client, as we will see later on.
Next, we create and initialize our led instance.
The init_led() method
The init_led() method simply creates a GPIOZero PWMLED instance and assigns it to the global led variable that we saw previously:
def init_led():
    """Create and initialize an PWMLED Object"""
    global led
    led = PWMLED(LED_GPIO_PIN)
    led.value = state['level'] / 100        # (7)
We explicitly set the LED's brightness to match the value of our server's brightness state on line (7) to ensure the server's managed state and the LED are in sync when the server starts. We are dividing by 100 because led.value expects a float value in the range of 0-1, while our API will be using an integer in the range 0-100.
Next, we start to see the code that defines our server and its service endpoints, starting with the code that serves the web page we visited earlier.
Serving a web page
Starting on line (8), we use the Flask @app.route() decorator to define a callback method that is invoked when the server receives an HTTP GET request from a client to the root URL /, that is, a request to http://localhost:5000:
# @app.route applies to the core Flask instance (app).
# Here we are serving a simple web page.
@app.route('/', methods=['GET'])                           # (8)
def index():
   """Make sure index_api_client.html is in the templates folder
   relative to this Python file."""
   return render_template('index_api_client.html',
                          pin=LED_GPIO_PIN)                # (9)
On line (9), render_template('index_api_client.html', pin=LED_GPIO_PIN) is a Flask method use to return a templated page to the requesting client. The pin=LED_GPIO_PIN parameter is an example of how to pass a variable from Python to the HTML page template for rendering. We will cover the contents of this HTML file later in this chapter.
Returning an HTML page to the client is the only core Flask feature that we will cover in this book, however, there will be additional resources listed in the Further reading section for you to explore the core concepts of Flask further.
Our next stop in code is the LEDController class. It's here that we are interacting with the LED and GPIOZero.
The LEDControl class
In Flask-RESTful, API resources are modeled as Python classes that extend the Resource class, and on line (10) in the following snippet, we see the LEDControl(Resource) class defined that will contain the logic used to control our LED. Later on, we will see how we register this class with Flask-RESTful so that it responds to client requests:
class LEDControl(Resource):                                    # (10)
    def __init__(self):
        self.args_parser = reqparse.RequestParser()            # (11)
        self.args_parser.add_argument(
            name='level',                  # Name of arguement
            required=True,                 # Mandatory arguement
            type=inputs.int_range(0, 100), # Allowed 0..100    # (12)
            help='Set LED brightness level {error_msg}',
            default=None)
On line (11), we create an instance of RequestParser() and assign it to the args_parser variable before configuring the parser with add_argument(). We use an instance of RequestParser() in Flask-RESTful to define validation rules for the arguments we expect our LEDControl resource to handle.
Here, we are defining a mandatory parameter named level, which must be an integer in the range 0 to 100, as shown on line (12). We've also provided a custom help message for when the level parameter is missing or out of range.
We will see the use of args_parser when we cover the post() method shortly, but first, let's discuss the get() method.
The get() class method
The get() class method handles HTTP GET requests for our LEDControl resource. It's what handled our URL request when we tested the API previously with the following command:
$ curl -X GET http://localhost:5000/led
get() simply returns, on line (13), the global state variable:
    def get(self):
        """ Handles HTTP GET requests to return current LED state."""
        return state         # (13)
Flask-RESTful returns JSON responses to clients, and that's why we return the state variable. In Python, state is a dictionary structure that can be mapped directly into a JSON format. We saw the following JSON example previously when we make a GET request using curl:
{ "level": 50 }
This class-as-a-resource (for example, LEDControl) and method-to-HTTP-method mapping (for example, LEDControl.get()) is an example of how the Flask-RESTful extension makes RESTful API development easy.
There are also method names reserved for other HTTP request methods, including POST, which we cover next.
The post() class method
The post() class method handles HTTP POST requests made to the LEDControl resource. It is this post() method that received and processed our curl POST request when we made the following request earlier when we tested our server:
curl -X POST -d '{"level": 100}'
     -H "Content-Type: application/json"
     http://localhost:5000/led
post() is more complex than our get() method. It is here where we change the brightness of our LED in response to a requesting client's input:
    def post(self):
        """Handles HTTP POST requests to set LED brightness level."""
        global state                                            # (14)

        args = self.args_parser.parse_args()                    # (15)

        # Set PWM duty cycle to adjust brightness level.
        state['level'] = args.level                             # (16)
        led.value = state['level'] / 100                        # (17)
        logger.info("LED brightness level is " + str(state['level']))

        return state                                            # (18)
On line (14), we use the Python global keyword to indicate that we will be altering the state global variable.
On line (15), we see the use of args_parser that we discussed previously. It's this call to args_parser.parse_args() that will parse and validate the caller's input (remember level was a required argument and it must be in the range 0-100). If our predefined validation rules fail, the user will be issued with an error message, and post() will terminate here.
If the arguments are valid, their values are stored in the args variable, and the code continues to line (16) where we update the global state variable with the newly requested brightness level. On line (17), we alter the physical LED's brightness using the GPIOZero PWMLED instance, led, which expects a value between 0.0 (off) and 1.0 (full brightness), so we're mapping our level input range of 0-100 back to 0-1. The value of state is returned to the client on line (18).
Our final task is to register LEDController with Flask-RESTful and start the server.
LEDController registration and starting the server
After calling the init_led() method to initiate and default out GPIOZero led instance, we then see how to register our LEDControl resource with api.add_resource() on line (19). Here, we are mapping the URL endpoint, /led, with our controller.
Finally, on line (20), our server is started (in debug mode) and is ready to receive client requests. Notice that we use the core Flask instance in the app variable to start the server:
# Initialize Module.
init_led()
api.add_resource(LEDControl, '/led')          # (19)

if __name__ == '__main__':
    app.run(host="0.0.0.0", debug=True)       # (20)
Well done! We've just covered the build of a simple, yet, functional RESTful API server in Python. You'll find links in the Further reading section to the official Flask-RESTful documentation so you can take your knowledge further.
As mentioned, we've used PWMLED in our server. Let's briefly introduce the term PWM before we proceed and review the web page that accompanies our RESTful API server.
Introduction to PWM
In the proceeding example, we used PWMLED, not LED, from GPIOZero. PWMLED allows us to control the brightness of the LED using a technique known as Pulse Width Modulation, commonly abbreviated as PWM.
PWM is a technique used to create a lower the average voltage from a source signal, which can be a 3.3-volt GPIO pin. We will be covering PWM and GPIO pin voltages in detail in Chapter 6, Electronics 101 for the Software Engineer.
For our current example, briefly (and somewhat oversimplified), PWM pulses the LED on and off really, really fast, and our eyes observe different pulse durations (that are creating different voltages) manifesting as different brightness levels of the LED. We changed this pulse duration (known as the duty-cycle) using the value property of a PWMLED instance, that is, led.value = state["level"] in LEDControl.post(). In Chapter 5, Connecting Your Raspberry Pi to the Physical World, we will explore PWM in greater detail.
We've now covered our Python-based Flask-RESTful API server and learned how to implement a simple and functional RESTful API server that is capable of handling both GET and POST requests, the two most popular ways of interacting with RESTful API servers. Plus, we also saw how to achieve data validation with Flask-RESTful as a simple and effective way to guard our server against invalid input data.
We also learned to use the curl command-line tool to interact with and test our server. As you build, test, and debug RESTful API servers, you will find curl a useful addition to your development toolkit.
Next, we will take a look at the code behind the web page that interacts with our API.
Adding a RESTful API client web page
The web page we are about to discuss is the one you interacted with previously to change the brightness of your LED when you visited http://localhost:5000 in your web browser. A screenshot of the web page is shown in Figure 3.1.
As we proceed through this section, we will be learning how to build this basic web page using HTML and JavaScript. We will discover how to make the HTML range component interact with the Flask-RESTful API server that we created in the previous section, so that when we change the range control (that is, slide the slider), our LED's brightness also changes.
You will find the page's code in the chapter03/templates/index_api_client.html file. Please review this file before proceeding to get an overall idea about what it contains.
The templates folder is a special Flask folder where template files are kept. An HTML page is considered a template in the Flask ecosystem. You will also find a folder named static. This folder is where static files are stored. For our example, this is where a copy of the jQuery JavaScript library file is found.
Let's walk through the web page code.
Understanding the client-side code
This section's code is JavaScript, and we will be using the jQuery JavaScript library. An understanding of basic JavaScript and jQuery will be essential to understanding the code examples that follow. If you are not familiar with jQuery, you can find learning resources at jQuery.com.
JavaScript imports
We see in the following, on line (1), that we import the jQuery library that is contained in the static folder:
<!-- chapter03/templates/index_api_client.html -->
<!DOCTYPE html>
<html>
<head>
    <title>Flask Restful API Example</title>
    <script src="/static/jquery.min.js"></script>    <!--(1)-->
    <script type="text/javascript">
Next, we will start to cover the JavaScript functions in the file.
The getState() function
The primary purpose of getState() is to retrieve the LED's current state from the server. It uses the JQuery get() method to make an HTTP GET request to our API server's /led resource. We saw, in the previous section, that the URL path, /led, is mapped to the LEDControl Python class, and because we're making a GET request, it's LEDControl.get() that will receive and handle our request:
// GET request to server to retrieve LED state.
function getState() {
    $.get("/led", function(serverResponse, status) { // (2)
       console.log(serverResponse)
       updateControls(serverResponse)                // (3)
    });
}
The server's response is contained in the serverResponse parameter on line (2), which is passed to the updateControls() function on line (3) to update the web page controls. We'll cover this method shortly.
While getState() gets data from our Python server, our next method, postUpdate(), sends (that is, posts) data to the server.
The postUpdate() function
postUpdate() changes the LED's brightness by performing an HTTP POST to the server. This time, it's the LEDControl.post() method in our API server that handled the request:
// POST Request to server to set LED state.
function postUpdate(payload) {                          // (4)
    $.post("/led", payload, function(serverResponse, status) {
        console.log(serverResponse)
        updateControls(serverResponse);                 // (5)
    });
}
On line (4), it receives and parses (remember arg_parser from LEDControl) the data in the payload parameter. payload is a JavaScript object with a state child property. We'll see this object constructed later in the web page slider's change event handler.
For consistency, we also update the controls on line (5) even though, in our case, the serverResponse variable will contain the same level value as the payload parameter.
Next, we will see what the call to updateControls() on line (5) does.
The updateControls() function
updateControls() changes the visual appearance of the web page controls. This function receives JSON input as the data parameter, which is in the form: {"level":50}. Starting on line (6) and using jQuery selectors, we update the slider control and text on the web page to reflect the new level value:
function updateControls(data) {
    $("input[type=range].brightnessLevel").val(data.level);  // (6)
    $("#brightnessLevel").html(data.level);
}
Next, we'll see how we use JQuery to create an event handler that responds when we or another user changes to the web page's slider component.
Registering event handlers with jQuery
We are following jQuery best practice and using the jQuery document ready function (that is, $(document).ready(...)) to register the event handlers for our web page's slider control and initialize our web page elements:
    $(document).ready(function() {
        // Event listener for Slider value changes.
        $("input[type=range].brightnessLevel")
            .on('input', function() {                    // (7)
               brightness_level = $(this).val();         // (8)
               payload = { "level": brightness_level }   // (9)
               postUpdate(payload);
            });

        // Initialize slider value form state on server.
        getState()                                       // (10)
    });
    </script>
</head>
On line (7), we register an event handler for the slider controls input event. This handler function will be called when a user interacts with the slider on the web page.
Starting on line (8), after a user moves the slider, we extract the slider's new value of the slider using val() (which will be between 0 and 100—we'll see why shortly when we review the page's HTML).
On line (9), we create a JSON object containing our new brightness level before passing it to postUpdate(), which calls our RESTful API to change the brightness of our physical LED.
Finally, on line (10), we call our getState() function, which makes an HTTP request to our server to get the current brightness level for the LED. As we saw previously, getState() then delegates to updateControls(), which then updates the slider and page text to reflect the LED's brightness value.
We'll conclude this section by looking at the HTML that makes up the web page.
The web page HTML
Previously in our Python server, we had the line render_template('index_rest_api.html', pin=LED_GPIO_PIN). It's the pin parameter in this method call that is rendered on our web page on line (11), represented by the template variable, {{pin}}:
<body>
    <h1>Flask RESTful API Example</h1>
    LED is connected to GPIO {{pin}}<br>               <!--(11)-->
    Brightness: <span id="brightnessLevel"></span>%<br>
    <input type="range" min="0" max="100"              <!--(12)-->
           value="0" class="brightnessLevel">
</body>
</html>
Finally, we see, on line (12), our HTML slider component is restricted to the range of 0-100. As we saw previously, it's the call to getState() in the document ready handler that updates the slider's value attribute to match the brightness level stored on the server after the web page has finished loading.
Congratulations! We've reached a milestone now, having completed a full end-to-end server and client example based on RESTful APIs. Our learning about Flask and Flask-RESTful means we have learned to use one of the most popular and feature-rich Python libraries for building web services. Plus, learning to build a RESTful API server and matching client means we have practically implemented the most common approach used today for client-server communication.
We have barely scratched the surface of what can be achieved with Flask, Flask-RESTful, and RESTful APIs in general, and there is much more that can be explored. You'll find links in the Further reading section if you wish to take your understanding of these topics further.
Next, we will create the same client and server scenario we built in this section, only this time using Web Sockets as our transport layer.
Creating a Web Socket service with Flask-SocketIO
We will now implement our second Python-based server. Our overall outcome in this section will be similar to our RESTful API server and client that we created in the previous section—that is, we will be able to control our LED from a web browser. Our objective this time around, however, will be to create our program using a different technological approach using Web Sockets as our transport layer.
Web Sockets are a full-duplex communication protocol and are a common technology choice where real-time client/server interaction is required. Web Sockets are a technology that—in my opinion and experience—is best learned through doing rather than reading, especially if you are new to server development. A deep discussion of Web Sockets is beyond the scope of this chapter; however, you'll find two links in the Further reading section covering the basics.
If you are new to Web Sockets, I highly recommend reading those two resources as a primer before proceeding. And don't worry if the content does not sink in initially because I'm confident that, once you have used and understood how our Python Web Socket server and the accompanying Web Socket-enabled web page is implemented, the pieces of the larger Web Socket puzzle will start to come together.
For our Web Socket sever build, we will use the Flask-SocketIO library, which is modeled after and compatible with the popular Socket.IO library for JavaScript (https://socket.io).
We will start by running and using our Web Socket server to interact with the LED before proceeding to review the server's source code.
Running and testing the Python server
Let's start by having a quick look at our Python Web Socket server code and running the server to see it in operation. This will give us a broad idea of the code and a first-hand demonstration of how the code works before we discuss it in detail.
You will find the Web Socket server's code in the chapter03/flask_ws_server.py file. Please review this file before proceeding.
When you have looked through the code, we will run our server. Here are the steps to follow:
- Run the Web Socket server with the following command:
(venv) $ python flask_ws_server.py
... truncated ...
NFO:werkzeug: * Running on http://0.0.0.0:5000/ (Press CTRL+C to quit)
... truncated ...
The preceding output is similar to what we saw when we ran the RESTful API server; however, you can expect more output messages on your Terminal for this server. The additional output you will see has been truncated from the preceding example.
$ chmod -x flask_ws_server.py
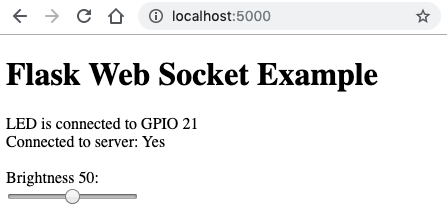
- Visit the http://localhost:5000 URL in a web browser. You will get a web page with a slider as shown in Figure 3.2. While the visual appearance of the web page is similar to the RESTful API server's web page, the underlying JavaScipt is different:
Verify that you can use the slider on the web page to change the brightness of the LED.
- Find on the web page, the line Connected to server: Yes, then perform the following:
- Terminate the server by pressing Ctrl + C in the Terminal, and you will notice the line changes to Connected to server: No.
- Restart the server again and it changes back to Connected to server: Yes.
This illustrates the bi-directional nature of Web Sockets. We'll see how this is implemented on the web page when we review it's JavaScript but first, we will review the Python code that makes up our Web Socket server.
Server code walkthrough
In this section, we will walk through our Python server's source code and discuss the core parts. Again, we'll skip over any code and concepts that we covered in earlier chapters. First, let's see what we're importing.
Imports
Near the top of the source file, we have the following imports:
from flask import Flask, request, render_template
from flask_socketio import SocketIO, send, emit            # (1)
The main difference concerning our preceding imports compared to the RESTful API imports are on line (1), where we now import classes and functions from Flask-SocketIO.
Next, in our source code, we start to work with Flask and the Flask-SocketIO extension.
Flask and Flask-RESTful API instance variables
On line (2), we create an instance of SocketIO and the Flask-SocketIO extension and assign it to the socketio variable. It's this variable that we will use throughout our server to access and configure our Web Socket service:
# Flask & Flask Restful Global Variables.
app = Flask(__name__) # Core Flask app.
socketio = SocketIO(app) # Flask-SocketIO extension wrapper  # (2)
Following the creation of our SocketIO instance, we once again will server a web page from the default URL endpoint, /.
Serving a web page
Similarly to the RESTful API example, we configure the core Flask framework to serve a web page from the root URL using the @app.route() decorator:
@app.route('/', methods=['GET'])
def index():
    """Make sure index_web_sockets.html is in the templates folder
    relative to this Python file."""
    return render_template('index_web_sockets.html',         # (3)
                           pin=LED_GPIO_PIN)
For our Web Socket server, this time, we are serving the HTML file, index_web_sockets.html, which we will be covering shortly in the next section, Adding a Web Socket client web page.
Next, we start to see the code that sets up and handles Web Socket event messages.
Connecting and disconnecting handlers
From this point in code forward, we start to see the major differences between the RESTful API server and this Web Socket server:
# Flask-SocketIO Callback Handlers
@socketio.on('connect')                                     # (4)
def handle_connect():
    logger.info("Client {} connected.".format(request.sid)) # (5)

    # Send initializating data to newly connected client.
    emit("led", state)                                      # (6)
We see, on line (4), how to register a message or event handler using the Python decorator notation. The parameter to each @socketio.on(<event_name>) is the name of an event our server will listen for. The connect and disconnect events (in the following) are two reserved events. These handlers are called whenever a client connects to or disconnects from the server.
You will notice, on line (5), we are logging whenever a client connects, along with a unique identifier for the client accessed via request.sid. Each client session with the server receives a unique SID. When you visit http://localhost:5000, you will see this connected message logged by the server. If you open two or more web browsers (or tabs) to this URL, you will notice that each session receives a unique SID.
On line (6), we emit the current LED state back to the connecting client so it can initialize itself as required:
@socketio.on('disconnect')                               # (7)
def handle_disconnect():
    """Called with a client disconnects from this server"""
    logger.info("Client {} disconnected.".format(request.sid))
Our disconnect handler on line (7) is simply logging the fact that a client disconnects. As you browse away from http://localhost:5000, you will notice the server logging this message, along with the disconnecting client's sid.
Next, we come across the event handler that controls our LED.
LED handler
On line (8) in the following, we have another message handler—this time using a custom event named led. Also notice on line (9) that this event handler has a data parameter, whereas the connect and disconnect handlers in the preceding section had no parameters. The data parameter contains data sent from the client, and we see, on line (10), the level child property of data. All data form clients are strings, so here we validate the data and cast it to an integer on the following line. There is no equivalent built-in argument validating and parsing utility with Flask-SocketIO, so we must perform validation checks manually, as shown starting on line (11):
@socketio.on('led')                                 # (8)
def handle_state(data):                             # (9)
    """Handle 'led' messages to control the LED."""
    global state
    logger.info("Update LED from client {}: {} "
                .format(request.sid, data))

    if 'level' in data and data['level'].isdigit(): # (10)
        new_level = int(data['level'])

        # Range validation and bounding.            # (11)
        if new_level < 0:
            new_level = 0
        elif new_level > 100:
            new_level = 100
In the following code block, on line (12), we set the LED's brightness. On line (13), we see the server-side use of the emit() method. This method call emits a message to one or more clients. The "led" parameter is the name of the event that will be consumed by a client. We've called both the client-side and server-side events related to LED control the same name, led. The state parameter is the data to pass to the client. Similar to the RESTful API server, it's a Python dictionary object.
The broadcast=True parameter means that this led message will be emitted to all connected clients, not just the client that originated the led message on the server. The broadcasting of this event is why, when you opened multiple web pages and changed the slider on one, the others also stayed in sync:
        led.value = new_level / 100               # (12)
        logger.info("LED brightness level is " + str(new_level))

        state['level'] = new_level

    # Broadcast new state to *every*
    # connected connected (so they remain in sync)
    emit("led", state, broadcast=True)            # (13)
Our final task is to cover how to start our Web Socket server.
Starting the server
Finally, we start the server on line (14). This time, we are using the Flask-SocketIO instance, socketio, rather than the core Flask app instance, as we did for the RESTful API server:
if __name__ == '__main__':
    socketio.run(app, host="0.0.0.0", debug=True)  # (14)
Well done! That's our Web Socket server complete.
We have now seen how we can build a Web Socket server using Python together with Flask-SocketIO. While the overall outcome of our Web Socket server implementation controls our LED similarly to our RESTful API server, what we have learned is a different approach to achieving the same end result. However, in addition to this, we demonstrated a feature provided by a Web Socket approach, which is how we can keep multiple web pages in sync!
Now that we have seen the Python server implementation of a Web Socket server, we'll next turn our attention to the Web Socket version of the web page.
Adding a Web Socket client web page
In this section, we will review the HTML web page we used to control our LED from our Web Socket server. An example of this page as seen in Figure 3.2.
We will learn how to use the Socket.IO JavaScript library with our web page so we can send and receive messages (when we work in a Web Socket environment, we tend to refer to data as messages) to and from our Python Flask-SocketIO Web Socket server. Plus, as we explore the JavaScript and Socket.IO-related code, we'll discover how our client-side JavaScript code relates to our Python server-side code.
You will find the following web page's code in the chapter03/templates/index_ws_client.html file. Please review the contents of this file to get a broad overview of what it contains.
When you have reviewed our HTML file, we will continue and discuss the important parts of this file.
Understanding the client-side code
Now that you had a look through the chapter03/templates/index_ws_client.html file, it's time to discuss how this file is constructed and what it does. We will start our code walk-through with the additional JavaScript import we need for Web Socket support.
Imports
Our Web Socket client requires the Socket.IO JavaScript library, and we see this imported on line (1). You will find a link to the Socket.IO JavaScript library in the Further reading section if you want to learn more about this library and how it works:
<!-- chapter03/templates/index_ws_client.html -->
<!DOCTYPE html>
<html>
<head>
    <title>Flask Web Socket Example</title>
    <script src="/static/jquery.min.js"></script>
    <script src="/static/socket.io.js"></script>   <!-- (1) -->
    <script type="text/javascript">
Following the imports, we will see next the JavaScript that integrates with our Python Web Socket server.
Socket.IO connect and disconnect handlers
In the <script> section of the file, on line (2), we create an instance of the io() class from the socket.io JavaScript library and assign it to the socket variable:
    var socket = io();                         // (2)

    socket.on('connect', function() {          // (3)
        console.log("Connected to Server");
        $("#connected").html("Yes");
    });

    socket.on('disconnect', function() {       // (4)
        console.log("Disconnected from the Server");
        $("#connected").html("No");
    });
On line (3), with socket.on('connect', ...), we register a connect event listener. This handler is called every time our web page client connects successfully to our Python server. This is the client-side equivalent of the Python server's on connect handler we defined with @socketio.on('connect').
On line (4), we see the disconnect handler that is called every time the client web page loses its connection to the server. This is the client-side equivalent of the Python server-side @socketio.on('disconnect') handler.
Notice, in both handlers, we update our web page to indicate whether it has a connection back to the server. We saw this in operation previously when we terminated and restarted the server.
Next, we have a handler related to our LED.
The on LED handler
On line (5), we have our led message handler, which is responsible for updating the HTML controls with the current brightness level of our LED:
socket.on('led', function(dataFromServer) {         // (5)
    console.log(dataFromServer)
    if (dataFromServer.level !== undefined) {
        $("input[type=range].brightnessLevel").val(dataFromServer.level);
         $("#brightnessLevel").html(dataFromServer.level);
     }
});
If you review the Python server's @socketio.on('connect') handler, you will notice it contains the line emit("led", state). When a new client connects to the server, it emits back to the connecting client a message containing the current state of our LED. It's the JavaScript socket.on('led', ...) part on line (5) that consumes this message.
Next, we have the jQuery document ready callback.
The document ready function
The jQuery document ready callback is where we set up the event handler for the HTML slider:
        $(document).ready(function(){
            // Event listener for Slider value changes.
            $("input[type=range].brightnessLevel")
              .on('input', function(){
                  level = $(this).val();
                  payload = {"level": level};
                  socket.emit('led', payload);         // (6)
            });
        });
    </script>
</head>
On line (6), we see how to emit a message in JavaScript. The call to socket.emit('led', payload) emits a message to the Python server with the brightness level we want to apply to our LED.
It's the Python @socketio.on('led') handler that receives this message and changes the LED's brightness.
If you review this Python handler, you will notice the line: emit("led", state, broadcast=True). This line broadcasts a message with the new LED state to all connected clients. Each client's socket.on('led', ...) handler will consume this message and synchronize their sliders accordingly.
Finally, we have the HTML that makes up our web page.
The web page HTML
The only difference to the RESTful API web page is the inclusion on line (7) of a message to indicate whether we have a connection to the Python server:
<body>
  <h1>Flask Web Socket Example</h1>
  LED is connected to GPIO {{pin}}<br>
  Connected to server: <span id="connected">No</span> <!-- (7) -->
  <br><br>
  Brightness <span id="brightnessLevel"></span>:<br>
  <input type="range" min="0" max="100"
         value="0" class="brightnessLevel">
</body>
</html>
Congratulations! That's two Python servers and web page clients using two different transport layers you have just completed.
We have seen how to implement the same project to control an LED's brightness using both a RESTful API-based approach and a Web Sockets-based approach. These are two very common options for implementing web services and integrating a web page (or any client for that matter) to a backend server, so an understanding and appreciation of both techniques are useful so you can choose the most suitable technique for your own applications or for those times when you are trying to understand how an existing application is implemented.
Let's recap what we have covered by comparing the approaches and learning a little more about which problem domains each approach is best suited for.
Comparing the RESTful API and Web Socket servers
A RESTful-based API is conceptually similar to design, develop, and test, and are more commonly found across the internet where a one-way request/response data exchange is needed.
Here are some defining characteristics of this approach:
- The communication protocol is built around HTTP methods with GET, POST, PUT, and DELETE being the most common.
- The protocol is half-duplex in the form of request-response. The client makes a request and the server responds. The server cannot initiate a request to a client.
- We have options including curl on the command line and GUI tools such as Postman to test and development RESTful APIs.
- We can use a common web browser to test HTTP GET API endpoints
- In Python, we can use the Flask-RESTful extension to help us to build a RESTful API server. We model endpoints as Python classes that have class methods such as .get() and .post() that match HTTP request methods.
- For a web page client, we can use a library such as jQuery to make HTTP requests to our Python server.
Web Sockets, on the other hand, are often found in chat applications and games where real-time two-way data exchange is needed, often with many simultaneous clients.
Here are some defining characteristics of this approach:
- The communication protocol is based on publishing and subscribing to messages.
- The protocol is full-duplex. Both the client and the server can initiate requests to one another.
- In Python, we can use the Flask-SocketIO extension to help us to create Web Socket services. We create methods and designate them as a callback handler for a message event.
- For a web page client, we use the socket.io JavaScript library. Similar to Python, we create common JavaScript functions and register them with socket.io as callback handlers for message events.
Is one approach better than the other? There is no single best or one-size-fits-all approach, so choosing a networking approach for your IoT applications is largely going to depend on what you are creating and how clients are going to connect to and use your application. If you are new to building networked applications and web services in general, RESTful APIs with Flask-RESTful is a great place to start while you learn the concepts and experiment. This is a very common and widely used approach, plus if you use a tool such as Postman (getpostman.com) as your API client while developing, then you'll have a powerful and fast way to play with and test the APIs that you create.
Summary
In this chapter, we have covered in two common methods for building networked services with Python—RESTful APIs and Web Socket services. We built these services in Python using the Flask microservices framework and the Flask-RESTful and Flask-SocketIO extensions. After we created each server, we also created web page clients. We learned how to use the JavaScript jQuery library to make a RESTful API request and the Socket.IO JavaScript library to perform Web Socket messaging and subscribing.
With this new knowledge, you now have the foundations and a simple end-to-end client-server framework built using Python, HTML, JavaScript, and jQuery that you can expand on and experiment with to create grander IoT applications. For example, as you proceed through Part 3 of this book, IoT Playground, and learn about different electronic sensors and actuators, you'll be in a position to expand and build upon this chapter's examples using different electronic components. We'll also see another example of Flask-RESTful and RESTful APIs when we reach Chapter 14, Tying It All Together – An IoT Christmas Tree, where we introduce a web page that interacts with a LED lighting strip and servo.
In Chapter 4, Networking with MQTT, Python, and the Mosquitto MQTT Broker, we will look at a more advanced and very versatile approach to building the networking layer of IoT applications, this time with MQTT, the Message Queue Telemetry Transport protocol.
Questions
As we conclude, here is a list of questions for you to test your knowledge regarding this chapter's material. You will find the answers in the Assessments section of the book:
- What feature of the Flask-RESTful extension can we use to help to validate a client's input data?
- What communication protocol can be used to provide real-time full-duplex communication between a client and a server?
- How do we perform request data validation with Flask-SocketIO?
- What is the Flask templates folder?
- When using jQuery, where should we create component event listeners and initialize our web page content?
- What command-line tool can be used to make requests to a RESTful API service?
- What happens to the physical LED when we change the value property of a PWMLED instance?
Further reading
We have mentioned the word "RESTful" a lot in this chapter, without any deep discussion of what it means exactly. If you want all of the details, a great introductory tutorial can be found on SitePoint.com:
- REST on SitePoint.com: https://www.sitepoint.com/developers-rest-api
Our RESTful API example barely even touches the basics of Flask and Flask-RESTful but provides a working example that you can build upon. I encourage you to read at a minimum the Flask Quick Start Guide, followed by the Flask RESTful Quick Start Guide to get a good grounding and understanding of these two frameworks:
- Flask Quick Start: https://flask.palletsprojects.com/en/1.1.x/quickstart
- Flask-RESTful Quick Start: https://flask-restful.readthedocs.io/en/latest/quickstart.html
As mentioned during the chapter in the section titled Introducing the Flask microservices framework, if you experience difficulties with Flask-RESTful and cannot find answers in its documentation, you should also consult the official core Flask documentation:
- Flask documentation: https://flask.palletsprojects.com
We have also only scratched the surface of Web Sockets with Flask-SocketIO and Socket.IO. The following links point to the official Flask-SocketIO and Socket.IO libraries. I've also included two additional links that provide a generalized and simple introduction to Web Sockets. As a reminder, Web Sockets are a technology that is best learned through doing rather than reading, especially if you are new to server development. So, as you read introductory material on Web Sockets, expect core underlying concepts to be illustrated with a wide range of different code examples and libraries in addition to the Flask-SocketIO and Socket.IO libraries we used in this chapter:
- Flask-SocketIO: https://flask-socketio.readthedocs.io
- Socket.IO (JavaScript library): https://socket.io
- Web Socket basics: https://www.html5rocks.com/en/tutorials/websockets/basics
- Web Socket basics: https://medium.com/@dominik.t/what-are-web-sockets-what-about-rest-apis-b9c15fd72aac