
Using Silverlight's Native Printing Functionality
Silverlight's printing functionality revolves around the PrintDocument class. This class provides a very primitive means of sending content to the printer, but it's quite easy to use for simple tasks. Let's look at how you can use it to send some output to the printer.
![]() Note For simple printing tasks such as printing a screen, the
Note For simple printing tasks such as printing a screen, the PrintDocument class provides a nice, easy means of doing so. However, when it comes to printing reports and other more complex printing jobs, it can become quite unwieldy to implement printing at such a low level. Therefore, generating and displaying PDF reports may be a solution better suited to those needs. We'll look at this alternative shortly.
Starting a Print Job
Silverlight's printing mechanism works using an event-based model, where you do the work required in response to its events. The PrintDocument class has three events to which you can respond:
BeginPrint: You can take this opportunity to initialize the content you want to print.PrintPage: You use this event to provide the content for a page to the printer. This event is fired for each page that is printed.EndPrint: This event will be raised when printing is complete or an error has occurred.
The only event you need to handle is the PrintPage event, although it's also useful to handle the EndPrint event so that you can determine whether an error has occurred during the printing process.
To start a print job, create an instance of the PrintDocument class, add event handlers for the events you want to handle on this object, and then call the Print method, to which you pass a name for the document, to start printing. Note that at this stage you haven't specified what content is to be printed; you actually do this in response to the PrintPage event.
PrintDocument pd = new PrintDocument();

pd.PrintPage += Document_PrintPage;

pd.Print("Chapter 15 – Printing Workshop");
![]() Note By default, the
Note By default, the Print method of the PrintDocument class uses the vector printing mode in Silverlight 5 (assuming the printer is PostScript-enabled). The PrintDocument class also has a PrintBitmap method that you can use to force bitmap printing if you wish. This method behaves exactly the same as the PrintDocument class's Print method did in Silverlight 4 when vector printing was not supported. Vector printing is generally your best option, because it results in higher quality print output and smaller files being sent to the printer. However, the Print method will automatically fall back to bitmap printing if the object tree to be printed contains non-PostScript-compatible objects. In this scenario, you can still force vector printing using the PrinterFallbackSettings class, which we'll look at shortly.
Providing the Content for a Printed Page
When you call the PrintDocument class's Print/PrintBitmap method, the standard Windows print dialog will be displayed. Assuming the user goes ahead with the printing, the BeginPrint event of the PrintDocument object will be raised, after which the PrintPage event will be raised. This is where you can now send some content to the printer.
private void Document_PrintPage(object sender, PrintPageEventArgs e)

{

}
The event handler method is passed a PrintPageEventArgs object, which has four properties:
HasMorePagesPageMarginsPageVisualPrintableArea
You assign an object hierarchy to the PageVisual property, representing the content to send to the printer for that page. This can be a control in a view or an object hierarchy that you create in code. For example, if you have a DataForm control named ProductDataForm that you want to print, your event handler for the PrintPage event will be as follows:
private void Document_PrintPage(object sender, PrintPageEventArgs e)

{

    e.PageVisual = ProductDataForm;

    e.HasMorePages = false;

}
Note that this code sets the HasMorePages property of the PrintPageEventArgs object to false. To print additional pages, you need to set this property to true. When the property is set to true, the event will be raised again, and you can send the next page's content to the printer (and so on). When you have reached the last page to be printed, set this property to false. The EndPrint event will then be raised, and the print job will complete.
Advanced Print Settings
As demonstrated earlier, the Print method of the PrintDocument class takes a document name as its parameter. This method also has an overload, enabling you to pass in an instance of the terFallbackSettings class. This class has two properties: ForceVector and OpacityThreshold.
- The
ForceVectorproperty enables you to force vector printing, even if the object tree to be printed contains non-PostScript-compatible objects. - The
OpacityThresholdproperty is used to set the opacity value that objects in the object hierarchy need be above in order to be printed. Vector printing does not support opacity, so you need to designate an opacity value where all objects whose opacity is below that value will not be printed, and those above it will be (with full opacity). Its default value is 0, meaning that all objects in the object hierarchy will be printed (with full opacity).
The overload of the Print method that takes an instance of the PrinterFallbackSettings class also has an optional parameter that allows you to skip displaying the Windows print dialog and automatically print to the default printer. This is only possible when the application is running with elevated privileges, which we'll discuss in Chapter 16. Attempting to do so without having elevated privileges will result in an exception being raised.
The following code demonstrates specifying fallback settings and skips displaying the Windows print dialog by setting the useDefaultPrinter parameter of the Print method to true:
PrintDocument pd = new PrintDocument();

pd.PrintPage += new EventHandler<PrintPageEventArgs>(pd_PrintPage);


var fallbackSettings = new PrinterFallbackSettings();

fallbackSettings.ForceVector = true;

fallbackSettings.OpacityThreshold = 0.5;

pd.Print("Chapter 15 - Printing Workshop", fallbackSettings, true);
 Workshop: Printing a Screen
In this workshop, we're simply going to print a view.
- Create a view, and place various controls on it to be printed. Also add a button named PrintButton on the view, and handle its
Clickevent in the code behind, like so:<Button Name="Printbutton" Content="Print" Height="25" Width="80"
Click="PrintButton_Click" /> - Open the code behind for the view. Add the following
usingstatement:using System.Windows.Printing; - In the
PrintButtoncontrol'sClickevent, add the following code:private void PrintButton_Click(object sender, System.Windows.RoutedEventArgs e)
{
PrintDocument pd = new PrintDocument();
pd.PrintPage += Document_PrintPage;
pd.Print("Chapter 15 - Printing Workshop");
} - Now, you need to handle the
PrintDocumentclass'sPrintPageevent, like so:private void Document_PrintPage(object sender, PrintPageEventArgs e)
{
} - Add the following code in bold. This simply tells the
PrintDocumentobject to print this view, and then tells it that there are no more pages to print.private void Document_PrintPage(object sender, PrintPageEventArgs e)
{
e.PageVisual = this;
e.HasMorePages = false;
} - Run your application. When you click the Print button, the Windows printer dialog will appear, and then go on to print the current view to the selected printer.
![]() Note When testing printing, you're best off printing to a virtual print driver (such as PrimoPDF,
Note When testing printing, you're best off printing to a virtual print driver (such as PrimoPDF, www.primopdf.com), rather than to an actual printer. This will save paper and allow you to quickly see the result on the screen. Of course, you should complete your testing against a real printer once you're happy with the output.
Workshop: Printing a Report Created in Code
Sometimes, you want to print content that isn't being displayed to the user. In this case, you need to build an object hierarchy in code and assign the top-level object to the PrintPageEventArg's PageVisual property.
In Chapter 4, we created a ProductSummary presentation model object on the server and exposed a collection of ProductSummary objects to the client. In Chapters 5 and 6, you learned how to consume that data in your Silverlight application. In this workshop, we're going to print this data as a tabular report. We could simply create a DataGrid control via code, populate it with the collection of ProductSummary objects, and print the DataGrid, but instead, we'll take a slightly finer grained approach and lay out the page using TextBlock controls within a Grid control.
For the purpose of this workshop, we'll assume that the collection of ProductSummary objects has already been retrieved from the server and has been stored in a class-level variable named _productCollection of type List<T>. We'll print the Name, Number, QuantityAvailable, ListPrice, and Model properties for each ProductSummary object in the collection.
- Implement the previous workshop first, because we'll use that as a base and modify it to print the report that we'll generate instead of the view.
- Add a class level constant named
rowsPerPage. We're going to implement a primitive form of paging, displaying a fixed number of rows on each page (65 in this example). In a real-world scenario, you should calculate this based on the page margins and printable area, but we'll keep things simple for this workshop.private const int rowsPerPage = 65; - Change the
Document_PrintPageevent handler as follows (changes in bold):private void Document_PrintPage(object sender, PrintPageEventArgs e)
{
PrintDocument pd = sender as PrintDocument;
e.PageVisual = GenerateReportPage(pd.PrintedPageCount, e);
e.HasMorePages = ((pd.PrintedPageCount + 1) * rowsPerPage < _productCollection.Count);
}Here, we are passing off the generation of the page to a method named
GenerateReportPageand determining whether further pages should be printed based on the current page number, the number of rows to be displayed on each page, and the size of the collection being printed. - The remainder of the code is included here in full. In summary, we configure a Grid control to hold all the data for the page, with columns and a header row. Then, for each item in the collection that appears in the current page, we add a TextBox control to the appropriate cell in the Grid control, which displays the value of the item's property. We then return the Grid control back to the caller (
Document_PrintPage), which outputs it to the printer.private UIElement GenerateReportPage(int pageNumber, PrintPageEventArgs printPage)
{
Grid pageLayoutGrid = CreatePageLayout(printPage);
int startIndex = pageNumber * rowsPerPage;
for (int rowIndex = 0; rowIndex < rowsPerPage; rowIndex++)
{
if (startIndex + rowIndex < _productCollection.Count)
{
// Create the row
RowDefinition row = new RowDefinition();
row.Height = new GridLength(1, GridUnitType.Auto);
pageLayoutGrid.RowDefinitions.Add(row);
// Populate it with data from the current item in the collection
ProductSummary product = _productCollection[startIndex + rowIndex];
AddGridCell(pageLayoutGrid, rowIndex + 1, 0, product.Name);
AddGridCell(pageLayoutGrid, rowIndex + 1, 1, product.Number);
AddGridCell(pageLayoutGrid, rowIndex + 1, 2,
product.QuantityAvailable.ToString());
AddGridCell(pageLayoutGrid, rowIndex + 1, 3, product.ListPrice.ToString("C"));
AddGridCell(pageLayoutGrid, rowIndex + 1, 4, product.Model);
}
}
return pageLayoutGrid;
}
private Grid CreatePageLayout(PrintPageEventArgs printPage)
{
Grid pageLayoutGrid = new Grid();
pageLayoutGrid.MaxWidth = printPage.PrintableArea.Width;
// Create the columns
for (int colIndex = 0; colIndex < 5; colIndex++ )
{
var column = new ColumnDefinition();
column.Width = new GridLength(1, GridUnitType.Auto);
pageLayoutGrid.ColumnDefinitions.Add(column);
}
// Create the header row
RowDefinition headerRow = new RowDefinition();
headerRow.Height = new GridLength(1, GridUnitType.Auto);
pageLayoutGrid.RowDefinitions.Add(headerRow);AddGridCell(pageLayoutGrid, 0, 0, "Name", true);
AddGridCell(pageLayoutGrid, 0, 1, "Number", true);
AddGridCell(pageLayoutGrid, 0, 2, "Quantity Available", true);
AddGridCell(pageLayoutGrid, 0, 3, "List Price", true);
AddGridCell(pageLayoutGrid, 0, 4, "Model", true);
// Show a line underneath the header
Line line = new Line();
line.Stretch = Stretch.Fill;
line.VerticalAlignment = VerticalAlignment.Bottom;
line.Stroke = new SolidColorBrush(Colors.Black);
line.X2 = pageLayoutGrid.MaxWidth;
line.SetValue(Grid.RowProperty, 0);
line.SetValue(Grid.ColumnProperty, 0);
line.SetValue(Grid.ColumnSpanProperty, 5);
pageLayoutGrid.Children.Add(line);
return pageLayoutGrid;
}
private void AddGridCell(Grid pageLayoutGrid, int row, int col,
tring text, bool isBold = false)
{
TextBlock cellText = new TextBlock();
cellText.Text = text;
cellText.Margin = new Thickness(3, 0, 3, 0);
if (isBold)
cellText.FontWeight = FontWeights.Bold;
cellText.SetValue(Grid.RowProperty, row);
cellText.SetValue(Grid.ColumnProperty, col);
pageLayoutGrid.Children.Add(cellText);
}
- Now, run your application, and click the Print button. The Windows print dialog will appear, and you can print all the data in the collection to the report, as shown in Figure 15-1.
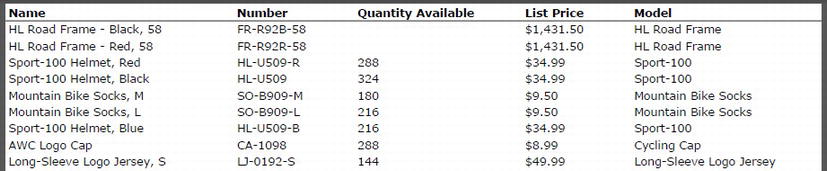
Figure 15-1. A subset of the output from printing a report created in code