
Configuring Elevated Trust
Prior to Silverlight 4, Silverlight applications could run only in a sandboxed mode, with partial trust. This protective measure prevented rogue Silverlight applications from damaging the user's machine. This was an essential security measure but vastly limited the possibilities available to Silverlight applications. By restricting you to the sandbox, you couldn't interact with the host operating system. For example, you couldn't
- Read or write files from the users' file systems without their interaction via the open or save file dialogs.
- Interact with hardware attached to the users' machines, such as printers, scanners, and biometric devices.
- Query a local database engine, such as SQL Server.
- Interact with oter applications installed on the users' machines, such as Word and Excel.
For some business applications, these restrictions meant that Silverlight was not a suitable application development platform to meet their requirements.
From Silverlight 4 on, however, you can configure your Silverlight applications to run with elevated trust, enabling them to break out of the sandbox (partially, at least) and helping overcome a number of the prevailing concerns of Silverlight's usefulness as an application development platform. Silverlight 4 enabled applications to run with elevated trust only when they were running outside of the browser, but Silverlight 5 introduces the ability for application to run with elevated trust inside the browser too.
Let's go through some features of Silverlight that are available only when running with elevated trust. First, however, we need to look at how you can enable elevated trust and determine whether or not the application has elevated trust permissions at runtime.
![]() Note Despite having elevated trust, the application will not exceed the user's Windows privileges. Therefore, having elevated trust will not enable users to read or write to file paths that they have no access to, nor will they be able to perform actions via COM that their Windows privileges do not permit.
Note Despite having elevated trust, the application will not exceed the user's Windows privileges. Therefore, having elevated trust will not enable users to read or write to file paths that they have no access to, nor will they be able to perform actions via COM that their Windows privileges do not permit.
Enabling Elevated Trust in OOB Mode
Enabling your Silverlight application to run with elevated trust when it is running outside the browser is a very simple process. In the Out-Of-Browser Settings window properties (shown previously in Figure 16-2), which you can get to via the project's properties, select the “Require elevated trust when running outside the browser” check box. You'll note that with this option set, the install dialog for the application is quite different from the one displayed without the option set (as was shown in Figure 16-4). Instead, the user will get a more severe-looking dialog, as shown in Figure 16-13.
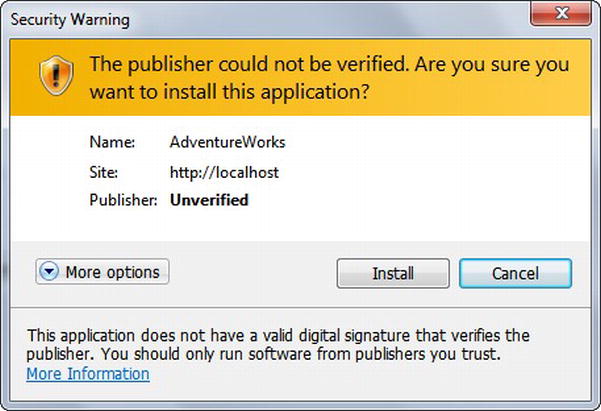
Figure 16-13. The install dialog for unsigned applications requesting elevated trust permissions
This dialog can be made a little friendlier by signing your XAP file. Doing so will change the warning at the top of the dialog to a simple question asking whether you want to install the application and will also display the application's icon (XAP signing is discussed in Chapter 17).
Before invoking any functionality that requires elevated trust, you should ensure that the application is actually running with elevated trust permissions. Despite having set the option that it should do so, while it is running within the browser, it won't have these privileges. Only when the application is installed and actually running in OOB mode will it have the elevated trust permissions.
You can determine whether the application has elevated trust permissions when it's running by checking the HasElevatedPermissions property of the current Application object, like so:
bool hasElevatedTrust = Application.Current.HasElevatedPermissions;
Whenever your application attempts to use features that require elevated trust, it should check this property first to ensure that it has permission to use them.
![]() Note Often, when an application makes extensive use of features that require elevated trust, it will insist that it be installed and run in OOB mode when accessed by displaying an install button only when it runs inside the browser. The means for implementing this was discussed earlier in this chapter.
Note Often, when an application makes extensive use of features that require elevated trust, it will insist that it be installed and run in OOB mode when accessed by displaying an install button only when it runs inside the browser. The means for implementing this was discussed earlier in this chapter.
Enabling Elevated Trust Inside the Browser
Although Silverlight 4 allowed your applications to request and run with elevated trust privileges, they could do so only when running outside the browser. Not all Silverlight applications are suited to being run outside the browser, so forcing them to do so to gain elevated trust privileges posed quite a limitation on those applications. However, Silverlight 5 now permits applications requiring elevated trust privileges to run inside the browser as well, although there are a few hoops you need to jump through to enable this on client machines.
![]() Note In addition to gaining elevated trust privileges inside the browser, enabling you to use COM and P/Invoke and directly access files, turning on in-browser elevated trust enables you to display toast notifications and use the WebBrowser control when your Silverlight applications are running within the browser. However, the WebBrowser control will work only for Silverlight applications running inside Internet Explorer; it will not work in other web browsers. You also cannot open additional windows inside the browser using the
Note In addition to gaining elevated trust privileges inside the browser, enabling you to use COM and P/Invoke and directly access files, turning on in-browser elevated trust enables you to display toast notifications and use the WebBrowser control when your Silverlight applications are running within the browser. However, the WebBrowser control will work only for Silverlight applications running inside Internet Explorer; it will not work in other web browsers. You also cannot open additional windows inside the browser using the Window class.
To configure your application to request elevated trust privileges when running inside the browser, open the Silverlight tab of the Silverlight application's project properties, and select the “Require elevated trust when running in-browser” option, as shown in Figure 16-14.
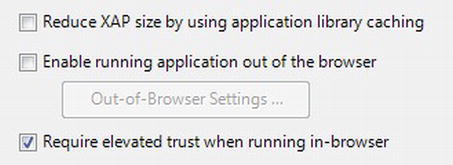
Figure 16-14. Turning on elevated trust for Silverlight applications running inside the browser
If you were to run your Silverlight application now from localhost, you will find that it is successfully running with elevated trust privileges inside the browser. You can confirm this by checking the value of the Application.Current.HasElevatedPermissions property. However, when you deploy your application to a server and run it, you will find that it won't run with elevated trust privileges. You can easily test this by replacing localhost in the browser's address bar with the name of your machine instead. For example, change
http://localhost/AventureWorksTestPage.aspx


to


http://chrispc/AventureWorksTestPage.aspx
You'll find that when the Silverlight application is downloaded from the second URL, the application will not have elevated trust privileges, despite it having them when it's downloaded from the first URL. The reason the application runs with elevated trust privileges under localhost is because localhost is a white-listed domain, which enables you to debug and test applications without needing the application to be signed and so on. Unfortunately, this behavior can be rather confusing if you're not aware of it, with the application working successfully on your local machine but not when you deploy it to a server.
For Silverlight applications to run inside the browser with elevated trust when the application is hosted on a server, the XAP file needs to be signed, the client machines need to permit them to do so by having a special registry key set, and the client machines also need to have the certificate used to sign the XAP file installed.
Follow these steps to enable your Silverlight application to run with elevated trust inside the browser once it is deployed:
- Select the “Require elevated trust when running in-browser” option in the project properties, as previously described.
- Sign your XAP file. The application will not run with elevated trust privileges inside the browser without being signed, unless it's run from localhost. This can be a self-signed certificate if you don't have a real certificate available. See Chapter 17 for details on how to sign XAP files. Your application is now properly configured to run with elevated trust privileges inside the browser, but you need to configure your clients to permit the application to run with elevated trust privileges inside the browser.
- The certificate that you used to sign the application needs to be installed on the client machines. Usually, you will do this throughout an organization using Active Directory Domain Services and a group policy. Steps for doing so can be found at
http://technet.microsoft.com/en-us/library/cc770315.aspx. The certificate will need to be installed to the Trusted Publishers certificate store. If it is a self-signed certificate, it will also need to be installed to the Trusted Root Certification Authorities certificate store. - The client machines also require a registry key to be set, explicitly permitting Silverlight applications to run with elevated trust privileges inside the browser. Your best option again is using a group policy to configure this registry key. You need to add a value named
AllowElevatedTrustAppsInBrowserof typeDWORDunder the following keys:HKEY_LOCAL_MACHINESoftwareMicrosoftSilverlightfor 32-bit WindowsHKEY_LOCAL_MACHINESoftwareWow6432NodeMicrosoftSilverlightfor 64-bit WindowsSet its value to
1to enable Silverlight applications run with elevated trust privileges inside the browser or0to disable them from doing so.
With both your Silverlight application and the client machines configured accordingly, your Silverlight application will successfully run with elevated trust privileges when it is deployed and run on those machines. Be aware, however, that the privileges of the Silverlight application are still subject to the browser's security settings. For example, Internet Explorer's protected mode, turned on by default for the Internet zone, will affect your application's privileges.
![]() Note You can determine whether the application has been configured to run with elevated trust privileges inside the browser at runtime in code using the
Note You can determine whether the application has been configured to run with elevated trust privileges inside the browser at runtime in code using the Deployment.Current.InBrowserSettings object. However, you cannot modify the settings at runtime, and this does not indicate that the application actually has elevated trust privileges.
Accessing the File System
Having elevated trust permissions opens the user's file system to direct reading and writing, without the need to go via the open or save file dialogs. Silverlight 4 limited users to accessing only the folders within their profile, but Silverlight 5 has lifted this restriction, enabling reading and writing of files anywhere that the user has privileges to do so.
The classes that enable you to read from and write to the file system can be found under the System.IO namespace and closely mirror those available in the full .NET Framework. For example, you will find the Directory, DirectoryInfo, File, FileInfo, and Path classes in this namespace that you can use when running with elevated trust. Despite many of these classes having methods that appear to allow you certain functionality, not all of these methods are actually implemented.
Let's take a look at some of the tasks you can perform on the file system when running with elevated trust permissions.
Getting the Path of a Special Folder
To access a file for reading or writing, you first have to determine the location of the file, a task performed by the user via the open or save file dialogs in the examples detailed earlier in this chapter. To do so, you can use the GetFolderPath method of the Environment class, passing it a value from the Environment.SpecialFolder enumeration that denotes the folder you are after. The following code demonstrates obtaining the path to the user's Documents folder:
string docPath = Environment.GetFolderPath(Environment.SpecialFolder.MyDocuments);
Enumerating Files and Directories Within a Folder
Once you've obtained a folder's path, you can enumerate through the files and directories within the folder.
To enumerate through the files within a folder, you can create a DirectoryInfo object, passing in the path to its constructor, and use the methods that it exposes. For example, you can enumerate through the files within the user's Documents folder like so:
string docPath = Environment.GetFolderPath(Environment.SpecialFolder.MyDocuments);

DirectoryInfo docPathInfo = new DirectoryInfo(docPath);


IEnumerable<FileInfo> docPathFiles = docPathInfo.EnumerateFiles();


foreach (FileInfo file in docPathFiles)

{

    // Work with the FileInfo object here as required

}
![]() Note When calling the
Note When calling the EnumerateFiles method, you can make use of one of its overloads to provide a pattern to filter the files that should be returned. Another overload allows you to specify whether files from all the subdirectories below the folder should be returned as well.
Likewise, you can enumerate through the directories within the folder like so:
string docPath = Environment.GetFolderPath(Environment.SpecialFolder.MyDocuments);

DirectoryInfo docPathInfo = new DirectoryInfo(docPath);


IEnumerable<DirectoryInfo> docPathSubdirectories =

    docPathInfo.EnumerateDirectories();


foreach (DirectoryInfo directory in docPathSubdirectories)

{

    // Work with the DirectoryInfo object here as required

}
![]() Note Like the
Note Like the EnumerateFiles method, the EnumerateDirectories method also provides some overloads. One enables you to supply a pattern filtering what directories should be returned, and another enables you to specify whether it should also return directories from all the subdirectories below the folder.
You can return both files and directories within a folder in a single method call using the EnumerateFileSystemInfos method, in the same manner as described for the other two methods, but this method returns a collection of FileSystemInfo objects.
![]() Note You can also access corresponding methods from the
Note You can also access corresponding methods from the Directory class without the need to create a DirectoryInfo object first. Both means are completely valid, and the one you use will depend on your personal preference.
Determining Whether a File or Folder Exists
You can determine whether a file exists by using the Exists method on the File class. For example, the following code determines whether a file named Test.txt exists under the user's Documents folder:
string docPath = Environment.GetFolderPath(Environment.SpecialFolder.MyDocuments);

bool fileExists = File.Exists(Path.Combine(docPath, "Test.txt"));
In a similar fashion, you can determine whether a folder exists by using the Exists method on the Directory class. For example, the following code determines whether a folder named Test exists under the user's Documents folder:
string docPath = Environment.GetFolderPath(Environment.SpecialFolder.MyDocuments);

bool folderExists = Directory.Exists(Path.Combine(docPath, "Test"));
![]() Note Alternatively, you can create a
Note Alternatively, you can create a FileInfo or DirectoryInfo object, passing in the name of the file/directory to its constructor, and check the Exists property on that instead.
Reading Data from a File
You can read text or binary data from a file in the same manner as was demonstrated previously when discussing the open file dialog, after obtaining or creating a FileInfo object pointing to the file.
Elevating trust permissions opens a number of other methods of reading data from a file that are somewhat easier to use than the previously described methods. From the File class, you now have access to the ReadAllText, ReadLines, ReadAllBytes, OpenText, and OpenRead methods. Each of these reduces the amount of code required to read data from a file. For example, the following code demonstrates reading the entire contents of a text file into a string:
string fileContents = File.ReadAllText(filePath);
Saving Data to a File
As with reading data from a file, having elevated trust permissions opens a number of other easier methods of writing data to a file. From the File class, you now have access to the WriteAllText, WriteAllLines, WriteAllBytes, OpenWrite, OpenText, CreateText, and Create methods. For example, the following code demonstrates writing “Hello” to a text file:
File.WriteAllText(filePath, "Hello");
Appending Text to a File
The File class also exposes the AppendText, AppendAllLines, AppendAllText methods that enable you to append text to a file. If the given file doesn't exist, these methods will create it for you. For example, you may wish to keep a log file containing all of the errors experienced on the client for later analysis. These methods will enable you to implement that behavior. For example, the following code demonstrates appending “Hello” to a file:
File.AppendAllText(filePath, "Hello");
Creating a New Folder
You can create a new folder within the user's profile via the CreateDirectory method of the Directory class. For example, to create a folder named Test under the user's Documents folder, you would use the following code:
string docPath = Environment.GetFolderPath(Environment.SpecialFolder.MyDocuments);

Directory.CreateDirectory(Path.Combine(docPath, "Test"));
![]() Note Alternatively, you can use the
Note Alternatively, you can use the CreateSubdirectory method of a DirectoryInfo object to achieve the same outcome.
Deleting a File
You can delete a file either via the Delete method of either a FileInfo object or the File class, for example:
File.Delete(filePath);
Copying or Moving a File
You can copy a file to a folder using either the CopyTo method of a FileInfo object or the Copy method of the File class, for example:
File.Copy(sourceFilePath, destinationFilePath);
Moving a file is a very similar process, using either the MoveTo method of a FileInfo object or the Move method of the File class:
File.Move(sourceFilePath, destinationFilePath);
![]() Note The
Note The Copy method has an overload with an additional overwrite parameter that enables you to specify that any existing file in the destination folder with the same name can be overwritten.
Accessing File/Folder Attributes
It's worth noting that once you are running with elevated trust permissions, you can access the file attributes, such as creation time and directory, that you were unable to access from the FileInfo objects returned from the OpenFileDialog class when your application is running in the normal sandboxed mode. However, even with elevated trust, selecting a file located outside the user's profile folders via the OpenFileDialog class will still deny access to its file attributes–file attributes will be accessible only if the file resides in the user's profile folders, regardless of trust level.
COM Automation
A somewhat controversial feature added to Silverlight 4 was support for enabling COM automation. Most people have an overwhelmingly negative memory of dealing with COM, and they generally prefer that it remains just that—a memory. A more important argument against support for COM is that it is a Windows-only feature, so using it deviates from Silverlight's cross-platform nature.
However, COM does underpin many of Windows features and those of a number of high-profile Windows applications, such as the Office suite. Therefore, Silverlight's COM support opens a wide range of new possibilities for applications running with elevated trust, some of which will be discussed here.
Determining Whether COM Automation Is Available
Before attempting to call COM, you should perform a basic check to ensure that you can actually do so. To access a COM component, you must be running with elevated trust and on a Windows operating system. The IsAvailable property of the AutomationFactory class (found under the System.Runtime.InteropServices.Automation namespace) will return a Boolean value indicating whether these conditions are satisfied, denoting that the application can access COM automation.
bool canAccessCOM = AutomationFactory.IsAvailable;
Accessing COM Components
Once you know that you have access to COM automation, you need to create or obtain an instance of the COM component you wish to automate. You can do so using either the CreateObject or the GetObject methods of the AutomationFactory class. You can use the CreateObject method to create a new instance of the COM object, and you can use the GetObject to obtain an existing instance of the COM object. For example, if you wanted to interact with a running instance of Word, you could use the GetObject method to get that existing instance, returning the most recent instance if there are multiple instances running, or you could use the CreateObject method to start a new instance.
![]() Note The preceding behavior can differ between COM components.
Note The preceding behavior can differ between COM components.
To create or obtain a COM object instance, you need to know its programmatic identifier, most commonly known as its progID. Every COM component has a Globally Unique Identifier (GUID) that uniquely identifies that component, known as a CLSID. This is a unique identifier that the COM component is registered in Windows with. However, this CLSID is not particularly human friendly, so each COM component has a corresponding meaningful string that can be used to access it—its progID. For example, the progID to automate Word is Word.Application.
![]() Note To find the progID for a specific COM component, refer to its associated documentation.
Note To find the progID for a specific COM component, refer to its associated documentation.
Once you have obtained an instance of a COM object, you need to assign it to a variable. However, you have no assembly reference providing the types that you can cast the instance to because you can't add any sort of reference to those types in Silverlight, which creates a problem. Therefore, if you assign the instance to a variable of type object, the only way to call methods on the COM object and access properties is via reflection. Help is at hand, however, with the dynamic keyword.
The dynamic keyword enables you to assign an object instance to a variable and call methods or access properties on that object—without needing to cast it to a particular type first. This is particularly useful when interacting with a COM component, as you don't know its type and cannot cast an object instance to one. Essentially, a variable's type is resolved at runtime, as opposed to the var keyword that resolves a variable's type at compile time—a concept known as late binding.
![]() Note To use the
Note To use the dynamic keyword, you first need to reference the Microsoft.CSharp.dll assembly in your project.
Putting it all together now, let's create a new instance of a Word application (which has a progID of Word.Application):
using (dynamic word = AutomationFactory.CreateObject("Word.Application"))

{

    // Put code to interact with Word here

}
![]() Note As a general rule, you should use a
Note As a general rule, you should use a using block as demonstrated in the preceding example, to ensure that the instance is disposed of properly once you are finished interacting with it.
Obtaining an existing instance of Word is almost identical to the previous example; simply replace the CreateObject method with GetObject instead:
using (dynamic word = AutomationFactory.GetObject("Word.Application"))

{

    // Put code to interact with Word here

}
![]() Note Attempting to obtain an existing instance of a COM object using the
Note Attempting to obtain an existing instance of a COM object using the GetObject method will raise a generic Exception exception if no instance is currently running, stating that it failed to get an object instance for the specified progID.
One of the downsides of defining a variable as a dynamic type is that you don't get any help from IntelliSense in the Visual Studio code editor. Therefore, it may be worth writing the code somewhere where you do, such as creating an application using the full .NET Framework and the Visual Studio Tools for Office to write the initial code and then translating it to run in Silverlight instead, making the code-writing process much easier and involving less trial and error.
Determining Whether a COM Component Is Available
There's no way to tell if a COM component is registered on the system without attempting to create or get an instance of the component. For example, you may want to interact with Word, but the users may not have Word installed on their machines or may not have the right version of Word.
When attempting to create or get an instance of a COM component, a generic Exception exception will be raised, stating that no object was found registered with the specified progID. Therefore, always wrap your calls to COM components in a try . . . catch block, as there's no guarantee that the COM component will actually be available on the users' machines.
Using the Windows Script Host Object
The Windows Script Host is a COM component built into Windows that is generally used to script and automate administrative tasks. It contains a number of COM objects that you can use to perform tasks, such as running applications, reading from and writing to the registry, and creating shortcuts to name a few.
For example, you can launch an application using the Run method of the WScript.Shell COM object. The following code demonstrates launching the Windows Calculator application:
using (dynamic shell = AutomationFactory.CreateObject("WScript.Shell"))

{

    shell.Run("calc.exe");

}
![]() Note A full breakdown of the variety of tasks you can perform with the Windows Script Host component can be found in the MSDN article at
Note A full breakdown of the variety of tasks you can perform with the Windows Script Host component can be found in the MSDN article at http://msdn.microsoft.com/en-us/library/9y04zt1a.aspx.
Reading and Writing Files
A complete range of file system access functions are available via the Scripting.FileSystemObject COM component built into Windows, including functionality that isn't provided to you by the Silverlight runtime. For example, the following code demonstrates enumerating all the drives on the host machine and displaying the list in a message box:
using (dynamic fso = AutomationFactory.CreateObject("Scripting.FileSystemObject"))

{

    StringBuilder driveInfo = new StringBuilder();


    foreach (dynamic drive in fso.Drives)

    {

        driveInfo.AppendLine("Drive path: " + drive.Path);

    }


    MessageBox.Show(driveInfo.ToString());

}
![]() Note More information on how to use the
Note More information on how to use the FileSystemObject component can be found in the MSDN article at http://msdn.microsoft.com/en-us/library/6kxy1a51.aspx.
Automating Office Applications
As discussed earlier, you can automate Word by creating or obtaining an instance of it using its progID of Word.Application. The following example demonstrates creating a new instance of Word, adding a document, and inserting some text into it:
using (dynamic word = AutomationFactory.CreateObject("Word.Application"))

{

    dynamic document = word.Documents.Add();

    document.Content = "This was inserted by Silverlight";

    word.Visible = true;

}
You can automate Excel in a very similar fashion, by creating or obtaining an instance of it using its progID of Excel.Application. The following example demonstrates creating a new instance of Excel, adding a worksheet, and inserting some text into its first cell:
using (dynamic excel = AutomationFactory.CreateObject("Excel.Application"))

{

    dynamic workbook = excel.Workbooks.Add();

    dynamic cell = workbook.ActiveSheet.Cells[1, 1];

    cell.Value = "This was inserted by Silverlight";

    excel.Visible = true;

}
Integrating with the Office applications is one of the more common uses that you will have for COM in your Silverlight business applications. This will allow the users to extract data from the system and manipulate it for their own uses, such as producing reports and letters in Word and charts in Excel.
![]() Note When automating the Office applications, always remember to set their
Note When automating the Office applications, always remember to set their Visible property to true, as demonstrated, because they are hidden by default until you do so.
Handling COM Events
You can handle events raised by COM components using the GetEvent method of the AutomationFactory class. You pass the object and the name of the event to handle to this method, and it will return an AutomationEvent object, whose EventRaised event will be raised in turn when the COM object's event is raised.
For example, following on from the previous example of opening Excel and creating a new workbook, you could handle the BeforeClose event of the Workbook object returned from the excel.Workbooks.Add method, like so:
AutomationEvent beforeClosingEvent =

    AutomationFactory.GetEvent(workbook, "BeforeClose");


beforeClosingEvent.EventRaised += (s1, e1) =>

    {

        System.Diagnostics.Debug.WriteLine("The workbook is closing!");

    };
This will write a line to the output window in Visual Studio when the workbook is about to be closed in Excel.
Communicating with Local Databases
As discussed earlier in this chapter, there's no built-in client-side database that can be used by Silverlight to store data locally on the user's machine. However, COM automation enables you to read and write data to an existing database on the user's machine. For example, the following code demonstrates reading data from a local SQL Server database using ADO:
using (dynamic connection = AutomationFactory.CreateObject("ADODB.Connection"))

{

    using (dynamic rs = AutomationFactory.CreateObject("ADODB.RecordSet"))

    {


        string connectionString = @"Provider=SQLNCLI10.1;Data Source=.SQL2008;" +

                             "Database=AdventureWorks;Integrated Security=SSPI";

        connection.Open(connectionString);


        rs.Open("SELECT TOP 5 ProductID, Name FROM Production.Product", connection);


        while (!rs.EOF)

        {

            int productID = (int)rs.Fields.Item("ProductID").Value;

            string name = rs.Fields.Item("Name").Value;


            // Write out the data to Visual Studio's Output window

            System.Diagnostics.Debug.WriteLine("{0} - {1}", productID, name);

            rs.MoveNext();

        }


        rs.Close();

    }


    connection.Close();

}
And the following code demonstrates inserting a row into the database:
using (dynamic connection = AutomationFactory.CreateObject("ADODB.Connection"))

{

    using (dynamic command = AutomationFactory.CreateObject("ADODB.Command"))

    {

        string connectionString = @"Provider=SQLNCLI10.1;Data Source=.SQL2008;" +

                             "Database=AdventureWorks;Integrated Security=SSPI";

        connection.Open(connectionString);

        command.ActiveConnection = connection;

        command.CommandText = "INSERT INTO ErrorLog(ErrorTime, UserName, " +

            "ErrorNumber, ErrorSeverity, ErrorState, ErrorProcedure, ErrorLine, " +

            "ErrorMessage)" +

            "VALUES (GETDATE(), 'UserName', 0, 0, 0, 'None', 0, 'Test Insert!')";

    }


    connection.Close();

}
Accessing Local Hardware Devices
Silverlight 4 introduced support for accessing the webcam, microphone, and printer attached to the user's machine, but what if you have other hardware devices attached locally? If these hardware devices are accessible via a COM component, accessing them is entirely possible. Windows also provides a generic automation layer for some device types that you can take advantage of to gain access to devices. For example, Windows includes an automation layer that enables access to the Windows Image Acquisition (WIA) platform, which provides access to imaging hardware such as cameras and scanners. Features of its associated COM component include enabling you to enumerate the connected cameras and scanners, take pictures, and scan images.
For example, the following code demonstrates displaying the Acquire Image dialog and saving the acquired image to the user's Pictures folder:
using (dynamic acquireDialog = AutomationFactory.CreateObject("WIA.CommonDialog"))

{

    dynamic image = acquireDialog.ShowAcquireImage();


    if (image != null)

    {

        string path =

            Environment.GetFolderPath(Environment.SpecialFolder.MyPictures);


        image.SaveFile(Path.Combine(path, "ScannedImage.jpg"));

    }

}
![]() Note You can get more information about the WIA automation layer from the MSDN article at
Note You can get more information about the WIA automation layer from the MSDN article at http://msdn.microsoft.com/en-us/library/ms630827.aspx.
Creating and Installing Your Own COM Component
The built-in COM components demonstrated in the preceding sections provide a wide array of additional functionality that you can access from your Silverlight application, but you can also create your own COM component, providing further native functionality, and have that downloaded and registered by your application if the available Windows privileges allow it (or have it preinstalled by an administrator).
You can expose classes from projects targeting the full .NET Framework by making their corresponding assemblies COM-visible. Doing so enables you to implement features not possible in Silverlight and make them available to Silverlight applications. An excellent article written by Elton Saulsberry on doing so is published here: www.codeproject.com/KB/silverlight/Silverlight4COM.aspx.
The downsides of this particular method is that it requires the user to have the full .NET Framework installed on their machine, in which case the application may as well have been completely implemented in WPF. Alternatively, you may wish to develop the component using Visual C++ and ATL to avoid this requirement. You can find an old (but helpful) article written by C. Lung in 1999 on doing so at www.codeguru.com/cpp/com-tech/atl/tutorials/article.php/c17.
P/Invoke
Platform Invoke, better known as P/Invoke, provides a means for calling functions in the Win32 API and other unmanaged DLLs that export functions. This feature, introduced with Silverlight 5, is applicable only to Silverlight applications running under Windows, and it essentially provides a way to access functionality under Windows that's not available via COM. You can now access the full Windows API and potentially access hardware that you cannot access via any other means.
The following example demonstrates how you can use P/Invoke to get the user name and computer name and display them in a message box:
- Add the following using statements to the top of a code-behind file:
using System.Runtime.InteropServices;

using System.Text; - Within the class (but not within a method), declare the following external methods:
[DllImport("Kernel32")]

public static extern bool GetComputerName(StringBuilder buffer, ref int size);


[DllImport("Advapi32.dll")]

private static extern bool GetUserName(StringBuilder buffer, ref int Size); - Now, you can call these methods. For example, add the following code to the
Clickevent handler of a Button control, passing in aStringBuilderobject with a predefined capacity that will be populated with the result and the size of the buffer (that is, theStringBuilderobject's capacity).int size = 64;
StringBuilder computerName = new StringBuilder(size);
GetComputerName(computerName, ref size);
size = 64;
StringBuilder userName = new StringBuilder(size);
GetUserName(userName, ref size);
MessageBox.Show("You are " + userName.ToString() + " on " + computerName.ToString()); - Run your application. When the code is executed, it will display the name of the current user and the computer's name in the message box.
![]() Note Making P/Invoke calls can become very complicated. To find information on the signature of various method declarations and their use,
Note Making P/Invoke calls can become very complicated. To find information on the signature of various method declarations and their use, www.pinvoke.net can be a very helpful source, with information and examples for many popular P/Invoke calls. Alexandra Rusina, a member of the Silverlight team at Microsoft, has some advanced examples of using P/Invoke in Silverlight 5 on her blog at http://blogs.msdn.com/b/silverlight_sdk/archive/2011/09/27/pinvoke-in-silverlight5-and-net-framework.aspx.
Creating Additional OOB Windows
Since Silverlight 3, we've had the ability to run Silverlight applications in a window, outside the browser. However, the applications have been limited to operating in just that one window. However, Silverlight 5 lifts this restriction and enables you to create additional windows when your application is running outside the browser with elevated trust.
![]() Note You cannot create windows in this manner when your Silverlight application is running inside the browser, even if it has elevated trust privileges.
Note You cannot create windows in this manner when your Silverlight application is running inside the browser, even if it has elevated trust privileges.
Unlike WPF, you can't create a window using an item template. Instead, like the NotificationWindow class for toast notifications, you need to create an instance of the Window class and assign content to its Content property. Your best option is to create a user control containing the window's contents. Let's say you have a user control named MyWindowContents. To open a new window with this user control as its contents, use the following code:
Window window = new Window();

window.Content = new MyWindowContents();

window.Title = "My Window";

window.Width = 640;

window.Height = 480;

window.Show();
As you can see, you simply need to create a Window object, set its content and title, set its width and height, and then show it.
You can also set the state of the window: WindowState.Normal, WindowState.Minimized, or WindowState.Maximized, for example:
window.WindowState = WindowState.Maximized;
For windows whose window state is set to normal, the window will be positioned randomly on the screen, unless you set its Top and Left properties before you show it:
window.Top = 300;

window.Left = 700;
These windows can have custom chrome, just like the main window. Simply set their WindowStyle property to WindowStyle.SingleBorderWindow, WindowStyle.None, or WindowStyle.BorderlessRoundCornersWindow, for example:
window.WindowStyle = WindowStyle.BorderlessRoundCornersWindow;
You can enumerate all the open windows using the Application.Current.Windows collection.
![]() Note If you close the main window, the other windows that it spawned will be closed too.
Note If you close the main window, the other windows that it spawned will be closed too.
Custom Chrome
When your application is running in OOB mode it will have the standard window chrome as determined by your operating system's display theme. However, this standard chrome can look quite out of place in comparison to the design of your application's user interface, and it would be nice to be able to implement your own custom chrome that is more integrated with your application's design instead. This is possible when the application has elevated trust permissions.
When your application is configured to run with elevated trust, you can select the Window Style option that you want to use from the Out-Of-Browser Settings window (shown in Figure 16-2). The default option is Default, where your application is contained within the standard window chrome, as shown in Figure 16-15, but the other options available include No Border and Borderless Round Corners.
With the default chrome, a very basic Silverlight application running out of browser might look like the example shown in Figure 16-14.
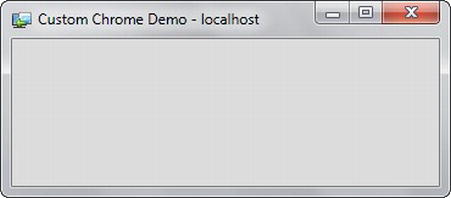
Figure 16-15. An OOB application window with the default window chrome
By setting the Window Style option to No Border, you will get the output shown in Figure 16-16.

Figure 16-16 An OOB application window with no chrome
This is a very square window shape, whereas most windows these days have rounded corners. You can implement a borderless window with rounded corners by setting the Window Style option to Borderless Round Corners. This will give you the output shown in Figure 16-17.

Figure 16-17. An OOB application window with no chrome and rounded corners
One of the issues that you will find when turning on custom chrome is that your application will not only have no border but will have no title bar either. This means that the user can't move the application around the screen, minimize or maximize it, close it, or resize it. You will now have to implement each of these features manually.
Minimizing and maximizing your application's window (setting its state) is easy, as is closing it. Similarly, the ability to move and resize the window is also surprisingly easy to implement. Let's implement a custom title bar that enables the user to move the window around the screen and a resize handle to enable the user to resize the window, as shown in Figure 16-18.

Figure 16-18. An OOB application window with a custom title bar and resize handle
Moving the Window
To enable the window to be moved, let's create a custom title bar using the following XAML:
<Rectangle Name="TitleBar" Height="15" Fill="#D8727272" VerticalAlignment="Top"

           MouseLeftButtonDown="TitleBar_MouseLeftButtonDown" />
Note that you are handling the MouseLeftButtonDown event on the Rectangle. You will use this event to initiate the window move, as per the following code:
private void TitleBar_MouseLeftButtonDown(object sender, MouseButtonEventArgs e)

{

    Application.Current.MainWindow.DragMove();

}
That's all there is to it. The DragMove method on the window will tell the window to move based on the position of the mouse, relative to its current position, and it will automatically continue to do so until the left mouse button is released.
Resizing the Window
To enable the window to be resized, let's create a handle that will appear in the bottom-right corner of the window that the user can click and drag to resize it, using the following XAML:
<Path Name="ResizeGlyph" Data="M20,0 L20,20 L0,20 z" Fill="#D8727272"

      Grid.Row="2" HorizontalAlignment="Right" VerticalAlignment="Bottom"

      Height="20" Width="20" Cursor="SizeNWSE"

      MouseLeftButtonDown="ResizeGlyph_MouseLeftButtonDown" />
Note that you are handling the MouseLeftButtonDown event of the Path. You will use this event to initiate the window resizing, as follows:
private void ResizeGlyph_MouseLeftButtonDown(object sender, MouseButtonEventArgs e)

{

    Application.Current.MainWindow.DragResize(WindowResizeEdge.BottomRight);

}
This works in exactly the same way as moving the window, where the DragResize method on the window will tell the window to resize based on the position of the mouse, relative to its current position, and it will automatically continue to do so until the left mouse button is released. Note that you need to provide what edge of the window the user is resizing to the DragResize method as a parameter, so that the resizing can be handled accordingly.
Other Restrictions Lifted by Elevated Trust
Running with elevated trust lifts a number of other restrictions imposed by the sandbox, including the following:
- When attempting to communicate with a server that isn't the site of origin for the application (that is, communicating cross-domain), you no longer require a cross-domain policy file to be located in the root of that server in order to do so (detailed in Chapter 8).
- Attempting to communicate with a server via sockets no longer requires a cross-domain policy file. Also, the application is not limited to only communicating over ports within the range 4502–4534 (detailed in Chapter 8).
- As described earlier, most keyboard input was disabled while the application was in full-screen mode. This will no longer be the case.
- Consent messages will no longer be displayed when the application attempts to access the clipboard, switch to full-screen mode, and so on. However, the user will have to provide permission for the application to access the video and audio streams.
- Copying to and pasting from the clipboard, displaying open and save file dialogs, and initiating full-screen mode no longer need to be user-initiated actions.
Restrictions Imposed by Elevated Trust
Although elevated trust lifts a number of the restrictions placed on Silverlight applications, having elevated trust does impose one restriction on the application that is not placed on standard OOB applications. Earlier in this chapter, we discussed having your OOB Silverlight application check the server for an update, download it, and automatically apply it the update the next time it is started. However, this poses a potential security risk to machines if the application has elevated trust permissions, simply because of the additional access to the user's machine granted to the application. A rogue application update could potentially be put in place that is designed to harm the user's machine. With the application having elevated trust, it could potentially do so.
Therefore, Silverlight applications having elevated trust can automatically update only if the application is signed. This confirms that the update is sourced from the original application developer and should therefore be safe to install. When the update has been downloaded, Silverlight will check that the signature of the original application matches that of the update and will only install the update if they do.
Rather confusingly, however, Silverlight applications with elevated trust will update if sourced from localhost, even if they aren't signed. This feature was implemented to make testing easier in a development environment but can lead to frustration when developers deploy their applications to a production environment and find out that it won't update (and don't know why).
Therefore, Silverlight applications with elevated trust should always be signed. Application signing is discussed in Chapter 17.
Enabling/Disabling Elevated Trust Applications with
a Windows Group Policy
System administrators may want to install the Silverlight runtime but not permit Silverlight applications that request elevated trust permissions to be installed on the machine. This can be implemented via a Windows group policy setting, as detailed here:
www.microsoft.com/GetSilverlight/resources/documentation/grouppolicysettings

.aspx#TrustedApplications