
Implementing Server-Side Security Using RIA Services
The following are different types of security functions that you generally need to consider as a part of your application design; these functions should be implemented in the services that expose data and operations from the server:
- Maintain a list of users, their authentication details, and their roles within the system.
- Validate that a user is permitted to access the application (known as user authentication). The most common technique for doing this is to require the user to enter a username and password in a login screen, although integration with the user's Windows profile is another method.
- Prevent users from calling specified operations until they are authenticated.
- Prevent users from calling operations that their roles do not permit them to call (known as user authorization), including create, read, update, delete (CRUD), invoke, and custom operations.
- Provide access to only a subset of the data in the database based on the user's role or ID—for example, users can view only the notes they've entered into the system, not those created by other users.
- Decide what part of a given set of data users are allowed to update and delete based on their IDs or roles. For example, a user may be able to view the notes entered into the system by all the users in the system, but not update or delete notes created by other users unless he or she is a manager (that is, in the Manager role).
- Enable users to view or edit only part of an entity based on their roles—for example, customer service personnel can only view the retail price of a product, not the markup amount or the price that the company paid for the product.
The preceding security options represent the most important security-related concepts to consider when designing a system, and RIA Services, in conjunction with the ASP.NET Membership API, helps provide an easy framework to implement most of them. RIA Services makes it very easy to design security into your system, and if you have used the Silverlight Business Application template as the base for your project, you will find that user authentication and registration functionality has already been included. Let's take a look at how to handle each of the preceding points on the server side with RIA Services.
Using the ASP.NET Membership API
As previously stated, if you've used the Silverlight Business Application project template as the base for your project, you will already have the basic infrastructure in place to handle authentication of users and registration of new users (the functionality can be disabled if not required or wanted). This template uses the ASP.NET Membership API to provide the user authentication and authorization features. You will probably be familiar with ASP.NET Membership if you have previously done any ASP.NET development, and the same infrastructure is leveraged by RIA Services to provide user authentication and authorization functionality in your Silverlight applications.
ASP.NET Membership's provider model is extremely flexible, with a number of extensibility points that allow you to either use the default provider or plug in your own, with the provider configuration managed through the web project's web.config file. This enables you to work with a single interface without worrying about the actual underlying implementation.
The default ASP.NET Membership authentication provider implemented in the Silverlight Business Application project template is the Forms Authentication provider. As in ASP.NET projects, this provider maintains your authentication status by storing a temporary cookie on the client (containing authentication information) after the user is authenticated, which is then passed back to the server with each request. The server automatically handles the processing of this cookie and populates the User identity for the current HTTP context with information about the users and their roles.
The other common approach is to use the Windows Authentication provider. This provider authenticates users using their Windows accounts and impersonates them on the server. This can be a good alternative to Forms Authentication if your Silverlight application will be run only within the corporate network, saving the user from needing to log into the application. However, if the application will be run outside the corporate network, Forms Authentication is the best choice.
![]() Note To use Windows Authentication, you will need to use IIS to debug your application, as the Visual Studio development server does not support this mode. You will need to disable anonymous access on the application in IIS and enable one of the Windows-based authentication modes, such as Windows Integrated Authentication.
Note To use Windows Authentication, you will need to use IIS to debug your application, as the Visual Studio development server does not support this mode. You will need to disable anonymous access on the application in IIS and enable one of the Windows-based authentication modes, such as Windows Integrated Authentication.
You can specify which authentication provider you wish to use in the web project's web.config file by setting the mode attribute of the authentication element to Forms or Windows:
<authentication mode="Forms" />
In addition to the authentication providers, there are membership, role, and profile providers. These providers are used to handle persisting the user, role, and profile data, generally in conjunction with the Forms Authentication provider. The default providers are as follows:
- Membership: The SQL membership provider (
SqlMembershipProvider) - Role: The SQL role provider (
SqlRoleProvider) - Profile: The SQL profile provider (
SqlProfileProvider)
These providers store users, roles, and profile data in a SQL Server database. These providers and their default options are configured in the machine.config file found in the %WINDIR%Microsoft.NETFramework<.NET Framework Version>Config folder (change Framework to Framework64 if your IIS server is running in 64-bit mode) but can be overridden in the web.config file in your web project. You will need to override the defaults when you want to specify a database to which the settings will be persisted, as will be demonstrated in the next section.
These default SQL Server providers write to their own database table structures. However, you may be working with an existing database with its own tables storing user, role, and profile data. Alternatively, you may be working with a database other than a SQL Server database, or you may not be using a database to store this data at all. In these cases, you will have to create your own custom user, role, and profile providers and plug them into the ASP.NET Membership model by configuring them in the web project's web.config file. This process won't be covered in this chapter, but creating a custom membership, role, or profile provider is easy—you simply create a class that inherits from the corresponding base provider class and override its methods and properties to add your own functionality.
This chapter will demonstrate using the Forms Authentication mode with the SQL membership, role and profile providers.
![]() Note You can find further information on ASP.NET Membership at
Note You can find further information on ASP.NET Membership at http://msdn.microsoft.com/en-us/library/91f66yxt.aspx.
Configuring Your Database for Forms Authentication
Assuming your AdventureWorks application is still configured to use Forms Authentication (the default mode), you can simply run the project and register yourself as a new user. Silverlight's Business Application project template already implements the user interface that does this.
This all works because the template automatically creates a new SQL Server database called ASPNETDB.MDF for you in the App_Data folder of the web project and creates the required ASP.NET Membership tables. It then attaches this database to SQL Server or SQL Server Express as a user instance. However, you will most likely want to configure it to store the user data in your own database instead.
To do so, you will need to modify the web.config file, creating a connection string to the database and pointing the defaultProvider property of the authentication, roleManager, and profile sections to the name of that connection. Luckily, the Silverlight 5 version of the Silverlight Business Application project template already does these tasks for you; you just need to customize them to your needs. You simply need to update the existing ApplicationServices connection string and point it toward your database.
![]() Note If you've implemented your own custom membership providers, targeting your own database schema for storing users, roles, and profile information, you will need to remove the existing provider references and add your own in their place.
Note If you've implemented your own custom membership providers, targeting your own database schema for storing users, roles, and profile information, you will need to remove the existing provider references and add your own in their place.
Once you've got the providers pointing toward the database, you need to add the required ASP.NET Membership tables to the database's schema.
![]() Note You can skip this step if you've implemented your own custom membership providers that target your own database schema for storing users, roles, and profile information.
Note You can skip this step if you've implemented your own custom membership providers that target your own database schema for storing users, roles, and profile information.
Using the command line (or Run option in the Start menu), run %WINDIR%Microsoft.NETFrameworkv4.0.30319aspnet_regsql.exe. This will open a wizard that you can point toward your AdventureWorks database, and it will create the tables, views, and stored procedures that it requires.
You can now use the ASP.NET Configuration tool for the web application (the rightmost icon in the Solution Explorer window when the web project in your solution is selected) to set up users and roles for the application. Alternatively, simply run the project, and use the registration feature to add yourself as a user.
Setting Up Authentication
AuthenticationService, located in the Services folder, is a standard domain service that enables users to be logged in and out and their profiles to be retrieved and saved from the client. It inherits from the AuthenticationBase class, which contains a set of default authentication-related functions—including Login, Logout, GetUser, and UpdateUser, which make use of the corresponding functionality in the membership provider configured for the application. The AuthenticationService class is therefore very simple, because all the functionality is implemented in the base class, as shown in the following code:
[EnableClientAccess]

public class AuthenticationService : AuthenticationBase<User> { }
Nothing else needs to be added—simply defining this domain service in your web project allows user authentication to be enabled from the client, including returning the user details and roles to the client and maintains the user authentication status by creating a temporary Forms Authentication cookie to be passed between the client and the server with each server request.
![]() Note The temporary Forms Authentication cookie has a default timeout of 2880 minutes (48 hours). That means that if there is no communication with the server for longer than 48 hours, the cookie will expire, and the user will be logged out. The actual implementation of how the expiry works is a little more complicated, but this is the simple version (you can find the more complicated behavior described at
Note The temporary Forms Authentication cookie has a default timeout of 2880 minutes (48 hours). That means that if there is no communication with the server for longer than 48 hours, the cookie will expire, and the user will be logged out. The actual implementation of how the expiry works is a little more complicated, but this is the simple version (you can find the more complicated behavior described at http://support.microsoft.com/kb/910439). You can increase or decrease this value if required (in the web.config file), but it's not recommended to make it too long. The longer the lifetime of the cookie, the more opportunity someone has to steal it and impersonate the user. You may actually want to consider shortening this default lifespan of the cookie—especially if server communication is not being performed over an HTTPS connection. The forms element under the authentication element has a timeout attribute. Change its value (specified in minutes) to the new lifespan that the cookie should have.
Requiring Authentication
By default, the operations that you've created in your domain service can be called by any anonymous user who can get to your service. Ideally, as a first step, you7#39;ll want to limit access to these operations (perhaps some, perhaps all) to only authenticated users of your system.
![]() Note Limiting access to the service calls on the client doesn't mean that those services are secure. Hackers—or more appropriately, crackers—who want to obtain your sensitive data will attempt to circumvent client limitations by directly connecting to the service on the server to see what they can obtain from it. Therefore, you shouldn't make any data available from the service unless the user is properly authenticated and authorized to access that data. In addition, you shouldn't permit the user to perform any operations on the data, such as insert/update/delete, without having the appropriate permissions.
Note Limiting access to the service calls on the client doesn't mean that those services are secure. Hackers—or more appropriately, crackers—who want to obtain your sensitive data will attempt to circumvent client limitations by directly connecting to the service on the server to see what they can obtain from it. Therefore, you shouldn't make any data available from the service unless the user is properly authenticated and authorized to access that data. In addition, you shouldn't permit the user to perform any operations on the data, such as insert/update/delete, without having the appropriate permissions.
To restrict access to all the operations in a domain service to only authenticated users, decorate the domain service class with the RequiresAuthentication attribute:
[EnableClientAccess]

[RequiresAuthentication]

public class ProductService :

   LinqToEntitiesDomainService<AdventureWorksEntities>
If the user is not authenticated and calls one of these operations, the service will raise a DomainOperationException on the client stating that access has been denied to the operation.
In some instances, you may want to select which operations in your domain service require authentication, leaving others available to anonymous users. This is possible by decorating only the operations that require the user to be authenticated with the RequiresAuthentication attribute.
Restricting Access to Operations by Role
Perhaps the user is authenticated, but you want to further restrict access to a domain service or an operation based on the user's role. In this case, you can simply decorate the domain service class or operation with the RequiresRole attribute and include which roles are permitted to call the operation. The following example shows how to limit access to the operation to only users who are in the Administrators role or the Managers role:
[RequiresRole("Administrators", "Managers")]

public IQueryable<Product> GetProducts()
![]() Note By default, any users registering themselves through the Silverlight Business Application project will be added to the Registered Users role. To create additional roles you can use the ASP.NET Configuration tool for the web application (the rightmost icon in the Solution Explorer window). However, you will need to create the users through this same interface to assign them to those roles, or you need add the ability for roles to be specified when registering a user through the Silverlight project. See the “Registering Users” section for more information.
Note By default, any users registering themselves through the Silverlight Business Application project will be added to the Registered Users role. To create additional roles you can use the ASP.NET Configuration tool for the web application (the rightmost icon in the Solution Explorer window). However, you will need to create the users through this same interface to assign them to those roles, or you need add the ability for roles to be specified when registering a user through the Silverlight project. See the “Registering Users” section for more information.
Including the role names as strings in multiple places is not ideal, so it's recommended that you define some constants with the role names and use these instead. Alternatively, you can create your own authorization attribute by creating a class in your project that inherits from AuthorizationAttribute, overriding its IsAuthorized method and inserting your own authorization logic, like so:
public class GTManagerRoleAttribute : AuthorizationAttribute

{

    protected override AuthorizationResult IsAuthorized(

                                    System.Security.Principal.IPrincipal principal,

                                    AuthorizationContext authorizationContext)

        if (principal.IsInRole("Administrators") || principal.IsInRole("Managers"))

            return AuthorizationResult.Allowed;

        else

            return new AuthorizationResult(

                "You do not have sufficient rights to perform this operation.");

    }

}
You can then decorate the operation with this attribute instead of the RequiresRole attribute:
[GTManagerRole]

public IQueryable<Product> GetProducts()
If you want to restrict access to all the domain operations in a domain service, you can simply decorate the domain service with the RequiresRole attribute, or with your own custom attribute, instead.
![]() Note You may also need to implement per-user permission overrides, where users can be permitted access to certain functions that their roles do not allow without assigning an additional role with all its permissions—these permissions can be managed in the user object as properties, with the values stored in the user profile, as demonstrated in the “Exposing Custom User Profile Data” section later in this chapter. You will also need to create your own authorization attribute to handle this scenario.
Note You may also need to implement per-user permission overrides, where users can be permitted access to certain functions that their roles do not allow without assigning an additional role with all its permissions—these permissions can be managed in the user object as properties, with the values stored in the user profile, as demonstrated in the “Exposing Custom User Profile Data” section later in this chapter. You will also need to create your own authorization attribute to handle this scenario.
For insert, update, and delete operations, you might need to reference the instance of the entity being passed into the operation in your authorization attribute. For example, you might want to ensure that the user is permitted to update the given entity. Note that there is an AuthorizationContext object being passed into the IsAuthorized method that you are overriding. The Instance property on that object will have the entity being inserted/updated/deleted assigned to it:
Product product = authorizationContext.Instance as Product;
If you need to pass additional data into the authorization attributes to use as part of the authorization process, you can override the Initialize method of the domain service class, create an instance of the AuthorizationContext class, and assign the data to its Items property, which is a Dictionary property to which you can assign any number of keyed values. Assign this to the AuthorizationContext property of the domain service, and this object will then be passed to any authorization attributes used in the domain service, for example:
public override void Initialize(DomainServiceContext context)

{

    base.Initialize(context);


    Dictionary<string, bool> customUserPermissions = new Dictionary<string, bool>();


    // Load user permissions

    AuthorizationContext = new AuthorizationContext(context);

    AuthorizationContext.Items["CustomUserPermissions"] = customUserPermissions;

}
You can then get this object from the AuthorizationContext object of your custom authorization attributes:
Dictionary<string, bool> customUserPermissions =

    authorizationContext.Items["CustomUserPermissions"] as Dictionary<string, bool>;
Returning a Subset of Data Based on the User's ID or Role
Returning a specific subset of data is more of an implementation issue than one that can be provided in the RIA Services framework. However, here is an example of how to obtain the user's credentials so that you can filter the data being queried accordingly.
The credentials you are likely to require are the user's ID, username, and/or roles. The identity of the user is exposed by the ServiceContext object on the DomainService base class. You will find a User principle object exposed as a property on the ServiceContext object. From here, you can get the user's username from the ServiceContext.User.Identity.Name property and determine whether the user is in a specific role using the ServiceContext.User.IsInRole method:
string userName = ServiceContext.User.Identity.Name;

bool isAdministrator = ServiceContext.User.IsInRole("Administrators");
To get additional details about the user, such as the user's ID and roles, you will need to turn to ASP.NET Membership's functions to get those details for the user from the database:
// You will need a using statement to System.Web.Security

MembershipUser user = Membership.GetUser();         // User object

Guid userID = (Guid)user.ProviderUserKey;           // User ID

string[] userRoles = Roles.GetRolesForUser();       // User roles
You can now use these details to filter the data being queried before returning the data to the client. In addition, you may have a requirement that entities can be passed back to users, but users may not be able to view or edit all the fields on that entity. For example, they may be allowed to view a customer entity but not be permitted to see the credit card number of that customer. This should be handled on the server so that the fields that the user can't access are not sent to the client. In this scenario, it is best to use plain-old CLR object (POCO) types when returning data and populate the fields of only each object that the user is permitted access to.
Permitting Update/Delete Operations According to Data
Sometimes, you may want to allow the user to retrieve a collection of entities from the server but enable that particular user to update or delete only some of them. This is also more of an implementation issue than one that the RIA Services framework can help with. Again, within the operation itself, you will need to obtain the list of the user's roles, and based on both the data that is passed into the operation and the user's roles, determine whether the user is permitted to perform that operation. Otherwise, raise an exception to notify the client that the call was unsuccessful.
Exposing Custom User Profile Data
As you may have noticed when we were defining the AuthenticationService class earlier in this chapter, in the “Setting Up Authentication” section, the AuthenticationBase class that it inherits from is a generic class, and you are specifying a type of User:
[EnableClientAccess]

public class AuthenticationService : AuthenticationBase<User> { }
The User class contains information about the user and is returned to the client when it attempts to authenticate with the server. This class can be found in the Models folder. It inherits from UserBase, which includes properties exposing the user name, the roles that the user is in, and whether the user has been authenticated. You can add additional properties to this class, and these properties will be returned with the object to the client. For example, you may wish to store additional information about the user (such as contact details), maintain a set of user preferences on the server, or provide some properties specifying additional permissions to those designated by the user's assigned roles. A corresponding User class will be created in the client project with the same properties that you defined on the User class in the web project, enabling the properties' values to be read and saved there too. You will find that the Silverlight Business Application project template has already created the FriendlyName property on the User object:
public string FriendlyName { get; set; }
The values of these custom user properties are stored in the profile membership table in the database, but you will need to define them in the web.config file before you can access them. You will already find the FriendlyName entry here, and you can add any additional properties below it:
You don't have to worry about populating the values of the properties you've created on the User object with the data from the profile, because the AuthenticationBase class does this automatically using reflection. However, when you add additional properties to the User object, be sure to add a corresponding entry to the web.config file, with a matching name. Otherwise, an exception will be raised when you attempt to use the authentication service. You will also need to populate each new profile property in the CreateUser method of the UserRegistrationService domain service.
Registering Users
To add users to the system, you can either use the ASP.NET Configuration tool for the web application or the registration facility already in the Silverlight project. This facility is enabled via the UserRegistrationService, located in the Services folder in the web project—a standard domain service simply exposing an AddUser domain operation enabling new users to be registered within the system via the Silverlight client. It's ready to create a user, with the details supplied, assigning that user to a default role called Registered Users, defined as a constant named DefaultRole within the service, enabling you to change it as required, and creating the profile for the user as described in the previous section.
However, in typical business applications, you don't allow users to register themselves. Generally, that's the role of another user who has permission to add users to the system. In this case, you want to prevent users from accessing this domain service unless they are authenticated and belong to a given role.
If you don't want to expose the ability to add users to the system publicly, you can simply delete the UserRegistrationService class, along with the corresponding functionality in the Silverlight client, preventing users from being created in the system though the application or directly via the domain service. Alternatively, you can restrict access to it such that only authenticated users with specific roles can register new users, using the methods discussed previously.
You can modify the UserRegistrationService domain service, adding additional functionality as you see fit. For example, you will generally need to enable the adding user to select what roles this new user will be assigned to. This will require the client to be able to access the full list of roles and pass the selected roles back to the server when the user is being created, functionality that unfortunately is not built into the Silverlight Business Application project template. To expose the full list of roles to the client, simply add the following Invoke operation to the UserRegistrationService domain service:
[Invoke]

public string[] GetAllRoles()

{

    return Roles.GetAllRoles();

}
You can then add a new property to the RegistrationData class (in the Models folder) to pass the selected roles back to the server and update the AddUser domain operation in the UserRegistrationService domain service to assign the user to those roles accordingly. Note that the RegistrationData class contains all the data about the user that you will use when registering the user. Therefore, if you have additional properties that you wish to add, such as data to populate any custom user profile properties that you've configured, you will need to add those properties to this class and update the AddUser domain operation in the UserRegistrationService domain service to save those property values as required. The registration form is generated at runtime by reflecting over the RegistrationData class, meaning that it will then automatically display data entry fields for any additional properties that you have added to this class.
![]() Note If you want to remove the security question and answer properties from the user registration procedure, you can remove them from the
Note If you want to remove the security question and answer properties from the user registration procedure, you can remove them from the RegistrationData class and update the AddUser domain operation in the UserRegistrationService domain service accordingly, but you will also need to update the ASP.NET Membership provider configuration in the web.config file in the web project to set its requiresQuestionAndAnswer property to false.
Avoiding SQL Injection Attacks
Throughout the history of application development, SQL injection has always been a relatively simple technique for hacking into the databases behind applications. This attack involves crafting a special query entered into a text box and submitting it to the web site. It exploits the fact that many developers simply concatenate the data entered into a form with their SQL database query. Therefore, if you enter the right text into the text box, you can effectively modify the query that is being run against the database!
This exploit can allow a user to gain access to all the tables and records in the database, including people's names, contact details, and credit card information, and even cause outright damage, such as enabling them to delete database tables. The latter issue, of course, can be prevented by ensuring that the database user account that the web application is running under has minimal privileges and cannot be used to delete tables.
The methods demonstrated throughout this book are not open to SQL injection, primarily because we're using the Entity Framework as our data access layer, which manages this issue; however, if you are using a different mechanism to query and persist changes to a database, such as building SQL statements manually, you should be aware of this issue and cater for it accordingly. Parameterized database queries are one of the best options for preventing SQL injection, but best practice is to also always validate any user input before using it in a database query or persisting data to the database. Also, never allow a query, such as a complex filter, to be dynamically created on the client and executed on the server—this makes it even easier for someone to gain complete control over your database than SQL injection does.
Sanitizing Errors Sent to the Client
To crackers, more knowledge makes it easier to find points of weakness that they can target. Therefore, it's always good practice to avoid sending error messages raised on the server directly to the client, because these generally include stack traces and other information detailing the inner workings of your application that crackers can find useful. Instead, any error messages should be sanitized before being sent to the client.
This can be configured in the customErrors element of your web.config file in the same manner as in a standard ASP.NET application/web site. By default, your ASP.NET application uses the RemoteOnly mode, meaning that full exception details will be passed to clients running on the local machine to the server but will be sanitized when clients are running on remote machines. Setting the mode property of the customErrors element to Off will disable exception sanitizing for all clients, remote or local, and setting it to On will enable it for all clients, which is useful when you want to test the client's experience when exceptions are thrown. For example, add the following element to the system.web section of your web.config file to sanitize server exceptions before exposing them to the client:
To identify the error such that you can fix the problem, log the error on the server, as described in the “Handling Server Errors” section of Chapter 4.
 Workshop: Practicing with Server-Side Security
In Part 1 of this chapter's example, we'll add the required tables to the AdventureWorks database to maintain user membership and role information, point the membership providers to this database, and test this configuration using our project's existing functionality (generated by the Silverlight Business Application project template) to register a user and to log in as that user. In Part 2 of the workshop, we'll restrict access to the services to authenticated users only and restrict access to some domain operations to users with specific roles only.
Part 1: Configuring the Database
In Chapter 4, you installed the AdventureWorks database and hooked your AdventureWorks application up to work with it. We now need to add the ASP.NET Membership tables to the database. Use the following steps to configure the database:
- Using the command line (or Run option in the Start menu), run the following to display the ASP.NET SQL Server Setup Wizard, as shown in Figure 8-1:
C:WindowsMicrosoft.NETFrameworkv4.0.30319aspnet_regsql.exe - Click Next.
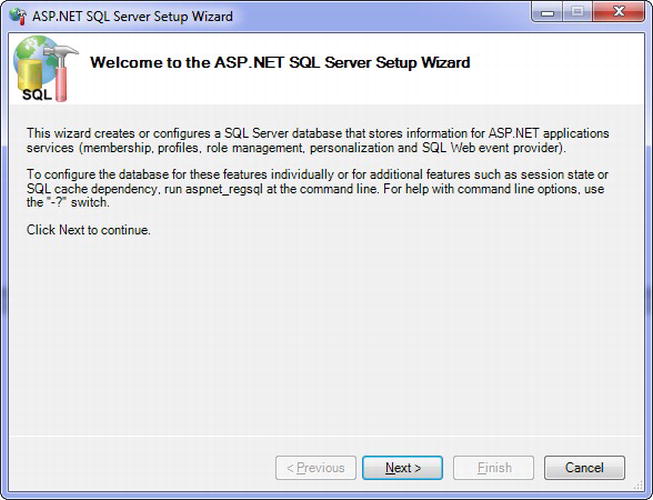
Figure 8-1. The ASP.NET SQL Server Setup Wizard
- On the Setup Option step (page 2 of the wizard), select the “Configure SQL Server for application services” option. Then on the final step (Select the Server and Database), point it to your database. Click the Finish button, and the wizard will add the required tables, views, and stored procedures to the database. You can see these in your database using the SQL Server Management Studio or by adding the database to the Data Connections node in Visual Studio's Server Explorer.
- We now need to point the ASP.NET Membership providers to this database. Open the
web.configfile in your Web project. You will find a connection string namedApplicationServicesalready defined and pointing to a database that's attached as a user instance. We need to modify this and point it to our AdventureWorks database instead. Your SQL Service instance may not be a local instance namedSQLEXPRESS, as follows—you might need to alter this connection string accordingly:<connectionStrings>
<add name="ApplicationServices"
connectionString="Data Source=.SQLEXPRESS;Database=AdventureWorks;
Integrated Security=true"
providerName="System.Data.SqlClient" />
</connectionStrings> Note You cannot use the connection string used by your Entity Framework model, because it is formatted differently than normal database connection strings and cannot be understood by the database provider. This unfortunately means that you need to duplicate your connection strings in your
 web.configfile and maintain them separately. - Although not essential, it's good practice to set the
ApplicationNameproperty on each provider to the name of your application (the default value is simply). Set the value of this property on each provider toAdventureWorks. - Select the Web project in Visual Studio's Solution Explorer tool window. This will show the icon for the ASP.NET Configuration tool, as shown in Figure 8-2. Click this to open the tool. We'll use this to set up users and roles for the application.
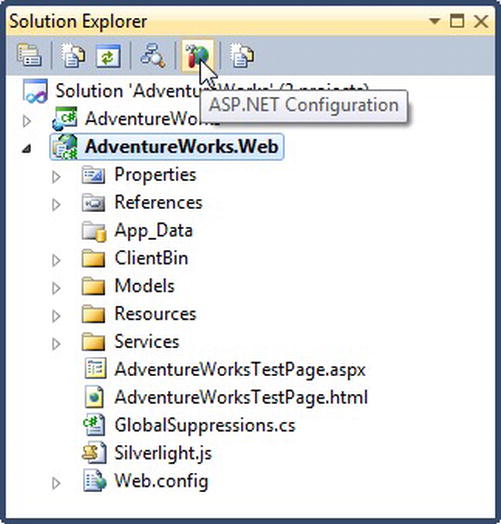
Figure 8-2. The ASP.NET Configuration tool's icon in the Solution Explorer tool window
- The user interface for the ASP.NET Configuration tool is fairly straightforward, so we won't go through it step by step. Go to the Security section, and add three roles: Administrators, Managers, and Staff. Then add at least one user under each role, for example, AdminUser, ManagerUser, and StaffUser.
- If you run your application now, you should be able to log in as each of those users, proving that it's all hooked up correctly.
Part 2: Implementing Security Restrictions
Let's use the following steps to restrict the UserRegistrationService and ProductService domain services to allow only authenticated users to access them:
- Add the
RequiresAuthenticationattribute to their class definitions, like so:[EnableClientAccess]
[RequiresAuthentication]
public class ProductService : LinqToEntitiesDomainService<AdventureWorksEntities>
and like so
[EnableClientAccess]

[RequiresAuthentication]

public class UserRegistrationService :
                                LinqToEntitiesDomainService<AdventureWorksEntities>
If you run your application now, you will find that you can view the list of products and register a user only if you're logged in. Otherwise, you should get a message stating that access is denied.
- Let's now allow only users in the Administrators role to register new users and allow only users in the Administrators and Managers roles to delete products. We'll implement these both possible ways: using the
RequiresRoleattribute and (in step 10) creating our own custom authorization attribute. First, we'll use the RequiresRole attribute. Add theRequiresRoleattribute to restrict access to the UserRegistrationService domain service's class to administrators:[EnableClientAccess]
[RequiresAuthentication]
[RequiresRole("Administrators")]
public class UserRegistrationService : DomainService - Now, add a new class named
GTManagerRoleAttributeto theServicesfolder in the project. It should have the following code, which will be used to permit access only to users in the Administrators and Managers roles:public class GTManagerRoleAttribute : AuthorizationAttribute
{
protected override AuthorizationResult IsAuthorized(
System.Security.Principal.IPrincipal principal,
AuthorizationContext authorizationContext)
if (principal.IsInRole("Administrators") || principal.IsInRole("Managers"))
return AuthorizationResult.Allowed;
else
return new AuthorizationResult(
"You do not have sufficient rights to perform this operation.");
}
} - Now, you can apply this attribute to the
DeleteProductdomain operation in theProductServicedomain service's class:[GTManagerRole]
public void DeleteProduct(Product product) - Run the application. You will find that only if you are already logged in as AdminUser can you successfully register a new user, using the user registration functionality provided by the Silverlight Business Application project template (found by opening the Login window and clicking the “Register now” link on that window to show the user registration screen). Also, you can delete a product only if you're logged in as AdminUser or ManagerUser.