
File System Open and Save Dialogs
Isolated storage is the primary means Silverlight provides to store and retrieve data locally on the user's machine, but sometimes you need to read and write to actual files within the user's file system. For example, you may want to save a file that was downloaded from the server or upload a file to the server from the user's machine.
As part of the Silverlight sandbox, you can't read or write files directly from or to disk without user interaction, unless you have elevated permissions (discussed later in this chapter). Instead, you need to display an open/save dialog first to gain explicit permission from the user to read or write a file. Let's take a look at how you use these dialogs, and the file based operations that they enable.
![]() Note Attempting to display an open or save file dialog must be the result of a user initiated action. In other words, you can show an open or save file dialog only in response to an event raised by some sort of user input, such as the
Note Attempting to display an open or save file dialog must be the result of a user initiated action. In other words, you can show an open or save file dialog only in response to an event raised by some sort of user input, such as the Click event. Any attempt to display the open or save file dialog in an event not initiated by user input, as in response to the Loaded event of a control, would raise an exception. This rule applies only when the application is running in sandboxed mode. When the application is running with elevated trust permissions (described later in this chapter), this limitation is lifted.
The Open File Dialog
You can use the OpenFileDialog class to display a dialog that enables the user to select a file to open, as shown in Figure 16-8. This will provide you with the permission to access the selected file by returning one or more FileInfo objects (from the System.IO namespace) that enable you to open the file and read the data from it.
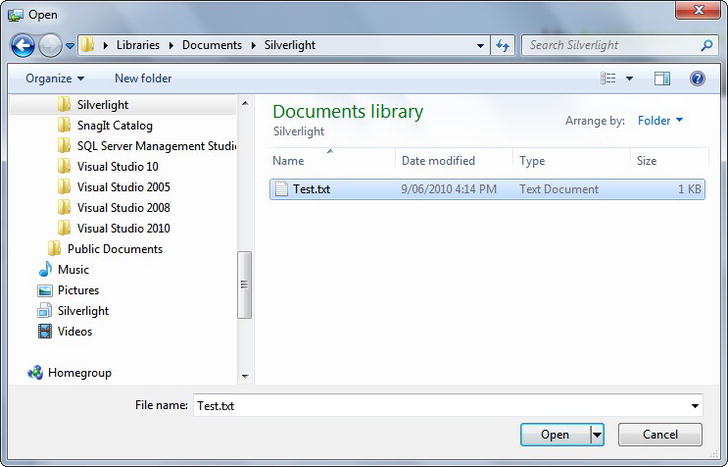
Figure 16-8. The Open File dialog
Displaying the Dialog
The code to display the open file dialog is as follows:
OpenFileDialog dialog = new OpenFileDialog();

bool? fileSelected = dialog.ShowDialog();


if (fileSelected.HasValue && fileSelected.Value)

{

    // Code to open and read the file goes here

}
The ShowDialog method is the code that actually displays the dialog and returns a nullable Boolean indicating whether the user selected a file or cancelled the operation. This variable will be set to true if the user selected a file and then clicked the Open button.
![]() Note This method may throw an
Note This method may throw an InvalidOperationException or SecurityException exception. Ensure that your code catches this exception and handles it accordingly.
Filtering the Files
You can limit the dialog to displaying files of only a given type (or types) by specifying one or more file filters using the Filter property of the dialog object. Unfortunately, the way to assign these filters is somewhat archaic, but it aligns to what you may be used to when configuring file filters for dialogs in other technologies, such as Windows Forms. For example, to limit files to just text files (files with a .txt extension), you can use the following syntax before opening the dialog:
dialog.Filter = "Text Files|*.txt";
This string is split into two sections, separated by a pipe character. The first section denotes the text to display representing the filter in the drop-down list, and the second section denotes the actual filter to apply to limit the files displayed.
You can extend this filter to include a number of file types and extensions by separating the file extensions in the second section of the filter string with a semicolon, as follows:
dialog.Filter = "Documents|*.doc;*.docx;*.rtf";
Alternatively, you can have multiple filters that the user can select from in the dialog like so:
dialog.Filter = "Word 2002/2003 Documents|*.doc|Word 2007/2010 Documents|*.docx";
As you can see, another pipe character is used to separate each entry. If the first entry is not the one you want to use as the default selection, you can specify a different one using the FilterIndex property. This is a one-based index, so you would set this property to 2 to select the Word 2007 and 2010 Documents filter (that is, the second filter) from the preceding example.
Opening and Reading a Selected File
Once the user has selected a file, you can retrieve the FileInfo object that it has created. When running in sandbox mode, you can view only limited information about the selected file. Attempting to access file properties such as its directory or its attributes will be denied, resulting in a SecurityException being thrown. You can get its name from the FileInfo's Name property and its size from its Length property.
![]() Note You can't create an instance of the
Note You can't create an instance of the FileInfo class unless you are running with elevated trust, as discussed later in this chapter. Attempting to do so will result in a SecurityException, stating that access to the file has been denied.
The FileInfo object is assigned only limited permissions for the actions you can perform on it, but it does allow you to open the file and read its contents. There are two methods on the object that you can use to do so: OpenText and OpenRead.
Opening and Reading Text Files
If you know (or expect) the selected file to be a text file, you can use the OpenText method to read its contents. This method allows you to read the file by retrieving:
- A given number of characters at a time
- The contents line by line
- The entire contents of the file in a single step
The latter two methods are the most common when dealing with text files and are demonstrated in the following sections.
Reading the File Line by Line
To read the file one line at a time, use the ReadLine method:
string fileContents = null;


using (StreamReader fileStream = dialog.File.OpenText())

{

    while (!fileStream.EndOfStream)

    {

        fileContents = fileStream.ReadLine();

        // Do something with the line contents

    }


    fileStream.Close();

}


// Do something with the file contents
Reading the Whole File in a Single Step
To read the whole file in a single step, use the ReadToEnd method:
string fileContents = null;


using (StreamReader fileStream = dialog.File.OpenText())

{

    fileContents = fileStream.ReadToEnd();

    fileStream.Close();

}


// Do something with the file contents
Opening and Reading Binary Files
When working with other non-text file types, such as images and documents, you will need to use the OpenRead method to read their contents as a byte array.
Reading the Whole File in a Single Step
The following code demonstrates reading the entire contents of a file into a byte array using the Read method:
byte[] fileContents = null;


using (FileStream fileStream = dialog.File.OpenRead())

{

    fileContents = new byte[dialog.File.Length];

    fileStream.Read(fileContents, 0, (int)dialog.File.Length);

    fileStream.Close();

}


// Do something with the file contents
Reading the File in a Chunks
You can read the file in chunks, also using the Read method like so (especially useful when the file is large):
const int chunkSize = 4096; // 4kb blocks


using (FileStream fileStream = dialog.File.OpenRead())

{

    byte[] chunk = new byte[chunkSize];

    int bytesRead = 0;

    int position = 0;


    do

    {

        bytesRead = fileStream.Read(chunk, 0, chunkSize);


        // Do something with the chunk


        position += bytesRead;

    } while (bytesRead > 0);


    fileStream.Close();

}
Reading and Dislaying an Image File
If you want to load an image to display in an Image control, the code is even simpler. The following code demonstrates populating a BitmapImage object with the contents of a file and assigning it to the Source property of an Image control (named imageControl in the code):
using (FileStream fileStream = dialog.File.OpenRead())

{

    BitmapImage image = new BitmapImage();

    image.SetSource(fileStream);


    // Assign the BitmapImage object to the Source property of an Image control

    imageControl.Source = image;


    fileStream.Close();

}
Enabling Multiple File Selection
By default, the user can select only a single file from the open file dialog. However, you can set its Multiselect property to true to enable the user to select multiple files at the same time. The File property will return only the first file selected, but you can use the Files property instead. That returns an array of FileInfo objects that you can loop through and read as required.
The Save File Dialog
You can use the SaveFileDialog class, as shown in Figure 16-9, to display a dialog that enables the user to specify the name and location of a file to save or select a file to overwrite. This will provide you with the permission to write to the selected file, by returning a FileInfo object that enables you to create the file and write data to it.

Figure 16-9. The Save File dialog
Displaying the Dialog
The code to display the open file dialog is as follows:
SaveFileDialog dialog = new SaveFileDialog();

bool? fileEntered = dialog.ShowDialog();


if (fileEntered.HasValue && fileEntered.Value)

{

    // Code to open and write the file goes here

}
You'll note that this is very similar to how the OpenFileDialog class is used.
![]() Note If the user enters invalid characters as the file name, this will raise a message box notifying the user as such, and the dialog won't accept a file name with these characters. However, on a Mac, the dialog will accept these characters but will consequently throw an
Note If the user enters invalid characters as the file name, this will raise a message box notifying the user as such, and the dialog won't accept a file name with these characters. However, on a Mac, the dialog will accept these characters but will consequently throw an ArgumentException. Ensure that your code catches this exception and handles it accordingly.
Setting a Default File Name
Silverlight 5 introduced the ability for you now to specify a default file name when opening the save file dialog. Simply assign the default name that the file should have to the SaveFileDialog object's DefaultFileName property.
Setting a Default Extension
Like the OpenFileDialog class, you can set various filters to limit the files displayed in the dialog. If you specify one or more filters and the user does not enter an extension with the file name, the extension associated with the selected filter will be automatically appended to the file name. If no filter is specified or if it is an All Files (*.*) type filter, the value assigned to the DefaultExt property of the OpenFileDialog class will be appended to the file name instead (if provided).
Writing to the File
Once the user has specified a name and path for the file, you can create it and open it for writing to by calling the SaveFileDialog object's OpenFile method You will note that unlike the OpenFileDialog class, which has separate methods for reading files as text or binary, the SaveFileDialog class has only this single method.
![]() Note You can get the name of the file as provided by the user, excluding path information, from the dialog class's
Note You can get the name of the file as provided by the user, excluding path information, from the dialog class's SafeFileName property.
Writing a Text File
To write text to the file, you need to create a StreamWriter from the stream returned from the OpenFile method. You can then use the Write or the WriteLine methods of the StreamWriter object to write text to the file as required.
using (Stream stream = dialog.OpenFile())

{

    using (StreamWriter writer = new StreamWriter(stream))

    {

        writer.WriteLine("Text written from Silverlight");

        writer.Close();

    }


    stream.Close();

}
Writing a Binary File
Writing binary data to a file is actually easier than writing text because there's no need for a StreamWriter (or similar) to help you in doing so. You can simply use the Write method of the stream that's returned when opening the file to write the contents of a byte array to the file. The following code demonstrates writing the contents of a byte array named fileContents to the file:
using (Stream stream = dialog.OpenFile())

{

    stream.Write(fileContents, 0, fileContents.Length);

    stream.Close();

}