
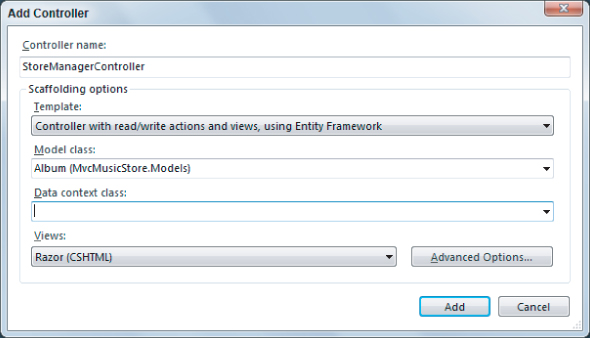
Your next decision might be to create a store manager. A store manager is a controller enabling you to edit album information. To get started you can right-click the Controllers folder in your new solution and select Add Controller. In the dialog that appears (shown in Figure 4.3), you can set the controller name and select scaffolding options. The scaffolding template selected in the screenshot requires a model class and a data context.
What Is Scaffolding?
Scaffolding in ASP.NET MVC can generate the boilerplate code you need for create, read, update, and delete (CRUD) functionality in an application. The scaffolding templates can examine the type definition for a model (such as the Album class you've created), and then generate a controller and the controller's associated views. The scaffolding knows how to name controllers, how to name views, what code needs to go in each component, and also knows where to place all these pieces in the project for the application to work.
Scaffolding Options
Like nearly everything else in the MVC framework, if you don't like the default scaffolding behavior, you can customize or replace the code generation strategy to fulfill your own desires. You can also find alternative scaffolding templates through NuGet (just search for scaffolding). The NuGet repository is filling up with scaffolding to generate code using specific design patterns and technologies.
If you really don't like the scaffolding behavior, you can always handcraft everything from scratch. Scaffolding is not required to build an application, but scaffolding can save you time when you can make use of it.
Don't expect scaffolding to build an entire application. Instead, expect scaffolding to release you from the boring work of creating files in the right locations and writing 100 percent of the application code by hand. You can tweak and edit the output of the scaffolding to make the application your own. Scaffolding runs only when you tell it to run, so you don't have to worry about a code generator overwriting the changes you make to the output files.
Three scaffolding templates are available in MVC 3. The scaffolding template you select will control just how far the scaffolding will go with code generation.
Empty Controller
The empty controller template adds a Controller-derived class to the Controllers folder with the name you specify. The only action in the controller will be an Index action with no code inside (other than the code to return a default ViewResult). This template will not create any views.
Controller with Empty Read/Write Actions
This template adds a controller to your project with Index, Details, Create, Edit, and Delete actions. The actions inside are not entirely empty, but they won't perform any useful work until you add your own code and create the views for each action.
Controller with Read/Write Actions and Views, Using Entity Framework
This template is the template you are about to select. This template not only generates your controller with the entire suite of Index, Details, Create, Edit, and Delete actions, but also generates all the required views and the code to persist and retrieve information from a database.
For the template to generate the proper code, you have to select a model class (in Figure 4.3, you selected the Album class). The scaffolding examines all the properties of your model and uses the information it finds to build controllers, views, and data access code.
To generate the data access code, the scaffolding also needs the name of a data context object. You can point the scaffolding to an existing data context, or the scaffolding can create a new data context on your behalf. What is a data context? I have to take another aside to give a quick introduction to the Entity Framework.
Scaffolding and the Entity Framework
A new ASP.NET MVC 3 project, with the MVC 3 Tools Update installed, will automatically include a reference to the Entity Framework (EF) version 4.1 (this is not the version of the EF that shipped with .NET 4.0, but a newer version). EF is an object-relational mapping framework and understands how to store .NET objects in a relational database, and retrieve those same objects given a LINQ query.
Flexible Data Options
If you don't want to use the Entity Framework in your ASP.NET MVC application, there is nothing in the framework forcing you to take a dependency on EF. In fact, there is nothing in the framework forcing you to use a database, relational or otherwise. You can build applications using any data access technology or data source. If you want to work with comma-delimited text files or web services using the full complement of WS-* protocols, you can!
In this chapter, you work with EF 4.1, but many of the topics covered are broadly applicable to any data source.
EF 4.1 supports a code first style of development. Code first means you can start storing and retrieving information in SQL Server without creating a database schema or opening a Visual Studio designer. Instead, you write plain C# classes and EF figures out how, and where, to store instances of those classes.
Remember how all the properties in your model objects are virtual? Virtual properties are not required, but they do give EF a hook into your plain C# classes and enable features like an efficient change tracking mechanism. The Entity Framework needs to know when a property value on a model changes because it might need to issue a SQL UPDATE statement to reconcile those changes with the database.
What Comes First—the Code or the Database?
If you already are familiar with the Entity Framework, and you are using a model first or schema first approach to development, the MVC scaffolding will support you, too. The Entity Framework team designed the code first approach to give developers a friction-free environment for iteratively working with code and a database.
Code First Conventions
EF, like ASP.NET MVC, follows a number of conventions to make your life easier. For example, if you want to store an object of type Album in the database, EF assumes you want to store the data in a table named Albums. If you have a property on the object named ID, EF assumes the property holds the primary key value and sets up an auto-incrementing (identity) key column in SQL Server to hold the property value.
EF also has conventions for foreign key relationships, database names, and more. These conventions replace all the mapping and configuration you historically provide to an object-relational mapping framework. The code-first approach works fantastically well when starting an application from scratch. If you need to work with an existing database, you'll probably need to provide mapping metadata (perhaps by using the Entity Framework's schema-first approach to development). If you want to learn more about the Entity Framework, you can start at the Data Developer Center on MSDN (http://msdn.microsoft.com/en-us/data/aa937723).
The DbContext
When using EF's code-first approach, the gateway to the database will be a class derived from EF's DbContext class. The derived class will have one or more properties of type DbSet<T>, where each T represents the type of object you want to persist. For example, the following class enables you to store and retrieve Album and Artist information:
public class MusicStoreDB : DbContext
{
    public DbSet<Album> Albums { get; set; }
    public DbSet<Artist> Artists { get; set; }
}
Using the preceding data context, you can retrieve all albums in alphabetical order using the LINQ query in the following code:
var db = new MusicStoreDB();
var allAlbums = from album in db.Albums
                orderby album.Title ascending
                select album;
Now that you know a little bit about the technology surrounding the built-in scaffolding templates, let's move ahead and see what code comes out of the scaffolding process.
Executing the Scaffolding Template
Back at the Add Controller dialog box (refer to Figure 4.3), select the drop-down list under Data Context Class and select New Data Context. The New Data Context dialog shown in Figure 4.4 appears and you can enter the name of the class you will use to access the database (including the namespace for the class).
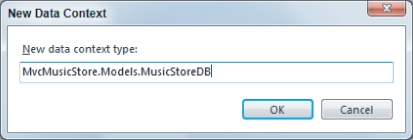
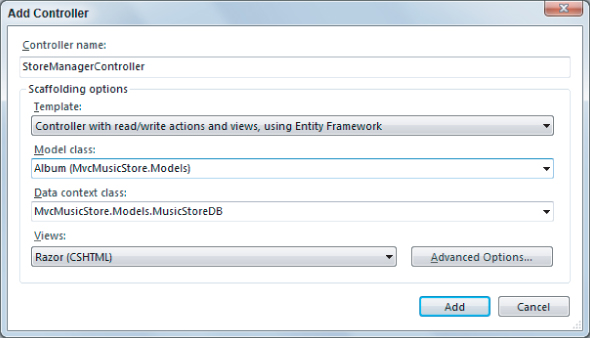
Name your context MusicStoreDB, click OK, and the Add Controller dialog (Figure 4.5) is complete. You are about to scaffold a StoreManagerController and its associated views for the Album class.
After you click the Add button, scaffolding jumps into action and adds new files to various locations in the project. Let's explore these new files before you move forward.
The Data Context
The scaffolding adds a MusicStoreDB.cs file into the Models folder of your project. The class inside the file derives from the Entity Framework's DbContext class and gives you access to album, genre, and artist information in the database. Even though you told the scaffolding only about the Album class, the scaffolding saw the related models and included them in the context.
public class MusicStoreDB : DbContext
{
    public DbSet<Album> Albums { get; set; }

    public DbSet<Genre> Genres { get; set; }

    public DbSet<Artist> Artists { get; set; }
}
To access a database, all you need to do is instantiate the data context class. You might be wondering what database the context will use. I answer that question later when you first run the application.
The StoreManagerController
The scaffolding template you selected also generates a StoreManagerController into the Controllers folder of the application. The controller will have all the code required to select and edit album information. Look at the starting few lines of the class definition:
public class StoreManagerController : Controller
{
    private MusicStoreDB db = new MusicStoreDB();

    //
    // GET: /StoreManager/

    public ViewResult Index()
    {
        var albums = db.Albums.Include(a => a.Genre).Include(a => a.Artist);
        return View(albums.ToList());
    }

    // more later ...
In this first code snippet, you can see the scaffolding added a private field of type MusicStoreDB to the controller. Because every controller action requires database access, the scaffolding also initializes the field with a new instance of the data context. In the Index action, you can see the code is using the context to load all albums from the database into a list, and passing the list as the model for the default view.
Loading Related Objects
The Include method calls that you see in the Index action tell the Entity Framework to use an eager loading strategy in loading an album's associated genre and artist information. An eager loading strategy attempts to load all data using a single query.
The alternative (and default) strategy for the Entity Framework is a lazy loading strategy. With lazy loading, EF loads only the data for the primary object in the LINQ query (the album), and leaves the Genre and Artist properties unpopulated:
var albums = db.Albums;
Lazy loading brings in the related data on an as-needed basis, meaning when something touches the Genre or Artist property of an Album, EF loads the data by sending an additional query to the database. Unfortunately, when dealing with a list of album information, a lazy loading strategy can force the framework to send an additional query to the database for each album in the list. For a list of 100 albums, lazy loading all the artist data requires 101 total queries. The scenario I've just described is known as the N+1 problem (because the framework executes 101 total queries to bring back 100 populated objects), and is a common problem to face when using an object-relational mapping framework. Lazy loading is convenient, but potentially expensive.
You can think of Include as an optimization to reduce the number of queries needed in building the complete model. To read more about lazy loading see “Loading Related Objects” on MSDN at http://msdn.microsoft.com/library/bb896272.aspx.
Scaffolding also generates actions to create, edit, delete, and show detailed album information. You take a close look at the actions behind the edit functionality later in this chapter.
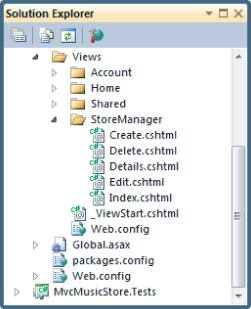
The Views
Once the scaffolding finishes running, you'll also find a collection of views underneath the new Views/StoreManager folder. These views provide the UI for listing, editing, and deleting albums. You can see the list in Figure 4.6.
The Index view has all the code needed to display a table full of music albums. The model for the view is an enumerable sequence of Album objects, and as you saw in the Index action earlier, an enumerable sequence of Album objects is precisely what the Index action delivers. The view takes the model and uses a foreach loop to create HTML table rows with album information:
@model IEnumerable<MvcMusicStore.Models.Album>

@{
    ViewBag.Title = "Index";
}

<h2>Index</h2>

<p>@Html.ActionLink("Create New", "Create")</p>
<table>
    <tr>
        <th>Genre</th>
        <th>Artist</th>
        <th>Title</th>
        <th>Price</th>
        <th>AlbumArtUrl</th>
        <th></th>
    </tr>

@foreach (var item in Model) {
    <tr>
        <td>@Html.DisplayFor(modelItem => item.Genre.Name)</td>
        <td>@Html.DisplayFor(modelItem => item.Artist.Name)</td>
        <td>@Html.DisplayFor(modelItem => item.Title)</td>
        <td>@Html.DisplayFor(modelItem => item.Price)</td>
        <td>@Html.DisplayFor(modelItem => item.AlbumArtUrl)</td>
        <td>
            @Html.ActionLink("Edit", "Edit", new { id=item.AlbumId }) |
            @Html.ActionLink("Details", "Details", new { id=item.AlbumId }) |
            @Html.ActionLink("Delete", "Delete", new { id=item.AlbumId })
        </td>
    </tr>
}

</table>
Notice how the scaffolding selected all the “important” fields for the customer to see. In other words, the table in the view does not display any foreign key property values (they would be meaningless to a customer), but does display the associated genre's name, and the associated artist's name. The view uses the DisplayFor HTML helper for all model output.
Each table row also includes links to edit, delete, and detail an album. As mentioned earlier, the scaffolded code you are looking at is just a starting point. You probably want to add, remove, and change some of the code and tweak the views to your exact specifications. But, before you make changes, you might want to run the application to see what the current views look like.
Executing the Scaffolded Code
Before you start the application running, let's address a burning question from earlier in the chapter. What database will MusicStoreDB use? You haven't created a database for the application to use or even specified a database connection.
Creating Databases with the Entity Framework
The code-first approach of EF attempts to use convention over configuration as much as possible. If you don't configure specific mappings from your models to database tables and columns, EF uses conventions to create a database schema. If you don't configure a specific database connection to use at runtime, EF creates one using a convention.
Configuring Connections
Explicitly configuring a connection for a code-first data context is as easy as adding a connection string to the web.config file. The connection string name must match the name of the data context class. In the code you've been building, you could control the context's database connections using the following connection string:
<connectionStrings>
  <add name="MusicStoreDB"
     connectionString="data source=.SQLEXPRESS;
                       Integrated Security=SSPI;
                       initial catalog=MusicStore"
     providerName="System.Data.SqlClient" />
</connectionStrings>
Without a specific connection configured, EF tries to connect to the local instance of SQL Server Express and find a database with the same name as the DbContext derived class. If EF can connect to the database server, but doesn't find a database, the framework creates the database. If you run the application after scaffolding completes, and navigate to the /StoreManager URL, you'll discover that the Entity Framework has created a database named MvcMusicStore.Models.MusicStoreDB on the local machine's SQL Express instance. If you look at a complete diagram of the new database, you'd see what's shown in Figure 4.7.
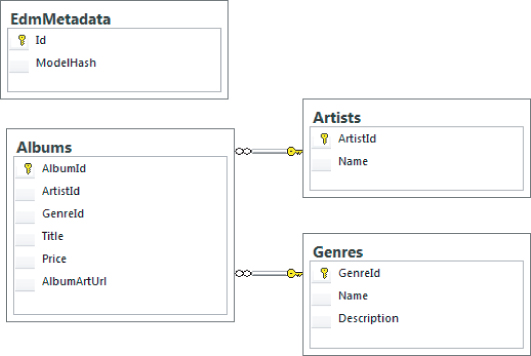
The Entity Framework automatically creates tables to store album, artist, and genre information. The framework uses the model's property names and data types to determine the names and data types of the table column. Notice how the framework also deduced each table's primary key column, and the foreign key relationships between tables.
The EdmMetadata table in the database is a table EF uses to ensure the model classes are synchronized with the database schema (by computing a hash from the model class definitions). If you change your model (by adding a property, removing a property, or adding a class, for example), EF will either re-create the database based on your new model, or throw an exception. Don't worry. EF will not re-create the database without your permission; you need to provide a database initializer.
EdmMetadata
EF does not require an EdmMetadata table in your database. The table is here only so EF can detect changes in your model classes. You can safely remove the EdmMetadata table from the database and the Entity Framework will assume you know what you are doing. Once you remove the EdmMetadata table, you (or you DBA) will be responsible for making schema changes in the database to match the changes in your models. You might also keep things working by changing the mapping between the models and the database. See http://msdn.microsoft.com/library/gg696169(VS.103).aspx as a starting point for mapping and annotations.
Using Database Initializers
An easy way to keep the database in sync with changes to your model is to allow the Entity Framework to re-create an existing database. You can tell EF to re-create the database every time an application starts, or you can tell EF to re-create the database only when it detects a change in the model. You choose one of these two strategies when calling the static SetInitializer method of EF's Database class (from the System.Data.Entity namespace).
When you call SetInitializer you need to pass in an IDatabaseInitializer object, and two are provided with the framework: DropCreateDatabaseAlways and DropCreateDatabaseIfModelChanges. You can tell by the names of the classes which strategy each class represents. Both initializers require a generic type parameter, and the parameter must be a DbContext derived class.
As an example, say you wanted to re-create the music store database every time the application starts afresh. Inside global.asax.cs, you can set an initializer during application startup:
        protected void Application_Start()
        {
            Database.SetInitializer(new DropCreateDatabaseAlways<MusicStoreDB>());

            AreaRegistration.RegisterAllAreas();
            RegisterGlobalFilters(GlobalFilters.Filters);
            RegisterRoutes(RouteTable.Routes);
        }
You might be wondering why anyone would want to re-create a database from scratch every time an application restarts. Even when the model changes, don't you want to preserve the data inside?
These are valid questions, and you'll have to remember that features in the code-first approach (like the database initializer) facilitate the iterative and fast changing phases early in the application life cycle. Once you push a site live and take real customer data, you won't just re-create the database every time your model changes.
Of course, even in the initial phase of a project you might still want to preserve data in the database, or at least have a new database populated with some initial records, like lookup values.
Seeding a Database
For the MVC Music Store let's pretend you want to start development by re-creating the database every time your application restarts. However, you want the new database to have a couple genres, artists, and even an album available so you can work with the application without entering data to put the application into a usable state.
In this case you can derive a class from the DropCreateDatabaseAlways class and override the Seed method. The Seed method enables you to create some initial data for the application, as you can see in the following code:
public class MusicStoreDbInitializer
    : DropCreateDatabaseAlways<MusicStoreDB>
{
    protected override void Seed(MusicStoreDB context)
    {
        context.Artists.Add(new Artist {Name = "Al Di Meola"});

        context.Genres.Add(new Genre { Name = "Jazz" });

        context.Albums.Add(new Album
                           {
                               Artist =  new Artist { Name="Rush" },
                               Genre = new Genre { Name="Rock" },
                               Price = 9.99m,
                               Title = "Caravan"
                           });
        base.Seed(context);
    }
}
Calling into the base class implementation of the Seed method saves your new objects into the database. You'll have a total of two genres (Jazz and Rock), two artists (Al Di Meola and Rush), and a single album in every new instance of the music store database. For the new database initializer to work, you need to change the application startup code to register the initializer:
protected void Application_Start()
{
    Database.SetInitializer(new MusicStoreDbInitializer());

    AreaRegistration.RegisterAllAreas();
    RegisterGlobalFilters(GlobalFilters.Filters);
    RegisterRoutes(RouteTable.Routes);
}
If you restart and run the application now, and navigate to the /StoreManager URL, you'll see the store manager's Index view as shown in Figure 4.8.

Voilà! A running application with real functionality! And with real data!
Although it might seem like a lot of work, you spent most of the chapter so far on understanding the generated code and the Entity Framework. Once you know what scaffolding can do for you, the actual amount of work is relatively small and requires only three steps.
1. Implement your model classes.
2. Scaffold your controller and views.
3. Choose your database initialization strategy.
Remember, scaffolding only gives you a starting point for a particular piece of the application. You are now free to tweak and revise the code. For example, you may or may not like the links on the right side of each album row (Edit, Details, Delete). You are free to remove those links from the view. What you'll do in this chapter, however, is drill into the edit scenario to see how to update models in ASP.NET MVC.