
Chapter 5 introduced templated helpers. The templated helpers are the subset of HTML helpers including EditorFor, and DisplayFor, and they are called the templated helpers because they render HTML using model metadata and templates. To jog your memory, imagine the following Price property on a model object.
public decimal Price { get; set; }
You can use the EditorFor helper to build an input for the Price property.
@Html.EditorFor(m=>m.Price)
The resulting HTML will look like the following.
<input class="text-box single-line" id="Price" name="Price" type="text" value="8.99" />
You've seen how you can change the output of the helper by adding model metadata in the form of data annotation attributes like Display and DisplayFormat. What you haven't seen yet is how to change the output by overriding the default MVC templates with your own, custom templates. Custom templates are powerful and easy, but before building any custom templates we'll show you how the built-in templates work.
The Default Templates
The MVC framework includes a set of built-in templates the templated helpers will use when constructing HTML. Each helper will select a template based on information about the model — both the model type and model metadata. For example, imagine a bool property named IsDiscounted.
public bool IsDiscounted { get; set; }
Again, you can use EditorFor to build an input for the property.
@Html.EditorFor(m=>m.IsDiscounted)
This time, the helper renders a checkbox input (compare this to the editor for the Price property earlier, which used a text input).
<input class="check-box" id="IsDiscounted" name="IsDiscounted" type="checkbox" value="true" /><input name="IsDiscounted" type="hidden" value="false" />
Actually, the helper emits two input tags (we discussed the reason for the second, hidden input in the “Html.CheckBox” section of Chapter 5), but the primary difference in output is because the EditorFor helper used a different template for a bool property than it did for the decimal property. It makes sense to provide a checkbox input for a bool value and a more freeform text entry for a decimal.
You might be wondering at this point what the built-in templates look like, and where they come from? To answer this question we'll turn to the MVC source code and MVC Futures library.
MVC Futures and Template Definitions
The built-in templates the MVC framework uses are compiled into the System.Web.Mvc assembly, and not readily accessible. However, you can download the ASP.NET MVC 3 Futures and see exactly what the templates look like in source code form. The download is available from http://aspnet.codeplex.com/releases/view/58781.
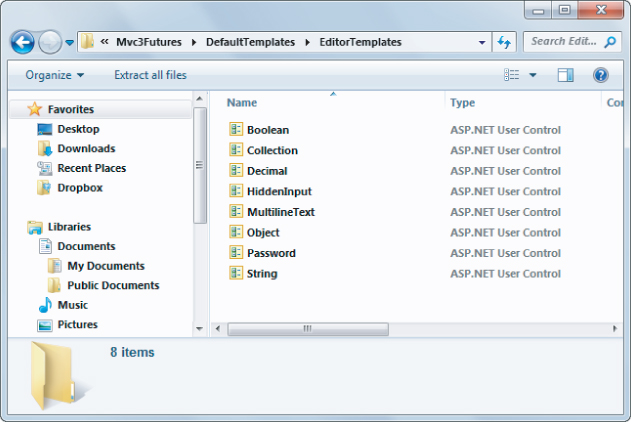
Once you extract the zip you'll find a DefaultTemplates folder, and inside of DefaultTemplates you'll find two subfolders: EditorTemplates and DisplayTemplates. The EditorTemplates contain the templates for the editor oriented HTML helpers (Editor, EditorFor, EditorForModel), while DisplayTemplates contain the templates for display helpers (Display, DisplayFor, DisplayForModel). This section will focus on the editor templates, but you can apply the information in this section to either set of templates.
Inside the EditorTemplates folder you'll find the eight files shown in Figure 14.5.
You can think of templates as similar to partial views — they take a model parameter and render HTML. Unless the model metadata indicates otherwise, the templated helpers select a template based on the type name of the value it is rendering. When you ask EditorFor to render a property of type System.Boolean (like IsDiscounted), it uses the template named Boolean. When you ask EditorFor to render a property of type System.Decimal (like Price), it uses the template named Decimal. You'll see more details about template selection in the next section.
Web Forms and Razor Templates
The templates in the ASP.NET Futures download are authored using Web Forms. However, when you build your own custom templates later in this chapter, you can use Razor views with a cshtml extension. The MVC framework works by default with templates in either form.
Using Razor syntax, the Decimal template looks like the following code.
@using [email protected]("", FormattedValue, new { @class = "text-box single-line" })@functions { private object FormattedValue { get { if (ViewData.TemplateInfo.FormattedModelValue == ViewData.ModelMetadata.Model) { return String.Format( CultureInfo.CurrentCulture, "{0:0.00}", ViewData.ModelMetadata.Model ); } return ViewData.TemplateInfo.FormattedModelValue; } }}
The template uses the TextBox helper to create an input element (of type text) with a formatted model value. Notice the template also uses information from the ModelMetadata and TemplateInfo properties of ViewData. ViewData contains a wealth of information you might need inside a template, and even the simplest of the templates, the String template, uses ViewData.
@Html.TextBox("", ViewData.TemplateInfo.FormattedModelValue, new { @class = "text-box single-line" })
The TemplateInfo property of ViewData gives you access to a FormattedModelValue property. The value of this property is either the properly formatted model value as a string (based on the format strings in ModelMetadata), or the original raw model value (if there is no format string specified). ViewData also grants access to model metadata. You can see model metadata at work in the Boolean editor template (the template the framework uses for the IsDiscounted property you saw earlier).
@using System.Globalization@if (ViewData.ModelMetadata.IsNullableValueType) { @Html.DropDownList("", TriStateValues, new { @class = "list-box tri-state" }) } else { @Html.CheckBox("", Value ?? false, new { @class = "check-box" }) }@functions { private List<SelectListItem> TriStateValues { get { return new List<SelectListItem> { new SelectListItem { Text = "Not Set", Value = String.Empty, Selected = !Value.HasValue }, new SelectListItem { Text = "True", Value = "true", Selected = Value.HasValue && Value.Value }, new SelectListItem { Text = "False", Value = "false", Selected = Value.HasValue && !Value.Value }, }; } } private bool? Value { get { if (ViewData.Model == null) { return null; } return Convert.ToBoolean(ViewData.Model, CultureInfo.InvariantCulture); } }}
There is quite a bit of work inside the Boolean template, but it builds a different editor for nullable boolean properties (using a drop down list) versus a non-nullable property (a checkbox). Most of the work here is building the list of items to display in the drop-down list.
Template Selection
It should be clear that if the framework selects a template based on a model's type name, then a decimal property renders with the Decimal template. But what about types that don't have a default template defined in Figure 14.5? Types like Int32 and DateTime?
Before checking for a template matching the type name, the framework first checks model metadata to see if a template hint exists. You can specify the name of a template to use with the UIHint data annotation attribute — you'll see an example later. The DataType attribute can also influence template selection.
[DataType(DataType.MultilineText)] public string Description { get; set; }
The framework will use the MultilineText template when rendering the Description property shown above. A DataType of Password also has a default template.
If the framework doesn't find a matching template based on metadata, it falls back to the type name. A String uses the String template; a Decimal uses the Decimal template. For types that don't have a matching template, the framework uses the String template if the object is not a complex type, or the Collection template if the object is a collection link an array or list. The Object template renders all complex objects. For example, using EditorForModel helper on the Music Store's Album model would result in the Object template taking charge. The Object template is a sophisticated template that uses reflection and metadata to create HTML for the right properties on a model.
if (ViewData.TemplateInfo.TemplateDepth > 1) { if (Model == null) { @ViewData.ModelMetadata.NullDisplayText } else { @ViewData.ModelMetadata.SimpleDisplayText }} else { foreach (var prop in ViewData.ModelMetadata .Properties .Where(pm => ShouldShow(pm))) { if (prop.HideSurroundingHtml) { @Html.Editor(prop.PropertyName) } else { if (!String.IsNullOrEmpty( Html.Label(prop.PropertyName).ToHtmlString())) { <div class="editor-label"> @Html.Label(prop.PropertyName) </div> } <div class="editor-field"> @Html.Editor(prop.PropertyName) @Html.ValidationMessage(prop.PropertyName, "*") </div> } }}@functions { bool ShouldShow(ModelMetadata metadata) { return metadata.ShowForEdit && !metadata.IsComplexType && !ViewData.TemplateInfo.Visited(metadata); }}
The opening if statement in the Object template ensures the template only traverses one level into an object. In other words, for a complex object with a complex property, the Object template shows only a simple summary of the complex property (using NullDisplayText or SimpleDisplayText from model metadata).
If you don't like the behavior of the Object template, or the behavior of any of the built-in templates, then you can define your own templates and override the defaults.
Custom Templates
Custom templates will live in a DisplayTemplates or EditorTemplates folder. The MVC framework follows a familiar set of rules when it resolves the path to a template. First, it looks underneath the folder associated with a specific controller's views, but then it also looks underneath the Views/Shared folder to see if any custom templates exist. The framework looks for templates associated with every view engine configured into the application (so by default, the framework looks for templates with .aspx, .ascx, and .cshtml extensions).
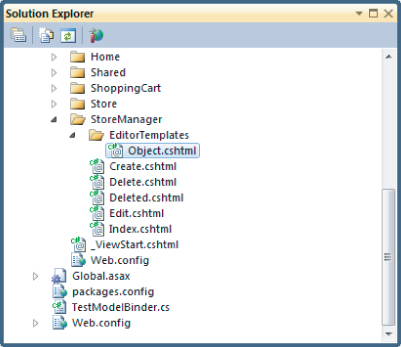
As an example, say you want to build a custom Object template, but only make it available to views associated with the MVC Music Store's StoreManager controller. In that case, you create an EditorTemplate underneath the Views/StoreManager folder and create a new Razor view named Object.cshtml (see Figure 14.6).
You can do many interesting things with custom templates. Perhaps you don't like the default styles associated with a text input (text-box single-line). You could build your own String editor template with your own styles and place it in the SharedEditorTemplates folder to make it work throughout the entire application.
Another example is to emit custom data- attributes for client scripting (you saw data- attributes in Chapter 8). For example, say you wanted to hookup a jQuery UI Datepicker widget with every editor for a DateTime property. The framework will render a DateTime property editor using the String template by default, but you can create a DateTime template to override this behavior, because the framework helper looks for a template named DateTime when it renders a DateTime value with templates.
@Html.TextBox("", ViewData.TemplateInfo.FormattedModelValue, new { @class = "text-box single-line", data_datepicker="true" })
You could place the above code inside a file named DateTime.cshtml, and place the file inside the SharedEditorTemplates folder. Then, all you need to add a Datepicker to every DateTime property editor is a small bit of client script (be sure to include the jQuery UI scripts and stylesheets as you saw in Chapter 8, too).
$(function () { $(":input[data-datepicker=true]").datepicker(); });
Now imagine you didn't want a Datepicker available for every DateTime editor, but only a handful of special cases. In that case, you could name the template file SpecialDateTime.cshtml. The framework won't select this template for a DateTime model unless you specify the template name. You can specify the name using the EditorFor helper (in this case rendering a DateTime property named ReleaseDate).
@Html.EditorFor(m => m.ReleaseDate, "SpecialDateTime")
Alternatively, you can place a UIHint attribute on the ReleaseDate property itself.
[UIHint("SpecialDateTime")]public DateTime ReleaseDate { get; set; }
Custom templates are a powerful mechanism you can use to reduce the amount of code you need to write for an application. By placing your standard conventions inside of templates, you can make sweeping changes in an application by changing just a single file.