
As detailed in Chapter 50, Visual Studio add-ins are components that run within Visual Studio and extend its functionality via the Visual Studio automation model.
This chapter takes you through the process of creating a Visual Studio add-in that integrates with the Visual Studio IDE to display a tool window (that enables you to store some notes), perform actions in Visual Studio (copy selected text from the code editor), and handle Visual Studio events (capture the cut and copy command events from the code editor).
When you create a Visual Studio add-in project, the Add-in Wizard appears and helps you to create the appropriate structure and base functionality in your add-in based on your input to its questions. From there you are on your own to implement the functionality from this base framework. You start from the base that it gives you and gradually add functionality to make it a useful tool.
Start by creating a new project, using the Visual Studio Add-in project template in the Extensibility project category (under the Other Project Type category), as shown in Figure 51-1.

Note
You'll note that the Extensibility category also contains a Shared Add-in project template. This template is similar to the Visual Studio Add-in, but is used for creating add-ins for the various applications in Microsoft Office instead of Visual Studio (although this has largely been taken over by VSTO).
Clicking OK starts the Add-in Wizard. The wizard consists of seven steps (including a welcome step and summary step). This section goes through each of these steps in the wizard and the options that each step provides.
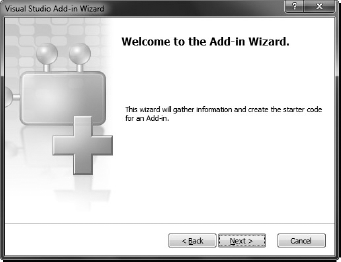
There is a welcome page at the start, which gives a short description of the wizard (as shown in Figure 51-2).
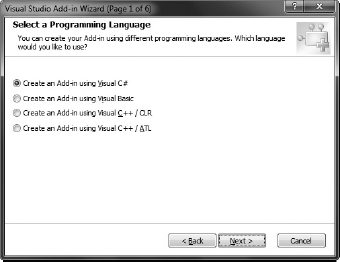
In the next step of the Add-in Wizard (as shown in Figure 51-3) you need to choose a development language for your add-in (because the Visual Studio Add-in project template was not under a particular language category in the New Project dialog). You have four options — Visual C#, Visual Basic, Visual C++/CLR, and Visual C++/ATL. Visual Studio generates the project in the language that you choose here.
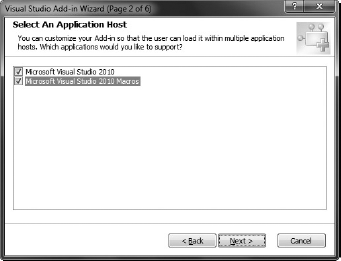
Now you need to choose an application host for your add-in (as shown in Figure 51-4). Two application hosts are available for your add-ins: the Visual Studio IDE and the Visual Studio Macros IDE (which is discussed in the next chapter). You can check or uncheck each host to select or deselect it. Your add-in will be available to the application host(s) that you select here.
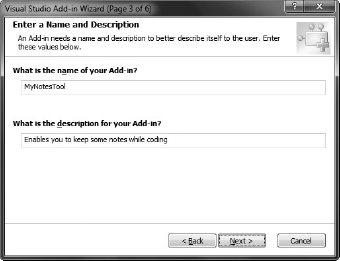
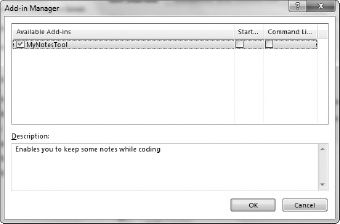
Now you can enter a name and description for your add-in (as shown in Figure 51-5). This information is what end users see in the Add-in Manager dialog in Visual Studio for your add-in.
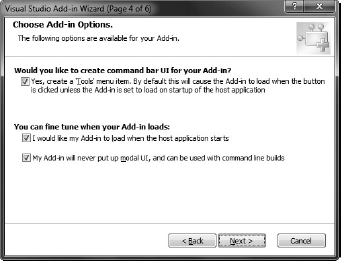
The next step contains the options for how your add-in will load and interact with Visual Studio. You can check three options to include in your add-in (as shown in Figure 51-6). The first option specifies that your add-in will have a menu item in the Tools menu that can be used to activate it. The second option indicates that you would like to load your add-in when the Visual Studio IDE or Visual Studio Macros IDE starts, and the third option is used to specify that your add-in doesn't show any modal user interfaces, and thus can be used with command-line builds.
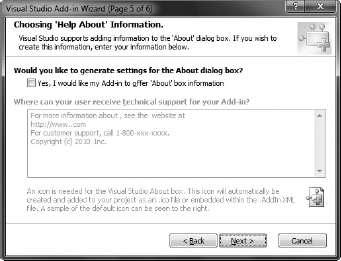
The next step (as shown in Figure 51-7) enables you to display some information in the Visual Studio About box for your add-in — especially useful if you are releasing your add-in as a product.
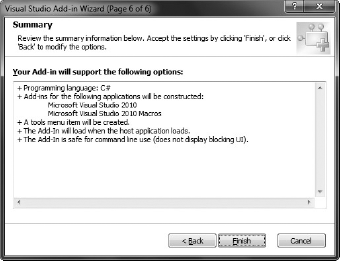
In the final step you will see a summary of what you have chosen in your wizard (as shown in Figure 51-8). At this stage, you can go back and change your options or click the Finish button to go ahead and generate the solution and initial code for your add-in.
After you click the Finish button, Visual Studio generates a solution with the required files for creating the add-in, configured according to the options you've selected for the add-in.
Once the project has been created, you will find the project structure, shown in Figure 51-9.
As you can see, the project consists of a Connect.cs (or Connect.vb) file, and two files with the .AddIn extension.

The Connect.cs/Connect.vb file contains the core class that controls the add-in. The .AddIn files are used to enable Visual Studio to discover the add-in so it can load it. One is located in your project folder, but you'll note that the other is a linked file (MyNotesTool - For Testing.AddIn), located in the My DocumentsVisual Studio 2010Addins folder of your Windows user profile. As its name suggests, this file is used so that Visual Studio can discover your add-in during its testing and debugging. The reason the file is in this folder is that it is one of the paths that Visual Studio looks in to discover add-in files. If you open both files, you will find that they are identical with one exception — the Assembly node of the linked file includes the full path to the compiled add-in assembly, whereas the other only includes the name of the assembly (expecting it to be in the same folder as the .AddIn file). We take a closer look at .AddIn files later in this chapter.
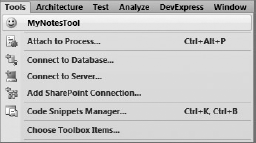
First, check to make sure everything works OK by simply running your project. This starts a new instance of Visual Studio 2010 in which you can test and debug the add-in. If you selected the options in the wizard to start automatically when the IDE is started and to create a Tool menu item, you should see a menu item at the top of the Tools menu for your add-in, with a default smiley face icon (which you can change to your own icon), as shown in Figure 51-10.
If you haven't selected the add-in to load automatically with the IDE, you can start it from the Add-in Manager (Tools
Note
If your add-in is not appearing in the Add-in Manager, Visual Studio is unable to find the .AddIn file. Go to Tools

Close the debugging instance of Visual Studio to finish debugging the add-in.
As mentioned earlier in this chapter, there are two .AddIn files in your solution: one in the project folder, and a linked file that has been placed in the My DocumentsVisual Studio 2010Addins folder on your machine.
In early versions of Visual Studio, you had to register the COM component by hand for an add-in on the machine, making deployment a little difficult (the add-in couldn't be deployed using a simple XCOPY). .AddIn files were designed to make the process of deploying add-ins easier. By placing the .AddIn file in a folder that Visual Studio is configured to look in, Visual Studio will use it to discover your add-in and load it (without worrying about the need to register the add-in). Essentially, .AddIn files point Visual Studio to where your add-in is (which will usually be in the same path as the .AddIn file).
.AddIn files are XML files, and in addition to pointing Visual Studio to the location of your add-in, they also contain configuration information such as what hosts the add-in should be accessible to (including different versions of Visual Studio), what will appear in the Add-in Manager to describe the add-in, and startup options for the add-in.
If you open up an .AddIn file, you will find XML similar to the following:
<?xml version="1.0" encoding="UTF-16" standalone="no"?>
<Extensibility xmlns="http://schemas.microsoft.com/AutomationExtensibility">
    <HostApplication>
        <Name>Microsoft Visual Studio Macros</Name>
        <Version>10.0</Version>
    </HostApplication>
    <HostApplication>
        <Name>Microsoft Visual Studio</Name>
        <Version>10.0</Version>
    </HostApplication>
    <Addin>
        <FriendlyName>My Notes</FriendlyName>
        <Description>My Notes</Description>
        <Assembly>MyNotesTool.dll</Assembly>
        <FullClassName>MyNotesTool.Connect</FullClassName>
        <LoadBehavior>5</LoadBehavior>
        <CommandPreload>1</CommandPreload>
        <CommandLineSafe>1</CommandLineSafe>
    </Addin>
</Extensibility>
Of particular note are the HostApplication nodes, listing each host application name and its specific version that the add-in should be accessible to. The preceding file is making the add-in available to both Visual Studio 2010 and the Visual Studio Macros 2010 IDE. If you want to make your add-in accessible to other versions of Visual Studio, simply add additional HostApplication nodes, with the corresponding version number for that version of Visual Studio (Visual Studio 2008 = 9.0, Visual Studio 2005 = 8.0). Of course you must make sure that you don't use features specific to Visual Studio 2010, and remove references to the higher EnvDTE dlls than the lowest version you are supporting.
This section looks at the structure of the core class that manages the add-in. The Connect.cs class (or Connect.vb) manages the life cycle of the add-in, and you can find a number of methods that handle the event notifications from the IDTExtensibility2 and IDTCommandTarget interfaces that are implemented by the class.
The IDTExtensibility2 interface exposes handlers for the events raised by Visual Studio that notifies the add-in at each point in its life cycle. The following methods form the IDTExtensibility2 interface:
OnConnection: Called when the add-in is being loaded by Visual Studio.
OnStartupComplete: Called when Visual Studio has finished loading.
OnAddInsUpdate: Called when the collection of add-ins in Visual Studio has changed.
OnBeginShutdown: Called when Visual Studio is shutting down.
OnDisconnection: Called when the add-in is being unloaded by Visual Studio.
The IDTCommandTarget interface exposes handlers for the events of named commands used by the add-in. The following methods form the IDTCommandTarget interface:
Exec: Called when a command used by the add-in is called from Visual Studio (such as when the menu item created under the Tools menu is selected). Visual Studio will pass this method the name of the command so you can respond accordingly.
QueryStatus: Called when the status of a command (such as whether or not it is available) is requested by Visual Studio.
Now that you have looked at the structure and life cycle of an add-in, it's time to add some functionality to interact with the Visual Studio IDE and implement some useful behavior. The sample you work through in this chapter creates a dockable tool window in Visual Studio that will enable you to place some notes while working in Visual Studio. Unfortunately, the Add-in Wizard doesn't provide options to help in creating your own tool window (which is one of the more common requirements when writing add-ins), so you will have to do this yourself. This section takes you through the steps to do so.
Note
Despite Visual Studio 2010 having a complete user interface overhaul to use WPF, unfortunately you still have to use Windows Forms for your tool windows when creating add-ins. To use WPF for your tool windows, you will have to use VSPackages in the Visual Studio 2010 SDK when extending Visual Studio instead.
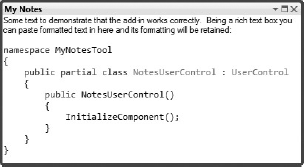
Add a new Windows Forms User Control item to your project, and call it NotesUserControl (.cs or .vb). Add a RichTextBox control to the user control, name it rtbNotes, set the BorderStyle property to None, and dock it to fill the area of the control.
Now return to the Connect.cs (or .vb) file, and add the following method to it to simplify the process of creating the tool window:
- VB
Private toolWindow As Window2 = Nothing Private Function CreateToolWindow(ByVal guid As String, ByVal windowTitle As String, ByVal classPath As String) As Object Dim windowObject As Object = Nothing Dim windows As Windows2 = DirectCast(_applicationObject.Windows, Windows2) Dim assemblyLocation As String = Assembly.GetCallingAssembly().Location toolWindow = DirectCast(windows.CreateToolWindow2(_addInInstance, assemblyLocation, classPath, windowTitle, guid, windowObject), Window2) Return windowObject End Function- C#
Private Window2 toolWindow = null;

private object CreateToolWindow(string guid, string windowTitle, string classPath)
{
    object windowObject = null;

    Windows2 windows = (Windows2)_applicationObject.Windows;
    string assemblyLocation = Assembly.GetCallingAssembly().Location;

    toolWindow = (Window2)windows.CreateToolWindow2(_addInInstance,
        assemblyLocation, classPath, windowTitle, guid, ref windowObject);

    return windowObject;
}
Note
A reference needs to be maintained to the user control at the class level because windows of add-ins are not destroyed/cleaned up during the life cycle of the add-in — instead they are merely hidden.
You will create the tool window when the menu item in the Tools menu is selected. You are notified of this in the Exec method, and you'll notice that the wizard already created the code to respond to this (although it currently does nothing). Use the following code to create the tool window and have it displayed in Visual Studio (the code to be added to the method has been bolded):
- VB
Private notesUserControl As NotesUserControl Public Sub Exec(ByVal commandName As String, ByVal executeOption As vsCommandExecOption, ByRef varIn As Object, ByRef varOut As Object, ByRef handled As Boolean) Implements IDTCommandTarget.Exec handled = False If executeOption = vsCommandExecOption.vsCommandExecOptionDoDefault Then If commandName = "MyNotesTool.Connect.MyNotesTool" Then' An ID that uniquely identifies this tool windowDim windowID As String = "{fb9e4681-681d-4216-9a28-0f09f3528360}"' Create the tool window if it hasn't already been createdIf toolWindow Is Nothing ThennotesUserControl = DirectCast(CreateToolWindow(windowID,"My Notes" , "MyNotesTool.NotesUserControl" ), NotesUserControl )End If' Make the tool window visible if it's currently hiddentoolWindow.Visible = Truehandled = True Return End If End If End Sub- C#
private NotesUserControl notesUserControl; public void Exec(string commandName, vsCommandExecOption executeOption, ref object varIn, ref object varOut, ref bool handled) { handled = false; if (executeOption == vsCommandExecOption.vsCommandExecOptionDoDefault) { if (commandName == "MyNotesTool.Connect.MyNotesTool") {// An ID that uniquely identifies this tool windowstring windowID = "{fb9e4681-681d-4216-9a28-0f09f3528360}" ;// Create the tool window if it hasn't already been createdif (toolWindow == null){notesUserControl = ( NotesUserControl)CreateToolWindow(windowID, "My Notes" ,"MyNotesTool.NotesUserControl" );}// Make the tool window visible if it's currently hiddentoolWindow.Visible = true;handled = true; return; } } }
As you can see from the code, it's now a relatively easy process to create the window. You pass an ID that uniquely identifies this tool window, a window title, and the qualified name of the user control class to the CreateToolWindow method you created earlier, and it handles calling the extensibility model to create the tool window in Visual Studio.
Now, run your project and select the menu item for the add-in under the Tools menu. The user control will display as a tool window (as shown in Figure 51-13), which you can then move around and dock to the IDE as if it were any other tool window.
Note
Visual Studio will remember the location of the window (using its unique ID to store and retrieve these details), so the next time you load Visual Studio the window will appear where you last placed it (although this only works when the add-in is not being debugged). However, for it to be displayed when Visual Studio is started, you will have to create the tool window when the add-in is started (rather than when its menu item is selected).
You can now add your own additional functionality to the tool window (in the user control) such as loading and saving the text to a text file (if you want) as if you were programming a standard application. However, this example doesn't currently demonstrate integrating with the functionality of Visual Studio and the events it raises, so add a feature to demonstrate this by creating a button to take selected code from the code editor and insert it into the notes at the current caret position.
To get to the Visual Studio object model from the user control, you'll have to make the class-level variable _applicationObject in the Connect class static and expose it publicly by wrapping it in a property as shown in the following code:
- VB
Private Shared _applicationObject As DTE2

Public ReadOnly Property ApplicationObject() As DTE2
    Get
Return _applicationObject End Get End Property- C#
private static DTE2 _applicationObject;

public static DTE2 ApplicationObject
{
    get { return Connect._applicationObject; }
}
Add a ToolStrip control to the user control with a button that will copy the selected text in the code editor and insert it into the textbox when clicked. In the event handler for this button, add the following code:
- VB
Private Sub btnCopy_Click(ByVal sender As System.Object, ByVal e As System.EventArgs) Handles btnCopy.Click If Not Connect.ApplicationObject.ActiveDocument Is Nothing Then Dim selection As TextSelection = DirectCast( Connect.ApplicationObject.ActiveDocument.Selection, TextSelection) rtbNotes.SelectedText = selection.Text End If End Sub- C#
private void btnCopy_Click(object sender, EventArgs e)
{
    if (Connect.ApplicationObject.ActiveDocument != null)
    {
        TextSelection selection =
            Connect.ApplicationObject.ActiveDocument.Selection as TextSelection;

        rtbNotes.SelectedText = selection.Text;
    }
}
This will take the selected text from the active code editor document and insert it at the current caret position in the rich textbox in the user control. Note that the code will be unformatted (that is, no syntax coloring) when it's put into the rich textbox. Alternatively, you can use the following code to copy the text out of the code editor and paste it into the rich textbox, which would retain the syntax coloring but lose the existing contents of the clipboard:
- VB
Private Sub btnCopy_Click(ByVal sender As System.Object,
                          ByVal e As System.EventArgs) Handles btnCopy.Click
    If Not Connect.ApplicationObject.ActiveDocument Is Nothing Then
Connect.ApplicationObject.ActiveDocument.Selection.Copy() rtbNotes.Paste() End If End Sub- C#
private void btnCopy_Click(object sender, EventArgs e)
{
    if (Connect.ApplicationObject.ActiveDocument != null)
    {
        Connect.ApplicationObject.ActiveDocument.Selection.Copy();
        rtbNotes.Paste();
    }
}
As a final example, handle an event raised by Visual Studio. You'll handle the Cut and the Copy command events (before the command is actually executed), get the selected text from the code editor, and automatically insert it into the rich textbox.
First, you need to get a reference to the commands whose events you want to capture (the Cut and Copy commands), and then the command events objects themselves. C# developers will also add an event handler for the BeforeExecute event for each command.
- VB
Private WithEvents cutEvent As CommandEvents = Nothing Private WithEvents copyEvent As CommandEvents = Nothing Private Sub EnableAutoCopy() ' Enable the event listening for the Cut and Copy commands Dim cmdCut As Command = Connect.ApplicationObject.Commands.Item("Edit.Cut", 0) Dim cmdCopy As Command = Connect.ApplicationObject.Commands.Item("Edit.Copy", 0) cutEvent = Connect.ApplicationObject.Events.CommandEvents(cmdCut.Guid, cmdCut.ID) copyEvent = Connect.ApplicationObject.Events.CommandEvents(cmdCopy.Guid, cmdCopy.ID) End Sub- C#
private CommandEvents cutEvent = null;
private CommandEvents copyEvent = null;

private void EnableAutoCopy()
{
    // Enable the event listening for the Cut and Copy commands
    Command cmdCut = Connect.ApplicationObject.Commands.Item("Edit.Cut", 0);
cutEvent = Connect.ApplicationObject.Events.get_CommandEvents(cmdCut.Guid, cmdCut.ID); cutEvent.BeforeExecute += new _dispCommandEvents_BeforeExecuteEventHandler(OnBeforeCutCopy); Command cmdCopy = Connect.ApplicationObject.Commands.Item("Edit.Copy", 0); copyEvent = Connect.ApplicationObject.Events.get_CommandEvents(cmdCopy.Guid, cmdCopy.ID); copyEvent.BeforeExecute += new _dispCommandEvents_BeforeExecuteEventHandler(OnBeforeCutCopy); }
Now you can define the event handler method that will handle the BeforeExecute event for both commands, extracting the selected text from the code editor and inserting it into the rich textbox:
- VB
Private Sub OnBeforeCutCopy(ByVal guid As String, ByVal id As Integer, ByVal customIn As Object, ByVal customOut As Object, ByRef cancel As Boolean) _ Handles cutEvent.BeforeExecute, copyEvent.BeforeExecute Dim codeWindow As TextWindow = TryCast( Connect.ApplicationObject.ActiveWindow.Object, EnvDTE.TextWindow) If Not codeWindow Is Nothing Then rtbNotes.SelectedText = codeWindow.Selection.Text & Environment.NewLine & Environment.NewLine End If End Sub- C#
private void OnBeforeCutCopy(string guid, int id, object customIn,
                             object customOut, ref bool cancel)
{
    TextWindow codeWindow = Connect.ApplicationObject.ActiveWindow.Object
                                                        as EnvDTE.TextWindow;

    if (codeWindow != null)
    {
        rtbNotes.SelectedText = codeWindow.Selection.Text +
            Environment.NewLine + Environment.NewLine;
    }
}
Finally, you need to clean things up when the add-in is unloaded and release any event handlers you have active (the CloseToolWindow method will be called from the Connect class in the OnDisconnection method):
- VB
private void DisableAutoCopy()
{
    if (cutEvent != null)
Marshal.ReleaseComObject(cutEvent); if (copyEvent != null) Marshal.ReleaseComObject(copyEvent); cutEvent = null; copyEvent = null; } public void CloseToolWindow() { DisableAutoCopy(); }- C#
private void DisableAutoCopy()
{
    if (cutEvent != null)
        Marshal.ReleaseComObject(cutEvent);

    if (copyEvent != null)
        Marshal.ReleaseComObject(copyEvent);

    cutEvent = null;
    copyEvent = null;
}

public void CloseToolWindow()
{
    DisableAutoCopy();
}
Despite being a COM component (which typically require registration in Windows), Visual Studio add-ins are very easy to deploy thanks to the .AddIn file, which enables Visual Studio to discover your add-in and use it.
As discussed earlier in the chapter, Visual Studio will look in each of the paths listed in the Options dialog (see Figure 51-12) for files with an .AddIn extension. Therefore, when deploying your add-in, you will need to place the .AddIn file and the add-in assembly (that is, the .dll file) into one of these paths (typically a user profile's My DocumentsVisual Studio 2010Addins folder), enabling Visual Studio to discover and load your add-in when it starts up.
You can use a simple XCOPY operation to deploy your add-in to another user's machine, but the best way would be to create a setup program to do this for you. You could use a standard Windows installer package (.msi), but in this instance it's probably better to use a Visual Studio Content Installer package. Unfortunately, it's a manual process to create a Visual Studio Content Installer package, but they're very easy to create. They essentially consist of your files packed into a zip file, but with a .vsi extension, and a specially formatted XML file (also included in the zip file) with a .vscontent extension that contains the details of the files to be installed (from the zip file) and where they are to be installed to.
Start by creating an XML file in your project with the name MyNotesTool.vscontent, and add the following content:
<VSContent xmlns="http://schemas.microsoft.com/developer/vscontent/2005">
  <Content>
    <FileName>MyNotesTool.Addin</FileName>
    <FileName>MyNotesTool.dll</FileName>
    <DisplayName>My Notes</DisplayName>
    <Description>
      Enables you to keep notes in a tool window in
      Visual Studio while you code.
    </Description>
    <FileContentType>Addin</FileContentType>
    <ContentVersion>2.0</ContentVersion>
  </Content>
</VSContent>
Now, in Windows Explorer (or your favorite zip tool), combine the MyNotesTool.AddIn file, the MyNotesTool.dll file, and the MyNotesTool.vscontent file into a zip file, and name it MyNotesTool.vsi (do not include the .zip extension). Now when someone double-clicks this .vsi file, the add-in will automatically be installed and ready for them to use when they next open Visual Studio.
In this chapter, you were introduced to Visual Studio add-ins, and went through the process of creating one that displayed a dockable tool window, retrieved text from the code editor, and responded to some code editor events. Finally, you looked at the best way to deploy your add-in to other developers.