This appendix includes sections that cover how to configure the robotics hardware used in this book (the Parallax Boe-Bot, LEGO Mindstorms NXT, iRobot Create, and Arrick Robotics ARobot).
The Parallax Boe-Bot robot (which is referenced in Chapter 3) processes operating instructions on a small stamp known as the BASIC stamp microcontroller. This single-board computer works fine for operating a small device such as the Boe-Bot, but it would be unable to accommodate even a compact version of the .NET Framework. For this reason, Microsoft Robotics Studio (MSRS) requires an interface that stands between the MSRS runtime and the computer that runs your robot.
The BASIC stamp runs the Parallax BASIC (PBASIC) language interpreter, which was developed by Parallax. Using the BASIC Stamp Editor, you can create programs that operate the Boe-Bot by issuing commands and interfacing with sensors. The latest version of the BASIC Stamp Editor is available as a free download from the Parallax Web site: http://www.parallax.com/ProductInfo/Microcontrollers/BASICStampSoftware/tabid/441/Default.aspx.
Note
In case you are wondering whether you can operate the Boe-Bot without MSRS, you can do so. However, the benefits for using MSRS to control your robot far outweigh the complexity involved with getting your Boe-Bot configured. For example, you can use MSRS to create complex applications using any of the .NET languages. You can also monitor your robot remotely in real-time. These are things you would be unable to do using the BASIC Stamp Editor and BASIC Stamp that come with the Boe-Bot.
You need to download and install the BASIC Stamp Editor to configure your Boe-Bot to work with MSRS. This is the case regardless of whether you were using Visual Programming Language (VPL) or the Visual Studio template. You also need to download a zip file that contains PBASIC programs from the following URL: http://www.parallax.com/Portals/0/Downloads/src/prod/MSRS-Bluetooth-Boe-Bot-Code-v1.2.zip. You use the PBASIC programs to test your Boe-Bot and to enable it to work with MSRS. After you download from the Parallax Web site to your development machine, you need to use the BASIC Stamp Editor program to download the programs to the Boe-Bot. Specifically, you must download the BoeBotControlForMsrsCtp2.bs2 program (see Figure B-1) to the robot using the serial or USB cable. The zip file from Parallax contains the following four PBASIC programs:
TestSpeakerLedsServos.bs2. This file should be downloaded to the Boe-Bot to ensure that the motors, speaker, and LEDs have been added correctly. After downloading, the Boe-Bot should beep, flash the lights on and off, and move forward, left, right, and then backward. If this does not happen, then you know there is a problem, and you should refer to the manual that accompanies the Boe-Bot.
TestWhiskersAndIr.bs2. This file needs to be used only if you have added the whiskers or infrared detectors to your Boe-Bot. The program displays the values for these sensors in the debug window, so you can verify that they are detecting objects correctly.
End.bs2. This file can be used before installing the eb500 Bluetooth module to ensure that electrical signals do not damage the wireless card.
BoeBotControlForMSRSCtp2.bs2. This file acts as a software driver for the Boe-Bot. Just like a printer driver allows your operating system and printer to communicate, this PBASIC program allows MSRS to communicate with your Boe-Bot. You must download this program to the Boe-Bot using the serial or USB cable before you can use VPL or any of the robotics tutorials.
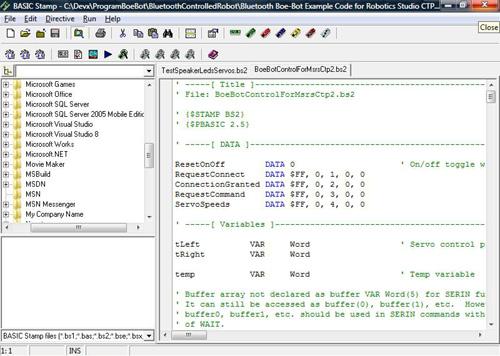
Figure B-1. The BoeBotControlForMSRSCtp2.bs2 PBASIC program must be downloaded to your Boe-Bot using the serial or USB connection before you can control the robot using MSRS.
Tip
The Boe-Bot comes in a serial and USB version. Check to see if your machine has a serial connection. If it does not, then you will need the USB version, which includes a USB to serial (RS232) converter and a USB A to mini B cable. You can combine these with your serial cable to connect the Boe-Bot without a serial connection on your computer.
The Boe-Bot comes with a serial or USB cable, which allows you to send commands to your Boe-Bot. If you use a cable to operate your robot, then it is considered tethered. This limits your ability to operate the robot because it can travel only as far as the three- or six-foot cable allows it to. Fortunately, the Boe-Bot provides support for a Bluetooth wireless connection through an eb500 Bluetooth module. The module comes with the Boe-Bot for the MSRS kit or is available for purchase separately from the Parallax Web site.
After installing the software that comes with your Bluetooth adapter, you will need to add the device using the Add Bluetooth Device Wizard. The Boe-Bot uses a passkey value of 0000. After entering the passkey, your operating system should assign the device to both an outgoing and incoming COM port. Record these numbers because you will need to enter them later.
MSRS needs to know what COM port to use when communicating with the Boe-Bot. In this case, it will be the outgoing port that will be referenced. To change the COM port reference, you will need to open the BASICStamp2 solution located in the MSRS installation directory under the samplesPlatformsParallax subdirectory. Open the file using Visual Studio 2005, and then open the Parallax.MotorIrBumper.config.xml file, which is located in the BSServicesConfig folder. You need to change the element named SerialPort to contain the COM port used by your Bluetooth device. You also need to change the SerialPort element located in the Parallax.BoeBot.Config.xml file found in the samplesConfig subdirectory.
Tip
Andy Lindsay from Parallax maintains a document that details what you need to do to get the Boe-Bot to work with MSRS. This 20-page document lists more detail than is included here and should be referenced if you have any problems configuring your Boe-Bot. You can refer to the latest version of this document through the following URL: http://www.parallax.com/dl/docs/prod/robo/MSRS-Bluetooth-Boe-Bot-v1.4.pdf.
You then need to locate the private variable for the serial port, which is located in the BasicStamp2.cs file. Change the value for the variable named DefaultSerialPort to the value for your machine. The variable is located at the top of the class definition, such as in the following code:
public class BasicStamp2Service : DsspServiceBase
    {
        private const int DefaultSerialPort = 6;
Finally, you must build the BASICStamp2 solution and ensure that the build was successful. The solution includes two projects: BASICStamp2 and BSServices2. Changes are made to both projects, so you will need to recompile the entire solution.
Note
You should also pay special attention to whether your Bluetooth module is marked as eb500 SER C. You can find this on the module’s serial tag. If it is, then you might encounter infrared (IR) interference that could cause your sensors not to perform properly. To avoid this, you need to request a new module or modify the existing module by snipping off one of the pin headers. Refer to the documentation listed in the previous tip for more information about this situation.
By default, whiskers are disabled by the service that operates the Boe-Bot. If you decide to install the whiskers for your Boe-Bot, you must also make a change to the BoeBotControl.cs file in the BASICStamp2 project. The ExecuteMain method contains code that initiates a connection with the Boe-Bot and is responsible for enabling or disabling the appropriate sensors. To enable the Boe-Bot to use whiskers, you need to uncomment the call to EnableWhiskers and comment the call to DisableWhiskers, such as in the following code:
if (!handshake)
{
    handshake = WaitForConnect();
    irFlag = EnableIr();
    wFlag = EnableWhiskers();
    //wFlag = DisableWhiskers();
    digFlag = EnableDigitalSensors();
    for(int i = 0; i < 2; i++)
    {
        SetPins(3, 14, 3, 15);
        SpeakerTone(50, 4000);
        SetPins(4, 14, 4, 15);
    }
}
After you make the code changes, you must rebuild the entire BasicStamp2 solution and reload VPL before continuing.