
Now that we have the necessary building blocks in place, we can start developing our application. Let's start with a very simple application:
- Go to the directory where you unpacked the example code.
- Go to the directory
Chapter 2. - Double-click the file
nocontent.py, a text window will open (alternatively you can enter the commandpython nocontent.pyfrom the command line):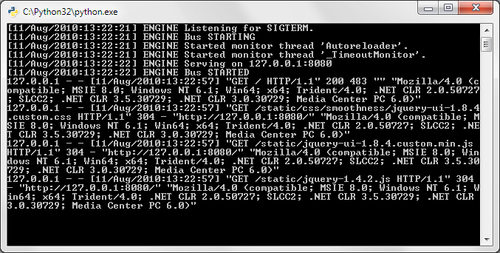
- Open your favorite browser and enter
http://localhost:8080in the address bar. You will be presented with a rather dull page:
Tip
If your browser is unable to connect to http://localhost:8080, this might be because your local name server is not configured to resolve the name localhost. If you do not have the means to correct this, it is equally valid, though less convenient, to enter http://127.0.0.1:8080 in the address bar of your browser.
It is also possible that the default port that the application will be listening on (8080) is already in use, in which case, Python will raise an exception: IOError: Port 8080 not free on '127.0.0.1'. If that is the case, we can configure CherryPy to listen on a different port (see the info box in the next section).
Double-clicking nocontent.py caused the Python interpreter to start and execute the script. This opened up a console window where the CherryPy framework logged the fact that it started and that it will be listening on port 8080 at 127.0.0.1 (the so called loop back IP-address of the local machine, an address present on the machine even if it is not connected to the Internet).
This address and port are the ones we point our browser to, after which the HTTP server provides us with an HTML file, and a couple of JavaScript files to serve the application. Each file that is retrieved by the browser is logged in the console window together with a status. This will be convenient for spotting the missing files, for example.
Our script can be stopped from serving requests by closing the console window or by pressing Ctrl + Break (on Windows) or Ctrl + C (on Windows and most other platforms).