
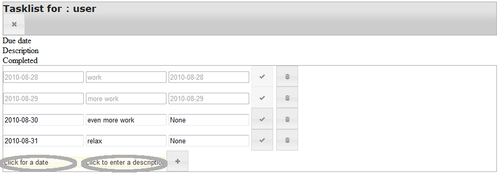
Take a look again at the screenshot of the list of tasks:
The highlighted parts show what we mean by inline labels. The input fields display some helpful text to indicate their use and when we click such a field, this text will disappear and we can enter our own text. If we abort the input by clicking outside the input field when we have not yet entered any text, the inline label is shown again.
tooltip.js shows a number of important concepts: First how to apply a function to each member of a selection (highlighted). In this case, we apply the function to all<input> elements that have a title attribute. Within the function passed to the each() method, the selected<input> element is available in the this variable. If the content of an<input> element is completely empty, we change its content to that of the title attribute and add the class inline-label to the<input> element. That way, we can style the text of an inline label differently than the regular input text if we like, for example, a bit lighter to make it stand out less.
The second concept shown is binding to the focus and blur events. When the user clicks an<input> element or uses the Tab key to navigate to it, it gains focus. We can act upon this event by passing a function to the focus() method. In this function, the<input> element that gains focus is again available in the this variable and we check if the content of this<input> element is equal to the content of its title attribute. If this is true, the user hasn't yet changed the content, so we empty this element by assigning an empty string to it (highlighted).
The same line shows another important concept in jQuery, that of chaining. Most jQuery methods (like val() in this example) return the selection they act upon, allowing additional methods to be applied to the same selection. Here we apply removeClass() to remove the inline-label class to show the text the user is typing in the regular font and color for this<input> element.
We also act on losing focus (commonly referred to as blurring), for example, when the user clicks outside the<input> element or uses the Tab key to navigate to another element. We therefore pass a function to the blur() method. This function checks whether the content of the<input> element is empty. If so, then the user hasn't entered anything and we insert the content of the title attribute again and mark the element with an inline-label class.
Chapter3/tooltip.js
$(document).ready(function() {
	$('input[title]').each(function() {
		if($(this).val() === '') {
			$(this).val($(this).attr('title'));
			$(this).addClass('inline-label'),
		}
		$(this).focus(function() {
			if($(this).val() === $(this).attr('title')) {
					$(this).val('').removeClass('inline-label'),
			}
		});
		$(this).blur(function() {
			if($(this).val() === '') {
				$(this).val($(this).attr('title'));
				$(this).addClass('inline-label'),
			}
		});
	});
});
Without some additional styling to tweak the layout, our tasklist application would look a bit disheveled, as seen before.
Our main challenges are aligning all columns and moving all buttons consistently to the right. All elements in our HTML markup that make up the columns are marked with a class to indicate that they belong in the left, middle, or right column. All we have to do to align these columns is to set their width based on their class (highlighted).
The largest part of the rest of tasklist.css is concerned with either floating elements to the right (like buttons) or to the left (containers, like the<div> element with the id attribute content). Most containers are not only floated to the left, but also explicitly set to a width of 100 percent to make sure they fill the element they are contained in themselves. This is not always necessary to position them correctly, but if we do not take care, the background color of the enclosing element might show if an element doesn't fill its enclosing element:
Chapter3/tasklist.css
input[type="text"] {
	font-size:1.1em;
	margin:0;
	border:0;
	padding:0;}
.left, .right { width: 8em; }
.middle { width: 20em;}
form {
	float:left;
	border:0;
margin:0;
padding:0;
	clear:both;
	width:100%; }
form.logoff{
float:right;
	border:0;
margin:0;
padding:0;
	clear:both;
width:auto;
	font-size:0.5em;}
#items { float:left; clear:both; width:100%; }
.header { width:100%; }
.taskheader, .header, #content{ float:left; clear:both;}
.taskheader div { float:left; font-size:1.1em; font-weight:bold;}
.logoff-button, .done-button, .del-button, .add-button { float:right;}
.done-button, .add-button, .del-button { width: 6em; height: 1.1em; }
#content { min-width:900px;}
Note that our stylesheet only deals with measurements and font sizes. Any coloring is applied by the chosen jQuery UI theme. With the styles applied, the application looks a fair bit tidier:

- In
tasklist.js, we explicitly configured all buttons to show just an icon without any text. But what if we wanted to show both an icon and some text, what would we do? - If we didn't set the width of the form that makes up a task explicitly to 100 percent, what would the biggest disadvantage be?
To display the date as ISO 8701 (or YYYY-MM-DD) isn't everybody's idea of a readable date format. For many people, the default mm/dd/yy is far more readable. How would you change tasklist.js to display the tasks with this default date format? Hint: it isn't enough to leave out the dateFormat option when calling the datepicker() plugin, you also need to change the comparator function to sort the tasks in a suitable manner.
For the impatient or curious readers: a sample implementation is available as tasklist2.js (start up tasklist2.py to see the effect).
One way to measure how reusable a piece of code is, is by using it in a situation that you did not yet have in mind when you designed it. Of course, that doesn't mean our task module should be able to function as a control application for an automobile construction plant, but what if we would like it to be part of a larger suite of applications served from the same root? Would we have to change anything?
Say we want to serve the tasklist application from the URL /apps/task instead of /task, what would we have to change?
Hint: In CherryPy, you can create a tree of URLs by assigning object instances to class variables of the object instance that is passed to the quickstart() method.
A possible implementation can be found in tasklistapp.py.