
11
Package Management
When working in complex systems, especially in microservices or similar architectures, there is sometimes a need to share code so it's available at different, unconnected parts of the system. That's normally code that will help to abstract some functions, which can vary greatly, from security purposes (for example, calculating a signature in a way that's understood by other systems that will have to verify it), to connecting to databases or external APIs, or even helping to monitor the system consistently.
Instead of reinventing the wheel each time, we can reuse the same code multiple times to be certain that it's properly tested and validated, and consistent throughout the entire system. Some modules may be interesting to share not only across the organization but even outside it, creating a standard module others can take advantage of.
Others have done that before, and a lot of common use cases, such as connecting to existing databases, using network resources, accessing OS features, understanding files in all kinds of formats, calculating common algorithms and formulas, in all kinds of domains, creating and operating AI models, and a long list of other cases besides, are available.
To enhance the sharing and utilization of all those abilities, modern programming languages have their own ways of creating and sharing packages, so the usefulness of the language multiplies greatly.
In this chapter, we will discuss the use of packages, mostly from a Python perspective, covering when and how to decide to create a package. We will explore the different options available, from a simple structure to packages that include code compiled so that it can be optimized for specific tasks.
In this chapter, we'll cover the following topics:
- The creation of a new package
- Trivial packaging in Python
- The Python packaging ecosystem
- Creating a package
- Cython
- Python package with binary code
- Uploading your package to PyPI
- Creating your own private index
Let's start by defining what code could be a candidate to create a package.
The creation of a new package
In any software, there will be snippets of code that could be shared across different parts of the code. When working with small, monolithic applications, this can be as easy as creating some internal modules or functions that can share functionality by calling it directly.
Over time, this common function or functions could be grouped together under a module to clarify that they are to be used across the application.
Avoid the temptation to use the name utils for a module with code expected to be used in different positions. While this is very common, it is also not very descriptive and a bit lazy. How does someone know if a function is in the utils module? Instead of that, try to use a descriptive name.
If it's not possible, divide it into submodules, so you can create something like utils.communication or utils.math to avoid this effect.
This will work fine up to a certain size. Some of the problems that can arise as the code grows and becomes more complex are as follows:
- Create a more generic API to interact with the module, aimed at greater flexibility in terms of module utilization. This can involve creating a more defensive style of programming, to be sure that the module is used as expected and return proper errors.
- Specific documentation needs to be provided for the module so that developers who are not familiar with the module are able to use it.
- Ownership of the module may need to be clarified and its own maintainers specified. This can take the form of a stricter code review before changing the code, with some developer or developers designated as the point of contact for the module.
- The most critical one, the functionality of the module, is required to be present in two or more independent services or code bases. If this happens, instead of just copying/pasting the code across different code bases, it makes sense to create an independent module that can be imported. This could be a deliberate option upfront, to standardize certain operations (for example, produce and verify signed messages across multiple services) or it could be an afterthought following successful implementation of the functionality in one code base that it could be handy to have in other services of the system. For example, instrumenting the communication messages to you generates a log. This log can be useful in other services, so, from the original service, it gets migrated to others.
In general, the module starts getting its own entity, and not only as a shared location for incorporating code that is going to be shared. At that time, it starts to make sense to treat it as an independent library more than a module attached to a particular code base.
Once the decision to create some code as an independent package has been taken, several aspects should be considered:
- As we've seen before, the most important is the ownership of the new package. Packages exist in the boundaries between different teams and groups, as they are used by different ones. Be sure to provide clear ownership regarding any package to be sure that the team responsible for it is reachable, both for any possible inquiries and for setting its own maintenance.
- Any new package will require time to develop new features and adjustments, especially as the package is in use, probably stretching its limits as it's used in multiple services and in more ways. Be sure to take this into account and adjust the load of the team responsible accordingly. This will be very dependent on how mature the package is and how many new features are required.
- In the same way, be sure to budget time to maintain the package. Even if there are no new features, bugs will be detected and other general maintenance, such as updating the dependencies on account of security fixes or compatibility with new OS versions, will need to be continued.
All these elements should be taken into account. In general, it is advisable to create some sort of roadmap where the team responsible can define what the objectives are and a time frame to achieve them.
The bottom line is that a new package is a new project. You need to treat it as such.
We will focus on creating a new package in Python, but the basics are similar when creating other packages in other languages.
Trivial packaging in Python
In Python, it is easy to create a package to be imported by just adding a subdirectory to the code. While this is simple, it can be adequate initially, as the subdirectory can be copied. For example, the code can be added directly to the source control system, or it can even be installed by compressing the code and uncompressing it in place.
This is not a long-term solution, as it won't handle multiple versions, dependencies, and so on, but it can work in some cases as a first step. At least initially, all the code to be packetized needs to be stored in the same subdirectory.
The structure of the code for a module in Python can be worked out as a subdirectory with a single entry point. For example, when creating a module called naive_package with the following structure:
└── naive_package
    ├── __init__.py
    ├── module.py
    └── submodule
        ├── __init__.py
        └── submodule.py
We can see that the module contains a submodule, so let's start there. The submodule directory contains two files, the submodule.py file with the code, and an empty __init__.py file to allow the other file to be imported, as we will see later.
__init__.py is a special Python file that indicates that the directory contains Python code and can be imported externally. It symbolizes the directory itself, as we will see later.
The content of submodule.py is this example function:
def subfunction():
    return 'calling subfunction'
The top level is the module itself. We have the module.py file, which defines the some_function function that calls the submodule:
from .submodule.submodule import subfunction
def some_function():
    result = subfunction()
    return f'some function {result}'
The import line has a detail, a dot in the form of the submodule located in the same directory. This is specific syntax in Python 3 for being more precise when importing. Without the dot, it will try to import from the library instead.
You can learn more about relative imports in PEP-328, which describes it, here: https://www.python.org/dev/peps/pep-0328/. PEPs (Python Enhancement Proposals) are documents describing new features relating to the Python language or information related to the community. It is the official channel for proposing changes and advancing the language.
The rest of the function calls subfunction and combines the result to return a string of text.
The __init__.py file, in this case, is not empty, but instead, it imports the some_function function:
from .module import some_function
Note again the relative import as indicated by the preceding dot. This allows having the some_function function available as part of the top level of the naive_package module.
We can now create a file to call the module. We'll write the call_naive_package.py file, which needs to be at the same level as the native_package directory:
from naive_package import some_function
print(some_function())
This file just calls the module-defined function and prints the result:
$ python3 call_naive_package.py
some function calling subfunction
This method of handling a module to be shared is not recommended, but this small module can help us understand how to create a package and what the structure of a module is. The first step to detaching a module and creating an independent package will be to create a single subdirectory that has a clear API, including clear entry points to use it.
But to get a better solution, we will need to be able to create a full Python package from there. Let's take a look at what that means exactly.
The Python packaging ecosystem
Python has a very active ecosystem of third-party open source packages that covers a wide variety of topics and enables the power of any Python program to be enhanced. You can take advantage of installing them by using pip, which is installed automatically for any new Python install.
For example, to install the package named requests, a package allowing the compilation of easier and more powerful HTTP requests, the command is:
$ pip3 install requests
pip searches in the Python Package Index automatically to see whether the package is available and if it is, it will download it and install it.
Note that the pip command could take the form of pip3. This depends on the installation of Python in your system. We will use them indistinctly.
We will see more detailed usage on pip later in the chapter, but first, we need to discuss the main source where the packages are downloaded.
PyPI
The Python Package Index (PyPI, normally pronounced as Pie-P-I, as opposed to Pie-Pie) is the official source of packages in Python and can be checked at https://pypi.org:
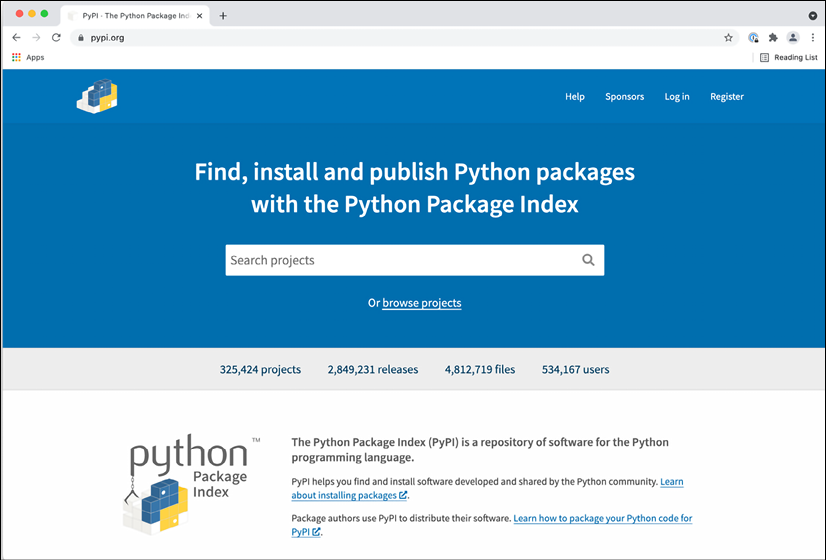
Figure 11.1: pypi.org main page
On the PyPI web page, the search enables specific packages to be found along with useful information, including available packages with partial matches. They can also be filtered.
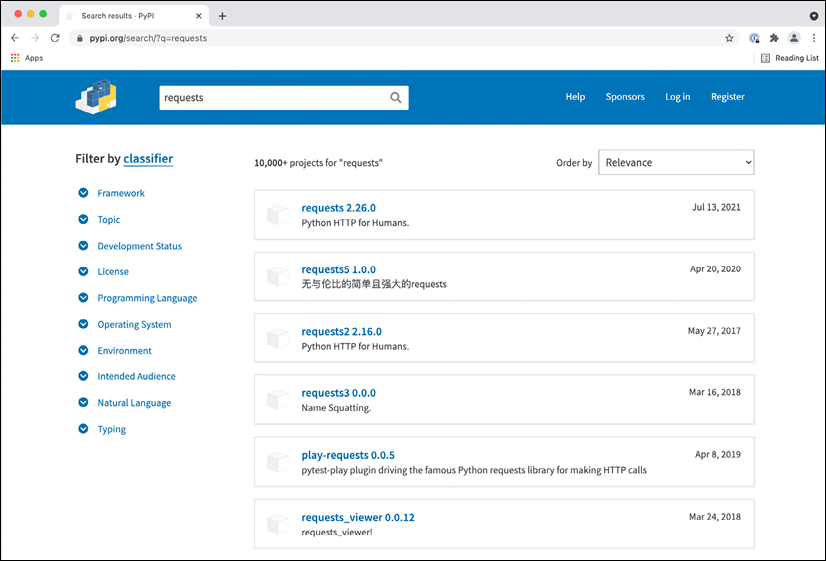
Figure 11.2: Searching for packages
Once the individual package is specified, more information can be found regarding brief documentation, links to the source and home page of the project, and other similar kinds of licenses or maintainers.
The home page and documentation page are very significant for big packages, as they will include much more information about how to use the package. Smaller packages will normally only include the documentation on this page, but it's always worth checking their page for the source as it may link to a GitHub page with details about bugs and the possibility of submitting patches or reports.
The page for requests looks like this at the time of writing this book:

Figure 11.3: Detailed info about a module
Searching directly in PyPI can help locate some interesting modules, and in some cases, will be quite straightforward, such as finding a module to connect to a database (for example, searching by the name of the database). This, though, normally involves a significant amount of trial and error, as the name may not be indicative of how good a module will be for your use case.
Spending some time on the internet searching for the best module for a use case is a great idea and it will improve the chances of finding the right package for your use case.
A great source of knowledge in this case is StackOverflow (https://stackoverflow.com/), which contains a lot of questions and answers that can be used to ascertain interesting modules. A general Google search will also help.
In any case, given the number of available packages for Python, of varying quality and maturity, it's always worthwhile setting aside some time to research alternatives.
Packages are not curated in any way by pypi.org, as it's publicly available to anyone to submit their packages, although malicious ones will be eliminated. How popular a package is will require more indirect methods, such as searching how many downloads or searching through a searcher online to see whether other projects are using it. Ultimately, it will require the performance of some Proof-of-Concept programs to analyze whether the candidate packages cover all the required functionalities.
Virtual environments
The next element in the packaging chain is the creation of virtual environments to isolate the installation of modules.
When dealing with installing packages, using the default environments in the system leads to the packages being installed there. This means that the general installation of the Python interpreter will be affected by this.
This can lead to problems, as you may install packages that have side effects when using the Python interpreter for other purposes, as dependencies in the packages may interfere with each other.
For example, if the same machine has a Python program that requires the package1 package and another Python program that requires package2, and they are both incompatible, that will create a conflict. Installing both package1 and package2 won't be possible.
Note that this can also happen through version incompatibility, especially in the dependencies of the packages, or in the dependencies of dependencies. For example, package1 requires dependency version 5 to be installed, and package2 requires dependency version 6 or higher. They won't be able to run in conjunction with one another.
The solution to this problem is to create two different environments, so each package and its dependencies are stored independently – independently from each other, but also independently from the system Python interpreter, so it won't affect any possible system activity that depends on the Python system interpreter.
To create a new virtual environment, you can use the standard module venv, included in all installations of Python 3 after 3.3:
$ python3 -m venv venv
This creates the venv subdirectory, which contains the virtual environment. The environment can be activated using the following source command:
Please note that we have used a name for the created virtual environment, venv, which is the same as the name of the module. That's not necessary. Virtual environments can be created with any name. Be sure to use a name that's descriptive in your use case.
$ source ./venv/bin/activate
(venv) $ which python
./venv/bin/python
(venv) $ which pip
./venv/bin/python
You can see that the python interpreter and pip that get executed is the one located in the virtual environment, and not the system one, and also the indication in the prompt that the virtual environment, venv, is active.
The virtual environment also has its own library, so any installed packages will be stored here, and not in the system environment.
The virtual environment can be deactivated by calling the deactivate command. You can see that the (venv) indication disappears.
Once in the virtual environment, any call to pip will install the packages in the virtual environment, so they are independent of any other environment. Each program can then be executed within its own virtual environment.
In cases where the virtual environment cannot be activated directly through the command line and the command needs to be executed directly, for example, for cronjob cases, you can call the python interpreter directly in the virtual environment by its full path, such as /path/to/venv/python/your_script.py.
With a proper environment, we can use pip to install the different dependencies.
Preparing an environment
Creating a virtual environment is the first stage, but we need to install all dependencies for our software.
To be able to replicate the environment in all situations, the best is to create a requirements file that defines all dependencies that should be installed. pip allows working with a file, normally called requirements.txt, to install dependencies.
This is an excellent way of creating a replicable environment that can be started from scratch when necessary.
For example, let's take a look at the following requirements.txt file:
requests==2.26.0
pint==0.17
The file can be downloaded from GitHub at https://github.com/PacktPublishing/Python-Architecture-Patterns/blob/main/chapter_11_package_management/requirements.txt.
Note the format is package==version. This specifies the exact version to use for the package, which is the recommended way of installing dependencies. That avoids the problem of using just package, which will install the latest version, and which can lead to an upgrade that's not planned, which may break compatibility.
Other options, such as package>=version, to specify a minimum version are available.
The file can be installed in the virtual environment (remember to activate it) using the following command:
(venv) $ pip install -r requirements.txt
After that, all the specified requirements will be installed in the environment.
Note that the dependencies of your specified dependencies may not be totally pinned down to specific versions. This is because the dependencies have their own definition, which can produce unknown upgrades on second-level dependencies when a new package is delivered.
To avoid having that problem, you can create an initial installation with your first-level dependencies, and then obtain all the dependencies that have been installed with the pip freeze command:
(venv) $ pip freeze
certifi==2021.5.30
chardet==3.0.4
charset-normalizer==2.0.4
idna==2.10
packaging==21.0
Pint==0.17
pyparsing==2.4.7
requests==2.26.0
urllib3==1.26.6
You can use the output to update the requirements.txt directly, so the next installation will have all the second-level dependencies also pinned down.
Note that adding new requirements will require the same process to be generated, to install first, then run freeze, and then update the requirements.txt file with the ouput.
A note on containers
When working in a container manner, the distinction between the system interpreter and the program interpreter is more diluted, as the container has its own OS wrapped, thereby enforcing a strong separation.
In the traditional way of deploying services, they are installed and run in the same server, making it necessary to keep a separation between the interpreter due to the restrictions that we talked about previously.
By using containers, we have already created a wrap around each of the services into their own OS filesystem, which means that we can skip the creation of a virtual environment. The container acts as a virtual environment in this case, enforcing separation between different containers.
As we've discussed previously in Chapter 8, Advanced Event-Driven Structures, when talking about containers, each container should serve only a single service, coordinating different containers to generate different servers. That way, it eliminates the case of having to share the same interpreter.
This means that we can ease some of the restrictions that we would normally impose in a traditional setting, and care just about one environment, being able to take less care about polluting the system environment. There's only one environment, so we can play with it more freely. If we need more services or environments, we can always create more containers.
Python packages
A Python module ready to use is, in essence, a subdirectory with certain Python code. This subdirectory gets installed in the proper library's subdirectoy, and the interpreter searches in this subdirectory. The directory is called site-packages.
This subdirectory is available in the virtual environment, if you are using one. You can check the following subdirectory: venv/lib/python3.9/site-packages/.
To distribute it, the subdirectory is packaged into two different files, either Egg files or Wheel files. Importantly, though, pip can only install Wheel files.
Source packages can also be created. In this case, the file is a tar file that contains all the code.
Egg files are considered deprecated, as their format is older and it's basically a zipped file containing some metadata. Wheel files have several advantages:
- They are better defined and allow for more use cases. There's a specific PEP, PEP-427 (https://www.python.org/dev/peps/pep-0427/), that defines the format.
Eggfiles were never officially defined. - They can be defined to have better compatibility, allowing the creation of
Wheelfiles that are compatible between different versions of Python, including Python 2 and Python 3. Wheelfiles can include already compiled binary code. Python allows the inclusion of libraries that are written in C, but these libraries need to target the proper hardware architecture. InEggfiles, the source files were included and compiled at install time, but that required the proper compilation tools and environment in the installation machine, and this could easily result in compilation issues.- Instead of that,
Wheelfiles can be precompiled with binary files. TheWheelfile has better-defined compatibility based on hardware architecture and the OS, so the rightWheelfile will be downloaded and installed, if available. This makes the installation faster, as no compilation needs to be performed in the installation, and removes the need for compilation tools available in the target machine. AWheelfile with a source file can also be created to allow its installation in machines not already precompiled, though in this case, it will require a compiler. Wheelfiles can be cryptographically signed, whileEggsdon't support this option. That adds an extra layer to avoid compromised and modified packages.
Right now, the standard for packaging in Python is Wheel files, and they should be preferred as a general rule. Egg files should be limited to older packages that haven't been upgraded to the new format.
Egg files can be installed with the older easy_install script, although this is no longer included in the latest versions of Python. Check the documentation for setup tools on how to use easy_install: https://setuptools.readthedocs.io/en/latest/deprecated/easy_install.html.
We will see now how to create your own package.
Creating a package
Even if, in most cases, we will use third-party packages, at some point, it is possible that you'll need to create your own package.
To do so, you need to create a setup.py file, which is the base of the package, describing what is inside it. Base package code will look like this:
package
├── LICENSE
├── README
├── setup.py
└── src
    └─── <source code>
The LICENSE and README files are not mandatory but are good to include for adding information about the package. The LICENSE file will be included automatically in the package.
Choosing your own open source license can be difficult. You can use the web (https://choosealicense.com/), which shows different options and explains them. We will use the MIT license as an example.
The README file is not included, but we will include its content in a full description of the package as part of the build process, as we will see later.
The code of the process is the setup.py file. Let's take a look at an example:
import setuptools
with open('README') as readme:
    description = readme.read()
setuptools.setup(
    name='wheel-package',
    version='0.0.1',
    author='you',
    author_email='[email protected]',
    description='an example of a package',
    url='http://site.com',
    long_description=description,
    classifiers=[
        'Programming Language :: Python :: 3',
        'Operating System :: OS Independent',
        'License :: OSI Approved :: MIT License',
    ],
    package_dir={'': 'src'},
    install_requires=[
        'requests',
    ],
    packages=setuptools.find_packages(where='src'),
    python_requires='>=3.9',
)
The setup.py file essentially contains the setuptools.setup function, which defines the package. It defines the following:
name: The name of the package.version: The version of the package. It will be used when installing a particular version or when ascertaining which is the latest version.authorandauthor_email: It is good to include these to receive any possible bug reports or requests.description: A short description.url: The URL for the project.long_description: A longer description. Here, we are reading theREADMEfile, storing the content in thedescriptionvariable:with open('README') as readme: description = readme.read()An important detail of
setup.pyis that it is dynamic, so we can use code to determine the values of any parameter.classifier: Categories for allowing packages to be categorized in different areas, such as the kinds of licenses and languages, or if the package is supposed to work with a framework like Django. You can check the full list of classifiers at the following link: https://pypi.org/classifiers/.package_dir: The subdirectory where the code of the package is located. Here, we specifysrc. By default, it will use the same directory assetup.py, but it's better to make the division so as to keep the code tidy.install_requires: Any dependency that needs to be installed with your package. Here, we are addingrequestsas an example. Note that any second-order dependencies (dependencies ofrequests) will be installed as well.packages: Using thesetuptools.find_packagesfunction, include everything that's in thesrcdirectory.python_requires: Define what Python interpreters are compatible with the package. In this case, we define it for Python 3.9 or higher.
Once the file is ready, you can run the setup.py script directly, for example, to check that the data is correct:
$ python setup.py check
running check
This command will verify that the setup.py definition is correct and that no mandatory elements are missing.
Development mode
The setup.py file can be used to install the package in develop mode. This installs the package in the current environment in a linked way. This means that any changes to the code will be applied directly to the package after the interpreter is restarted, making it easy to change and work with tests. Remember to run it while inside the virtual environment:
(venv) $ python setup.py develop
running develop
running egg_info
writing src/wheel_package.egg-info/PKG-INFO
writing dependency_links to src/wheel_package.egg-info/dependency_links.txt
writing requirements to src/wheel_package.egg-info/requires.txt
writing top-level names to src/wheel_package.egg-info/top_level.txt
reading manifest file 'src/wheel_package.egg-info/SOURCES.txt'
adding license file 'LICENSE'
...
Using venv/lib/python3.9/site-packages
Finished processing dependencies for wheel-package==0.0.1
The developed version can be uninstalled easily to clean up the environment:
(venv) $ python setup.py develop --uninstall
running develop
Removing /venv/lib/python3.9/site-packages/wheel-package.egg-link (link to src)
Removing wheel-package 0.0.1 from easy-install.pth file
You can read more about development mode in the official documentation here: https://setuptools.readthedocs.io/en/latest/userguide/development_mode.html.
This step installs the package directly in the current environment and can be used to run tests and validate that the package is working as expected once installed. Once this is done, we can prepare the package itself.
Pure Python package
To create a package, we first need to define what kind of package we want to create. As we described before, we have three options: a source distribution, an Egg, or a Wheel. Each one is defined by a different command in setup.py.
To create a source distribution, we will use sdist (source distribution):
$ python setup.py sdist
running sdist
running egg_info
writing src/wheel_package.egg-info/PKG-INFO
writing dependency_links to src/wheel_package.egg-info/dependency_links.txt
writing requirements to src/wheel_package.egg-info/requires.txt
writing top-level names to src/wheel_package.egg-info/top_level.txt
reading manifest file 'src/wheel_package.egg-info/SOURCES.txt'
adding license file 'LICENSE'
writing manifest file 'src/wheel_package.egg-info/SOURCES.txt'
running check
creating wheel-package-0.0.1
creating wheel-package-0.0.1/src
creating wheel-package-0.0.1/src/submodule
creating wheel-package-0.0.1/src/wheel_package.egg-info
copying files to wheel-package-0.0.1...
copying LICENSE -> wheel-package-0.0.1
copying README.md -> wheel-package-0.0.1
copying setup.py -> wheel-package-0.0.1
copying src/submodule/__init__.py -> wheel-package-0.0.1/src/submodule
copying src/submodule/submodule.py -> wheel-package-0.0.1/src/submodule
copying src/wheel_package.egg-info/PKG-INFO -> wheel-package-0.0.1/src/wheel_package.egg-info
copying src/wheel_package.egg-info/SOURCES.txt -> wheel-package-0.0.1/src/wheel_package.egg-info
copying src/wheel_package.egg-info/dependency_links.txt -> wheel-package-0.0.1/src/wheel_package.egg-info
copying src/wheel_package.egg-info/requires.txt -> wheel-package-0.0.1/src/wheel_package.egg-info
copying src/wheel_package.egg-info/top_level.txt -> wheel-package-0.0.1/src/wheel_package.egg-info
Writing wheel-package-0.0.1/setup.cfg
creating dist
Creating tar archive
removing 'wheel-package-0.0.1' (and everything under it)
The dist package is available in the newly created dist subdirectory:
$ ls dist
wheel-package-0.0.1.tar.gz
To generate a proper Wheel package, we need to install the wheel module first:
$ pip install wheel
Collecting wheel
Using cached wheel-0.37.0-py2.py3-none-any.whl (35 kB)
Installing collected packages: wheel
Successfully installed wheel-0.37.0
This adds the bdist_wheel command to the available commands in setup.py, which generates a wheel:
$ python setup.py bdist_wheel
running bdist_wheel
running build
running build_py
installing to build/bdist.macosx-11-x86_64/wheel
...
adding 'wheel_package-0.0.1.dist-info/LICENSE'
adding 'wheel_package-0.0.1.dist-info/METADATA'
adding 'wheel_package-0.0.1.dist-info/WHEEL'
adding 'wheel_package-0.0.1.dist-info/top_level.txt'
adding 'wheel_package-0.0.1.dist-info/RECORD'
removing build/bdist.macosx-11-x86_64/wheel
And the wheel file is available, once more, in the dist subdirectory:
$ ls dist
wheel_package-0.0.1-py3-none-any.whl
Note that it also includes Python version 3.
Wheel packages compatible with both Python 2 and Python 3 can be used. These wheels are called Universal. That was useful while doing the transition between both versions. Hopefully, by now, most of the new code in Python is using version 3 and we don't have to worry about that.
All these created packages can be installed directly with pip:
$ pip install dist/wheel-package-0.0.1.tar.gz
Processing ./dist/wheel-package-0.0.1.tar.gz
...
Successfully built wheel-package
Installing collected packages: wheel-package
Successfully installed wheel-package-0.0.
$ pip uninstall wheel-package
Found existing installation: wheel-package 0.0.1
Uninstalling wheel-package-0.0.1:
Would remove:
venv/lib/python3.9/site-packages/submodule/*
venv/lib/python3.9/site-packages/wheel_package-0.0.1.dist-info/*
Proceed (Y/n)? y
Successfully uninstalled wheel-package-0.0.1
$ pip install dist/wheel_package-0.0.1-py3-none-any.whl
Processing ./dist/wheel_package-0.0.1-py3-none-any.whl
Collecting requests
Using cached requests-2.26.0-py2.py3-none-any.whl (62 kB)
...
Collecting urllib3<1.27,>=1.21.1
Using cached urllib3-1.26.6-py2.py3-none-any.whl (138 kB)
...
Installing collected packages: wheel-package
Successfully installed wheel-package-0.0.
Note that the dependencies, in this case, requests, are installed automatically as well as any second-level dependency, for example, urllib3.
The power of the packaging is not only applicable to packages that contain only Python code. One of the most interesting features of wheels is the ability to generate pre-compiled packages, which includes compiled code for a target system.
To be able to show that, we need to produce some Python module that contains code that will be compiled. To do so, we need to take a small detour.
Cython
Python is capable of creating C and C++ language extensions that are compiled and interact with the Python code. Python itself is written in C, so this is a natural extension.
While Python has a lot of great features, pure speed when performing certain operations, such as numerical operations, is not its forte. This is where the C extensions come into their own as they enable low-level code to be accessed, which can be optimized and run faster than Python. Don't underestimate the possibility of creating a small, localized C extension that speeds up critical parts of the code.
Creating a C extension, however, can be difficult. The interface between Python and C is not straightforward, and the memory management required in C may be daunting unless you have significant experience of working with the C language.
If you want to dive deep into the topic and create your own C/C++ extensions, you can start by reading the official documentation at https://docs.python.org/3/extending/index.html.
Other options are available, such as creating extensions in Rust. You can check how to do this in the following article: https://developers.redhat.com/blog/2017/11/16/speed-python-using-rust.
Fortunately, there are some alternatives to make the task easier. A very good one is Cython.
Cython is a tool that compiles Python code with some extensions in C, so writing a C extension is as simple as writing Python code. The code is annotated to describe the C types for variables, but other than that, it looks pretty similar.
A complete description of Cython and all its possibilities is beyond the scope of this book. We present just a brief introduction. Please check the complete documentation for more information: https://cython.org/.
Cython files are stored as .pyx files. Let's see an example, which will determine whether a number is a prime number with the help of the wheel_package_compiled.pyx file:
def check_if_prime(unsigned int number):
cdef int counter = 2
if number == 0:
return False
while counter < number:
if number % counter == 0:
return False
counter += 1
return True
The code is checking whether a positive number is a prime number:
- It returns
Falseif the input is zero. - It tries to divide the number by a number from 2 to the number. If any division is exact, it returns
Falseas the number is not a prime number. - If no division is exact, or the number is lower than 2, it returns
True.
The code is not exactly Pythonic, as it will be translated into C. It's more efficient to avoid Python calls like range or similar. Don't be afraid to test different approaches to see what's faster to execute.
The code is not particularly good; it attempts too many divisions in general. It is just for the purpose of showing example code that may make sense to be compiled and is not too complicated.
Once the pyx file is ready, it can be compiled and imported into Python, using Cython. First, we need to install Cython:
$ pip install cython
Collecting cython
Using cached Cython-0.29.24-cp39-cp39-macosx_10_9_x86_64.whl (1.9 MB)
Installing collected packages: cython
Successfully installed cython-0.29.24
Now, using pyximport, we can import the module directly like a py file. Cython will automatically compile it if necessary:
>>> import pyximport
>>> pyximport.install()
(None, <pyximport.pyximport.PyxImporter object at 0x10684a190>)
>>> import wheel_package_compiled
venv/lib/python3.9/site-packages/Cython/Compiler/Main.py:369: FutureWarning: Cython directive 'language_level' not set, using 2 for now (Py2). This will change in a later release! File: wheel_package_compiled.pyx
tree = Parsing.p_module(s, pxd, full_module_name)
.pyxbld/temp.macosx-11-x86_64-3.9/pyrex/wheel_package_compiled.c:1149:35: warning: comparison of integers of different signs: 'int' and 'unsigned int' [-Wsign-compare]
__pyx_t_1 = ((__pyx_v_counter < __pyx_v_number) != 0);
~~~~~~~~~~~~~~~ ^ ~~~~~~~~~~~~~~
1 warning generated.
>>> wheel_package_compiled.check_if_prime(5)
True
You can see that the compiler produces an error because there's a comparison between unsigned int and int (between counter and number).
This has been deliberately left to clearly show when the compilation takes place and that any compilation feedback, such as warnings or errors, will be displayed.
Once the code is compiled, Cython creates both a wheel_package_compiled.c file, local to the directory, and the compiled .so file, which, by default, is stored in $HOME/ .pyxbld:
Note that this will be specific to your system. Here, we are showing a module compiled for macOS.
$ ls ~/.pyxbld/lib.macosx-11-x86_64-3.9/
wheel_package_compiled.cpython-39-darwin.so
Using pyximport is good for local development, but we can create a package that compiles and packages it as part of the build process.
Python package with binary code
We will use the code we created using Cython to show how to build a package that combines Python code with precompiled code. We will generate a Wheel file.
We create a package called wheel_package_compiled that extends the previous example package, wheel_package, with the code presented to be compiled in Cython.
The code is available in GitHub at https://github.com/PacktPublishing/Python-Architecture-Patterns/tree/main/chapter_11_package_management/wheel_package_compiled.
The structure of the package will be like this:
wheel_package_compiled
├── LICENSE
├── README
├── src
│ ├── __init__.py
│ ├── submodule
│ │ ├── __init__.py
│ │ └── submodule.py
│ ├── wheel_package.py
│ └── wheel_package_compiled.pyx
└── setup.py
This is the same as the package introduced previously, but with the addition of the .pyx file. The setup.py file needs to add some changes:
import setuptools
from Cython.Build import cythonize
from distutils.extension import Exteldnsion
extensions = [
Extension("wheel_package_compiled", ["src/wheel_package_compiled.pyx"]),
]
with open('README') as readme:
    description = readme.read()
setuptools.setup(
name='wheel-package-compiled',
version='0.0.1',
author='you',
author_email='[email protected]',
description='an example of a package',
url='http://site.com',
long_description=description,
classifiers=[
'Programming Language :: Python :: 3',
'Operating System :: OS Independent',
'License :: OSI Approved :: MIT License',
],
package_dir={'': 'src'},
install_requires=[
'requests',
],
ext_modules=cythonize(extensions),
packages=setuptools.find_packages(where='src'),
python_requires='>=3.9',
)
The changes introduced, other than the name change for the package, are all related to the new extension:
from Cython.Build import cythonize
from distutils.extension import Extension
extensions = [
    Extension("wheel_package_compiled", ["src/wheel_package_compiled.pyx"]),
]
...
ext_modules=cythonize(extensions),
The extension definition targets the name of the module to add, and the location of the source. With the cythonize function, we are indicating that we want to use Cython to compile it.
Extension modules are modules compiled in C/C++. In this case, Cython will run the intermediate steps to be sure that the proper .c file is the one being compiled.
Once this is configured, we can run the code to generate the wheel, calling setup.py:
$ python setup.py bdist_wheel
Compiling src/wheel_package_compiled.pyx because it changed.
[1/1] Cythonizing src/wheel_package_compiled.pyx
...
running bdist_wheel
running build
running build_py
...
creating 'dist/wheel_package_compiled-0.0.1-cp39-cp39-macosx_11_0_x86_64.whl' and adding 'build/bdist.macosx-11-x86_64/wheel' to it
adding 'wheel_package_compiled.cpython-39-darwin.so'
adding 'submodule/__init__.py'
adding 'submodule/submodule.py'
adding 'wheel_package_compiled-0.0.1.dist-info/LICENSE'
adding 'wheel_package_compiled-0.0.1.dist-info/METADATA'
adding 'wheel_package_compiled-0.0.1.dist-info/WHEEL'
adding 'wheel_package_compiled-0.0.1.dist-info/top_level.txt'
adding 'wheel_package_compiled-0.0.1.dist-info/RECORD'
removing build/bdist.macosx-11-x86_64/wheel
The compiled Wheel is available, as before, in the dist subdirectory.
$ ls dist
wheel_package_compiled-0.0.1-cp39-cp39-macosx_11_0_x86_64.whl
Compared with the Wheel created previously, we can see that it adds the platform and hardware architecture (macOS 11 and x86 64 bits, which is the computer used to compile it while writing the book). The cp39 part shows that it used the Python 3.9 ABI (Application Binary Interface).
The created Wheel is ready to use for the same architecture and system. The Wheel package directly includes all the compiled code, so the package will install quickly, as only copying files is involved. Also, there will be no need to install compilation tools and dependencies.
When working with packages that need to be installed in multiple architectures or systems, you'll need to create an individual Wheel for each case and add the source distribution file to allow other systems to work with it.
But, unless you are creating a general package to be submitted to PyPI, the package will be for self-consumption, and normally you only need to create a Wheel file for your specific use case.
Which leads to the same step. What if you want to share your module with the whole Python community?
Uploading your package to PyPI
PyPI is open to accepting packages from any developer. We can create a new account and upload our packages to the official Python repo to allow any project to use it.
One of the great characteristics of open source projects, like Python and its ecosystem, is the ability to use code that is gracefully shared by other developers. While not mandatory, it is always good to give back and to share code that could be of interest to other developers to increase the usefulness of the Python library.
Be a good participant in the Python ecosystem and share code that could be useful to others.
To help with testing and to be sure that we can verify the process, there's a testing site called TestPyPI at https://test.pypi.org/ that can be used to perform tests and to upload your package first.

Figure 11.4: TestPyPI main page
The site is the same as the production one but indicates with a banner that it's the testing site.
You can register a new user at https://test.pypi.org/account/register/. After that, you'll need to create a new API token to allow the package to be uploaded.
Remember to verify your email. Without a verified email, you won't be able to create an API token.
If there's a problem with the API token or you lose it, you can always delete it and start again.

Figure 11.5: You'll need to grant the full scope to upload a new package
Create a new token and copy it to a safe place. The token (which starts with pypi-) will only be displayed once for safety reasons, so be careful with it.
The token replaces the login and password when uploading a package. We will see later how to use it.
The next step is to install the twine package, which simplifies the process of uploading. Be sure to install it in our virtual environment:
(venv) $ pip install twine
Collecting twine
  Downloading twine-3.4.2-py3-none-any.whl (34 kB)
...
Installing collected packages: zipp, webencodings, six, Pygments, importlib-metadata, docutils, bleach, tqdm, rfc3986, requests-toolbelt, readme-renderer, pkginfo, keyring, colorama, twine
Successfully installed Pygments-2.10.0 bleach-4.1.0 colorama-0.4.4 docutils-0.17.1 importlib-metadata-4.8.1 keyring-23.2.0 pkginfo-1.7.1 readme-renderer-29.0 requests-toolbelt-0.9.1 rfc3986-1.5.0 six-1.16.0 tqdm-4.62.2 twine-3.4.2 webencodings-0.5.1 zipp-3.5.0
Now we can upload the packages created in the dist subdirectory.
For our example, we will use the same package created previously, but keep in mind that trying to reupload it may not work, as there may already be a package called that in TestPyPI. TestPyPI is not permanent, and regularly deletes packages, but the example uploaded as part of the writing process of the book could still be there. To do your tests, create your own package with a unique name.
We have now built the compiled Wheel and the source distribution:
(venv) $ ls dist
wheel-package-compiled-0.0.1.tar.gz
wheel_package_compiled-0.0.1-cp39-cp39-macosx_11_0_x86_64.whl
Let's upload the packages. We need to indicate that we want to upload to the testpy repo. We will use __token__ as the username and the full token (including the pypi- prefix) as the password:
(venv) $ python -m twine upload --repository testpypi dist/*
Uploading distributions to https://test.pypi.org/legacy/
Enter your username: __token__
Enter your password:
Uploading wheel_package_compiled-0.0.1-cp39-cp39-macosx_11_0_x86_64.whl
100%|███████████████████████████████████████████████████████████████████████| 12.6k/12.6k [00:01<00:00, 7.41kB/s]
Uploading wheel-package-compiled-0.0.1.tar.gz
100%|███████████████████████████████████████████████████████████████████████| 24.0k/24.0k [00:00<00:00, 24.6kB/s]
View at:
https://test.pypi.org/project/wheel-package-compiled/0.0.1/
The package is now uploaded! We can check the page on the TestPyPI website.

Figure 11.6: Main page for the package
You can verify the uploaded files by clicking Download files:
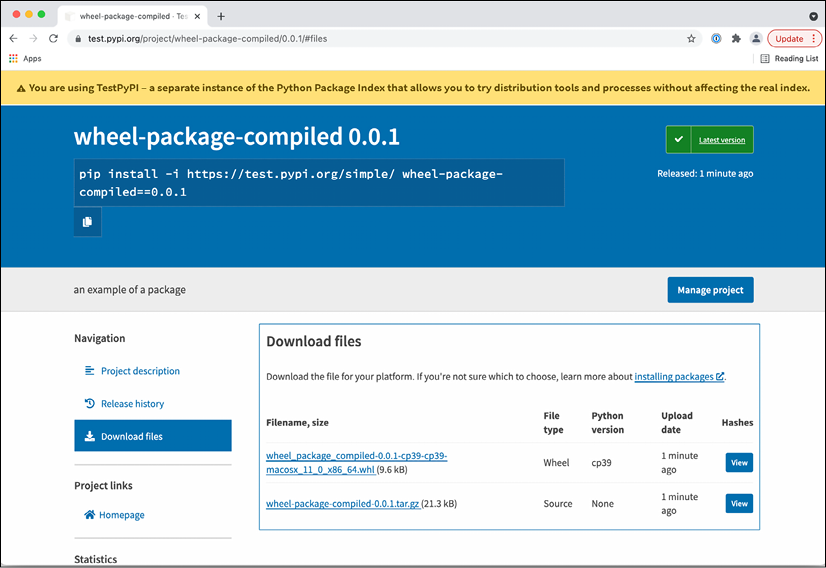
Figure 11.7: Verifying the uploaded files
You can also access the files through the search function:
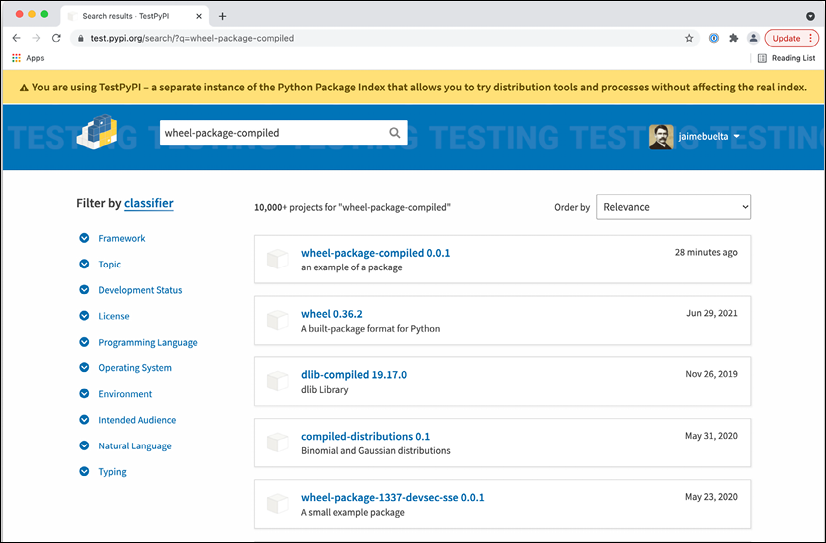
Figure 11.8: The package available in search
You can now download the package directly through pip, but you need to indicate that the index to use is the TestPyPI one. To ensure a clean installation, create a new virtual environment as follows:
$ python3 -m venv venv2
$ source ./venv2/bin/activate
(venv2) $ pip install --index-url https://test.pypi.org/simple/ wheel-package-compiled
Looking in indexes: https://test.pypi.org/simple/
Collecting wheel-package-compiled
  Downloading https://test-files.pythonhosted.org/packages/87/c3/881298cdc8eb6ad23456784c80d585b5872581d6ceda6da3dfe3bdcaa7ed/wheel_package_compiled-0.0.1-cp39-cp39-macosx_11_0_x86_64.whl (9.6 kB)
Collecting requests
  Downloading https://test-files.pythonhosted.org/packages/6d/00/8ed1b6ea43b10bfe28d08e6af29fd6aa5d8dab5e45ead9394a6268a2d2ec/requests-2.5.4.1-py2.py3-none-any.whl (468 kB)
     |████████████████████████████████| 468 kB 634 kB/s
Installing collected packages: requests, wheel-package-compiled
Successfully installed requests-2.5.4.1 wheel-package-compiled-0.0.1
Note that the version downloaded is the Wheel one, as it is the right target for the compiled version. It also correctly downloads the specified requests dependency.
You can now test the package through the Python interpreter:
(venv2) $ python
Python 3.9.6 (default, Jun 29 2021, 05:25:02)
[Clang 12.0.5 (clang-1205.0.22.9)] on darwin
Type "help", "copyright", "credits" or "license" for more information.
>>> import wheel_package_compiled
>>> wheel_package_compiled.check_if_prime(5)
True
The package is now installed and ready to use. The next step is to upload this package to production PyPI instead of TestPyPI. This is totally analogous to the process that we've seen here, creating an account in PyPI and proceeding from there.
But, what if the objective of the package is not to create a publicly available package? It is possible that we need to create our own index with our packages.
Creating your own private index
Sometimes, you'll need to have your own private index, so you can serve your own packages without opening them to the full internet, for internal packages that need to be used across the company, but where it doesn't make sense to upload them to the public PyPI.
You can create your own private index that can be used to share those packages and install them by calling to that index.
To serve the packages, we need to run a PyPI server locally. There are several options in terms of available servers that can be used, but an easy option is pypiserver (https://github.com/pypiserver/pypiserver).
pypiserver can be installed in several ways; we will see how to run it locally, but to serve it correctly, you'll need to install it in a way that's available in your network. Check the documentation to see several options, but a good option is to use the official Docker image available.
To run pypiserver, first, install the package using pip and create a directory for storing the packages:
$ pip install pypiserver
Collecting pypiserver
  Downloading pypiserver-1.4.2-py2.py3-none-any.whl (77 kB)
     |████████████████████████████████| 77 kB 905 kB/s
Installing collected packages: pypiserver
Successfully installed pypiserver-1.4.2
$ mkdir ./package-library
Start the server. We use the parameter -p 8080 to serve it in that port, the directory to store the packages, and -P . -a . to facilitate the uploading of packages without authentication:
$ pypi-server -P . -a . -p 8080 ./package-library
Open a browser and check http://localhost:8080.

Figure 11.9: Local pypi server
You can check the available packages in this index by going to http://localhost:8080/simple/.

Figure 11.10: Empty index so far
We now need to upload the packages, using twine again, but pointing to our private URL. As we are able to upload with no authentication, we can enter an empty username and password:
$ python -m twine upload --repository-url http://localhost:8080 dist/*
Uploading distributions to http://localhost:8080
Enter your username:
Enter your password:
Uploading wheel_package_compiled-0.0.1-cp39-cp39-macosx_11_0_x86_64.whl
100%|████████████████████████████████| 12.6k/12.6k [00:00<00:00, 843kB/s]
Uploading wheel-package-compiled-0.0.1.tar.gz
100%|████████████████████████████████| 24.0k/24.0k [00:00<00:00, 2.18MB/s]
The index is now showing the package available.

Figure 11.11: Showing the package uploaded
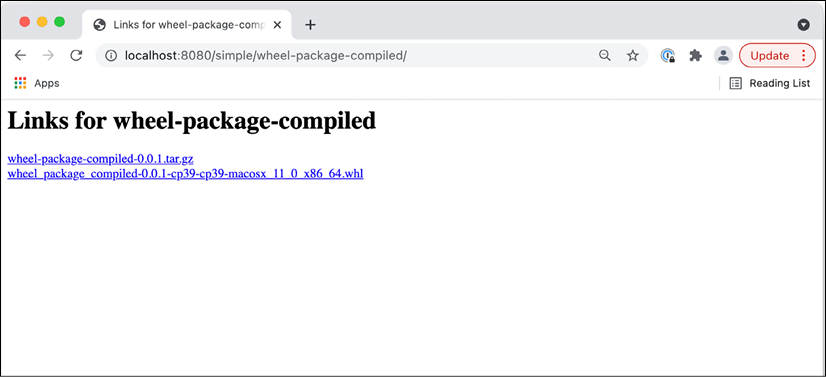
Figure 11.12: All the uploaded files for the package
The files are also uploaded to the package-library directory:
$ ls package-library
wheel-package-compiled-0.0.1.tar.gz
wheel_package_compiled-0.0.1-cp39-cp39-macosx_11_0_x86_64.whl
Any file added to package-library will also be served, allowing packages to be added by moving them to the directory, although that could be complicated once the server is deployed properly to the packages over the network.
The package can now be downloaded and installed, pointing to your private index using the –index-url parameter:
$ pip install --index-url http://localhost:8080 wheel-package-compiled
Looking in indexes: http://localhost:8080
Collecting wheel-package-compiled
  Downloading http://localhost:8080/packages/wheel_package_compiled-0.0.1-cp39-cp39-macosx_11_0_x86_64.whl (9.6 kB)
…
Successfully installed certifi-2021.5.30 charset-normalizer-2.0.4 idna-3.2 requests-2.26.0 urllib3-1.26.6 wheel-package-compiled-0.0.1
$ python
Python 3.9.6 (default, Jun 29 2021, 05:25:02)
[Clang 12.0.5 (clang-1205.0.22.9)] on darwin
Type "help", "copyright", "credits" or "license" for more information.
>>> import wheel_package_compiled
>>> wheel_package_compiled.check_if_prime(5)
True
This tests that the module can be imported and executed after installation.
Summary
In this chapter, we described when it's a good idea to create a standard package and the caveats and requirements that we should add to be sure that we are taking a good decision. In essence, creating a new package is creating a new project, and we should give the proper ownership, documentation, and so on, as expected of other projects in the organization.
We described the simplest possible package in Python just by structuring code, but without creating a proper package. This acts as a baseline on how the code should be structured later.
We continued describing what the current packaging environment is and what are the different elements that are part of it, like PyPI, which is the official source for publicly available packages, and how to create virtual environments to not cross-contaminate different environments when requiring different dependencies. We also described the Wheel package, which will be the kind of package that we will create later.
Next, we described how to create such a package, creating a setup.py file. We described how to install it in development mode to be able to do tests and how to build and get the package ready.
There are some alternatives to creating packages instead of using the standard setup.py file. You can take a look at the Poetry package (https://python-poetry.org/) to see how to manage packages in a more integrated way, especially if the package has many dependencies.
We took a small detour to explain how to generate code to be compiled with Cython, an easy way to create Python extensions writing in Python code with some extensions, to generate C code automatically.
We used Cython code to show how to generate a compiled Wheel, allowing the distribution of already precompiled code without needing to be compiled on installation.
We showed how to upload packages to PyPI to distribute publicly (showing how to upload to TestPyPI, allowing the upload of packages to be tested) and described how to create your own individual index so that you can distribute your own packages privately.
Join our book’s Discord space
Join the book’s Discord workspace for a monthly Ask me Anything session with the authors:
https://packt.link/PythonArchitechture
