
A common feature of many content-driven Web sites is the capability for users to add not only text, but also files—office documents, videos, PDFs, and of course the ubiquitous image. In this example application, we show you a working example of Django’s image upload field—ImageField—as used in a simple gallery-type application. In addition, we make our own custom ImageField subclass capable of automatically generating thumbnails. Finally, we are designing the app with a dynamic root URL to maximize ease of deployment.
The application we are building is simplistic—a collection of generic Items, each of which can have multiple Photo associations, with this small hierarchy represented by a gallery Django project and an items app within (for lack of a better name).
One could expand on this application to build a more typical gallery site, where our Item becomes more like a container or folder solely used for organizing photos. Or you could make it into a sort of showroom application, where each Item has additional attributes (such as a car’s model, make, and year) enabling for more sophistication. For our example, you can think of each Item as a stand-alone photo album.
We don’t want to do any more work than is necessary, so our app makes use of generic views where possible, and we do all its data entry via Django’s built-in admin. As such, its layout is pretty small:
Static in-template welcome message on landing (index) page.
Landing page features a “showcase” (small subset of thumbnails).
Listing page shows all
Items on the site.Detail views for each
Itemwith list of all itsPhotos (thumbnails again).Detail views for each
Photodisplaying image at full resolution.
We start off by defining the model, and then walk through the steps necessary to get file uploads working via the admin application. This is followed by detaied creation of our custom model field. Finally, we go over applying DRY to our URLs and create the front-end templates used to display our thumbnails and images to the rest of the world.
Note
This example application assumes an Apache + mod_python setup, although it can, of course, be modified to work with other deployment strategies. Because a gallery involves serving lots of static media—such as images—Django’s development server doesn’t really cut it. You can find out more about Apache configuration in Appendix B, “Installing and Running Django.”
Following is this application’s models.py, and aside from a single change we are making later on, it’s complete. Note the get_absolute_url methods are using the @permalink decorator, which is covered toward the end of the chapter.
class Item(models.Model):
    name = models.CharField(max_length=250)
    description = models.TextField()

    class Meta:
        ordering = ['name']

    def __unicode__(self):
        return self.name

    @permalink
    def get_absolute_url(self):
        return ('item_detail', None, {'object_id': self.id})

class Photo(models.Model):
    item = models.ForeignKey(Item)
    title = models.CharField(max_length=100)
    image = models.ImageField(upload_to='photos')
    caption = models.CharField(max_length=250, blank=True)

    class Meta:
        ordering = ['title']

    def __unicode__(self):
        return self.title

    @permalink
    def get_absolute_url(self):
        return ('photo_detail', None, {'object_id': self.id})

class PhotoInline(admin.StackedInline):
    model = Photo

class ItemAdmin(admin.ModelAdmin):
    inlines = [PhotoInline]

admin.site.register(Item, ItemAdmin)
admin.site.register(Photo)
As you can see, the Item is simple with the Photo being more the star of the show—it not only has the relation to its parent Item, but a title, the image itself, and an optional caption. Both objects are registered with the admin application; they also both have a Meta.ordering attribute set.
Our main focus is the ImageField in the Photo model, as that’s the field we are eventually customizing and also takes a bit of setup compared to most other model fields. Let’s explore how to get that working.
Before we can upload files to our gallery site, we need to be specific about where we want Django to put them. FileFields and ImageFields store uploaded data to a subdirectory of one’s settings.py-defined MEDIA_ROOT, which is specified in the upload_to field argument. In our model code, we’ve set this to 'photos,' so if our settings.py contained the following:
MEDIA_ROOT = '/var/www/gallery/media/'
our photos would necessarily end up in /var/www/gallery/media/photos/. If that directory doesn’t exist, it needs to be created, and it also needs to be writable by whatever user or group your Web server is running as. On our Debian-based system, we’re running Apache as the www-data user, so we can have a short shell session that looks like this (see Appendix A, “Command Line Basics,” for details on using the command line):
user@example:~ $ cd /var/www/gallery/media
user@example:/var/www/gallery/media $ ls
admin
user@example:/var/www/gallery/media $ mkdir photos
user@example:/var/www/gallery/media $ ls -l
total 4
lrwxrwxrwx 1 root  root    59 2008-03-26 21:41 admin ->
/usr/lib/python2.4/site-packages/django/contrib/admin/media
drwxrwxr-x 2 user user 4096 2008-03-26 21:44 photos
user@example:/var/www/gallery/media $ chgrp www-data photos
user@example:/var/www/gallery/media $ chmod g+w photos
user@example:/var/www/gallery/media $ ls -l
total 4
lrwxrwxrwx 1 root  root       59 2008-03-26 21:41 admin ->
/usr/lib/python2.4/site-packages/django/contrib/admin/media
drwxrwxr-x 2 user www-data 4096 2008-03-26 21:44 photos
The previous is only possible if your normal user is also in the www-data group—depending on your system setup you can find yourself having to use sudo or similar approaches, which is fine. We’ve found that when doing lots of system tasks that intersect with our Web server’s domain, it’s very useful to make ourselves part of its group; then as long as directories or files are group-writable (as previously shown) both the Web server and our user can interact with them.
Finally, note that a more fleshed-out application would probably have another symlink or two in the media directory—you need your CSS and JavaScript, after all—and your Web server needs to be configured to serve it up normally. If you use mod_python with Apache, for example, you need a short config block to “punch through” the Django-handled URL space so Apache serves your media files directly. See Appendix B for more on mod_python configuration.
At this point—once we’ve added our custom app to our settings.py and have run syncdb—we’re almost ready to upload some images. However, as we see in a moment, there’s one final task remaining. If we were to load up our admin site as things currently stand (with our Django project installed and the photos upload folder set up), chances are good we’d see a screen similar to that in Figure 7.1.
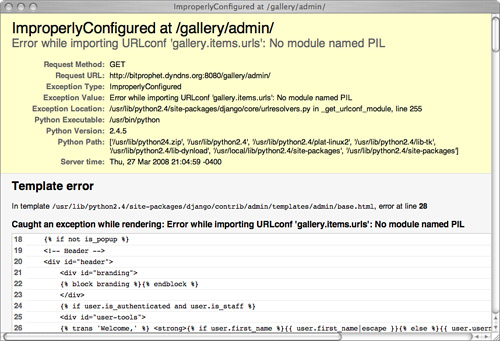
In other words—we need a special Python library to use ImageField, specifically PIL, or the Python Imaging Library. PIL is a commonly used Python library that can handle all sorts of image manipulation. ImageField uses it to verify that uploaded files are images and to store their height and width if you use the optional height_field and width_field options; we use it further to do our thumbnail resizing.
To install PIL for Unix-based systems, such as Linux or Mac, download the Source Kit from http://www.pythonware.com/products/pil/ and run setup.py install in its install directory once you’ve unpacked it. For Win32, you would download the appropriate .exe installation binary for your version of Python and install it.
A simpler way to install third-party Python packages on any platform is Easy Install. It knows about dependencies and makes download plus installation a complete one-step solution. You simply run easy_install pil to accomplish the same thing as all the steps previously described. To find out more information about obtaining and using the Easy Install tool, visit the PEAK Developers’ Center at http://peak.telecommunity.com/DevCenter/EasyInstall.
Regardless of how you did it, once PIL is installed and we’ve restarted and/or reloaded our Web server, the PIL-related errors should go away, and we can move onward and do a simple test of our ImageField.
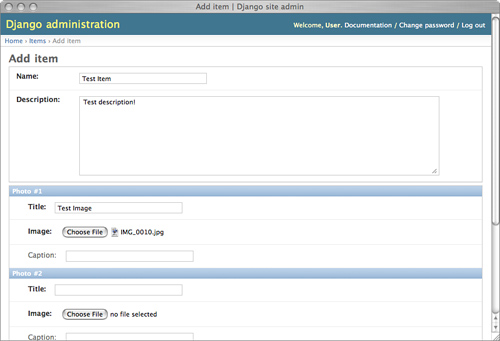
Because of the way the gallery’s model is constructed, we can’t just upload a random image not associated with an Item. A careful look at the model definition shows we’ve set up admin and inline classes, so our Photo objects can be edited as part of their parent Item. This enables us to easily add images at the same time as we define our items, and you can see this in Figure 7.2.
After saving our new Item, the selected image (in our case, a picture of one of the authors’ pet rabbit) is uploaded and stored. We can verify this via the admin, as seen in Figure 7.3.
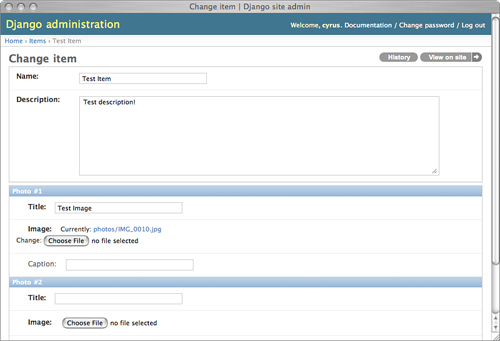
Note the Currently: link above the file selector for the first Photo—clicking it shows the uploaded image, as shown in Figure 7.4.

We can also verify the file upload via the command line.
user@example:/var/www/gallery/media/photos $ ls -l
total 144
-rw-r--r-- 1 www-data www-data 140910 2008-03-27 21:26 IMG_0010.jpg
It’s taken a bit of explanation, but as you can see, getting up and running with image uploads is pretty painless—up till now all we’ve really done is define a model, create a folder to hold the images, and install the imaging library. Now we can finally show you the interesting stuff, namely how to extend ImageField to perform thumbnailing.
Because Django provides no thumbnailing capabilities out of the box, we write our own model field, which is capable of transparently handling thumbnail creation, deletion, and display by subclassing ImageField. The official Django documentation has excellent information on writing entirely new model fields from scratch—here, we just want to tweak existing behavior, which is a bit simpler and probably more common.
To accomplish this, we needed to override four methods of our parent ImageField class, and in the process added one simple, private method as a refactoring aid. The source code that directly inspired this chapter is heavily commented—documentation greatly helps with the process of understanding new territory—but we’ve removed most of that here to make it easier to read.
Our thumbnailing ImageField, called—naturally—ThumbnailImageField, is stored in gallery.items.fields. It consists solely of some imports, a refactoring-based utility function, and a couple of subclasses that modify some built-in Django classes. If you’re unfamiliar with Python’s approach to object-oriented subclassing, see Chapter 1, “Practical Python for Django,” for details.
Let’s step through our file top-to-bottom.
Every Python file, except for some rare cases, begins with imports, and this one’s no different.
from django.db.models.fields.files import ImageField, ImageFieldFile
from PIL import Image
import os
Imports are simple; all we need for this task are the parent classes of ImageField and ImageFieldFile, PIL’s Image class, which does the thumbnailing for us, and the built-in os module for handling the thumbnail files themselves.
def _add_thumb(s):
    """
    Modifies a string (filename, URL) containing an image filename, to insert
    '.thumb' before the file extension (which is changed to be '.jpg').
    """
    parts = s.split(".")
    parts.insert(-1, "thumb")
    if parts[-1].lower() not in ['jpeg', 'jpg']:
        parts[-1] = 'jpg'
    return ".".join(parts)
_add_thumb is a utility function that, as the docstring says—always use good docstrings—takes the original image’s file path and inserts the string “.thumb.” So an uploaded image named rabbit.jpg would result in a thumbnail of rabbit.thumb.jpg; because our code can only generate JPEG thumbnails, it also changes the extension if necessary.
class ThumbnailImageField(ImageField):
    """
    Behaves like a regular ImageField, but stores an extra (JPEG) thumbnail
    image, providing get_FIELD_thumb_url() and get_FIELD_thumb_filename().

    Accepts two additional, optional arguments: thumb_width and thumb_height,
    both defaulting to 128 (pixels). Resizing will preserve aspect ratio while
    staying inside the requested dimensions; see PIL's Image.thumbnail()
    method documentation for details.
    """
    attr_class = ThumbnailImageFieldFile
Not much to say here—we’re defining our new subclass, having it inherit from ImageField, and putting in a nice big docstring. This way, anyone using Python’s help system, or automated documentation tools, gets a decent idea of what our code does.
The single line of actual code here, concerning attr_class, is used to update a special class our field uses as a delegate for attribute access. We go into detail about this class in the next section. The last piece of this introduction is __init__:
    def __init__(self, thumb_width=128, thumb_height=128, *args, **kwargs):
        self.thumb_width = thumb_width
        self.thumb_height = thumb_height
        super(ThumbnailImageField, self).__init__(*args, **kwargs)
Our overridden __init__ is also fairly simple—we’re just storing the desired max width and height of our thumbnail for use during the resize operation. This enables easy reuse of the field with varying thumbnail sizes.
Many fields are relatively low-key and don’t modify their containing model objects, but in our case, we want to make it easy to get to the extra information we provide (our thumbnails’ filenames and URLs). The solution is to subclass a special class that ImageField uses to manage its attributes, ImageFieldFile, which is used when one performs attribute lookups on the field itself.
For example, to obtain the filesystem path for an ImageField called image, you use myobject.image.path; in such a scenario, .path is an attribute on ImageFieldFile. Because Django caches the file data when possible and delegates the file to a lower layer, this is done via Python properties. (See Chapter 1 for a refresher on the property built-in function.)
The following code snippet illustrates how the default Django codebase implements ImageFieldFile.path:
    def _get_path(self):
        self._require_file()
                  return self.storage.path(self.name)
    path = property(_get_path)
This snippet is taken from the FieldFile class (which is the parent of ImageFieldFile, used — as you can guess — by ImageField). Recall our previous utility function _add_thumb, and how it transforms a given file path, and you can guess what we’ll do to add the .thumb_path and .thumb_url attributes to our field:
    class ThumbnailImageFieldFile(ImageFieldFile):
        def _get_thumb_path(self):
            return _add_thumb(self.path)
        thumb_path = property(_get_thumb_path)

        def _get_thumb_url(self):
            return _add_thumb(self.url)
        thumb_url = property(_get_thumb_url)
Because the .path and .url getters are already defined, and they take care of the minute boilerplate required for safe operation (the call to self._require_file, seen in the previous snippet concerning _get_path), we are free to omit that extra code.We simply perform our _add_thumb transformation and attach the result to the desired attribute names, with property.
With ThumbnailImageFieldFile defined above our ThumbnailImageField and referenced in the attr_class line at the top of ThumbnailImageField, we have added two new attributes to our field, which you can use in Python code or templates: myobject.image.thumb_path and myobject.image.thumb_url (given, of course, that myobject is a Django model instance and image is a ThumbnailImageField on that model).
Subclassing ImageFieldFile and tying that subclass to our ImageField subclass is probably not an obvious action to take; most custom model fields won’t need to go this far. In fact, as a user of Django, you’ll likely never see this particular aspect of the model (although it’s more accessible now than it used to be—the previous version of this section was a little more complex). However, it highlights the fact that the Django core team tries to apply extensible design to the internals of the framework and not just its public API.
Now that we have access to our desired thumbnail’s URL and filesystem path, we move on to actually creating (and removing) that thumbnail file.
The crux of the matter, creation of the thumbnail file itself, is an overridden save method on ThumbnailImageFieldFile (not ThumbnailImageField!) that looks like this:
        def save(self, name, content, save=True):
            super(ThumbnailImageFieldFile, self).save(name, content, save)
            img = Image.open(self.path)
            img.thumbnail(
                (self.field.thumb_width, self.field.thumb_height),
                Image.ANTIALIAS
            )
            img.save(self.thumb_path, 'JPEG')
The call to the superclass’s save takes care of normal saving operations for the primary image file, so all our method has to do is the three-step sequence of opening that original image, creating the thumbnail, and saving that thumbnail to our thumbnail filename. Note the use of self.field that lets us access the Field that this File object belongs to, which is where we’ve stored the desired thumbnail dimensions. Leveraging the PIL Image class, which we imported at the beginning, enables our code to be very simple indeed.
As a final step, we need to make sure our thumbnails are cleaned up when their “parent” images are deleted:
        def delete(self, save=True):
            if os.path.exists(self.thumb_path):
                os.remove(self.thumb_path)
            super(ThumbnailImageFieldFile, self).delete(save)
Thanks to Python’s syntax, this excerpt almost describes itself. We obtain the filename of our thumbnail, delete it (if it exists, of course—no point inviting an error if the file’s not there), and tell our superclass to do its own file deletion (which removes the original image). If it wasn’t obvious, the delete method, like save, is triggered by ImageField when its container model object is deleted.
Now that we’ve defined our subclass of ImageField, it’s time to put it to work. All that’s needed is to add a new import to our models.py:
from gallery.items.fields import ThumbnailImageField
and to replace models.ImageField with the thumbnail version in our Photo model:
class Photo(models.Model):
item = models.ForeignKey(Item)
title = models.CharField(max_length=100)
image = ThumbnailImageField(upload_to='photos')
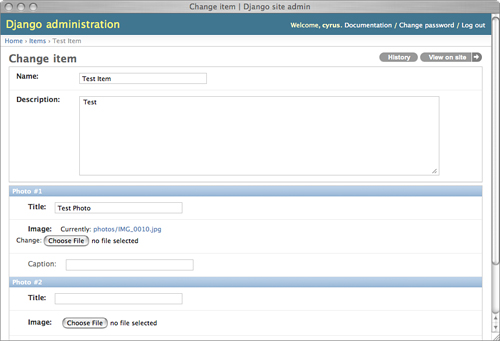
caption = models.CharField(max_length=250, blank=True)After a reload of our Web server, there’s no noticeable change in the admin because we didn’t modify anything that has to do with the form aspect of the field, as seen in Figure 7.5.
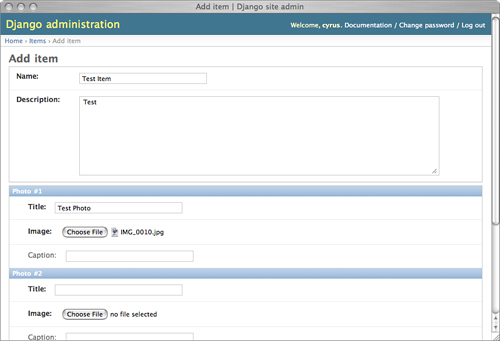
Post-upload, things also look identical to the earlier example, as shown in Figure 7.6.
However, checking our upload directory, we see the fruits of our labor.
user@example:/var/www/gallery/media/photos $ ls -l
total 148
-rw-r--r-- 1 www-data www-data 140910 2008-03-30 22:15 IMG_0010.jpg
-rw-r--r-- 1 www-data www-data   1823 2008-03-30 22:15 IMG_0010.thumb.jpg
Success! Unfortunately, it takes a bit of time to get to the point where we can view the thumbnail, as we’ve yet to show you the templates our application uses to display them. Before we do so, it’s time to quickly explore the secondary aspect of this application: how we’ve set up a fairly simple approach to preserving DRY in our URLs.
Until now, we’ve focused solely on the model aspects of the gallery app. It’s time to go over our URL structure, which provides the context necessary to understand the templates in the next section. First, though, we need a bit of background to explain a rather unusual setup. Because of how this application was developed, it was desirable to have it work equally well at the top level of a domain (such as http://www.example.com/) or as a subsection (for example, http://www.example.com/gallery/).
By default, a Django site is assumed to be in the former situation—URLs are parsed from the root of the domain, even if one’s Web server handler is hooked in higher up. Because of this, one’s URLs must include the entire URL path, so a site at /gallery/ needs all its URLs prefixed with that string.[1] We’ve simply done the obvious thing and stored that value as a settings.py variable and referenced it where necessary.
ROOT_URL = '/gallery/'
Because a couple of other settings.py variables rely on URL paths, we can put it to use right away for our authentication login URL, the media URL, and the admin’s media prefix.
LOGIN_URL = ROOT_URL + 'login/'
MEDIA_URL = ROOT_URL + 'media/'
ADMIN_MEDIA_PREFIX = MEDIA_URL + 'admin/'
Next, because of how Django’s URL include system works, we have to use a two-file root URLconf setup, where the “normal” top-level urls.py simply uses ROOT_URL, and then calls the “real” urls.py, which is blissfully ignorant of ROOT_URL and its implications. Here’s the root urls.py:
from django.conf.urls.defaults import *
from gallery.settings import ROOT_URL

urlpatterns = patterns('',
    url(r'^%s' % ROOT_URL[1:], include('gallery.real_urls')),
)
Note
We needed to slice ROOT_URL to chop off the leading slash because settings.py variables that use it—such as LOGIN_URL—require that leading slash in order to be correct absolute URLs. However, because Django’s URL parsing omits that leading slash character, we have to get rid of it for our URLs to parse correctly.
Here’s our “real” root URLconf, which we’ve called real_urls.py due to a lack of imagination:
from django.conf.urls.defaults import *
from django.contrib import admin

urlpatterns = patterns('',
    url(r'^admin/(.*)', admin.site.root),
    url(r'^', include('gallery.items.urls')),
)
Finally, it’s useful for templates to have access to ROOT_URL to construct similarly DRY-compatible include URLs, such as those needed for CSS or JavaScript includes. This can be accomplished with a simple context processor (covered previously in Chapter 6, “Templates and Form Processing”).
from gallery.settings import ROOT_URL

def root_url_processor(request):
    return {'ROOT_URL': ROOT_URL}
And that’s it! After applying those handful of tweaks to a normal Django project, everything now hinges on the value of ROOT_URL—it’s currently set to '/gallery/', meaning the application should live at http://www.example.com/gallery/, as mentioned previously. If we wanted to deploy the application to just http://www.example.com/, all we need to do is change ROOT_URL to '/' (and update our Web server config so Django is hooked in at the root level), and we’re done.
To complete the DRY-ness of our URL structure, we’re going to apply a three-part approach for our objects’ get_absolute_url methods. The first and most important part, you’ve already seen throughout the book—the use of the url function for defining our URLconfs, which enables us to give our URLs unique names. Following is the urls.py contained within the items app itself:
from django.conf.urls.defaults import *
from gallery.items.models import Item, Photo

urlpatterns = patterns('django.views.generic',
    url(r'^$', 'simple.direct_to_template',
        kwargs={
            'template': 'index.html',
            'extra_context': {'item_list': lambda: Item.objects.all()}
        },
        name='index'
    ),
    url(r'^items/$', 'list_detail.object_list',
        kwargs={
            'queryset': Item.objects.all(),
            'template_name': 'items_list.html',
            'allow_empty': True
        },
        name='item_list'
    ),
    url(r'^items/(?P<object_id>d+)/$', 'list_detail.object_detail',
        kwargs={
            'queryset': Item.objects.all(),
            'template_name': 'items_detail.html'
        },
        name='item_detail'
    ),
    url(r'^photos/(?P<object_id>d+)/$', 'list_detail.object_detail',
        kwargs={
            'queryset': Photo.objects.all(),
            'template_name': 'photos_detail.html'
        },
        name='photo_detail'
    ),
)
As you can see, the application consists of an index page, a list of items, per-item pages, and per-photo pages, each with the obvious name defined. These names can be referenced with the {% url %} templatetag, as we see next in the templates section, as well as with the permalink decorator that wraps get_absolute_url, such as:
class Item(models.Model):
    name = models.CharField(max_length=250)
    description = models.TextField()

    class Meta:
        ordering = ['name']

    def __unicode__(self):
        return self.name

    @permalink
    def get_absolute_url(self):
        return ('item_detail', None, {'object_id': self.id})
The permalink decorator expects its wrapped function to return a three-tuple consisting of the URL name, a list of positional arguments, and a dictionary of named arguments, which are used to reconstruct the URL. As you can see from the previous example, the item detail view takes no positional arguments and one named argument, and that’s what we’ve provided in our get_absolute_url.
When set up in this way, Item.get_absolute_url returns the appropriate URL, even if our URL structure changes, thus preserving DRY (albeit at the cost of making get_absolute_url behave rather oddly if the decorator is ever removed).
Finally, after making our custom model field and tweaking our URL setup, all that’s left—because we’re using entirely generic views—are the templates. We use a simple inheritance setup to maximize DRY, starting with our base template for structure and a dash of CSS.
<html>
<head>
<title>Gallery - {% block title %}{% endblock %}</title>
<style type="text/css">
body { margin: 30px; font-family: sans-serif; background: #fff; }
h1 { background: #ccf; padding: 20px; }
h2 { background: #ddf; padding: 10px 20px; }
h3 { background: #eef; padding: 5px 20px; }
table { width: 100%; }
table th { text-align: left; }
</style>
</head>
<body>
<h1>Gallery</h1>
{% block content %}{% endblock %}
</body>
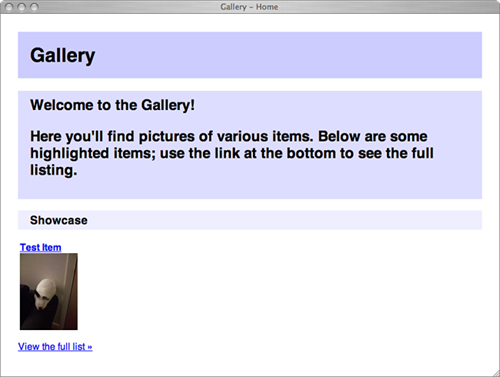
</html>Next up is the index page. In the application that inspired this chapter, it was fleshed out a bit more with some light CMS-like functionality to enable the “welcome” blurb to be edited in the admin; we’ve omitted that here in the interest of brevity. Instead, we’ve just got a static welcome paragraph and a short list of three highlighted Items, which is controlled in the URLconf. (It’s currently a list of all items, but could easily be changed to meet some other criteria.)
{% extends "base.html" %}
{% block title %}Home{% endblock %}
{% block content %}
<h2>Welcome to the Gallery!</h3>
<p>Here you find pictures of various items. Below are some highlighted
items; use the link at the bottom to see the full listing.</p>
<h3>Showcase</h3>
<table>
<tr>
{% for item in item_list|slice:":3" %}
<td>
<a href="{{ item.get_absolute_url }}"><b>{{ item.name }}</b><br />
{% if item.photo_set.count %}
<img src="{{ item.photo_set.all.0.image.thumb_url }}" />
{% else %}
<span>No photos (yet)</span>
{% endif %}
</a>
</td>
{% endfor %}
</tr>
</table>
<p><a href="{% url item_list %}">View the full list »</a></p>
{% endblock %}The previous template code renders the page view as seen in Figure 7.7.
Note the use of both get_absolute_url and {% url %} for linking to item detail pages and the item list, respectively; and, most importantly, the use of image.thumb_url on the first image in each item’s list of photos. An improvement on how we approach the “which thumbnail to use for an item” problem could be to update the Photo model to mark a specific image as the “representative” one—which is just one of many ways this application could be extended.
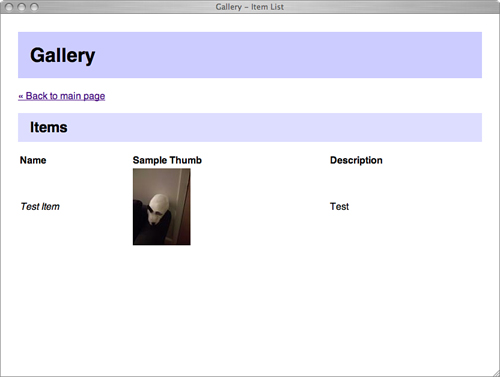
The item listing (items_listing.html) is just a more complete version of the highlight list on the index page, using the same tricks, as shown in Figure 7.8.
{% extends "base.html" %}
{% block title %}Item List{% endblock %}
{% block content %}
<p><a href="{% url index %}">« Back to main page</a></p>
<h2>Items</h2>
{% if object_list %}
<table>
<tr>
<th>Name</th>
<th>Sample Thumb</th>
<th>Description</th>
</tr>
{% for item in object_list %}
<tr>
<td><i>{{ item.name }}</i></td>
<td>
{% if item.photo_set.count %}
<a href="{{ item.get_absolute_url }}">
<img src="{{ item.photo_set.all.0.image.thumb_url }}" />
</a>
{% else %}
(No photos currently uploaded)
{% endif %}
</td>
<td>{{ item.description }}</td>
</tr>
{% endfor %}
</table>
{% else %}
<p>There are currently no items to display.</p>
{% endif %}
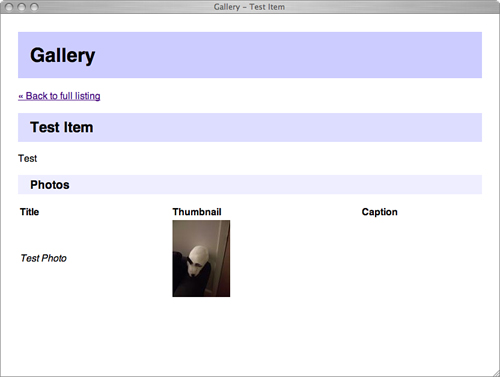
{% endblock %}Similarly, the item detail view (items_detail.html), is like the item listing view except that it lists all the photos instead of just using the first one as a representative, as shown in Figure 7.9.
{% extends "base.html" %}
{% block title %}{{ object.name }}{% endblock %}
{% block content %}
<p><a href="{% url item_list %}">« Back to full listing</a></p>
<h2>{{ object.name }}</h2>
<p>{{ object.description }}</p>
<h3>Photos</h3>
<table>
<tr>
<th>Title</th>
<th>Thumbnail</th>
<th>Caption</th>
</tr>
{% for photo in object.photo_set.all %}
<tr>
<td><i>{{ photo.title }}</i></td>
<td>
<a href="{{ photo.get_absolute_url }}">
<img src="{{ photo.get_image_thumb_url }}" />
</a>
</td>
<td>{{ photo.caption }}</td>
</tr>
{% endfor %}
</table>
{% endblock %}Finally, the following shows the photo detail view (photos_detail.html), which is the only place we actually use image.url, as shown in Figure 7.10.
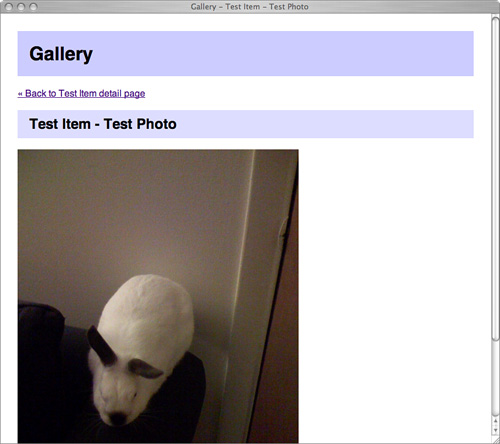
{% extends "base.html" %}
{% block title %}{{ object.item.name }} - {{ object.title }}{% endblock %}
{% block content %}
<a href="{{ object.item.get_absolute_url }}">« Back to {{
object.item.name }} detail page</a>
<h2>{{ object.item.name }} - {{ object.title }}</h2>
<img src="{{ object.get_image_url }}" />
{% if object.caption %}<p>{{ object.caption }}</p>{% endif %}
{% endblock %}It’s been a bit of a whirlwind tour, but hopefully at this point you’ve got a fairly complete picture of how this application has come together.
We defined our models and used the admin to demonstrate how image uploading works, including the necessary system-level setup.
The desire for thumbnails drove us to define a new subclass of Django’s image field and its related file class, during which we simply overrode a few methods to perform the resize and provide access to the thumbnail file.
We made full use of Django’s DRY URL features, including implementing a “root URL” setting (similar to one added to Django core just prior to 1.0) to help us maintain flexible URLs.
Finally, we created simple templates to enable users to navigate and view our photos.
[1] Django 1.0 introduced a new Apache configuration directive, PythonOption django.root <root>, which takes the place of much of the ROOT_URL functionality we outline here. However, we’re leaving this part of the chapter intact, as an example of how Django’s “just Python” approach enables you to alter its behavior in various ways.