To develop with Django, you need to have it installed, the manner of which depends on your choice of operating system and the tools at hand. The simplest environment needed to run Django consists of Python 2.5, a light SQL database package, and Django’s built-in development Web server.
However, the average Django deployment typically has a more robust set of applications behind it, using industry greats such as Apache or PostgreSQL. This appendix introduces you to the range of Django deployment options, including some specific pointers about the most common configurations, and is broken down into the necessary core parts: Python and Django themselves, a Web server, and a database engine.
As with most programming languages, newer versions of Python are better. Django runs on any version of Python 2.3 or newer, but we recommend the most current and stable version you can get your hands on. (At the time of writing, that was Python 2.5.2 with 2.6 approaching fast and in parallel with the next generation, 3.0.) See Chapter 1, “Practical Python for Django,” for details on the differences between these recent major revisions of Python.
Installers for all major platforms can be obtained from the official Python site at http://www.python.org/download/. Next, we outline some platform-specific notes of interest.
If you’re not sure what version of Python you have installed (if any), open a command shell and type python -V (note that’s a capital “V”). If Python is available, it reports its version number and exits.
$ python -V
Python 2.5.1
On the Mac, Python comes installed by default, but unless you’re using OS X 10.5 (“Leopard”), which comes with Python 2.5, you have Python 2.3, in which case we recommend upgrading. Python 2.4 or 2.5 can be obtained directly from python.org, which has installer packages, or via a software upgrade system such as MacPorts (http://macports.org). If you use MacPorts, you should also install the python_select port, so you can make the newer version your system’s default.
Most open-source Unix clones such as Linux or the BSD family also come with Python installed as part of their core system; the specific version varies greatly depending on which flavor you have, as well as how up-to-date it is. Check your distribution’s package management system to make sure you have the most recent Python available to you, or browse the python.org downloads page for stand-alone packages such as RPMs or source archives.
Windows doesn’t come with Python by default, so you need to head to the official Python downloads page. Alternately, you can visit the Web site for the Core Python book, http://corepython.com, and click the Download Python link on the left side of the page to see a handy grid with current versions of Python for all platforms. Get the latest stable version for your system.
There is an optional Windows-only Python library known as the Python Extensions for Windows (a.k.a. win32all), which enables development of native Windows Python applications. Users new to Python can find the package desirable for its IDE, PythonWin, even if they don’t yet need the integration with the operating system.
Once you’ve got Python installed, you may need to add the executable to your system’s path. This is typically taken care of for you on Unix-based systems, such as Linux and Mac OS X, if Python is installed in a well-known location such as /usr/bin, /usr/local/bin, and so on. Windows users, however, need to perform this step manually to run Python scripts in the command shell, as follows:
Right-click My Computer and pull down the Properties menu item to get to the System Properties pop-up. From here, you select the Advanced tab, as in Figure B.1.
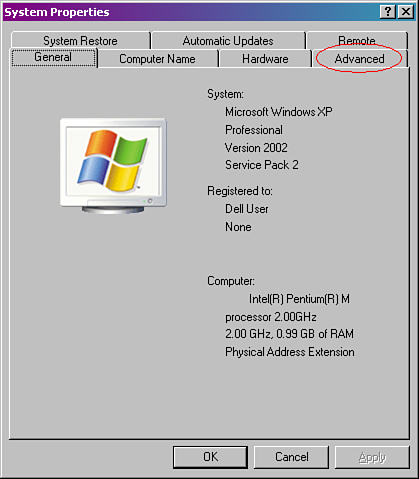
You find three main sections in the Advanced tab (see Figure B.2). Skip past these and go down to the bottom of the window and click the Environment Variables button.

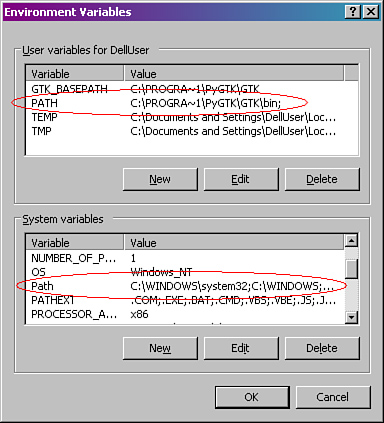
After clicking on that button, you are presented with two panels (see Figure B.3) with which to alter your environment variables. Here, you can choose whether to add/edit/update the path variable for just yourself (“User variables for USER”), PATH, or for all users of the entire system (“System variables”), Path, provided you have the proper permissions to do so.
Select the one you want to modify and click the appropriate Edit button and add C:Python25 to the list following the existing format, as in Figure B.4.
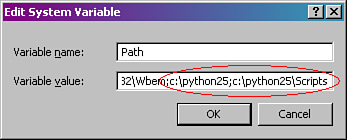
If there are already folders there, then you can just add it to any position, making sure all folders are still semicolon-delimited. If there is no such variable, then add it—it is also okay to be the only folder if such is the case.
Once you click OK and open a new DOS/Command shell, you should now be able to launch the interpreter without regurgitating the entire pathname C:Python25python.exe; just python by itself should work (see the following).
To make sure your Python installation went smoothly, simply load up the interactive interpreter by running the main Python program. Enter python in a shell/terminal window—sometimes appended with the version number, for example, python2.4. If everything’s working correctly, opening a command prompt and executing the interpreter results in a display that looks like this in a textual context:
$ python
Python 2.5.1 (r251:54863, Mar  7 2008, 04:10:12)
[GCC 4.1.3 20070929 (prerelease) (Ubuntu 4.1.2-16ubuntu2)] on linux2
Type "help", "copyright", "credits" or "license" for more information.
>>>
Or, if you are on Windows-based system in a DOS/Command window, it looks like Figure B.5.

The three “greater-than” prompt (>>>) means you are at the interactive interpreter prompt, which is waiting for you to enter some valid Python code. Exit with Ctrl-D (Unix shell or IDLE) or ^Z (DOS/Command window).
If you get an error such as “command not found” or “’python’ is not recognized as an internal or external command,” then you did not add the folder correctly to the PATH variable, so check it again, taking a careful look to verify your installation directory, the existence of python.exe, and the folder name you added to the PATH variable.
Finally, another useful convenience is to add the Scripts folder to your path, too, following the previous same steps. This enables you to run the Django administrative tool, django-admin.py, in a similar fashion as the Python interpreter.
Congratulations! If this is your first time using Python, and you haven’t yet run through any tutorials or read Chapter 1, we suggest you do so—at least briefly—before venturing further. It’s always good to do limited testing with any new tool before you start using it in earnest.
Along with your Python installation, there are a few recommended (but optional) tools that you can consider: Easy Install and IPython.
One of Python’s greatest strengths is that it comes with “batteries included,” a rich standard library of modules and packages to help you get things done. In case this doesn’t suffice for your application(s), a wealth of third-party software is available. So before you potentially reinvent the wheel, check out the Python Package Index, or “PyPI” at http://pypi.python.org to see if you can find a tool just for you.
Once you discover the additional wealth of external tools, managing your Python installation becomes more burdensome. You have to worry about things like compatibility with your version of Python, other software dependencies, integrating new packages and modules into your installation so they can be imported from your applications, and so forth.
The good news is there is a tool that does all this for you, called Easy Install, and it is available at http://peak.telecommunity.com/DevCenter/EasyInstall. You download the singular ez_setup.py, run it (via sudo or as an administrator), and it makes installing a new software package as easy as
easy_install NEW_3RD_PARTY_SOFTWARE
Easy Install uses “PyPI” to get the latest (or your specially requested) version of the desired software, downloads it (and all its dependencies), and installs it for you, all with one simple shell command.
Upgrading or uninstalling a software package is just as simple.
IPython is a third-party alternative to the standard interactive intepreter that comes distributed with Python. It adds many useful features on top of what Python gives you, including tab completion of variable and attribute names, command-line history, automatic indentation, easy access to docstrings and argument signatures, and much more. Because of IPython’s popularity and usefulness, it is the default interpreter if you start up a shell using your Django project’s manage.py administrative script. More information on IPython can be found at http://ipython.scipy.org.
As both an alternative to downloading it from its Web site as well as an introduction to both Easy Install and IPython—especially how simple it is to install third-party packages using Easy Install—here is a demo of installing IPython using Easy Install on a Linux system (and sudoing to obtain superuser access):
$ sudo easy_install ipython
Password:
Searching for ipython
Reading http://pypi.python.org/simple/ipython/
Reading http://ipython.scipy.org
Reading http://ipython.scipy.org/dist
Best match: ipython 0.8.4
Downloading http://ipython.scipy.org/dist/ipython-0.8.4-py2.4.egg
Processing ipython-0.8.4-py2.4.egg
creating /usr/lib/python2.4/site-packages/ipython-0.8.4-py2.4.egg
Extracting ipython-0.8.4-py2.4.egg to /usr/lib/python2.4/site-packages
Adding ipython 0.8.4 to easy-install.pth file
Installing ipython script to /usr/bin
Installing pycolor script to /usr/bin

Installed /usr/lib/python2.4/site-packages/ipython-0.8.4-py2.4.egg
Processing dependencies for ipython
Finished processing dependencies for ipython
The process is much the same on a Windows-based system, provided you have administrator access. Here is what happens on a PC where we already have the latest version of IPython for Windows installed:
C:>easy_install ipython
Searching for ipython
Best match: ipython 0.8.2
Processing ipython-0.8.2-py2.5.egg
ipython 0.8.2 is already the active version in easy-install.pth
Deleting c:python25Scriptsipython.py
Installing ipython-script.py script to c:python25Scripts
Installing ipython.exe script to c:python25Scripts
Installing pycolor-script.py script to c:python25Scripts
Installing pycolor.exe script to c:python25Scripts

Using c:python25libsite-packagesipython-0.8.2-py2.5.egg
Processing dependencies for ipython
Finished processing dependencies for ipython
Now that you’ve got Python up and running, the next step is to obtain Django’s own codebase. At the time of writing, Django 1.0 was recently released with version 1.1 in the works. We recommend that you use version 1.0, as this book is largely 1.0-compatible, and because using the latest stable version is generally a good idea. If you’re willing to live on the edge, however, see the following for information on using Django’s development version.
Packaged releases of Django can be obtained on the project’s Web site at http://www.djangoproject.com/download/ (or via some package managers—check your system’s packaging system for availability). Official releases from the Web site come in the common Unix package format of .tar.gz—Unix and Mac systems are able to open these natively, and Windows users require additional software, such as 7-Zip (http://7zip.org), the command-line LibArchive (http://gnuwin32.sf.net/packages/libarchive.htm), or a “Unix-on-Windows” environment such as Cygwin (http://www.cygwin.com/).
Django’s development version, which will have the latest features not found in the most recent stable version, requires use of the Subversion version control client program. Like Python, Subversion is typically available via package managers (on Unix) or MacPorts (on OS X) and requires a direct download otherwise—see the Subversion Web site (http://subversion.tigris.org/) for that.
Once you have Subversion, fetching the latest version of Django is a one-liner.
$ svn co http://code.djangoproject.com/svn/django/trunk django_trunk
After unpacking the .tar.gz file (for packaged releases) or checking out Django’s trunk (for the development version), there is a new directory at your current location named Django-1.0 or django_trunk. Inside that directory are all the pieces of Django—not only the framework (the Python module itself, the django directory), but documentation and tests, as well as other scripts and bits of information.
To get Django working, you can take one of three options:
Add the new directory to your
PYTHONPATH. If you did a trunk checkout in/home/username/, for example, you would want to add/home/username/django_trunk—not thedjangosubdirectory—to yourPYTHONPATH.Move, copy, or symlink the
djangosubdirectory into your Pythonsite-packagesdirectory.Enter the new directory and execute
python setup.py install(as an admin user), which installs Django to the proper location automatically.
For details on Python’s path mechanisms, see Chapter 1. We note here if you plan on using Subversion to keep a development checkout up-to-date, the first or second option (and only the symlink version of the second option) is preferable. Running setup.py install on a trunk checkout works fine, but you’d have to do it again every time you update from Subversion, so it’s not recommended.
To make sure Django is installed in your PYTHONPATH correctly, enter the Python interpreter and simply attempt to import django. If you see no errors, you’re all set! If you get a message such as ImportError: No module named django, double check your work, or try a different option from those described previously.
Having Python and Django installed is the first big step to actually using Django. The next most important aspect is the Web server, which takes care of delivering your dynamically generated HTML to browsers. Your Web server is also responsible for serving up static media files such as images and CSS, not to mention being a platform for the sorts of system-level things that crop up in Web development (load balancing, proxying, and so on).
The simplest Web server you realistically use with Django is its built-in “runserver” or development (“dev”) server, which is based on Python’s built-in BaseHttpServer (a good example of how to leverage the Python standard library). You’ve seen it in action in Chapter 2, “Django for the Impatient: Building a Blog,” where it was used via manage.py to rapidly test the beginnings of a simple Web application. That’s where the dev server shines: testing out new ideas and getting off the ground quickly. It’s also great for debugging, as it runs in the foreground of your terminal and thus all Python print statements show up in its output.
However, building Web servers that have performance, reliability, and security is no easy task, and the Django team has wisely declined to try and reinvent the wheel in this area. The development runserver hasn’t undergone the testing and refinement of a Web server suitable for deployment on the public Internet and is absolutely not to be used for anything but testing or simple development. The Django documentation used to joke about “revoking your Django license” if you so much as considered using it in production environments, and that sentiment is still quite true.
Finally, although the runserver does enable static file serving (see the official documentation or withdjango.com), we strongly recommend that once you’re at this point in your development, you invest in setting up one of the following server environments instead. There’s no real point in putting off the inevitable, and as a plus, you are developing in a close-to-production environment—always good for discovering potential deployment issues sooner instead of later.
The Apache Web server, along with its mod_python module, has long been the preferred method for deployment of Django sites. This is the combination that the Lawrence team who originated Django used in their busy public sites, and to date, it is still the most well-tested and well-documented deployment option.
If you have requirements that make mod_python unsuitable for you—a shared hosting environment or a non-Apache server, for example—see the following sections on WSGI and Flup for alternatives. However, if you control your own server (or virtual server instance) or otherwise have stable support for mod_python, then it’s a safe way to go.
You need Apache 2.0 or 2.2 (sometimes referred to in package managers as apache2 to differentiate them from Apache 1.3, which is much older) along with mod_python 3.0 or newer to use Django. As with Python, the actual installation of these packages varies between platforms, with Mac users on 10.4 or older needing to use MacPorts (only Leopard has Apache 2). Windows users can find prebuilt binaries at http://httpd.apache.org and http://www.modpython.org, respectively.
In terms of post-install configuration, there are two core issues to consider when deploying Django with mod_python: where to hook in Django itself and where to serve your static files.
The first thing you need to determine is how much of your domain’s URL space Django is handling—the entirety of one’s site, such as www.example.com, or only a subsection or subsections, such as www.example.com/foo/ (where www.example.com/ or www.example.com/bar/ are handled by, for example, PHP or static HTML). It’s also possible to use multiple Django projects, each attached to their own subsections.
Hooking up a Django project requires the following Apache configuration snippet, which would typically live inside a <VirtualHost> block, or within your main apache2.conf (httpd.conf on some systems) if you’re not using virtual hosts.
<Location "/">
    SetHandler python-program
    PythonHandler django.core.handlers.modpython
    SetEnv DJANGO_SETTINGS_MODULE mysite.settings
    PythonDebug On
</Location>
The previous <Location> block sets up the Django project mysite to handle the top level of whatever domain is controlled by the configuration file it lives in. To set up Django to cover only one section of the URL space, just update the location, like so:
<Location "/foo/">
There are also a few variations on this theme: One is when you don’t have your Django project on the global system PYTHONPATH and need to grandfather it in at the time that Apache is loading up Python modules. For this, just add an extra PythonPath directive. If your mysite Django project (the directory containing your settings.py, root URLconf, and app directories) was /home/user/django-stuff/mysite/, you need to add its containing folder to the Python path, as follows:
<Location "/">
    SetHandler python-program
    PythonPath "['/home/user/django-stuff/'] + sys.path"
    PythonHandler django.core.handlers.modpython
    SetEnv DJANGO_SETTINGS_MODULE mysite.settings
    PythonDebug On
</Location>
If you want to have multiple Python projects on the same domain, you can simply define multiple such <Location> blocks with one major caveat: You need to tell mod_python to keep them separate in memory, or else you can get unexpected behavior. This is done by giving each Python handler a distinct (but otherwise arbitrary) PythonInterpreter directive.
 <Location "/foo/">
    SetHandler python-program
    PythonHandler django.core.handlers.modpython
    SetEnv DJANGO_SETTINGS_MODULE foosite.settings
    PythonInterpreter foosite
    PythonDebug On
</Location>

 <Location "/bar/">
    SetHandler python-program
    PythonHandler django.core.handlers.modpython
    SetEnv DJANGO_SETTINGS_MODULE barsite.settings
    PythonInterpreter barsite
    PythonDebug On
</Location>
As you can see, there’s some flexibility with how you can use mod_python to serve your Django code. For details on these and other Python* Apache directives, see mod_python’s documentation at http://modpython.org.
We’ve got Django successfully served up by Apache, but there’s still something missing: our images and JavaScript/CSS (and possibly our videos or PDFs or whatever else our Web site has to serve up). Typically, you want to host these files in the same URL space as your application, so if your app lives at /foo/, your images and stylesheets might be /foo/media/. However, if we’ve just hooked up our Python code at /foo/, we’ve now got to make way for the media to get through.
This is a simple task: You just need to tell Apache to turn off the mod_python handler for a specific location by using another <Location> block following the one for your Django project.
<Location "/foo/media/">
    SetHandler none
</Location>
With this in place, requests to, say, /foo/users/ hit our Django code without issue, but requests to /foo/media/images/userpic.gif, for example, end up looking in Apache’s document root (defined elsewhere in your configuration or virtual host block). As you can expect, it’s also possible to specify multiple such “holes” in your mod_python URL space, meaning you could have distinct directories for images, CSS, and Javascript such as:
<LocationMatch "/foo/(images|css|js)/">
    SetHandler none
</LocationMatch>
<LocationMatch> enables the use of regular expressions in an otherwise normal <Location> block, and so here we’ve simply used regular expression branching to state we want the handler off for any of the specified three directory names. This is functionally equivalent to defining three <Location> blocks, but is of course a bit neater. There’s no reason to leave DRY in your Python code—apply it liberally to your system configuration, too!
WSGI (Web Server Gateway Interface) and mod_wsgi are the rising stars in Python Web hosting technology. Django has fairly complete support for WSGI, and an increasing number of Django programmers (and Python Web programmers in general) prefer it more than mod_python. WSGI is a flexible protocol intended to bridge Python code with any compatible Web server, not only Apache, but also alternatives such as lighttpd (http://lighttpd.net/), Nginx (http://nginx.net), CherryPy (http://cherrypy.org), and even Microsoft’s IIS.
Although WSGI is still relatively new, it works on all the previously mentioned Web servers and has been tested to work with a large number of Python Web frameworks, including Django, as well as popular stand-alone Python Web applications such as the MoinMoin wiki engine and the Trac software project manager.
The major selling points of mod_wsgi (besides the Web-server-agnostic aspect) are a reduced memory footprint and increased performance over mod_python; a single interface standard for all WSGI applications, including those outside Django; and a daemon mode that enables you to easily make a WSGI process “owned” by a particular user on your system.
The most significant downside to mod_wsgi at the time of this writing is it is not yet widely available in package managers, so chances are you have to compile and install it yourself. However, this is bound to change in the relatively near future, and Windows users can currently take advantage of some unofficial Windows binaries linked to from the main mod_wsgi Web site.
If no precompiled version exists for your operating system, you can fetch the source code from the mod_wsgi Web site, http://modwsgi.org/, and follow the installation instructions. After it’s installed, it’s not hard to get it running; a bit easier than mod_python in most cases, in fact. First, configure Apache to use the module. For Apache 2, that means a line such as this in your httpd.conf:
LoadModule wsgi_module /usr/lib/apache2/modules/mod_wsgi.so
And a configuration block such as this:
Alias /media/ "/var/django/projects/myproject/media"
<Directory /var/django/projects/myproject/>
    Order deny,allow
    Allow from all
</Directory>
WSGIScriptAlias / /var/django/projects/myproject/mod.wsgi
Then, finally, create the mod.wsgi script referenced in the previous last line:
import os, sys
sys.path.append('/var/django/projects')
os.environ['DJANGO_SETTINGS_MODULE'] = 'myproject.settings'

import django.core.handlers.wsgi

application = django.core.handlers.wsgi.WSGIHandler()
In all the previous code you would need to replace /var/django/projects with the path to the directory where your Django project or projects live. With the previous sys.path.append, the important thing, as always, is to use a path that contains your project directory; /var/django/projects rather than /var/django/projects/myproject.
The last potential Web server deployment method we cover here is the flup Python module, which is not only an alternate bridge to using WSGI (flup’s original goal), but supports a somewhat similar protocol known as FastCGI (sometimes abbreviated FCGI). FastCGI, such as WSGI, is intended to act as a bridge between one’s application code and a Web server, and has the same benefits: potentially better performance, due to running as a separate process, and potentially increased security by running as a user account separate from that of the Web server.
As things currently stand, FastCGI has more support on shared hosting platforms than WSGI does, partly because it supports multiple languages, and partly due to having been around a bit longer. As such, if Apache’s not an option and your environment doesn’t support the use of WSGI, FastCGI is an excellent choice.
The official Django documentation (see withdjango.com for a direct link) has an excellent tutorial on how to set up FastCGI, which we don’t replicate here. As that document mentions, flup provides support for a couple of additional protocols on top of WSGI and FastCGI—SCGI and AJP—which can be important to you if your deployment needs are a bit out of the ordinary.
Finally, we come to the last piece of the puzzle: You’ve got your Python code (Python, Django), and it’s hooked into your Web server (Apache, lighttpd, and so on) to serve dynamic requests. However, you still need persistence for your data, and that’s where a SQL database comes in. There are multiple options when it comes to running a database for Django, and each one typically requires both the database software itself, as well as a Python library for interfacing with it.
In addition to the following notes, the official Django documentation has specific notes and gotchas concerning these various platforms (see withdjango.com for a direct link). Make sure to check it out if you find yourself with questions or problems about your database of choice.
SQLite is well named; it’s a “light” SQL database implementation. Unlike PostgreSQL, MySQL, and various commercial databases such as Oracle or MS SQL, SQLite doesn’t run as a stand-alone server, but is simply a library interface to on-disk database files. As with other “light” implementations of typically complicated services, SQLite has its pluses (ease of use and setup, low overhead) and minuses (less functionality, poor performance for large amounts of data).
Therefore, SQLite is great for getting off the ground quickly (as you have already seen in Chapter 2) or for small sites where you don’t want or need the overhead of a full database server. However, once you’re past the learning phase, and certainly for any serious deployment, you want to upgrade to something more suitable.
To interface with SQLite, you need a Python library; if you’re on Python 2.5, the built-in sqlite3 module is the one to use, or for those on Python 2.4 and below, visit http://www.initd.org (or, always, your package manager) to obtain the pysqlite module.
Unlike the following database servers, SQLite doesn’t require explicit database creation or any user management; instead, simply choose a filesystem location for your database to live (one that your Web server can read from and write to) and record that as the DATABASE_NAME option in your settings.py. Once you’ve done this, normal use of Django utilities such as manage.py syncdb writes to a SQLite database file in that location, and you’re all set.
SQLite’s SQL shell is the sqlite3 program (sometimes just sqlite, especially if your system only has SQLite 2.x installed) and should be run with your database file as its argument, for example, sqlite3 /opt/databases/myproject.db.
PostgreSQL (often abbreviated as “Postgres”) is a full-fledged database server, providing a wide range of features and with a well-respected history as one of the leading open-source database applications. It’s recommended by the Django core team, which speaks pretty highly about its quality. Postgres is currently at version 8 (although version 7 is supported for use with Django) and is available for all major platforms, although it’s not quite as ubiquitous as MySQL on shared or managed servers.
The official Postgres Web site is http://www.postgresql.org, and the best place to start for downloading it (if you’re on Windows or it’s not in your package manager) is, at the time of writing, http://www.postgresql.org/ftp/binary/. Navigate to the latest version, then your platform, and go from there.
To use Postgres from Python, you need the psycopg library, ideally version 2, sometimes called psycopg2. psycopg can be downloaded from http://initd.org/pub/software/psycopg/ or your package manager. One minor note to keep in mind is Django has two separate database backends, one for each version of psycopg. Make sure you’re using the right one!
Creating databases and users with Postgres is easy; the default installation includes stand-alone command-line utilities such as createuser and createdb, and it’s obvious what these do. Depending on your system and method of installing Postgres, a database-level superuser could have been created for you—sometimes it’s a postgres system-level user, and other times it can be your own username. Check out the relevant documentation to make sure—either on the official Postgres Web site or that of your operating system (if you installed through a package manager).
Once you know the Postgres superuser name and password, you want to do something similar to the following example to set up a new database and user for your Django project:
$ createuser -P django_user
Enter password for new role:
Enter it again:
Shall the new role be a superuser? (y/n) n
Shall the new role be allowed to create databases? (y/n) y
Shall the new role be allowed to create more new roles? (y/n) n
Password:
$ createdb -U django_user django_db
Password:
The previous creates a new passworded Postgres-level database user, django_user with the permissions to create new databases, who is then used to create a new database, django_db. Once you’ve done the previous and entered the username and database name in your settings.py (along with the password you assigned the user), you should be all set to start using manage.py to create and update your database.
Note the final “Password:” prompt in our example was Postgres prompting us for our Postgres-level password—our system user is also our Postgres superuser. If that weren’t the case, we would have used the -U flag to createuser to specify that superuser account name, similar to what was done in the call to createdb.
Finally, PostgreSQL’s SQL prompt program is called psql and supports many of the same options as createdb and createuser, such as -U for choosing a username.
Another mainstream, open-source database server is MySQL, now at version 5 (4 is also supported). MySQL lacks some advanced functionality present in Postgres, but is also a bit more common, partly due to its tight integration with the common Web language PHP.
Unlike some database servers, MySQL has a couple of different internal database types that determine the effective feature set: One is MyISAM, which lacks transactional support and foreign keys but is capable of full-text searching, and another is InnoDB, which is newer and has a better feature set but currently lacks full-text search. There are others, but these two are the most commonly used.
If you’re on Windows or your package manager doesn’t have a recent version of MySQL, its official Web site is http://www.mysql.com, and offers binaries for most platforms. Django’s preferred MySQL Python library is MySQLdb, whose official site is http://www.sourceforge.net/projects/mysql-python, and you need version 1.2.1p2 or newer. Take note of that exact version number—some older Linux distributions can have versions such as 1.2.1c2, which are too old and not compatible with Django.
Creating databases with MySQL is typically accomplished with the all-purpose admin tool mysqladmin. As with Postgres, you need to figure out your installation’s database superuser name and password before you can create a new user for your Django project. This superuser is typically root and is also often set up with no initial password (something you should change as soon as you can), leading to a fairly quick database creation such as
$ mysqladmin -u root create django_db
Unlike Postgres, MySQL’s user management is done entirely within the database itself, so to create our django_user DB user we need to use MySQL’s SQL shell right away. It’s sensibly named mysql.
$ mysql -u root
Reading table information for completion of table and column names
You can turn off this feature to get a quicker startup with -A

Welcome to the MySQL monitor.  Commands end with ; or g.
Your MySQL connection id is 6
Server version: 5.0.51a-6 (Debian)

Type 'help;' or 'h' for help. Type 'c' to clear the buffer.

mysql> GRANT ALL PRIVILEGES ON django_db.* TO 'django_user'@'localhost' IDENTIFIED
BY 'django_pass';
Query OK, 0 rows affected (0.00 sec)

mysql>
That’s it! You’re now all set to update settings.py and start issuing database-related manage.py commands.
The final database currently supported by Django at the time of writing is a commercial offering, Oracle. If you’re new to database-driven development, you’re not likely to be considering this option, as Oracle itself is not as commonly available or deployed on shared hosting or Linux package managers. However, Oracle does have free versions available, and Django can interface with versions 9i and up.
Python’s Oracle bridge is cx-oracle, available at http://cx-oracle.sourceforge.net/.
Django’s database support is continually evolving. The best source of up-to-date information is the official Web site and the Django-users mailing list. Two options that are not currently supported by Django directly are Microsoft SQL Server and IBM DB2. An independently maintained project that gives Django MS SQL support is available on Google Code: http://code.google.com/p/django-mssql/. There is also Python-DB2 support on Google Code at http://code.google.com/p/ibm-db/, though as of this writing, it is not plug-and-play with Django.
We’re hopeful that by now you’ve gotten completely up and running with Django and all its constituent parts—Python, Django, a Web server, and a database. If you’ve run into trouble, keep in mind some advice we share in Chapter 2—back up, try things over again, and make sure you don’t miss any steps in the documentation you’re following.
Finally, Django’s own installation documentation (which covers all components and not just the Python library itself) is an excellent resource. See withdjango.com for a direct link.