
This book is about writing Web applications with Django, and as you’ve seen so far, the framework has sufficient built-in functionality, so you can accomplish a lot without straying outside of what it offers. However, like all tools, Django does have limits, and one popular piece of Web functionality that it explicitly omits is the integration of Ajax, or Asynchronous JavaScript And XML.
Thankfully, all this really means is Django doesn’t tie you to a single Ajax library, of which there are many, but simply leaves the door open for you to use one of your choosing.
In this chapter, we show you a relatively simple use of Ajax, the so-called “liveblog.” A liveblog is a Web page listing a number of short, timestamped entries capable of refreshing itself with new content without any user interaction. Those familiar with Apple’s media events in recent years have seen this sort of application on various Mac news and rumor sites such as macrumorslive.com. The same concept is used to a lesser extent on normal, static blogs, which cover live events in the same format, but usually without the dynamic updating.
Our example application goes over everything you need to know to integrate Ajax with a Django Web application without going too deep into the specifics of complex client-server interaction or animation. We also point out in a few places how Django works well with Ajax while remaining toolkit-agnostic.
Note
As with some of the other example applications, we’re going to use Apache here to make it easier to serve our static files (in this case, our JavaScript).
When someone mentions the term “Ajax” with relation to Web development, as opposed to the house-cleaning product, they are typically talking about two distinct but often intertwined behaviors.
Web pages pulling in extra information without requiring the user to reload or navigate elsewhere—think GMail and how it displays various emails, inboxes, and forms without your browser reloading and/or redrawing the entire page.
Advanced “dynamic” user interface behavior—think Google Maps’ map scrolling and zooming, or the drag-and-drop interfaces featured on various “widget”-based personal portal sites.
In terms of implementation, the “extra information” aspect of Ajax can be thought of as mini-requests where the browser and server engage in a normal HTTP conversation behind the scenes without a full page reload. We get into the details of how that’s accomplished later in the chapter; for now, just note the response part of these conversations is typically in XHTML or XML (thus the “X” in Ajax) or in a light data format known as JSON.
The UI aspect of Ajax is just fancy client-side Javascript and DOM manipulation, made recently accessible due to more powerful browsers and client computers. If you consider the display possibilities of correctly styled Web markup elements and the fact that Javascript is a full-fledged programming language, this means a Web page now resembles a canvas for traditional GUI animation techniques.
From a developer’s perspective, the capability to have a Web page engage in mini-requests is useful for a couple of reasons. It saves bandwidth in high-traffic situations, as the client browsers are only requesting specific chunks of data instead of an entire page, and it creates a more responsive user experience because the browser window isn’t constantly redrawing everything. This makes Web applications feel much more like desktop apps.
Although they are sometimes considered “eye candy,” advanced animations, drag-and-drop, and other “Web 2.0” features can also greatly enhance the user experience, as long as they’re done unobtrusively and in moderation. Coupled with the reduced amount of page reloading enabled by mini-requests, well-integrated animation and special effects further blur the line between the Web and the traditional GUI.
Before we get into the code, let’s lay out a simple specification for what features our application has and decide what tools (specifically, which Ajax library) we use to build it. First, let’s nail down some requirements, defining exactly what the application is supposed to do.
Our application consists of a single Web page. No need for anything fancy—we’re just setting up a site capable of liveblogging a single event at a time.
It tracks a single, sequential stream of information. Again, just keeping it simple.
The “stream” consists of timestamped text paragraphs. Therefore, we only need two fields in our model.
This stream is displayed in reverse chronological order with the most recent first. So the most recent info is always at the top of the page.
An initial page load displays the current state of the stream. Users visiting an in-progress liveblogging see all entries up through the present without any Ajax necessary.
The page asks the server for new entries once a minute. Here’s where the Ajax comes in.
Entries are submitted via the Django admin. However, it would be easy to make a custom form for this purpose as well, if desired—you could even use Ajax on the back end for submissions for responsiveness’ sake.
A number of Ajax JavaScript libraries are available at the time of writing, each with various strengths and weaknesses and with differing focus. Some of them attempt to deliver a large number of UI widgets, whereas others stay largely within the domain of making JavaScript an easier language to work with. They also differ in their approaches to updating JavaScript with their own syntax for manipulating and navigating the HTML structure of a Web page.
Many of these libraries have multiple components available for download, focusing on “core” elements such as the JavaScript language updates, “network” elements for the mini-request aspect, “widget” elements for the UI widgets, and of course a “full” version with the entire package. So in addition to choosing a toolkit, you also need to figure out what you want to do with that toolkit and download the correct version.
This seems like a lot of effort to go through, but it’s necessary. A large, bulky JavaScript library that needs to be downloaded with every page view can require a decidedly non-trivial amount of resources on the hosting Web server. Therefore, enabling developers to pick and choose components lets them only include what they need for their application.
Without further ado, here’s a quick rundown of the best-known Ajax toolkits and where to get them.
Dojo: (dojotoolkit.org) One of the larger Ajax libraries, Dojo has absorbed a few smaller libraries and offers multiple download options.
jQuery: (jquery.com) A newer library that provides a powerful “chaining” syntax for selecting and operating on multiple page elements at the same time.
MochiKit: (mochikit.com) One of the more “Pythonic” JavaScript libraries, which has taken inspiration from sources such as Python and Objective-C.
MooTools: (mootools.net) MooTools has an extremely modular download system, enabling for a very customizable library setup.
Prototype: (prototypejs.org) Originated from the Ruby on Rails Web framework, but has since branched out to be a stand-alone library.
Yahoo! User Interface (YUI): (developer.yahoo.com/yui) The best of Yahoo!’s recent and ongoing JavaScript UI work, packaged for community use.
In our example application, we are using jQuery, although this is largely an arbitrary choice on the part of the authors. The simple Ajax functionality we use here would be possible in any of the previous frameworks.
Time to roll up our sleeves and get started! This example application, which we call liveupdate, lives inside a generic Django project named liveproject. In addition to the app itself, we have the standard projectwide templates folder and a projectwide media folder (to house our JavaScript), so our initial setup can look something like the following output (from the Unix tree command):
liveproject/
|-- __init__.py
|-- liveupdate
|   |-- __init__.py
|   |-- models.py
|   |-- urls.py
|   `-- views.py
|-- manage.py
|-- media
|   `-- js
|-- settings.py
|-- templates
|   `-- liveupdate
`-- urls.py
Note the structure of the media folder is solely our own convention—nothing in Django forces you to organize your media files in any specific manner or even to have it hosted within your project folder. In our case, we’re going by habits borne of developing larger sites with many different JavaScript, CSS files, and images, where a separate js sub-folder makes a lot of sense. We’re not using external CSS or images for this particular example, but if we were, we’d have sibling img and css folders accompanying it.
Placing our media inside our Django project folder makes managing it on the server and in our source control a lot simpler. Symlinking the media folder into our Apache document root (and making sure Apache is configured to AllowSymlinks there) ensures the media files within are also served up correctly.
For our liveupdate app, we’ve got the generic package of one file each for models, urls, and views. Right now, given the previous requirements, our urls and models are extremely simple, and there aren’t any nongeneric views yet. Following are the contents of the app-level URLconf file liveupdate/urls.py (which should be included in the project-level urls.py as usual), which just lists our Update objects:
from django.conf.urls.defaults import *
from liveproject.liveupdate.models import Update

urlpatterns = patterns('django.views.generic',
    url(r'^$', 'list_detail.object_list', {
        'queryset': Update.objects.all()
    }),
)
Now let’s show you the models.py file, which defines the Update model class (including the default ordering) as well as setting it up for admin use:
from django.db import models
from django.contrib import admin


class Update(models.Model):
    timestamp = models.DateTimeField(auto_now_add=True)
    text = models.TextField()

    class Meta:
        ordering = ['-id']

    def __unicode__(self):
        return "[%s] %s" % (
            self.timestamp.strftime("%Y-%m-%d %H:%M:%S"),
            self.text
        )

admin.site.register(Update)
Finally, here’s our first stab at the template (templates/update_list.html), which is the initial “static” view of the current state of our updates list users see when they first load the site:
<html>
    <head>
        <title>Live Update</title>
        <style type="text/css">
            body {
                margin: 30px;
                font-family: sans-serif;
                background: #fff;
            }
            h1 { background: #ccf; padding: 20px; }
            div.update { width: 100%; padding: 5px; }
                div.even { background: #ddd; }
            div.timestamp { float: left; font-weight: bold; }
            div.text { float: left; padding-left: 10px; }
            div.clear { clear: both; height: 1px; }
        </style>

    </head>
    <body>
        <h1>Welcome to the Live Update!</h1>
        <p>This site will automatically refresh itself every minute with new
        content -- please <b>do not</b> reload the page!</p>

        {% if object_list %}
            <div id="update-holder">
                {% for object in object_list %}
                <div class="update {% cycle even,odd %}"id="{{ object.id }}">
                    <div class="timestamp">
                        {{ object.timestamp|date:"Y-m-d H:i:s" }}
                    </div>
                    <div class="text">
                        {{ object.text|linebreaksbr }}
                    </div>
                    <div class="clear"></div>
                </div>
                {% endfor %}
            </div>
        {% else %}
            <p>No updates yet -- please check back later!</p>
        {% endif %}
    </body>
</html>
As you can see, the template is fairly plain from a logic standpoint and lacks any JavaScript or JavaScript includes. In the next section, we flesh out the template’s dynamic aspects by leveraging jQuery.
Before we do this, let’s try giving our app a quick test drive to get a feel for it before we add in the core functionality. Enable the Admin (referring to earlier chapters if you need to remember the specifics), run manage.py syncdb, start or reload Apache, and navigate to the admin.
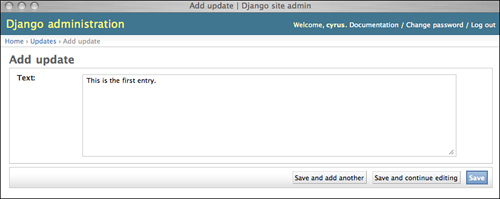
You should see the usual admin controls for our Update model class, so click the Add link and fill out the text area as in Figure 9.1. Note that because we specified auto_now_add in our timestamp field, all we need to do is enter the text—all the better for quick updates to our liveblog.
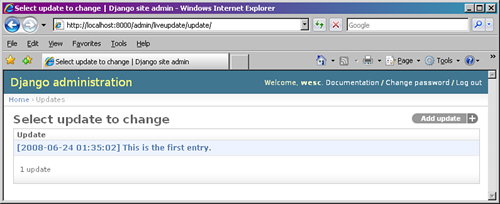
Once you’ve added an entry, the admin shows your newly added Update, such as in Figure 9.2.
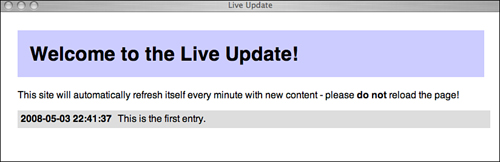
You can also see the “static” version of the liveblog by hitting the root front-end URL, as in Figure 9.3.
The base of our application is in place—it’s now time to apply the Ajax.
This section takes up most of the rest of the chapter, but don’t be discouraged! You need a lot of background to fully understand what’s going on when using Ajax, and as usual we want to make sure we give you the chance to learn something instead of simply finding out what to copy and paste.
We start with a quick overview of what’s required to use Ajax and what format it uses to transmit information, followed by installation and testing of an Ajax-capable JavaScript library, and finally show you the actual code that performs the magic, both on the server side and in the browser.
Practically speaking, “implementing Ajax” for a Web site consists of three primary tasks.
Importing the library: Because we’re using a third-party library to do the heavy lifting, we must include it in our template before it can be used.
Defining the client-side callback function: We use the library to write a function that makes a mini-request to the server and updates the Web page with the result.
Defining the server-side logic: Finally, the server needs to know how to respond to the mini-request, so we must define a Django view capable of doing so; Ajax-capable views are normal views (that is to say, functions that take an HTTP request and return an HTTP response), which occasionally have an extra header or two (see the section “Creating the View Function” later in the chapter).
The first step, importing the library, usually consists of a single JavaScript include, although the two functions can be as simple or as complex as your logic requires. Typically, the client-side functionality takes more work, as the server-side is often just a bridge between your JavaScript and the database; but this varies depending on your specific needs and those of your users. In addition, if you’re interested in using the UI aspects of your Ajax library, that code also lives at the template level, whether or not it executes concurrently with the mini-requests.
The dialogue between your client- and server-side functions can technically consist of any format your JavaScript code is capable of handling (and/or any format that HTTP can transmit because that’s what we’re using here). However, because the desired result is to transform or add HTML to your Web page, the majority of Ajax conversations—as noted earlier—utilize XML (of which XHTML is a variant) or a text data format called JSON (JavaScript Object Notation), which is simply text that can be evaluated as a JavaScript variable.
XML is arguably more commonly used, and of course lent its first initial to the name of the technology due to its popularity as an intersystem data transfer language. Given the intimate relationship between XML and (X)HTML, it’s also well-suited to the task because JavaScript and various Web development tools are already designed for manipulating its hierarchical data structure. In addition, it’s entirely possible to format your HTML on the server-side (with, say, a Django template and the rendering engine), thus simplifying your client-side code to a function that just drops it in place, ready-made.
JSON has recently risen in popularity due to its terse, readable syntax, and the fact it can be less bandwidth-intensive than XML. As a plus, its syntax is strikingly similar to that of Python’s data structures (strings, dicts, and lists). You can find out more about the JSON syntax at http://json.org.
Here’s a quick example of a simple JSON data structure.
{"first": "Bob", "last": "Smith", "favorite_numbers": [3,7,15]}Even if you don’t know any JavaScript, your Python background should make it obvious this is a dictionary with a couple string values and a third value that is a list of integers. Such a string evaluates to a working data structure in JavaScript and can then be utilized by client-side code.
We are using JSON in our application, but XML is still a popular choice; there is no shortage of examples, how-to documents, and tutorials for both formats in print and online.
Because we’ve settled on using jQuery for this example, we need to download it via the Download link at http://jquery.com. jQuery comes as a single library and is not compartmentalized like some of the others, but it does offer multiple downloads—minified, packed, and uncompressed. All three are functionally equivalent but have different file sizes and require different amounts of client CPU time to decompress.
We are using the minified variant of the current version of jQuery, which at press time was 1.2.6, but any version 1.2.x works for our code here. (Versions older than 1.2.x also work but lack the getJSON function and thus require an extra statement to evaluate JSON strings.)
jQuery needs to be included in our templates, and as such should live alongside our custom JavaScript in liveproject/media/js/. From a Win32 machine, just use a Web browser to download the file into that folder. On Unix-based hosts, such as Mac OS X and Linux, we like to use the wget or curl command line tools to download files directly, such as (using our browser’s Copy function to grab the final download URL):
user@example:/opt/code/liveproject $ cd media/js/
user@example:/opt/code/liveproject/media/js $ wget
http://jqueryjs.googlecode.com/files/jquery-1.2.6.min.js
--2008-05-01 21:52:15--  http://jqueryjs.googlecode.com/files/jquery-1.2.6.min.js
Resolving jqueryjs.googlecode.com... 64.233.187.82
Connecting to jqueryjs.googlecode.com|64.233.187.82|:80... connected.
HTTP request sent, awaiting response... 200 OK
Length: 54075 (53K) [text/x-c]
Saving to: `jquery-1.2.6.min.js'

100%[======================================================>] 54,075
227K/s   in 0.2s

2008-05-01 21:52:16 (227 KB/s) - `jquery-1.2.6.min.js' saved [54075/54075]
Now that we’ve got the library in our media directory, we need to add it to our template by adding this line in our <head> tag (note /media/custom is a symlink in our Apache docroot pointing to our liveproject/media directory).
<script type="text/javascript" language="javascript"
    src="/media/custom/js/jquery-1.2.6.min.js"></script>
We’re all set to start using jQuery now, so we first do a simple setup and test, and then move on to the real functionality.
Ajax libraries typically provide an easy way to access the library’s code, the current browser document, or the current DOM object. jQuery uses a somewhat unique syntax for almost all its functionality; the variable name $ is bound to a special callable object, which is either called as a function (for example $(argument)) or used to hold special methods (such as $.get(argument)).
For example, $(document) returns an object that’s generally comparable to the normal JavaScript document variable, but with jQuery magic added to it. One such extra method is ready, used to execute a JavaScript function when the page loads (while avoiding problems with JavaScript’s built-in onLoad).
As an example of this (and to set the stage for our eventual functionality) add the following, just after the include of jQuery itself, inside the <head> tag of your template:
<script type="text/javascript" language="javascript">
    $(document).ready(function() {
        alert("Hello world!");
    })
</script>
JavaScript is similar to Python in that functions are “first-class” or regular objects; advanced JavaScript development makes heavy use of modifying objects and passing functions around. In this case, $(document).ready takes a function to execute when the page is ready, and we’re just defining that function anonymously—similar to how Python’s lambda would work if it could span multiple lines. If all went well, and the template is able to include jQuery, our JS snippet just pops open a dialog window with “Hello World!” when you refresh the page, which is a nice proof-of-concept, but isn’t very exciting.
Let’s make things a bit more interesting and change it to dynamically add a <div> (one representing an Update object, albeit a hardcoded one) to our list when the page loads. This is, of course, the same action our live update code is doing later on with live data.
<script type="text/javascript" language="javascript">
    $(document).ready(function() {
        $("#update-holder").prepend('<div class="update">
                <div class="timestamp">2008-05-03 22:41:40</div>
                <div class="text">Testing!</div>
                <div class="clear"></div>
            </div>'),
    })
</script>
What’s going on here is we’re using jQuery’s selector syntax, which enables you to pass a CSS-like string to the $() query function and whose result is then a Query representing all matching objects. In this case, we’re looking for the <div id="update-holder"> tag defined in our previous template, and so we use the # character, which is CSS parlance for selecting an object ID.
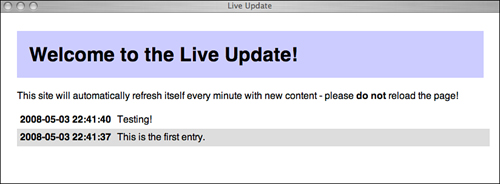
Once selected, we use the prepend method, which prepends an object or HTML string to the contents of the selection—so here, it tacks on another <div class="update"> to the beginning of our list. Not bad for a single line of JavaScript! Let’s see the result when we load the page, as shown in Figure 9.4.
We’re all set now—we know jQuery is installed and working. It’s time to go back to the server-side and create our Django view. We are implementing a tiny data-serving API, which we can then hook into with jQuery’s request mechanism for the final step.
The quickest and easiest way to implement our stated requirement for this feature—the capability for our JavaScript to ask for all updates newer than the latest one it currently has—is to set up a normal URL. If we needed to send more than one piece of info in our request, we’d probably want to use a POST-based API, but here we can get away with something simple.
Let’s say our Ajax-capable view lives at the URL /updates-after/<id>/, where <id> is the latest ID the requesting JavaScript has seen. Our view can do a simple query based off that ID number and return all newer Update objects. The return format is a JSON-encoded version of those model objects that our client-side JS can easily parse and wrap in HTML.
To do this, we need to add one line to our app-level URLconf file, liveupdate/urls.py.
url(r'^updates-after/(?P<id>d+)/$',
    'liveproject.liveupdate.views.updates_after'),
Here is the corresponding view function in liveupdate/views.py.
from django.http import HttpResponse
from django.core import serializers

from liveproject.liveupdate.models import Update


def updates_after(request, id):
    response = HttpResponse()
    response['Content-Type'] = "text/javascript"
    response.write(serializers.serialize("json",
        Update.objects.filter(pk__gt=id)))
    return response
We save a lot of time here by leveraging a built-in Django serializing library, which translates model objects into arbitrary text formats, including XML, JSON, and YAML. The serializers.serialize function does its work on a QuerySet, selecting the objects based on primary key (pk)—in our case, we are asking only for the objects whose ID is greater than the value of the id passed in.
The function then returns the resulting string in the format of our choice—here, it’s JSON—which we write into our response using HttpResponse’s file-like behavior. Finally, setting the Content-Type header of our response is necessary for JavaScript to correctly parse and use the body of the response.
The nice thing about using human-readable serialized text formats is we can debug them easily. Figure 9.5 shows what happens if we manually visit the URL http://localhost:8000/updates-after/0/ in our browser with a single test Update in our database.

We’re almost done—the final step is to write the keystone of the whole thing, the JavaScript to interface with this API view, and update the page with its response.
JavaScript provides a built-in timer function that is capable of evaluating arbitrary code at certain intervals, called setInterval, which takes a string to evaluate and an interval period in milliseconds, such as:
setInterval("update()", 60000);This makes an update() call every 60,000 milliseconds or 60 seconds. Paired with a useful jQuery method called getJSON—which performs a mini-request to a URL and parses the result as JSON—we’ve got our Ajax at last. Here’s the end result:
        <script type="text/javascript" language="javascript">
            function update() {
                update_holder = $("#update-holder");
                most_recent = update_holder.find("div:first");
                $.getJSON("/updates-after/" + most_recent.attr('id') + "/",
                    function(data) {
                        cycle_class = most_recent.hasClass("odd")
                            ? "even" : "odd";
                        jQuery.each(data, function() {
                            update_holder.prepend('<div id="' + this.pk
                                + '" class="update "' + cycle_class
                                + '"><div class="timestamp">'
                                + this.fields.timestamp
                                + '</div><div class="text">'
                                + this.fields.text
                                + '</div><div class="clear"></div></div>'
                            );
                            cycle_class = (cycle_class == "odd")
                                ? "even" : "odd";
                        });
                    }
                );

            }
            $(document).ready(function() {
                setInterval("update()", 60000);
            })
        </script>
The action taking place inside update should be pretty self-explanatory, but here’s the rundown:
We grab the container object (
update_holder) and the most recent existing update item (most_recent) via jQuery’s various selection methods.most_recent’s HTML ID attribute (which we’ve filled in with the server-side database ID number for convenience purposes) is used to construct the URL, which isgetJSON’s first argument.The second argument is the usual anonymous function, encompassing the following remaining points.
The first line in the function initializes the “even/odd” CSS class variable.
We then use jQuery’s
eachfunction to iterate over the JSON data from our view, which is giving us a list of serializedUpdateobjects.Those
Updateobjects are used to construct new HTML snippets, prepended to the container<div>.Finally, the CSS class is cycled at the end of each loop iteration to alternate the row colors.
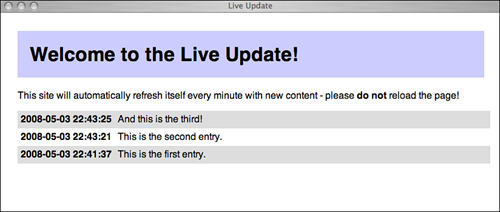
Once update has been so defined, the actual “action” code executed within ready is simply our previously mentioned call to setInterval. After posting additional blog entries, you should see them automatically loaded onto the Web page within a minute of saving them. Although we can’t actually show you this code in action—animated GIFs or videos don’t display well in book form—Figure 9.6 is a screenshot of what the site looks like after a handful of updates have been entered.
Although we’ve made good use of jQuery’s powerful selection syntax and its getJSON function to provide the client-side functionality, neither of them was absolutely required to use the server-side functionality we’ve set up here. Not only do most of the other Ajax libraries have similar tools handy, but it’s actually fairly easy to work with our small API view without any special libraries whatsoever.
The key here is everything involved speaks HTTP—our view expects the usual GET HTTP request, and similar views can use POST as well—and the return value (sent via HTTP) is also an open format, JSON. Just as Django’s internal components strive to be flexible and compartmentalized, the use of Ajax with Django relies on being similarly open and well-defined.
This chapter has focused more on the mini-request aspect of Ajax, but there’s plenty of reading material regarding many amazing things you can do with JavaScript on the UI front. We recommend you check out Appendix D, “Finding, Evaluating, and Using Django Applications,” for some places to start looking, and remember—it’s tempting to put a lot of graphical bells and whistles in your application, but your users will thank you for only doing so in moderation!