This recipe shows how to use the raspi-config utility during the initial boot of the "official" Raspbian Linux distribution to configure remote access.
During the normal installation of the "official" Raspbian Linux distribution, the Raspberry Pi configuration utility, raspi-config, is run automatically. This utility is used to configure many of the basic components of the Raspberry Pi including enabling the Secure Shell remote access server. This recipe shows how raspi-config is used to configure remote access.
The raspi-config utility was introduced in the Booting the "official" Raspbian Linux distribution recipe from Chapter 1, Installation and Setup. In that recipe, the utility was also used during installation. However, the utility can also be run from the command line after the system has been installed, as shown next in the Configuring memory usage recipe.
After you finish with this recipe, your Raspberry Pi will be accessible on your local network from another PC using the Secure Shell (SSH) protocol.
The following are the ingredients:
- An initial Raspberry Pi with a 5V power supply
- A connected display and keyboard
- A newly formatted SD card with the "official" Raspbian Linux image
- A network connection
- Another PC on the same network (for testing remote access)
This recipe does not require the desktop GUI and could either be run from the text-based console or from within an LXTerminal.
The following are the steps for configuring remote access to the Raspberry Pi:
- Insert the SD card into the Raspberry Pi and plug in the 5V power supply. The Raspberry Pi should start booting.
- After a short initial boot, the Raspi-config main menu is displayed.

The preceding screenshot shows the Raspi-config main menu. The menu item for enabling remote access is selected.
- Select ssh from the main menu to configure remote access.
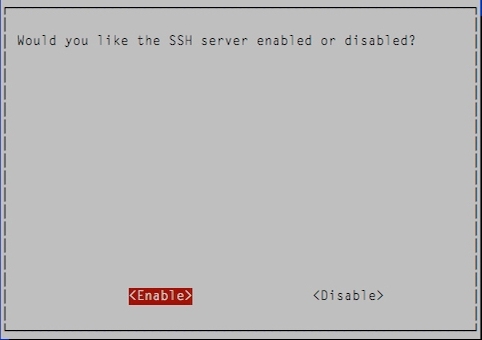
The preceding screenshot shows the
raspi-configutility asking to enable remote access. - The following screen asks, Would you like the SSH server enabled or disabled?. Choose <Enable> to enable secure remote access to the Raspberry Pi.
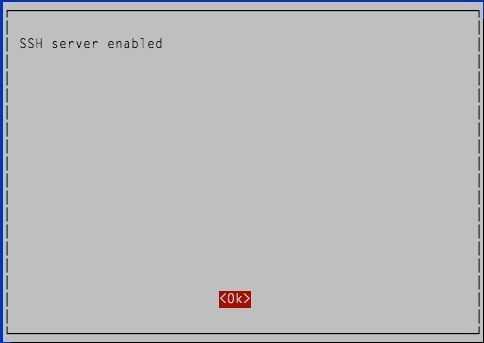
The preceding screenshot shows that remote access to the Raspberry Pi has been enabled.
- The SSH server enabled dialog appears. Press <Ok> to return to the main menu.
- Choose <Finish> from the main menu, and a dialog appears asking, Would you like to reboot now?, as shown in the following screenshot:
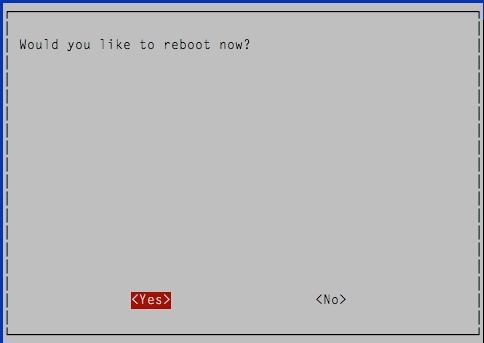
The
raspi-configutility asks to reboot. - Choose <Yes> to reboot the Raspberry Pi and enable remote access.
One of the selections available from the Raspi-config main menu is for enabling the OpenSSH Secure Shell server. The OpenSSH server enables secure access to the Raspberry Pi over a network connection. Once enabled, the SSH server will be started automatically each time the Raspberry Pi boots.
To disable remote access, disable the OpenSSH server. The server can be disabled from the raspi-config utility using the same steps in this recipe, except that <Disable> should be selected when the utility asks, Would you like the SSH server enabled or disabled?.
The Secure Shell server runs on the Raspberry Pi. A client program such as ssh on Mac OS X or Linux, or PuTTY on Windows can be used to connect to the Secure Shell server (see the See also section of this recipe). The client program is a virtual terminal that, once connected, permits a user to interact remotely with the Raspberry Pi as though connected directly with a keyboard and a display. The virtual terminal cannot run X Windows directly, so you will need another tool to view the Raspberry Pi's GUI (see the See also section of this recipe).
After the initial installation, the raspi-config configuration utility may be run again whenever there is a need to change the Raspberry Pi's configuration.
The utility can also be run remotely after logging in to the Raspberry Pi using ssh (see the See also section for an example).
- Secure Shell
http://en.wikipedia.org/wiki/Secure_Shell
Secure Shell is a network protocol for secure data communication.
- OpenSSH
An SSH1 and SSH2 implementation originally designed as part of the OpenBSD project. It is now included in most Linux distributions including the "official" Raspbian Linux.