
This recipe installs the Apache HTTP web server. Installation differences for the lighttpd and Nginx web servers are found at the end of this recipe.
The Apache web server is one of the most commonly used web servers on GNU Linux platforms, such as the "official" Raspbian Linux distribution used by the Raspberry Pi. Apache is a mature, extensible web server that can be used to host a variety of applications as well as static web pages.
After completing this recipe, the Raspberry Pi will be able to serve static and dynamic web pages from the SD card boot disk and from an external disk.
The following are the ingredients:
- A Raspberry Pi with a 5V power supply
- An installed and configured "official" Raspbian Linux SD card
- A network connection
- A client PC connected to the same network as the Raspberry Pi (for testing)
This recipe does not require the desktop GUI and could either be run from the text-based console or from within an LXTerminal.
If the Raspberry Pi's Secure Shell server is running, this recipe can be completed remotely using a Secure Shell client.
The examples in this recipe also use an external hard disk mounted at /media/bigdisk (see the some of the previous recipes for more information).
Note
Bear in mind that the IP address assigned to the Raspberry Pi will depend on your local area network configuration. The ifconfig command (see the Remote Access (ssh) recipe in Chapter 2, Administration) can be used to discover the IP address of the Raspberry Pi.
The steps for installing the Apache web server are as follows:
- Log in to the Raspberry Pi either directly or remotely.
- Execute the following command:
apt-get install apache2Download and install the Apache HTTP web server.
This command needs to be run as a privileged user (use
sudo).
The preceding screenshot shows the
apt-getbeing used to install the Apache web server's software distribution package. - (optional) Execute the following command:
ufw allow httpAllow the HTTP (web server) protocol through the firewall.
Use only if the
ufwfirewall utility has been installed.This command needs to be run as a privileged user (use
sudo).
The preceding screenshot shows how to use the
ufwcommand to allow the HTTP (web server) protocol to pass through the Raspberry Pi's firewall. - Use a web browser on another PC to connect to the Raspberry Pi.
Use the IP address of the Raspberry Pi to address the web server (
http://192.168.1.79).The Raspberry Pi is now accessible as a web server!
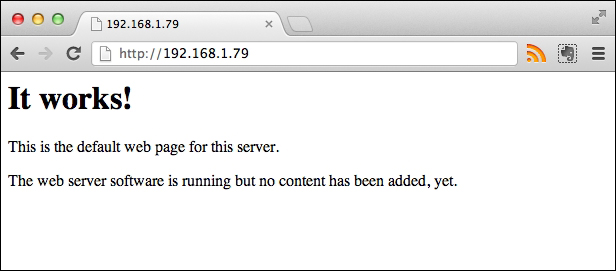
In the preceding screenshot, a web browser on another PC is used to access the default web page of the Apache web server running on the Raspberry Pi.
- Execute the following command:
ls –l /var/wwwList the contents of the web server's root directory.
There is one file:
index.html. - Execute the following command:
ls –l /media/bigdisk/MyWebsite/List the contents of a website stored on an external disk.
The disk has already been mounted.
- Execute the following command:
ln –s /media/bigdisk/MyWebsite /var/www/MyWebsiteCreate a symbolic link to an external disk from the web server's root.
- Execute the following command:
ls –l /var/www/The link to the external disk is visible in the web server's root directory.
- Execute the following command:
ls –l /var/www/MyWebsite/The linked external drive is accessible from the web server's root.
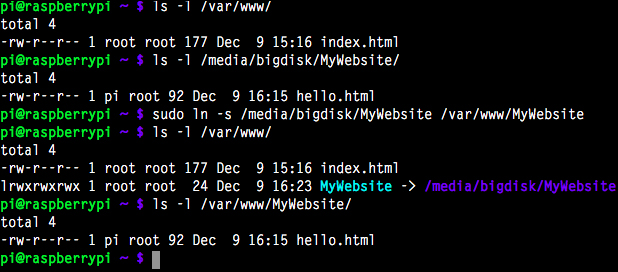
In the preceding screenshot, the
ln –scommand is used to create a link from the web server root to a website stored on an external disk. - Use a web browser on another PC to display the website (
http://192.168.1.79/MyWebsite/hello.html).The website on the external disk is now accessible!
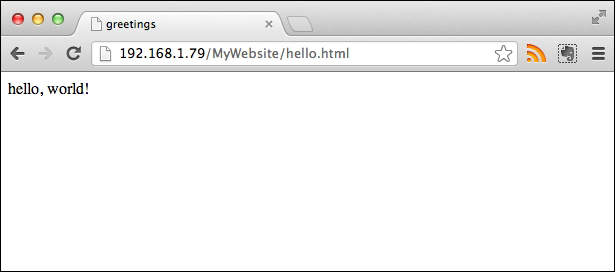
The preceding screenshot shows how a web browser on another PC is used to access a web page stored on an external disk attached to the Raspberry Pi.
- Execute the following command:
sudo nano /usr/lib/cgi-bin/timestampUse the
nanoeditor to create a dynamic web page.The
/usr/lib/cgi-bindirectory is protected (usesudo).
The preceding screenshot shows the
nanocommand used to create a dynamic web page. - Add the following lines to the dynamic web page:
#!/bin/sh
echo "Content-Type: text/plain"
echo ""
echo $(date)
The preceding screenshot shows the contents of the dynamic web page.
- Execute the following command:
chmod a+rx /usr/lib/cgi-bin/timestampMake the dynamic web page executable.

The preceding screenshot shows how to change the mode of a file so that it is executable by everyone.
- Use a web browser on another PC to display the dynamic web page (
http://192.168.1.79/cgi-bin/timestamp).The dynamic web page displays the current time with each page refresh!
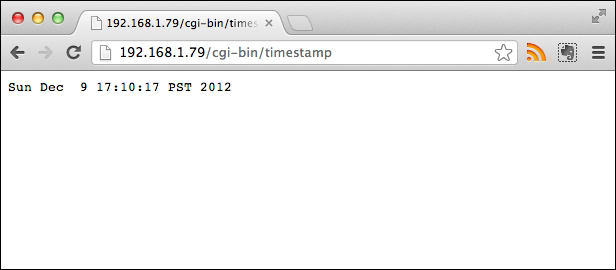
The preceding screenshot shows the dynamic web page in action—with every page refresh the timestamp is updated to the current time.
- Raspberry Pi is now a web server displaying static and dynamic pages.
- Execute the following command:
ls -l /var/log/apache2/Display the contents of the web server's logfiles directory.

The preceding screenshot shows how the
lscommand is used to display the contents of the Apache web server's logfiles directory.
After logging in to the Raspberry Pi, this recipe begins by downloading and installing the Apache HTTP server software distribution metapackage. The apache2 software distribution includes the Apache HTTP server and supporting utilities. The configuration files for the server are located in the /etc/apache directory. However, there is no need to change the configuration as the default configuration is sufficient for serving static web pages from the /var/www directory and CGI-based dynamic web pages from the /usr/lib/cgi-bin directory.
The Apache HTTP server is started as soon as it is installed. However, if the Raspberry Pi has been protected with a firewall, the firewall will need to be configured to allow HTTP connections. The ufw allow http command configures the Raspberry Pi to allow connections from other computers using the HTTP protocol.
After the firewall has been configured, a web browser is used to connect to the Raspberry Pi from another computer. The Raspberry Pi will most likely need to be addressed using its IP address (192.168.1.79) instead of its computer name (raspberrypi). The ifconfig command (see Chapter 2, Administration) can be used to discover the IP address of the Raspberry Pi.
Note
The IP address of the Raspberry Pi is dependent on the configuration of your local area network. The IP address of your Raspberry Pi is most likely different from the example used in this book. See the Remote Access (ssh) recipe in Chapter 2, Administration, which shows you how to determine the IP address of your Raspberry Pi.
The directory /var/www is the default location of static web pages, as well as static content such as images, fonts, video, and sounds. Any file located under this directory can be displayed in a web browser using the URL of the Raspberry Pi plus the name of the file (or path to the file). Initially, there is only one file in this directory, index.html. In the example it has the URL http://192.168.1.79/index.html. The /var/www directory is protected; use the sudo command to add, modify, or delete files in this directory.
The easiest way to add files from an external disk to the web server is to first mount the external disk in the /media directory and then create a symbolic link to the external disk in the root directory of the web server (/var/www). A symbolic link does not copy files, it just points to where files are located.
In the example, a website directory on the external disk (/media/bigdisk/MyWebsite) is linked into the web server's root directory at /var/www/MyWebsite. The example website has only one file, which is physically located on the external disk at /media/bigdisk/MyWebsite/hello.html. After the symbolic link is made, that file is also located symbolically at /var/www/MyWebsite/hello.html and can be reached from a web browser at the URL http://192.168.1.79/MyWebsite/hello.html.
The recipe continues by creating a simple dynamic web page that displays the current time. In the default Apache HTTP web server configuration, dynamic web pages use the Common Gate Interface (CGI) and are located in the /usr/lib/cgi-bin directory.
The nano editor is used to create the file timestamp in the cgi-bin directory. The directory is protected, so the sudo command is used as a prefix to temporarily grant the user the privilege of creating and editing the file.
The timestamp dynamic web page uses the BASH scripting language (#!/bin/bash). The web page first outputs a header describing the content of the web page as plain text (echo "Content-Type: text/plain") followed by a blank line (echo "") to separate the HTTP response header from the content of the web page. The last line of the web page displays the current time by executing the GNU date utility (echo "$(date)").
In order for the script to be called dynamically, the execution bit of the file's mode needs to be set with the chmod command (chmod a+rx). The file is located in a protected directory, so the sudo command is used again to temporarily grant privileges.
Refreshing the web page (http://192.168.1.79/cgi-bin/timestamp) in the browser on another computer shows that the page is dynamic as each refresh of the browser updates the web page to the current time.
Finally, the contents of the web server's logfile directory (/var/log/apache2/) are displayed. Each request sent to the Apache HTTP web server is logged in the access.log file—one line per request. Error messages are appended to the end of the error.log file. If a dynamic web page does not display, or does not display properly, look at the end of the error log for a message describing the cause. All of the logfiles in this directory should be deleted (or archived) on a regular basis to free up disk space.
The Apache HTTP web server is not the only web server that runs on the Raspberry Pi; however, it is perhaps the most famous and full-featured open source web server available today. Since 2009, more than 100 million websites have been hosted by Apache HTTP web servers. Although robust and complete, the Apache HTTP web server can also be resource heavy, consuming more memory and compute power than other servers.
The lighttpd web server is lighter on resources than Apache and has the potential to scale to a higher number of requests per second. Originally designed as a proof-of-concept to handle 10,000 parallel connections on one server, lighttpd has since become a popular web server. A very small bootable image containing lighttpd, PHP, and SQLite is distributed via BerryBoot (see Chapter 1, Installation and Setup).
The lighttpd web server can also be installed with the apt-get install lighttpd command. The command is privileged, so use sudo as a command prefix.
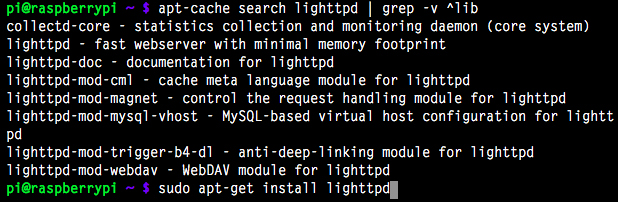
In the preceding screenshot, the commands apt-cache and grep are used to display a list of lighttpd software packages; and the apt-get command is used to install lighttpd.
Although lighttpd does use /var/www as the root directory of the web server, it does not run CGI dynamic web pages by default. The lighty-enable-mod cgi command is used to enable the lighttpd CGI module (the command is privileged, so use sudo). The lighttpd CGI module expects the cgi-bin directory to be located in the root directory of the web server instead of in the /usr/lib directory. The ln –s command can be used to create a symbolic link from the web server's root directory to the default location for dynamic web pages (/usr/lib/cgi-bin).

The preceding screenshot shows how to use the lighty-enable-mod command to enable CGI dynamic web pages and how to use the ln command to create a symbolic link to the cgi-bin directory.
The lighttpd web server's configuration files are stored in the /etc/lighttpd directory, and its logfiles are written to the /var/log/lighttpd directory.
Another popular modern web server is Nginx. Using an event-driven approach to handling requests, Nginx can provide more predictable performance under high loads than the Apache web server. Nginx has a number of options for deploying web applications including modular support for the popular web framework Ruby on Rails.
Nginx can be installed with the apt-get install nginx command. The command is privileged, so use sudo as a command prefix.
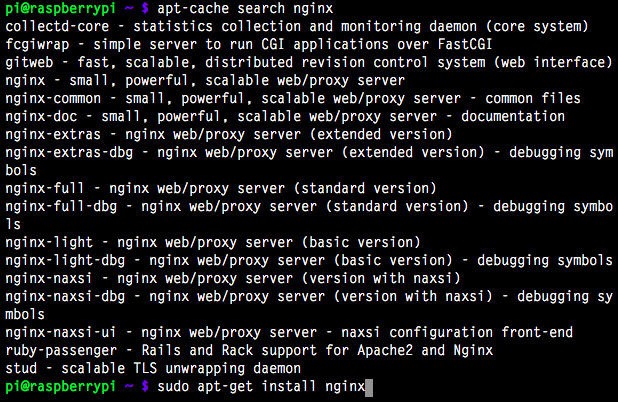
The preceding screenshot shows how to use the apt-cache command to display a list of Nginx software packages and how to use the apt-get command to install the nginx package.
The Nginx web server does not use the same root directory as the Apache HTTP and lighttpd web servers; instead, static web pages are stored in the /usr/share/ngix/www directory. The Nginx web server also does not support CGI; however, the Nginx web server can produce dynamic web pages using FastCGI or Ruby Passenger.
The Nginx web server's configuration files are stored in the /etc/nginx directory, and its logfiles are written to the /var/log/nginx directory.
In addition to Apache, lighttpd, and Nginx, the Raspberry Pi can also run a number of lesser-known web servers including AOLserver, Node.js, and Tntnet.
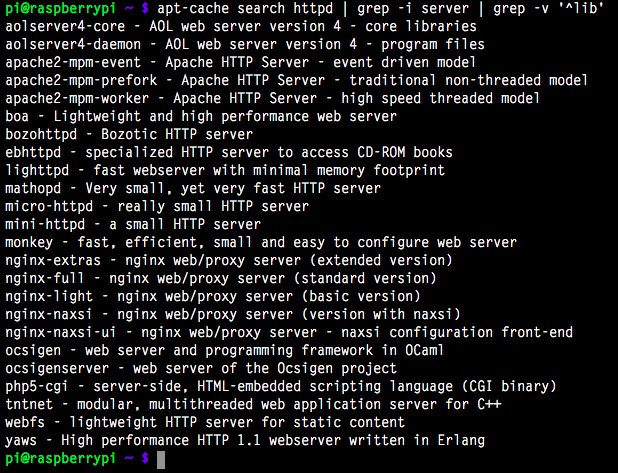
In the preceding screenshot, apt-cache and grep are used to display a list of available HTTP web servers.
- bash – GNU Bourne-Again SHell
http://manpages.debian.net/cgi-bin/man.cgi?query=bash
The Debian man page for
bash. - chmod – change file mode bits
http://manpages.debian.net/cgi-bin/man.cgi?query=chmod
The Debian man page for
chmod. - date – print or set the system date and time
http://manpages.debian.net/cgi-bin/man.cgi?query=date
The Debian man page for
date. - grep – print lines matching a pattern
http://manpages.debian.net/cgi-bin/man.cgi?query=grep
The Debian man page for
grep. - ln -s – make links between files
http://manpages.debian.net/cgi-bin/man.cgi?query=ln
The Debian man page for
ln. - AOLserver
The AOLserver website.
- Apache HTTP Server Project
The Apache web server website.
- Bash – the GNU Bourne-Again SHell
http://tiswww.case.edu/php/chet/bash/bashtop.html
The Bash maintainer's web page.
- lighttpd – fly light
The lighttpd website.
- Nginx
- Node.js
- PHP
http://php.net
The PHP website.
- SQLite
The SQLit website.
- tntnet