In this chapter, we're going to use a programming language called Scratch to create a simple animation. Along the way, we'll visit many of the main concepts of programming languages, so if you understand everything that you learn in this chapter, you will be well equipped to start writing programs of your own.
In this chapter, we will use Scratch to create our animation. Scratch is a programming language that has been specially designed so that you can make animations and games with ease. Version 1.4 of Scratch is pre-installed with the Raspbian OS but is also available on other computers. You can download it from http://scratch.mit.edu/ if you ever want to run your programs away from your Raspberry Pi. Start up Scratch by opening Menu at the top of the screen, and navigating to Programming, and then Scratch.
Tip
Downloading the example code
You can download the example code files from your account at http://www.packtpub.com for all the Packt Publishing books you have purchased. If you purchased this book elsewhere, you can visit http://www.packtpub.com/support and register to have the files e-mailed directly to you.
The following screenshot shows the layout of Scratch:
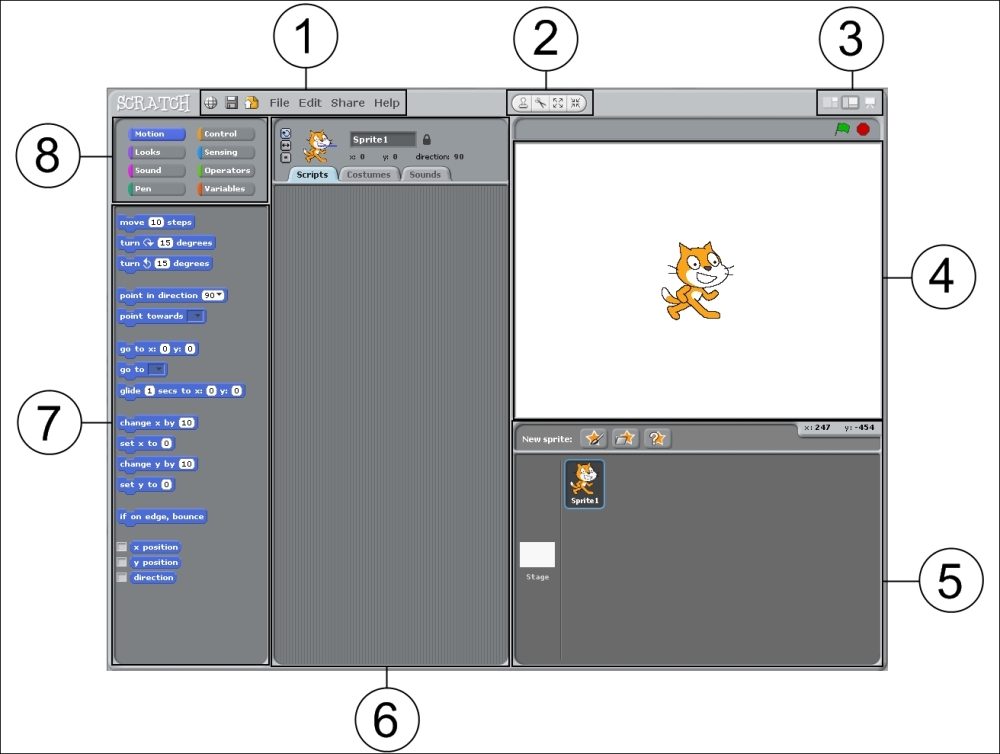
The following are its main sections. I'll mention the names of these sections throughout the next two chapters, so you might want to refer back to this page.
The following are the elements of Scratch, as shown in the preceding screenshot:
- Menu (1): This is where the options to save and load your projects are. If you ever want inspiration for projects, take a look at the provided examples by navigating to File | Open | Examples. Remember to save and back up your progress regularly!
- Sprite controls (2): Every picture in the game is called a sprite. These buttons allow you to copy, remove, grow, and shrink sprites. To use them, click on the button you want, and then click on the sprite you want to affect.
- Screen layout (3): Choose between a small Stage (see 4), a large Stage, and a fullscreen game. The small Stage is better for smaller screens as it allows more space for code.
- Stage (4): This is where you will see the effects of all your programming.
- Sprite list (5): All the sprites in your project are shown here, and you can easily add new pictures or change existing ones in it.
- Script area (6): Each sprite has a number of scripts attached to it, and they are shown in this area. Each script is a short piece of code that controls how the sprite behaves.
- Blocks (7): Each block is a programming command that can be connected to other blocks (similar to a jigsaw) to create scripts. Drag a block into the script area to use it, and then drop it next to another block in the script area to join the two.
- Block types (8): The blocks are separated into eight different categories, each having different roles in your programs.
Let's create a very simple program to show how easy it is to produce a visible result.
- From the Control section, drag a when green flag clicked block into the script area. Then drag a forever block so that it connects to the bottom of the when green flag clicked block. Finally, from the Motion section, drag a turn 15 degrees block into the middle of the forever block.
- Once the blocks are connected, you can move them all around at the same time by clicking and dragging the topmost block. If you drag a block in the middle of a collection of blocks, you will get that block and all the blocks below it.
- Click on the green flag present at the top-right corner of the screen to run the program.
The following screengrab graphically illustrates the preceding steps:
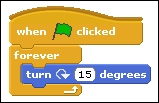
You should see the cat rotating. Your script should also be highlighted to show that it is active. You can change the rotation amount to any number you like to see the cat spin faster or slower—click on 15, seen in the preceding code block, and type in a new number. You can even choose a negative number, and the cat will spin in the opposite direction. Click on the red stop sign in the top-right corner to stop your program.
Now, I'll describe how the Raspberry Pi understands your program and knows what to do. It understands that a script should start when the green flag is clicked on because this is the top block. As soon as this has happened, it moves on to the next block, forever. Everything inside the forever block will execute repeatedly until you tell it to stop. In this case, we have told the Raspberry Pi that we want to continuously rotate the cat, and this is what we see. You can see that no blocks can be attached to the bottom of the forever block. If an action keeps on going forever, no later commands will ever run.
There are several types of code blocks available if you want to continue experimenting before we start working on the animation. A full description can be found online at http://info.scratch.mit.edu/Support/Reference_Guide_1.4. A quick tour of the code blocks is as follows:
- Motion: This allows us to control where a sprite is on the screen and which direction it is facing. Its options include rotating, moving to any position, and moving in the direction that the sprite is facing.
- Control: This allows us to choose when other blocks of code should run. In the preceding example, we saw how to decide when a script should start and how to repeat a block; however, it is also possible to execute a block only if a given condition is true.
- Looks: These enable us to decide what a sprite will look like. Each sprite can have multiple images or costumes associated with it, and these blocks can be used to switch between the two. It is also possible for the sprites to talk or change in size or color.
- Sensing: This enables us to allow a sprite to detect its surroundings.
- Sound: This enables us to play sound. You can add new sounds from the Sounds tab in the script area.
- Operators: These are simple mathematical functions, such as add and subtract. Note that some of the blocks are of different shapes; they show which blocks fit together and will be important later.
- Pen: This enables us to allow a sprite to draw a line to show where it has been.
- Variables: These allow us to give names to pieces of information so that they can be accessed from multiple places. We will go into more detail on this later in the chapter.
If you ever add a block which you no longer want, you can either drag it back to the Blocks area, or right-click on it and select delete.
A rotating cat is fun, but isn't particularly interesting, is it? Let's see if we can do something a little better.
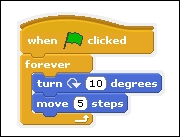
- Drag a move 10 steps block from the Motion section and place it anywhere inside your existing forever block. The cat should now move in a circle when you click on the green flag, rather than just spinning on the spot.
- Adjust the numbers in the move and rotate blocks until you are happy with the cat's movement. A larger number in the move block will make the circle larger and the motion faster. A smaller number in the rotate block will also make the circle larger, but this time it will take longer to complete a rotation. If the cat moves to a position you don't like, you can always drag it around on the Stage.
- If you like the path the cat is taking, but think it is moving too quickly, you might like to try adding in a wait 1 secs block (from the Control section) inside your forever block, and reducing its number to something very small, such as 0.01. I find the following to be a good combination:
- Now, cats don't usually move around in circles like this, so let's choose something a little more appropriate. At the top of the script area, click on the Costumes tab, then click on Import. You should see a whole selection of different images to use, including animals, people, and things.
- Choose an image of something that you think would be more likely to move in the circular motion you created, such as a fish, bird, or an airplane.
- Click on OK when you're happy with your selection, and you will be returned to the main Scratch screen.
- You should now be able to see the image you chose, and also a couple of slightly different versions of the cat image.
- We won't need the cat images anymore; remove them by clicking on the small X symbol next to each one.
We now have an image flying around in empty space. Let's add a background to make it look a bit better.
- In the sprite list, on the left-hand side, you will find a special sprite called Stage. This serves as the background of the animation. Click on it, and the script area will update to show you information on the Stage. You should see that there is one available background simply called background1, and it is a white rectangle (if you don't see this, click on the Backgrounds tab at the top of the script area).
- Just like we did before, click on Import, and choose a background that you think suits your sprite.
- When you've finished, click on X next to the white background and you should be able to see your sprite and the new background on the stage. I chose an airplane as my sprite, so I've chosen a background which has some sky for it to fly around in:
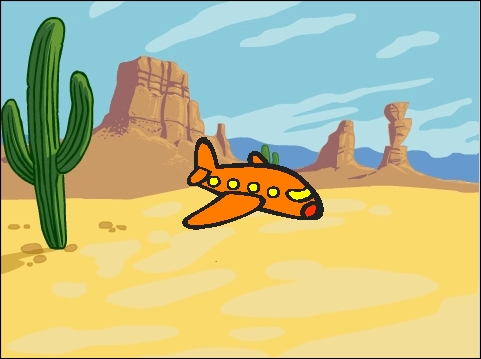
- As you can see, my plane looks like it has already crashed! I need to put it in a better position on the stage. If you also need to move your sprite to a different location, click on the sprite on the stage and drag it to a better position.
- I also want to make my plane a little smaller. This can be done using the final button in the sprite controls section (as shown here). The button next to it can be used to make sprites larger.

- Click on one of the buttons, and then click on your sprite repeatedly until it is the size you want it to be. You might want to adjust its position again when you are happy with its new size. Here's an illustration of my stage now:
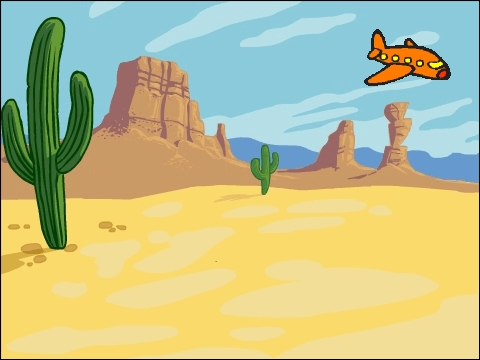
As you can see, I've moved the plane into the sky, and made it smaller so that it appears to be further away.
Remember how we earlier removed two slightly different cat images? They were there to allow a different way of animating, that is, switching between different images, or costumes. The following are the steps needed to switch between images and costumes:
- At the top of the sprite list, click on the middle button. It says Choose new sprite from file when you hover your mouse cursor over it.
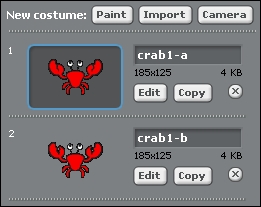
- Find an image you like and that has multiple versions of it available, such as crab1-a and crab1-b. Choose the former, and click on OK.
- Now, go into the Costumes tab and Import the second version of the same sprite, but this time, do not remove the costume that you already had. If your chosen sprite has more than two versions of it, repeat this process until you have all of them. You should see a screenshot similar to this one when you're done:
- Now that we have all the costumes we want, let's write a script that cycles through them to create an animation. Click on the Scripts tab at the top of the script area and build the following script in it. You'll notice that your script for the first sprite isn't here. Each sprite has its own collection of scripts that decides how it should behave. You can always return to see a particular sprite's scripts by clicking on that sprite in the sprite list:
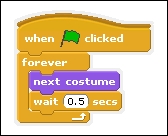
- The next costume code block can be found in the Looks section of the blocks area. Click on the green flag to see what your animation looks like – you may want to adjust the time taken between switching costumes, so as to make your animation look better.
- Finally, in the same way as we did for our first sprite, let's choose a sensible size and position for this second sprite. Drag it to a better position on the stage, and use the grow or shrink buttons to change its size.
Both of the animation methods we have met so far can be combined. It is possible to change a sprite's costume, and move it around the screen. This is as easy as adding a second script to a sprite. If we give both the scripts we have written so far to the same sprite, it will cycle through its costumes while it moves in a circle. Try it out if you like!