In this chapter, we're going to learn more about Python and its available modules by creating a program that will allow us to create notes on a map of our local area.
A program such as this needs a proper Graphical User Interface (GUI), which is just a complicated way of saying that it is a visual program with things to see and buttons to click. Here's what the program looks like when it's finished:
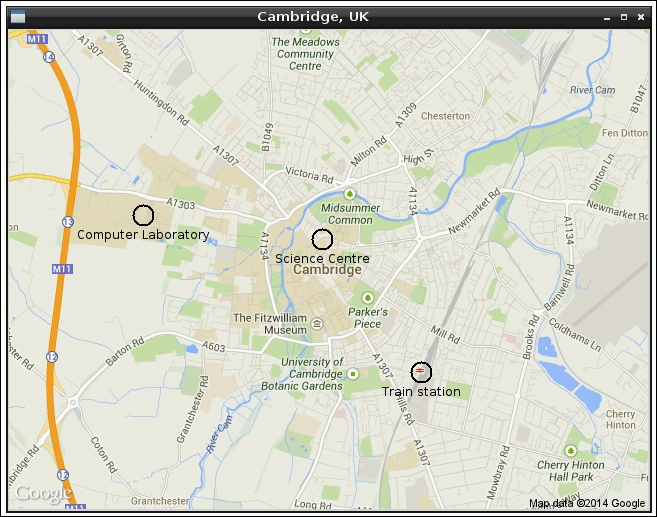
As you can see, the program looks quite professional with its title bar and buttons. You will be able to click on locations on the map and give helpful labels. By the end of this chapter, you will know enough about building GUIs to be able to add all sorts of additional features.
As is traditional when we learn about a new technology, we're going to start with the simplest program possible, just to make sure that we understand the basics. In this case, we're going to create a basic window with a title and some text inside.
There are many different Python modules available that let us create graphical programs, but we're going to use one called Tkinter. This module is included with Python by default and works on almost all computers and operating systems. It allows Python to communicate with the Tk toolkit, and it is Tk which will generate our displays.
Tkinter has easy-to-use functions to create textboxes, buttons, scroll bars, menus, and more. Collectively, these components are called widgets. To create a graphical user interface, we combine a number of widgets with a layout, which tells Tkinter how the widgets should be arranged. For example, we could say that all the buttons should be placed in a row or that they should be arranged vertically.
A summary of how to use the available widgets in the Extensions section is provided at the end of this chapter.
Before we start, open a fresh Python 2 window and make sure you are in the Code Editor window (navigate to File | New Window).
- The first thing we want to do is to import the
Tkintermodule so we can make use of all the functions it contains; therefore, add the following line of code at the top of the file:import Tkinter
- Now would also be a good time to save the program and give it a useful name. Navigate to File | Save and save the program as
hellogui.py. - Creating a window is very simple. All we need is the following code:
window = Tkinter.Tk()
window.mainloop()
Leave a blank line below the import line (for neatness) and type in the preceding code. That's it!
- We can now run the program (either by navigating to Run | Run Module or by pressing F5), and we will see an empty window appear.
The first line of code imports the Tkinter module, allowing us to access its functions; the second line creates a window; and the third line of code tells the window to enter its main loop. The main loop causes the window to be shown on the screen and lets it wait until any of its buttons are clicked (this is similar to how we had a loop in the previous chapter that waited for our controller buttons to be pressed.)
There are a few more very simple things we can do before we move on to creating the main program. This extra code must go between the previous two lines. The final mainloop line doesn't finish until the window is closed, so any code that comes afterwards will run too late to be shown on the screen. First, we can give the window a title, as follows:
window.title("Some text here")We can give the window any title we like. Secondly, we're going to place a simple widget in the window that displays some text, as follows:
label = Tkinter.Label(window, text="Hello!")
label.pack()
This code is a little more complex. First, we create a Label widget—a widget to display text (or images). When we're creating it, we pass in two arguments: the window we've created and the text that needs to be shown. Note that the second argument has been given the name text, but we provide the existing window without giving it a new name. In Python, functions can have the option of receiving lots of different arguments. All of the compulsory ones come first and don't need to be given names; the function can tell them apart from the order they are in. After that come the optional arguments. We always need to give names to these so that the function can tell which arguments have been included and which have been left out. We need the first argument because the Label widget needs to know which window it will be in. In more advanced GUIs, we can even tell widgets which sections of the GUI they should go in. The second line of code packs, the Label widget to work out what size it is and start displaying it.
You might notice that if you run your program now that the window has shrunk to fit the Label widget we just added, so we can't see the title anymore! We can fix this by telling the window the minimum size it is allowed to be, as shown in the following code snippet:
width = 200
height = 50
window.minsize(width, height)
You might like to tweak the width if you have a long window title. You should now have a window that looks something similar to this:
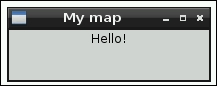
Now that the window has a minimum size, you will notice that if you drag the edges of the window, you can make it larger; however, you can't make it any smaller.
We're now ready to move on. The following is the complete code for this simple example. I've grouped some of the lines together to keep things organized, but the main point is that anything involving the way the window looks is placed between the window being created and the window's main loop starting:
import Tkinter

width = 200
height = 50

window = Tkinter.Tk()
window.title("Some text here")
window.minsize(width, height)

label = Tkinter.Label(window, text="Hello!")
label.pack()

window.mainloop()