The next thing we want to do is add a marker to the map whenever we click on it with the mouse. This can be done in two parts: by detecting the click and reacting to the click.
Detecting mouse clicks is very simple. Tkinter does most of the work for us. All we have to do is bind
a function to the mouse button. Once the program has entered its main loop, whenever the mouse button creates an event (by being clicked on), the function will be executed. Reacting to an event in this way is similar to using a when key pressed code block in Scratch. Place the following line of code with the rest of the Canvas code before the main loop:
canvas.bind("<Button-1>", canvasclick)This code says that whenever Button-1 (the left mouse button) is clicked on, run the canvasclick function. We'll write this function next.
We can create these bindings for as many buttons and keys as we like and for any widget that we like. The "<Button-3>" button is the right mouse button, "<space>" is the Space bar, "<Return>" is the Enter key, and "a", "b", "c", and so on correspond to the letters. There are even events called "<Enter>" and "<Leave>" that can tell when the mouse moves over the widget.
When the mouse button is clicked, an event is given to our canvasclick function. The event contains lots of information, including the position of the click, the widget that was clicked, and the key that was pressed (if any).
Here's a quick version of canvasclick that should let you make sure that mouse clicks are being detected properly. Place it beneath the getmap function as follows:
def canvasclick(event):
    print "Mouse click at position", event.x, event.y
When we run the program, we should now see pairs of numbers being displayed in the Shell whenever we click on our map. These numbers should change depending on where we click on the map. What we really want, though, is to draw a marker on the map so we can highlight interesting points. We'll replace the print line with the following code, and a circle will be drawn on the map at each position clicked:
    x,y = event.x, event.y
    widget = event.widget
    size = 10
    widget.create_oval(x-size, y-size, x+size, y+size, width=2)
We're going to use event.x and event.y a few times, so here we've given them the more convenient names of x and y. We've done the same thing for event.widget (the widget that received this mouse click event), giving it the more convenient name of widget. The size variable stores the distance in pixels, from the click position to the edge of the circle, that is, the radius of the circle. You can change it if you like.
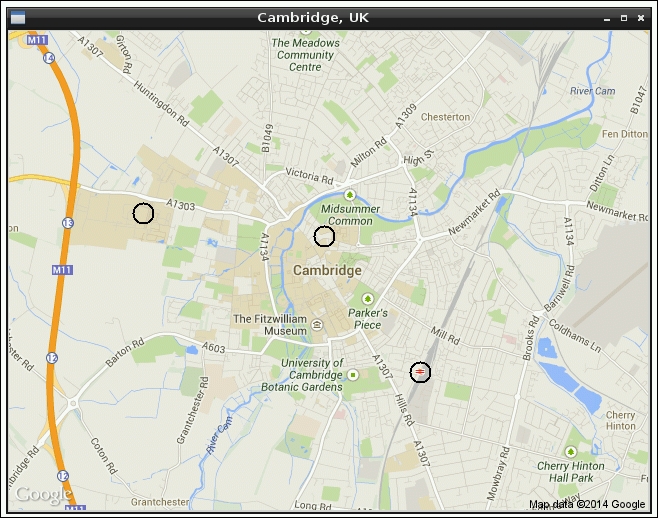
Finally, we draw the circle using widget.create_oval. The first four arguments are the coordinates of the left, top, right, and bottom edges of the circle, and width is the width of the line used to draw the circle. You can add extra arguments, such as outline="red" to change the color of the line and fill="blue" to change the internal color. I particularly like the activeoutline and activefill arguments, which work in the same way but only show their colors if the mouse is over the marker. Experiment until you have a marker design you like.
You should now have a program that looks like something similar to the following screenshot: