
So we have our audio gear all configured and ready to record—let's get sneaky with it!
Picture the following scenario: you know that something fishy is about to go down and you'd like to record whatever sound that fishiness makes. Your first challenge will be to hide the Pi out of sight with as few cables running to it as possible. Unless you're working with a battery, the Pi will have to be hidden somewhere within a few meters of a power outlet.
Next, you'll want to connect your USB microphone and keep it hidden, yet uncovered if possible, to avoid a muffled recording. Unless you expect the action to take place right in front of the microphone, you should set the capture signal to the max with alsamixer for the microphone to be able to pick up as much of the room as possible.
Now, all we need to worry about is how to trigger the recording.
The Waveform Audio File (WAV) is the most common file format used for recording audio.
- To save a recording to a file named
myrec.wavon the SD card, type in the following command:pi@raspberrypi ~ $ sox -t alsa plughw:1 myrec.wav - Play back the recording using the following command:
pi@raspberrypi ~ $ sox myrec.wav -d - If your USB gadget happens to have speakers, like a headset, you could listen to the recording in the headphones with the following command:
pi@raspberrypi ~ $ sox myrec.wav -t alsa plughw:1
So far we've been storing our audio as uncompressed WAV files. This is fine for shorter recordings, but it'll eat up the free space of your SD card rather quickly if you want to record several hours of audio data. One hour of uncompressed 16-bit, 48 kHz, stereo sound will take up about 660 MB of space.
What we want to do is compress the audio data by encoding the sound to MP3 or OGG format. This will drastically reduce the file size while keeping the audio sounding almost identical to the human ear.
Type in the following command to install the LAME encoder (for MP3) and the Vorbis encoder (for OGG):
pi@raspberrypi ~ $ sudo apt-get install lame vorbis-tools
- To encode
myrec.wavtomyrec.mp3, use the following command:pi@raspberrypi ~ $ lame myrec.wav - To encode
myrec.wavtomyrec.ogg, use the following command:pi@raspberrypi ~ $ oggenc myrec.wav
Once you have your MP3 or OGG file, you can of course delete the original uncompressed myrec.wav file to save space using the rm command:
pi@raspberrypi ~ $ rm myrec.wav
But wouldn't it be convenient if we could just record straight to an MP3 or OGG file? Thanks to the ingenious pipeline feature of our operating system, this is easy with the following command:
pi@raspberrypi ~ $ sox -t alsa plughw:1 -t wav - | lame - myrec.mp3
The line does look a bit cryptic, so
let's explain what's going on. The | character that separates the two commands is called a pipeline, or pipe. It
allows us to chain the standard output stream from one application into the standard input stream of another application. So in this example, we tell sox not to write the recording to a file on the SD card, but instead pass on the data to lame, which in turn encodes the sound as soon as it comes in and stores it in a file called myrec.mp3. The lone - characters represent the standard input and standard output streams respectively. We also specify the -t wav argument, which provides lame with useful information about the incoming audio data.
For OGG output, we have to use a slightly different command. It is as follows:
pi@raspberrypi ~ $ sox -t alsa plughw:1 -t wav - | oggenc - -o myrec.ogg
You can then play back these formats with sox just like any other file:
pi@raspberrypi ~ $ sox myrec.mp3 -d
Note
MP3 technology patents
In some countries, there are legal uncertainties around the distribution of MP3 encoder and player binaries. This is a problem, not only for the developers of free audio software, but affects you too as an end user in that you'll often have to obtain the binaries in question from alternative sources.
Chances are, you're getting tired of typing those never-ending sox commands by now. Fortunately, there's a feature built-in to the bash shell called alias that allows us to create convenient shortcuts for commands we'd like to avoid typing over and over again.
Type in the following command to create an alias called record that will start a sox recording and output to an MP3 file that you specify:
pi@raspberrypi ~ $ alias record='sox -t alsa plughw:1 -t wav - | lame -'
Now all you have to do to start recording to the newrec.mp3 file is type in the following:
pi@raspberrypi ~ $ record newrec.mp3
To view a list of all currently defined aliases, use the following command:
pi@raspberrypi ~ $ alias
As you can see, there are four default aliases added already created by Raspbian. Should you wish to modify your alias, just create it again with the alias command and provide a new definition, or use the unalias command to remove of it altogether.
Now there's only one problem with your nifty shortcut—it will disappear as soon as you reboot the Pi. To make it permanent, we will add it to a file called .bash_aliases in your home directory. The initial dot in the filename makes the file hidden from the normal ls file listing; you'll have to use ls -a to see it. This file will then be read every time you log in and your alias is recreated.
Start the nano text editor and edit the .bash_aliases file using the following command:
pi@raspberrypi ~ $ nano ~/.bash_aliases
The ~ character here is a shorter way of saying /home/pi—your home directory path.
Add your alias commands, one per line, then press Ctrl + X to exit and answer y when prompted to save the modified buffer, then press the Enter key to confirm the filename to write to.

Adding two aliases to ~/.bash_aliases
So you're logged into the Pi over the Wi-Fi and have started the recording. Just as things start to get interesting, there's a dip in the network connectivity and your SSH connection drops. Later, you retrieve the Pi only to discover that the recording stopped when your SSH session got cut.
Meet tmux, a terminal multiplexer or virtual console application that makes it possible to run commands in a protected session from which you can detach, on purpose or by accident, and then attach to again without interrupting the applications running inside the session.
- Let's install it using the following command:
pi@raspberrypi ~ $ sudo apt-get install tmux - Now we're going to start a new
tmuxsession using the following command:pi@raspberrypi ~ $ tmuxNotice the green status line across the bottom of the screen. It tells us that we are inside the first session [0] and we're looking at the first window 0: running the
bashcommand—our login shell. - To demonstrate the basic capabilities of
tmux, let's get a recording going using that handy alias we defined previously:pi@raspberrypi ~ $ record bgrec.mp3 - Now with the recording running, press Ctrl + B followed by C to create a new window.
We are now looking at the second window 1: running a new, separate
bashlogin shell. Also notice on the status line how the currently active window is indicated by the * character. - We can switch between these windows by pressing Ctrl + B followed by N for the next window.
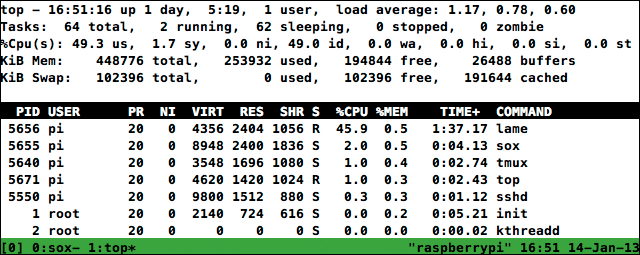
tmux session with two windows
- Let's get back to the reason why we installed
tmuxin the first place—the ability to disconnect from the Pi while our recording command continues to run. Press Ctrl + B followed by D to detach from thetmuxsession. Getting accidentally disconnected from the SSH session would have the same effect. - Then type in the following command to attach to the
tmuxsession:pi@raspberrypi ~ $ tmux attach - Use the following command to get a list of all the windows running inside
tmux:pi@raspberrypi ~ $ tmux lsw
We've only covered the bare essentials of the tmux application here, if you'd like to explore further, press Ctrl + B followed by ? for a complete list of keyboard shortcuts.