
When you take your headless Pi outside into the real world, chances are you'll want to communicate with it from a netbook or laptop from time to time. Since you won't be bringing your router or access point along, we need a way to make a direct point-to-point connection between your Pi and the other computer.
As there won't be a DHCP server to hand out IP addresses to our two network devices, what we want to do is assign static IP addresses on both Pi and laptop. We can pick any two addresses from the private IPv4 address space we saw in the Mapping out your network with Nmap section in Chapter 4, Wi-Fi Pranks – Exploring your Network. In the following example, we'll use 192.168.10.1 for the Pi and 192.168.10.2 for the laptop.
- Type in the following command on the Pi to open up the network interfaces configuration:
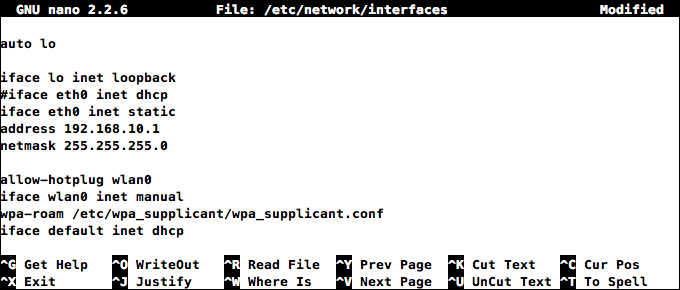
pi@raspberrypi ~ $ sudo nano /etc/network/interfaces - Now, find the line that says
iface eth0 inet dhcpand put a#character in front of the line to temporarily disable requesting an IP address from a DHCP server. Then add the following three lines beneath:iface eth0 inet static address 192.168.10.1 netmask 255.255.255.0
- Press Ctrl + X to exit and answer
ywhen prompted to save the modified buffer, then press the Enter key to confirm the filename to write to. You can now reboot the Pi and shift the focus to your laptop.Note
If your direct wired connection seems unstable or outright refuses to work, your laptop might require a special crossover cable made specifically for direct connections between two computers. You can read more about it at http://wikipedia.org/wiki/Ethernet_crossover_cable.
Let's set up the other end of the direct wired connection:
- From the Start menu, open the Control Panel and search for
adapterusing the search box. - Under Network and Sharing Center, click on View network connections.
- Select your Ethernet connection (usually called Local Area Connection), right-click and select Properties.
- Select Internet Protocol Version 4 (TCP/IPv4) from the list and click on the Properties button.
- Check the Use the following IP address checkbox, fill in
192.168.10.2for the IP address and255.255.255.0for the Subnet mask, then click on the OK button.
Let's set up the other end of the direct wired connection:
- From the Apple drop-down menu, open System Preferences… and click on the Network icon.
- Select Ethernet in the list on the left-hand side, then in the panel on the right-hand side, select Manually from the Configure IPv4 drop-down menu.
- Now fill in
192.168.10.2for IP Address and255.255.255.0for Subnet Mask, then click on the Apply button.
If your Linux distribution is based on Debian, you should be able to assign static addressing using the same method as we used for the Raspberry Pi. However, you can try the following command sequence to assign a static IP address to a running system:
$ sudo ip addr add 192.168.10.2/24 dev eth0
$ sudo ip route del default
Since there won't be a DHCP server to hand out IP addresses to our two network devices, what we want to do is assign static IP addresses on both Pi and laptop. We can pick any two addresses from the private IPv4 address space we saw in the Mapping out your network with Nmap section in Chapter 4, Wi-Fi Pranks – Exploring your Network. In the following example, we'll use 192.168.10.1 for the Pi and 192.168.10.2 for the laptop:
- Type in the following command on the Pi to open up the network interfaces configuration:
pi@raspberrypi ~ $ sudo nano /etc/network/interfaces - Now find the line that says
iface default inet dhcpand put a#character in front of the line to temporarily disable requesting an IP address from a DHCP server. Then add the following three lines beneath:iface default inet static address 192.168.10.1 netmask 255.255.255.0
- Press Ctrl + X to exit and answer
ywhen prompted to save the modified buffer, then press the Enter key to confirm the filename to write to.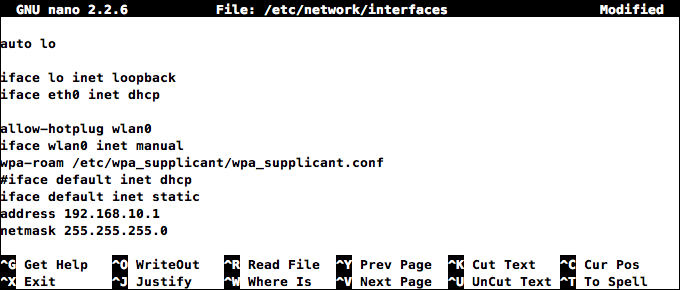
Adding a static IP address to a Wi-Fi connection on the Raspberry Pi
- Next, we need to open up the Wi-Fi configuration file to set up the ad hoc network itself:
pi@raspberrypi ~ $ sudo nano /etc/wpa_supplicant/wpa_supplicant.conf - If you have previously associated with a Wi-Fi access point, you need to temporary disable its network entry by putting a
#character in front of every line of the block. Then add an entry for your new ad hoc network to the end of the file, as follows:ap_scan=2 network={ ssid="MyHoc" mode=1 proto=WPA key_mgmt=WPA-NONE pairwise=NONE group=CCMP psk="CaptainHoc!" }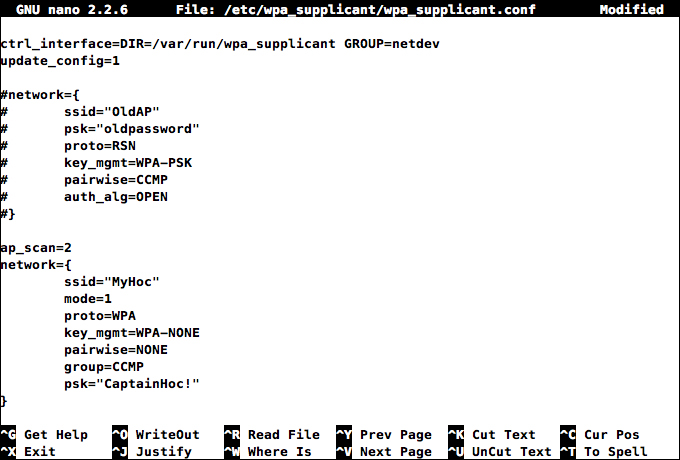
Adding an ad hoc Wi-Fi network on the Raspberry Pi
The extra
ap_scandirective is necessary for proper ad hoc support. Changessidto the name you'd like for your ad hoc network and changepskto a passphrase that connecting computers would have to supply.
- Now save and exit
nano, then reboot your Pi.
Let's set up the other end of the ad hoc Wi-Fi connection:
- From the Start menu, open the Control Panel and search for
wirelessusing the search box. - Under Network and Sharing Center, click on Manage wireless networks.
- Click on the Add button and select Manually create a network profile.
- Fill in the Network name of your ad hoc network, select WPA2-Personal from the Security type drop-down menu and AES from the Encryption type drop-down menu, then fill in your passphrase and click on the Next button.
- Close the dialog confirming that your network was successfully added, then click on the Adapter properties button next to the Add button.
- Select Internet Protocol Version 4 (TCP/IPv4) from the list and click on the Properties button.
- Check the Use the following IP address checkbox, fill in
192.168.10.2for the IP address and255.255.255.0for the Subnet mask, then click on the OK button. - Now you need to switch over to your newly created ad hoc network. On your taskbar to the far right, there's an icon to switch Wi-Fi networks. Click on it and select your ad hoc network from the list. Do not be alarmed by warnings about the ad hoc network being unsecured. This is due to Windows' inability to correctly detect the encryption in use.
Let's set up the other end of the ad hoc Wi-Fi connection:
- From the Apple drop-down menu, open System Preferences… and click on the Network icon.
- Select Wi-Fi in the list to the left, then in the panel to the right, select your ad hoc network from the Network Name drop-down menu and type in the WPA2 personal passphrase.
- Next click on the Advanced… button and go to the TCP/IP tab.
- Select Manually from the Configure IPv4 drop-down menu.
- Now fill in
192.168.10.2for the IP Address and255.255.255.0for the Subnet Mask, then click the OK button.