
How to create templates in the Django shell
</objective> <objective>How to render views using templates
</objective> <objective>How to extend templates
</objective> <objective>How to embed templates in other templates
</objective> </feature>So far, all the examples of web pages that you have created in your views have been hard-coded by Python code that generates an HTML web page. This has worked well because the web pages that you have created have been basic.
As you create more advanced web pages, you will want to begin using the Django template system. The Django template system allows you to write template files that define the presentation of the web page independent of the data. This means that you can write generic web pages and then use the Python code in the views to generate dynamic content inside them.
Using the template system has several benefits. For example, an HTML developer could be working on the web page views, and a Python developer could be working on processing the data at exactly the same time.
In this hour, you will get a chance to create some HTML templates and use them to render the data in your views.
The first step in adding templates to your website is to create and configure a directory to store them in. You will want to create at least one directory to store the templates in and then add that directory to the TEMPLATE_DIRS setting in the project’s settings.py file.
Django’s template engine will read the TEMPLATE_DIRS setting and use the directories that are configured there to process the relative paths you will specify for the template.
Django templates can combine a Django placeholder and just about any type of raw text code that displays a web page. Django placeholders are designated by encapsulating them in double braces:
{{ person_name }}
The raw text portion of the file can contain various types of information. The best way to explain this is with some examples. The following sections take you through some different methods of creating and using Django templates.
The first example we will look at is using Django templates in the Django shell to format text output. You probably won’t use templates in the shell. However, the shell is a great place to learn about them and try them out.
To create a template in the Django shell, first import the Template object class from the django.template project using the following command:
from django.template import Template
By the Way
You can use the following command from the root of your project to start the Django shell:
python manage.py
You create a template by calling the constructor of the Template class and passing in a string containing a placeholder. For example, the following line of code defines a Template object t that contains a variable placeholder emotion:
t = Template("I feel {{emotion}}.")
Next, you create some Context objects by calling the Context() constructor and passing it a dictionary that contains the emotion key:
from django.template import Context
c1 = Context({'emotion': 'happy'})
c2 = Context({'emotion': 'fine'})
c3 = Context({'emotion': 'good'})
By the Way
You can change the contents of Context by treating it as a Python dictionary. For example, to change the emotion of the c1 Context object in the preceding example, you could use the following line of code:
c1['emotion'] = 'cool'
After you have created the Template and Context objects, you can render the template to text by calling the render() function of the Template object and passing the appropriate context, as shown in Figure 7.1.

The render() function reads the dictionary in the context and replaces variable placeholders in the template that match keys in the dictionary with the key’s value.
Did you Know?
If you have a lot of text that needs to be processed as a template, you can store the template text as a text file and then use Python’s file functions to read in the contents of the template as a string. This also works when you use the Django shell to test your HTML templates. For example, to read the contents of a myTemplate.html file into a Template object, you could use the following line of code:
myT = Template(open('myTemplate.html', 'rU').read())
Most of the templates you will work with in your Django website will be HTML templates. HTML templates are text files that contain mostly HTML code but do contain some variable placeholders. You will be able to render the HTML template, using custom contexts, as a response to an HTTP request. Using this method, you can write your web pages using basic HTML tags but still can programmatically control the variable content.
The best way to create an HTML template is to first create an HTML file with the look and feel that you like and test it in a web browser. Then add the variable placeholders for data that needs to be dynamic. For example, test.html, shown in Listing 7.1, displays the simple web page shown in Figure 7.2.
Example 7.1. Full Contents of the test.html File
<html xmlns="http://www.w3.org/1999/xhtml" lang="en-us" xml:lang="en-us" >
<head>
<title>Title</title>
</head>
<body>
<table width=100%>
<tr bgcolor="aabbcc"><td colspan="2">
<font size="12" color="white">Title</font>
</td></tr>
<tr valign="top"><td width=70% bgcolor="aaaaaa"><font color="white" size="5">
    <H2>Headline</H2>
    data
</font></td>
<td width=30%>
    <h3>Current Time</h3>
    time
</td></tr>
</table>
</body>
</html>

To turn test.html into a Django template, you would replace the dynamic items Title, Headline, data, and time with the following variable placeholders, as shown in Listing 7.2:
{{ title}}, {{ headline }}, {{ data }} and {{time}}
Example 7.2. Full Contents of the Modified test.html File
<html xmlns="http://www.w3.org/1999/xhtml" lang="en-us" xml:lang="en-us" >
<head>
<title>{{ title }}</title>
</head>
<body>
<table width=100%>
<tr bgcolor="aabbcc"><td colspan="2">
<font size="12" color="white">{{ title }}</font>
</td></tr>
<tr valign="top"><td width=70% bgcolor="aaaaaa"><font color="white" size="5">
    <H2>{{ headline }}</H2>
    {{ data }}
</font></td>
<td width=30%>
    <h3>Current Time</h3>
    {{ time }}
</td></tr>
</table>
</body>
</html>
With the variable placeholders in the test.html file, Django enables you to deliver dynamic web pages based on different contexts. For example, the following code snippet creates a context that generates the web page shown in Figure 7.3:
c = Context()
c['title'] = 'My Log'
c['headline'] = 'Entry #5'
c['data'] = 'Found errors in subroutines 2, 5 and 8.'
from datetime import datetime
c['time'] = datetime.now()

To change the content that Django places in the web page, all that needs to happen is for the data in the context to change. For example, the following code snippet creates a context that generates the web page shown in Figure 7.4:
c = Context()
c['title'] = 'Corporate Memos'
c['headline'] = 'Company Party'
c['data'] = 'There will be a company Party on Friday. '
c['data'] += 'Families are invited.'
from datetime import datetime
c['time'] = datetime.now()

Django’s template parser allows you to access object fields directly from the template. This is a major advantage, because most of the data you will display in the web pages will be in the form of objects that were queried from the database. Instead of having to add each field as an entry in the Context dictionary, you only need to add the object.
Django uses the . (dot) syntax in the variable placeholder to access fields in the object. For example, to access the title field of a Blog object, you would use the following variable placeholder:
{{ blog.title }}
By the Way
If the value of the field is also an object, you can access the fields of the subobject as well. For example, if the Person object has a field blogs that refers to a list of Blog objects, you could access the title field of the first Blog object using the following syntax:
{{ person.blogs[0].name }}
Create an HTML Template for a Details View
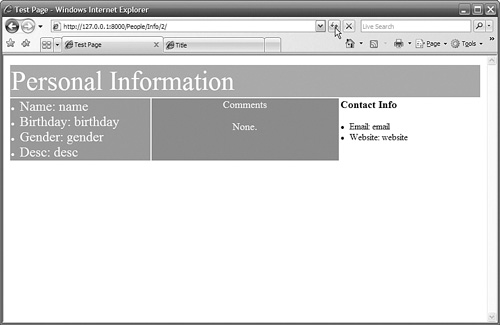
In this section, you will create an HTML template for the details view of a Person object in the iFriends project. You will first create the HTML file, and then you will add the variable placeholders to dynamically display details of the Person object.
Follow these steps to create an HTML document to display Person details and turn it into a Django template:
Using a text editor, create a file called
person_details.html, and place the code shown in Listing 7.3 in it. The file should generate a web page similar to the one shown in Figure 7.5.Example 7.3. Full Contents of the
person_details.htmlHTML Document<!DOCTYPE html> <html xmlns="http://www.w3.org/1999/xhtml" lang="en-us" xml
 :lang="en-us" >
<head>
<title>Test Page</title>
</head>
<body>
<table width=100%>
<tr bgcolor="aabbcc"><td colspan="3">
<font size="12" color="white">Personal Information</font>
</td></tr>
<tr valign="top"><td width=30% bgcolor="aaaaaa"><font
color="white" size="5">
<li>Name: name</li>
<li>Birthday: birthday</li>
<li>Gender: gender</li>
<li>Desc: desc</li>
</font></td>
<td width=40% bgcolor="aa99aa"><font color="white" size="4">
<p align="center">Comments</p>
<p align="center">None.
</font></td>
<td width=30%>
<h3>Contact Info</h3>
<li>Email: email</li>
<li>Website: website</li>
</td></tr>
</table>
</body>
</html>
:lang="en-us" >
<head>
<title>Test Page</title>
</head>
<body>
<table width=100%>
<tr bgcolor="aabbcc"><td colspan="3">
<font size="12" color="white">Personal Information</font>
</td></tr>
<tr valign="top"><td width=30% bgcolor="aaaaaa"><font
color="white" size="5">
<li>Name: name</li>
<li>Birthday: birthday</li>
<li>Gender: gender</li>
<li>Desc: desc</li>
</font></td>
<td width=40% bgcolor="aa99aa"><font color="white" size="4">
<p align="center">Comments</p>
<p align="center">None.
</font></td>
<td width=30%>
<h3>Contact Info</h3>
<li>Email: email</li>
<li>Website: website</li>
</td></tr>
</table>
</body>
</html>
Modify the following line from Listing 7.3 to match Listing 7.4 to display the person’s name in the title bar of the web browser:
<title>Test Page</title>
It becomes
<title>{{ p.name }}</title>Modify the following lines from Listing 7.3 to match Listing 7.4 to display the person’s details in the details section of the web browser:
<li>Name: name</li> <li>Birthday: birthday</li> <li>Gender: gender</li> <li>Desc: desc</li>
They become
<li>Name: {{p.name}}</li>
<li>Birthday: {{ p.birthday }}</li>
<li>Gender: {{ p.gender }}</li>
<li>Desc: {{ p.desc }} </li>
Modify the following lines from Listing 7.3 to match Listing 7.4 to display the person’s contact information in the contact section of the web browser:
<li>Email: email</li>
<li>Website: website</li>
They become
<li>Email: {{ p.email }}</li>
<li>Website: {{ p.favoriteURL }}</li>
Save the new file. (It is shown in Listing 7.4.)
Copy the
person_details.htmlfile to the iFriends/templates/People template directory for the People application of the iFriends project.
Example 7.4. Full Contents of the Modified person_details.html Django Template
<!DOCTYPE html> <html xmlns="http://www.w3.org/1999/xhtml" lang="en-us" xml
In the preceding section, you learned how to create a Django template from an HTTP document. This section covers how to display it using the render_to_response() shortcut function. The render_to_response() function accepts the name of a template file and a dictionary as its only two arguments, as shown in the following example:
render_to_response('person_detail.html', {'p': person})
When you call render_to_response(), it opens the template file, reads the contents into a Template object, creates a Context object using the dictionary argument, renders the Template object based on the Context object, and outputs the results as an HttpResponse.
Did you Know?
You can use the locals() Python function to generate a dictionary containing all the locals in the current function context. Instead of building your own dictionary, you can just specify the locals() function in the render_to_response call:
render_to_response('person_detail.html', locals())
Render a Web Page from a Template
In this section, you will modify the details() view function for the People application to use render_to_response() to display the Person details using the person_details.html template file you created in the preceding “Try It Yourself” section.
Follow these steps to modify the details() view to use the person_details.html template:
Open the
iFriends/People/views.pyfile in an editor.Import the
render_to_response()function using the following line of code from Listing 7.5:from django.shortcuts import render_to_response, get_object_or_404
Remove the current contents of the
details()function.Add the following line of code to the
details()function to get thePersonobject specified by thepIDargument, as shown in Listing 7.5:p = get_object_or_404(Person, pk=pID)
Add the following line of code to the
details()function to render the view using theperson_details.htmltemplate, as shown in Listing 7.5:return render_to_response('people/person_details.html', {'p': p})Save the
views.pyfile.Access the following URL in a web browser to verify that the view is working correctly, as shown in Figure 7.6:
http://127.0.0.1:8000/People/Info/2/

Example 7.5. Full Contents of iFriends/People/views.py
from django.http import HttpResponse
from iFriends.People.models import Person
from django.shortcuts import render_to_response, get_object_or_404

def index(request):
    response = HttpResponse()

    response.write("<h1>People</h1><hr>")
    pList = Person.objects.all()
    for p in pList:
        link = "<a href="Info/%d">" % (p.id)
        response.write("<li>%s%s</a></li>" % (link, p.name))

    return response

def details(request, pID='0', opts=()):
    p = get_object_or_404(Person, pk=pID)
    return render_to_response('people/person_details.html', {'p': p})
As you build your website, you will need to create several different template files for different applications and views. This can result in a lot of redundant HTML code for headers, banners, and other content that will appear on several pages. Django provides the extends tag in its template engine to solve this problem.
The extends tag allows you to create a parent template file that will contain website elements that appear in more than one HTML view. Then, as you create templates for various views, you will only need to create content for that specific view in the view’s template. When the Django template parser encounters an extends tag, it parses the parent template first and then applies the child template.
The following text shows the syntax for enabling a view template to inherit from another template:
{% extends "site_base.html" %}
By the Way
The parent template, specified in quotation marks, is specified as a path relative to the paths defined in the TEMPLATE_DIRS setting in the settings.py file. If you defined c:website emplates in the TEMPLATE_DIRS setting and you create a parent template called c:website emplatessiteheader.html, you would use the following extends statement:
{% extends "site/header.html" %}
Did you Know?
You can specify a variable name instead of a filename in the extends tag. This allows you to dynamically control what the content will be by specifying different template filenames from within the view code.
You use block tags to control where items from the child template will be placed in the parent template. The block tags need to appear in both the parent and child templates. In the parent template, the block tags designate where data, with a block with the same name, from the child template will be placed. In the child template, the block tag is used to partition a section of data and assign it a name that can be referenced from the parent.
Blocks begin with a block tag and end with an endblock tag. The following code snippet shows the syntax for creating a block and assigning it the name content:
{% block content %}
<block code here>
{% endblock %}
The best way to show you how to extend a template is through an example. Listing 7.6 defines a basic parent template.
Example 7.6. A Basic Parent Template File, base.html
<html>
<head>
<title>{% block content %}Title{% endblock %}</title>
</head>
<body>
{% block content %}
Base Site
{% endblock %}
</body>
</html>
Listing 7.7 shows how to apply the parent template shown in Listing 7.6 in a child template.
Example 7.7. A Basic Child Template File, view.html
{% extends "base.html" %}
{% block title %}My Template View{% endblock %}
{%block content %}
<h1> My Web Page</h1><hr>
<li>Testing templates.</li>
{% endblock %}
When the view.html template shown in Listing 7.7 is parsed, the Django template parser sees the extends tag and parses the base.html parent template. Then, as it encounters the title and content blocks in the view.html file, it applies the HTML code in those sections to the HTTP response. Listing 7.8 shows the resulting HTML code that is sent as the HTTP response.
Example 7.8. Resulting HTML Response When view.html Extends base.html
<html>
<head>
<title> My Template View </title>
</head>
<body>
<h1> My Web Page</h1><hr>
<li>Testing templates.</li>
</body>
</html>
By the Way
If a no block in the child matches a block in the parent, the data contained in the block and endblock statements is added to the HTML response. For example, if we had not included the title block in Listing 7.7, the Django parser would have included the value contained in the title block of Listing 7.6, and the <title> HTML tag in Listing 7.8 would have been <title>Title</title>.
Add a Base Template to Your Website
In this section, you will create a base template to use for the iFriends website and modify the template you created in the preceding section to extend the new parent template.
Follow these steps to create a base template called iFriends_base.html and to change the person_details.html template into a child template that extends iFriends.html:
In an editor, create and open a file called
iFriends/templates/iFriends_base.html.Add the contents of Listing 7.9 to the
iFriends_base.htmlfile.Example 7.9. Full Contents of
iFriends/templates/iFriends_base.html<!DOCTYPE html> <html xmlns="http://www.w3.org/1999/xhtml" lang="en-us" xml
:lang="en-us" >
<head>
<link rel="stylesheet" href="style.css" />
<title>{% block title %}iFriends{% endblock %}</title>
</head>
<body>
<table width=100% bgcolor="111177">
<tr><td>
<font size="12" color="white">iFriends Webspace</font>
</td></tr>
<tr><td>
<font size="3" color="white">Home</font>
</td></tr>
</table>
{% block content %}{% endblock %}
</body>
</html>
Save the file.
Open the
iFriends/templates/Person/person_details.htmlfile in an editor.Remove the following lines of code:
<!DOCTYPE html>
<html xmlns="http://www.w3.org/1999/xhtml" lang="en-us" xml
:lang="en-us" >
<head>
<title>{{ p.name }}</title>
</head>
<body>
. . .
</body>
</html>
Add the following lines of code, as shown in Listing 7.10, to extend the
iFriends_base.htmltemplate and assign the title and content blocks:{% extends "iFriends_base.html" %} {% block title %}test{% endblock %} {% block content %} {% endblock %}Save the file.
Access the following URL in a web browser to verify that the new view is working correctly, as shown in Figure 7.7:
http://127.0.0.1:8000/People/Info/2/

Example 7.10. Full Contents of iFriends/templates/person_details.html
{% extends "iFriends_base.html" %}

{% block title %}test{% endblock %}
{% block content %}
<tr bgcolor="aabbcc"><td colspan="3">

<font size="5" color="white">Personal Information</font>
</td></tr>
<tr valign="top"><td width=30% bgcolor="aaaaaa"><font
color="white" size="5">
    <li>Name: {{p.name}}</li>
    <li>Birthday: {{ p.birthday }}</li>
    <li>Gender: {{ p.gender }}</li>
    <li>Desc: {{ p.desc }} </li>
</font></td>
<td width=40% bgcolor="aa99aa"><font color="white" size="4">
    <p align="center">Comments</p>
    <p align="center">None.
</font></td>
<td width=30%>
    <h3>Contact Info</h3>
    <li>Email: {{ p.email }}</li>
    <li>Website: {{ p.favoriteURL }}</li>
</td></tr>
{% endblock %}
In addition to extending templates with parent templates, Django allows you to load the entire contents of a template into an existing template using the include tag. Unlike the extends tag, the include tag simply inserts the full contents of the specified template file into the existing template.
The include tag can be useful for creating “canned” components for your website, such as a calendar, that need to be displayed on several web pages.
For example, the following line of code embeds a template named comments.html into a template:
{% include "comments.html" %}
Did you Know?
You can specify a variable name instead of a filename in the include tag. This allows you to dynamically control what the content will be by specifying different template filenames from within the view code.
By the Way
Variables that are available in the view template also are available in templates that are embedded using the include tag.
Embed a Template File in Another Template
In this section, you will create a quote.html template that can be embedded into other template files.
Follow these steps to create a template called quote.html and embed it into person_details.html:
In an editor, create and open a file called i
Friends/templates/quote.html.Add the contents of Listing 7.11 to the
quote.htmlfile.Example 7.11. Full Contents of
iFriends/templates/quote.html<table width="100%"> <tr bgcolor="aa22aa" width="100%"><td align="center"> <font size="4">Quote of the Day</font> </td></tr> <tr><td align="center"> <font size="5">I think therefore I am.</font> </td></tr> <tr><td align="center"> <font size="2">- Rene Descartes</font> </td></tr> </table>
Save the file.
Open the
iFriends/templates/Person/person_details.htmlfile in an editor.Remove the following lines of code:
<p align="center">Comments</p>
<p align="center">None.
Add the following line of code, as shown in Listing 7.12, to embed the
quote.htmlfile:{% include "quote.html" %}Save the file.
Access the following URL in a web browser to verify that the new view is working correctly, as shown in Figure 7.8:
http://127.0.0.1:8000/People/Info/2/

Example 7.12. Full Contents of iFriends/templates/person_details.html
{% extends "iFriends_base.html" %}

{% block title %}test{% endblock %}
{% block content %}
<table width=100%>
<tr bgcolor="aabbcc"><td colspan="3">
<font size="5" color="white">Personal Information</font>
</td></tr>
<tr valign="top"><td width=30% bgcolor="aaaaaa"><font
color="white" size="5">
    <li>Name: {{p.name}}</li>
    <li>Birthday: {{ p.birthday }}</li>
    <li>Gender: {{ p.gender }}</li>
    <li>Desc: {{ p.desc }} </li>
</font></td>
<td width=40% bgcolor="aa99aa"><font color="white" size="4">
    {% include "quote.html" %}
</font></td>
<td width=30%>
    <h3>Contact Info</h3>
    <li>Email: {{ p.email }}</li>
    <li>Website: {{ p.favoriteURL }}</li>
</td></tr>
{% endblock %}
In this hour, you learned how to configure Django to allow you to use HTML templates. You learned how to create template files and use them to enhance your views. You also learned how to create base templates that will reduce the amount of HTML code that is needed in your view templates. You also learned how to create templates for specific tasks and embed them into your view templates using the include tag.
The workshop consists of a set of questions and answers designed to solidify your understanding of the material covered in this hour. Try answering the questions before looking at the answers.
1. | Create an HTML template that displays a table of all |
2. | Modify the template you created in Exercise 1 to extend the |