
How to localize strings in templates
</objective> <objective>How to create language files
</objective> <objective>Where to set language preference
</objective> <objective>How to enable languages at the session level
</objective> </feature>Django provides full support for internationalization by allowing you to define localized strings in your Python code and template files. Using localized strings allows you to build a website that can be displayed in several different languages.
Internationalizing your website is a three-step process. First, you define which strings should be localized in different languages. Next, you build message files that contain the translated strings for each language. Finally, you configure a way to determine what language should be displayed.
The following sections discuss how to define localized strings, build the message files, and activate languages.
The first step in internationalizing your website is to define the strings that need to be translated. In your Python code, strings are identified as being localized by wrapping them in a translation function. The following sections describe how to identify strings for translation using the standard, lazy, and no-op translation methods.
The standard translation method involves using the django.utils.translation.gettext() function. The gettext() function accepts a Python string as its only argument. The string that is specified in the gettext() function is added to the message file.
For example, the following code enables a direct string and a string variable for translation:
from django.utils.translation import gettext
def myView(request):
    rawText = 'Welcome to iFriends'
    transText = gettext(rawText)
    loginText = gettext('Please Login')
    . . .
By the Way
If you have a lot of strings that you would like to be localized, you might want to import the gettext() function as a shorter name, as in the following example:
from django.utils.translation import gettext as _
. . .
    transText = _('Please Login')
You should be mindful when adding variable placeholders to localized strings that you may need to use named-string syntax. That way, when the strings are translated, the variable placeholder can move position in the translation as necessary. For example, the string Tim is my name. would be translated to Ich heisse Tim. The following code shows an example of using a named variable placeholder:
text = gettext('%(name)s is my name.') % {'name': name}
The lazy translation method involves using the django.utils.translation.gettext_lazy() function. The gettext_lazy() function accepts a Python string as its only argument. The gettext_lazy() function stores a lazy reference to the string and translates the string only if it is used in a string context.
For example, the following model definition uses the gettext_lazy() function:
from django.utils.translation import gettext_lazy as _
class Contact(models.Model):
    name = models.CharField(_('Name'), max_length=80)
    location = models.CharField(_('Location', help_text=_('Your city.'))
Watch Out!
You should always use gettext_lazy() to identify strings for translation in your Django models. You can alias gettext_lazy() to reduce the amount of text you need to type when identifying strings for translation. For example, the following code aliases gettext_lazy() as the _ character:
from django.utils.translation import gettext_lazy as _
. . .
    title = models.CharField(_('Title'), help_text=_('Enter a Title Here.'))
Django provides the django.utils.translation.gettext_no-op() function to identify strings as translation strings. However, they are not actually translated yet. They are translated later as a variable at the last possible point before they are rendered to the user.
You can use no-op strings for things such as constant strings, or strings stored in the database. Django will not translate a no-op strings until the last possible moment.
By the Way
Several of the “Try it Yourself” sections in this hour add small amounts of code to Listing 20.2. Rather than listing the full contents in each “Try It Yourself” section, the full code listing is added in the final section to reduce redundancy.
You can also identify strings in template files that should be translated. Strings are localized in the template files the same way they are localized in Python code. However, you need to load the i18n template file into your own template first. Use the following code in your template to do so:
{% load i18n %}
The following sections discuss the different template tags and variables that you can use when localizing your templates.
The simplest way to localize a string in a template is to use the trans template tag. The trans template tag works the same way that the gettext() function does; it accepts a string and identifies that string as localized. The following is an example of using the trans template tag:
{% trans "Web Search Results" %}
The trans tag accepts only constant strings; it cannot accept variables. To localize string variables, you need to use the blocktrans tag. It identifies a block of text, including variables, as localized. The following example shows how to use the blocktrans tag:
{% blocktrans %}Title: {{ title }} {% endblocktrans %}
If you need to use some kind of template expression on a variable, such as a template filter, you need to bind the expression to a local variable to be used in the block. For example:
{% blocktrans with title|CAPFIRST as ctitle %}
    Title: {{ ctitle }}
{% endblocktrans %}
The i18n template file also provides translation hooks within any template that accepts constant strings. To use those template hooks, use the _() syntax, as shown in the following example:
{% CustomTag _("Translation String") %}
When you use these translation hooks, the tag sees the translated string and is unaware of the translation.
RequestContext has access to the following translation-specific variables that you can use when designing your templates:
LANGUAGESis a list of two element tuples in which the first element is the language code and the second is the language name.LANGUAGE_CODEis a string containing the preferred language code for the current user.LANGUAGE_BIDIis Boolean. If it isTrue, the current language is one that is read right to left (such as Arabic or Japanese). If it isFalse, the current language is a left-to-right language (such as English, Spanish, or German).
For example, the following template code uses the LANGUAGE_CODE variable to display English-only code if the user’s language is English:
{% ifequal LANGUAGE_CODE 'en' %}
    English Elements
    . . .
{% endifequal %}
If you are not using the RequestContext extension in the view, you can also assign the translation-specific variables using the following template tag code:
{% get_available_languages as LANGUAGES %}
{% get_current_language as LANGUAGE_CODE %}
{% get_current_language_bidi as LANGUAGE_BIDI %}
After you have identified all your localized strings in the Python and template code, you need to build message files that Django can use when rendering localized strings. Creating the language files is a three-step process.
The first step is to use the make-messages application to build message files for each language that will be localized. The next step is to add the translation strings to each language message file. The final step is to compile the message files into a binary form that Django can consume.
The following sections describe the process of creating language files. Before proceeding, download the Gnu gettext package from the following location, install it, and make certain that the bin directory is in the path:
www.gnu.org/software/gettext/gettext.html
The first step in creating language files is to build the message files. A message file is a text file that contains entries that include a message ID and translation string for that particular language. Each language has one message file.
Django provides the django/bin/make-messages.py utility to create and update message files. You can also build the message file for a specific language using the -l language-code parameter. The following example shows how to build the German message file:
message-make.py -l de
You need to run the message-make.py utility for each language you want to add to your project. However, after you have added the language files, you can use the -a parameter to update all the existing message files:
message-make.py -a
Watch Out!
The message-make.py file is not automatically added to your PATH. You need to either copy it to a location that is in your path or add the full path to the django/bin/ directory in your Django installation to the PATH setting.
Message files can be built at three different levels—the Django installation, the project, and the application.
Django already comes with its own message files built and compiled. You would need to build the message file at the Django installation level only if you modified a string in the Django code or if you wanted to add a language that Django currently doesn’t support. To build the message files for the Django installation, run the make-messages.py utility at the root of the Django installation. The messages are stored in the following file in the Django installation path:
django/confg/locale/language-code/LC_MESSAGES/django.po
Typically you will want to build message files for just your project. To do so, create a locale directory in the root of your project in which to store the message files. The message-make.py utility stores the message files in the following location in the project directory. However, it does not create the locale directory if it doesn’t exist:
locale/language-code/LC_MESSAGES/django.po
The message-make.py utility then searches through the .py and .html files in your project and builds the message files.
You can also build message files for only one application by creating a locale directory in the application directory and then running the messages-make.py application from the application directory.
The django.po files store localized messages using the following entries for each string:
#:specifies the relative path and line numbers to the source file(s) containing the localized string.msgidspecifies the translation string as it appears in the source. You should not change this value. Django uses it to identify the string.msgstrspecifies the translated string to use for this language. It starts out empty, and you insert the translated string.
Initially the translated strings are blank. You need to add translated strings to each message file you create. To do so, open the django.po file in an editor, and add the strings.
After your have added the translated strings to the message files, you need to compile the message files into a binary file that can be consumed by gettext. Django provides the django/bin/compile-messages.py utility to compile the message files. The compile-messages.py file parses the django.po files and creates django.mo language files.
The compile-messages.py file must be run from the same location that the make-messages.py utility was run. After you have compiled the message file, you are ready to implement languages in your project.
Languages can be set at either the site level or session level. The best way to understand how language preferences work is to understand how Django determines the language preference.
Django looks in the following four places to find the language preference:
First, Django looks for the
django_languagekey in the current user’s session.If Django cannot find the
django_languagekey, it looks for a cookie calleddjango_languagein the request.If Django cannot find the
django_languagecookie, it looks at theHTTP_ACCEPT_LANGUAGEheader in the request. The browser sends this header to tell the server which language(s) the user prefers, ordered by priority. Django tries each setting in the list until it finds one that is supported.If Django cannot find a language in the header, it uses the
LANGUAGE_CODEsetting in thesettings.pyfile.
To set the language at the site level, all you need to do is add the LANGUAGE_CODE setting to the settings.py file. For example, to set the site language to Spanish, you would use the following setting:
LANGUAGE_CODE = 'es'
If you want to set the language on a per-user basis, you must enable the django.middleware.locale.LocaleMiddleware framework. The LocaleMiddleware framework provides access to the language settings in the session, cookies, and HTTP headers. To enable the LocaleMiddleware framework, add the following entry to the MIDDLEWARE_CLASSES setting in the settings.py file:
'django.middleware.locale.LocaleMiddleware',
Watch Out!
The LocaleMiddleware framework needs to be installed after SessionMiddleware, but before any other django.middleware frameworks.
After the LocaleMiddleware framework is enabled, your view functions and templates try to determine the language settings for each user in the session, cookies, and HTTP headers.
You can allow the user’s browser to specify the preferred language, or you can set the language in the user’s session. The language can be set for the user either in the session or by setting a cookie in the user’s browser.
The best place to set the language is in the session, because that is the first place the LocaleMiddleware framework looks. For example, the following code sets the language for the session to English. As long as the session is active, the language is English:
def myView(request):
    request.session['django_language'] = 'en'
Set Language Preference in a Session
In this section, you will enable the LocaleMiddleware framework. Then you will modify the login_user() function to allow the user to set his or her preferred language. You will modify the LoginForm to add a language choice field that you can use to set the django_language key in the user’s session. Follow these steps to make the changes:
Stop the development server.
Open the
iFriends/settings.pyfile in an editor.Add the following setting to set the default language for the site to English:
LANGUAGE_CODE = 'en-us'
Add the following entry to the
MIDDLEWARE_CLASSESsetting to enable theLocaleMiddlewareframework:'django.middleware.locale.LocaleMiddleware',
Save the
iFriends/settings.pyfile.Open the
iFriends/Home/views.pyfile in an editor.Add the following line of code, shown in Listing 20.2, to define the
siteLanguagestuple that contains language names and codes:siteLanguages = (('en', 'English'), ('de', 'German' ))Add the following
ChoiceField, shown in Listing 20.2, to add a list of languages to theLoginForm:Language = forms.ChoiceField(choices=siteLanguages)
Add the following line of code, shown in Listing 20.2, to set the
django_languagekey in the user’s session:request.session['django_language'] = request.POST['Language']
Save the
iFriends/Home/views.pyfile.Start the development server.
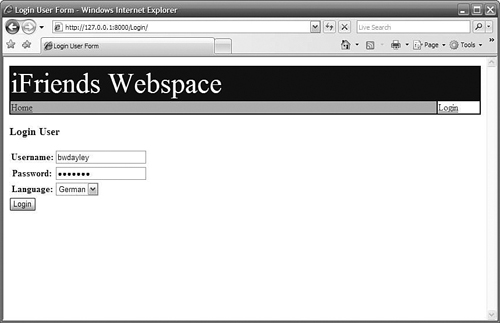
Access the following URL in a web browser to access the login page, shown in Figure 20.1:
http://127.0.0.1:8000/Login/
The message should be in English, because the language hasn’t been set for the session.
Enter a valid username and password, and select German from the Language drop-down menu.
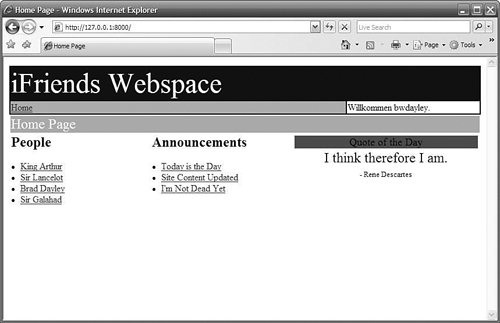
Click the Login button. You should be redirected to a home page similar to the one shown in Figure 20.2. The welcome message in the upper-right corner should be in German.
Access the following URL again in a web browser to go to the login page:
http://127.0.0.1:8000/Login/
As shown in Figure 20.3, the message should now be in German.
Enter a valid username and password. This time, select English from the Language drop-down menu.
Click the Login button. You should be redirected to a home page similar to the one shown in Figure 20.4. The welcome message should be in English.


Example 20.2. The LoginForm and login_user() View Function Definitions in the iFriends/Home/views.py File
siteLanguages = (('en', 'English'), ('de', 'German' ))
class LoginForm(forms.Form):
        username = forms.CharField(max_length=30)
        password = forms.CharField(max_length=20, widget=forms
.PasswordInput())
        Language = forms.ChoiceField(choices=siteLanguages)

def login_user(request, next='/'):
    message = gettext('Login User')
    lForm = LoginForm()

    if request.method == 'GET':
        request.session.set_test_cookie()

    if request.method == 'POST':
        if request.session.test_cookie_worked():
            request.session.delete_test_cookie()

            if request.GET.has_key('next'):
                next = request.GET['next']
            if request.POST['submit'] == 'Login':
                postDict = request.POST.copy()
                lForm = LoginForm(postDict)
                if lForm.is_valid():
                    uName = request.POST['username']
                    uPass = request.POST['password']
                    user = authenticate(username=uName,
 password=uPass)
                    if user is not None:
                        if user.is_active:
                            login(request, user)
                            request.session['django_language'] =
                            request.POST['Language']
                            return HttpResponseRedirect(next)
                        else:
                            message = 'Account Deactivated'
                    else:
                        message = 'Login Incorrect'
        else:
            message = "Please enable cookies and try again."

    return render_to_response('registration/login.html',{
                'lForm': lForm,
                'message': message})
.PasswordInput())
Language = forms.ChoiceField(choices=siteLanguages)
def login_user(request, next='/'):
message = gettext('Login User')
lForm = LoginForm()
if request.method == 'GET':
request.session.set_test_cookie()
if request.method == 'POST':
if request.session.test_cookie_worked():
request.session.delete_test_cookie()
if request.GET.has_key('next'):
next = request.GET['next']
if request.POST['submit'] == 'Login':
postDict = request.POST.copy()
lForm = LoginForm(postDict)
if lForm.is_valid():
uName = request.POST['username']
uPass = request.POST['password']
user = authenticate(username=uName,
password=uPass)
if user is not None:
if user.is_active:
login(request, user)
request.session['django_language'] =
request.POST['Language']
return HttpResponseRedirect(next)
else:
message = 'Account Deactivated'
else:
message = 'Login Incorrect'
else:
message = "Please enable cookies and try again."
return render_to_response('registration/login.html',{
'lForm': lForm,
'message': message})
In this hour, we discussed the process of internationalizing your website by defining which strings should be localized, building message files that contain the translated strings, and setting preferred languages. You learned that strings can be localized in Python code as well as in template files. We also covered using LocaleMiddleware to allow different users to use separate languages.
The workshop consists of a set of questions and answers designed to solidify your understanding of the material covered in this hour. Try answering the questions before looking at the answers.