
How to add Group objects to the website and assign them to users
How to create custom permissions in the model
</objective> <objective>How to assign permissions to users and groups
</objective> </feature>So far in this book, we have neglected one of the most basic parts of most websites—registration and authentication. Django includes several components that aid in registration and authentication.
This hour discusses getting started with the registration and authentication process. We will cover creating User and Group objects as well as adding custom permissions to your models. We will also discuss setting permissions that allow you to control access to parts of the website.
By the Way
Django currently provides a whole series of manipulator objects and built-in views to handle user creation, logins, logouts, password changes, and so on. Those manipulators are currently based on the old form framework, so I avoid using them. The examples that I will discuss cover creating your own Forms using the newforms library. I also will show you how to customize the registration and login process.
The first step in adding registration and authentication to the website is to implement some kind of User object so that you can determine who is trying to access the site. Hour 3, “Adding Models and Objects to Your Website,” introduced the admin interface and showed you how to use it to create User objects. Django implements User objects in the admin interface to control access. User objects can also be accessed from your views as part of registration, authentication, and permission control.
The following sections discuss User objects and how to create them from a view function.
Django User objects give you a way to control access to your website by providing a means to force requests to come from authenticated sources. Implementing User objects also allows you to define permissions to specific areas of the website.
The following list describes the fields of a User object:
usernameis required. It accepts up to 30 alphanumeric and underscore characters.first_nameis optional. It accepts up to 30 characters.last_nameis optional. It accepts up to 30 characters.emailis optional. It accepts a valid email address.passwordis required. The password is actually stored as a hash that describes the raw password.is_staffis Boolean. It defaults toFalse. It specifies whether the user can access the admin site.is_activeis Boolean. It defaults toTrue. It specifies whether the user can log into the website.is_superuseris Boolean. It defaults toFalse. It specifies whether the user has all permissions to the admin site.last_loginis adatetimeobject containing the time when the user last logged in.date_joinedis adatetimeobject containing the time when theUserobject was created.groupsis amany-to-manyfield that listsGroupobjects that theUserbelongs to.user_permissionsis amany-to-manyfield that lists permissions assigned to theUser.
Django implements a special User class to handle anonymous requests. If a request comes from a user who is not currently logged in, the user attribute of the HttpRequest object is a django.contrib.auth.model.AnonymousUser object. The AnonymousUser object is like a normal User object, with the following exceptions:
idis alwaysNone.is_staffis alwaysFalse.is_superuseris alwaysFalse.is_activeis alwaysTrue.groupsanduser_permissionsare always empty.is_anonymous()returnsTrueinstead ofFalse.has_perm()always returnsFalse.The
set_password(),check_password(),save(),delete(),set_groups(), andset_permission()functions raise aNotImplementedError.
The admin interface is an excellent way to create objects. However, you will likely want to automate the creation of User objects by providing a web page that allows people to register with your website. When new users register, they will be able to create their own User objects and immediately access the website using their new account.
You can create User objects from the view function by calling the User.objects create_user(username, email, password=None) function and passing it username, email, and password as arguments.
For example, the following code creates a new User object for a user named Tim:
from django.contrib.auth.models import User
user = User.objects.create_user('Tim', '[email protected]', 'timspass')
Watch Out!
Not specifying a password when using the create_user() function is not the same as entering a blank string for the password. An unuseable password is added, and the User object function has_useable_password() returns True. This feature can actually be useful if you are importing User objects from some other source using an automated method and you do not want to give them all the same generic password.
You can change user passwords in the Django admin interface. However, you may also want to allow users to change their own passwords. To do so, you can create a view that renders a password change form similar to that of a login form. Then, inside the view, use the User.set_password() function on the User object of the request to change the password of the currently logged-in user.
The following code snippet shows the POST handler from a password change view function that sets the password of the current User object:
if request.method == 'POST':
    if request.POST['submit'] == 'Change Password':
        newPass = request.POST['password']
        request.user.set_password(newPass)
        request.user.save()
        return HttpResponseRedirect('/home')
Add a User Object from a View Function
This section looks at a practical example of adding a User object to the iFriends website using a custom view. The Person objects are tied to the User objects, so you need to create them at the same time.
You will create a new form template and view function that will allow you to prompt the user for information to use when creating a new User object. You will use the information to create a new Person object and redirect the user to the details page for that object.
Follow these steps to create and enable the new user creation view:
Create and open a file called
iFriends/templates/registration/create_user.htmlin an editor.Add the code shown in Listing 14.1 to the file to extend the site base template and display a form that will be used to create a new user.
Save the
iFriends/templates/registration/create_user.htmlfile.Open the
iFriends/Home/views.pyfile in an editor.Add the following lines of code, shown in Listing 14.2, to import the
UserandHttpResponseRedirectobjects:from django.http import HttpResponseRedirect from django.contrib.auth.models import User
Add the following lines of code, shown in Listing 14.2, to define a
NewUserFormclass that you will display in thecreate_user.htmltemplate file to collect the information you will need to create theUserandPersonobjects. Thepasswordfield is set to thePasswordInputWidget so that the password is not displayed in the form:gender_list = (('M', 'Male'), ('F', 'Female' )) class NewUserForm(forms.Form): username = forms.CharField(max_length=30) password = forms.CharField(max_length=20, widget=forms.PasswordInput()) first = forms.CharField(max_length=20) last = forms.CharField(max_length=20) gender = forms.ChoiceField(choices=gender_list) email = forms.EmailField(max_length=30)Add the following lines of code, shown in Listing 14.2, to define a
create_user()view function that creates an instance of theNewUserFormand renders it using thecreate_user.htmltemplate:def create_user(request): message = 'Create New User' uForm = NewUserForm() . . . return render_to_response('registration/create_user.html',{ 'uForm': uForm, 'message': message })Add the following lines of code to the
create_user()view, shown in Listing 14.2, to handle aPOSTrequest from the form’s Create button. This generates an instance of theNewUserFormfrom thePOSTdata:if request.method == 'POST': if request.POST['submit'] == 'Create': postDict = request.POST.copy() uForm = NewUserForm(postDict)Add the following lines of code to the
create_user()view, shown in Listing 14.2, to create a newUserobject from the data in thePOSTrequest:user = User.objects.create_user( postDict['username'], postDict['email'], 'password') user.last_name = postDict['last'] user.first_name = postDict['first'] user.save()Add the following lines of code to the
create_user()view, shown in Listing 14.2, to create an instance of aPersonform using the name, gender, and email from thePOSTand theUserobject that was created in step 9. ThefavoriteURLanddescFields need to be filled in with some initial values because they are required in thePersonmodel:perDict = {} perDict['name'] = "%s %s" % (postDict['first'], postDict['last']) perDict['email'] = postDict['email'] perDict['gender'] = postDict['gender'] perDict['favoriteURL'] = 'http://www.iFriends.org' perDict['desc'] = 'New User' perDict['userID'] = user.id SaveForm = forms.form_for_model(Person) pForm = SaveForm(perDict)Add the following lines of code to the
create_user()view, shown in Listing 14.2, to validate the People form. If an error occurs, delete theUserobject and set the error message:if pForm.is_valid(): . . . else: message = 'Form Data Error' user.delete()Add the following lines of code to the
create_user()view, shown in Listing 14.2, to save the People form. If an error occurs, delete theUserobject and set a database error message:try: p = pForm.save() return HttpResponseRedirect('/People/Info/%d/' % p.id) except: message = 'Database Error.' user.delete()Save the
iFriends/Home/views.pyfile.Open
iFriends/urls.pyin an editor.Add the following line of code to enable the
create_user()view:(r'^NewUser/$', 'iFriends.Home.views.create_user'),
Access the following URL in a web browser to verify that the
create_user()view, shown in Figure 14.1, correctly displays the creation form:http://127.0.0.1:8000/NewUser/
Add valid data to the form, and click the Create button to create the new
UserandPersonobjects. APerson details()view similar to the one shown in Figure 14.2 should be displayed for the newPersonobject.Verify that the new
Userobject was created in the admin site by accessing the following URL. Click the newUserobject you created to bring up theUserobject admin page, shown in Figure 14.3:http://127.0.0.1:8000/admin/auth/user/


Example 14.1. Full Contents of iFriends/templates/registration/create_user.html
{% extends "iFriends_base.html" %}
{% block title %}Create User Form{% endblock %}
{% block content %}
<h3>{{ message }}</h3>
<form method="post" action=".">
<table>
{{ uForm }}
</table>
<input type="submit" name="submit" value="Create" />
</form>
{% endblock %}
Example 14.2. Full Contents of iFriends/Home/views.py
from django.shortcuts import render_to_response, get_object_or_404
from django.http import HttpResponseRedirect
from datetime import datetime
from django import newforms as forms
from iFriends.People.models import Person, Blog
from iFriends.Quotes.models import Quote
from django.contrib.auth.models import User
class EmailForm(forms.Form):
title = forms.CharField(max_length=50,
widget=forms.TextInput
 (attrs={'size':'50'}))
sender = forms.EmailField(max_length=30,
widget=forms.TextInput
(attrs={'size':'30'}))
date = forms.DateTimeField()
text = forms.CharField(widget=forms.Textarea(
attrs={'rows':'6','cols':'75'}))
gender_list = (('M', 'Male'), ('F', 'Female' ))
class NewUserForm(forms.Form):
        username = forms.CharField(max_length=30)
        password = forms.CharField(max_length=20,
                                   widget=forms.PasswordInput())
        first = forms.CharField(max_length=20)
        last = forms.CharField(max_length=20)
        gender = forms.ChoiceField(choices=gender_list)
        email = forms.EmailField(max_length=30)
def contact_view(request):
eForm = EmailForm()
return render_to_response('home/contact_form.html', { 'eForm'
:eForm })
def home_view(request):
quotes = Quote.objects.all()
pList = Person.objects.all()
bList = Blog.objects.all()
return render_to_response('home/homepage.html', {
'quotes': quotes,
'pList': pList,
'bList': bList})
def create_user(request):
message = 'Create New User'
uForm = NewUserForm()
if request.method == 'POST':
    if request.POST['submit'] == 'Create':
        postDict = request.POST.copy()
        uForm = NewUserForm(postDict)
try:
#create User object
user = User.objects.create_user(postDict['username'],
postDict['email'],
postDict['password'])
user.last_name = postDict['last']
user.first_name = postDict['first']
user.save()
#Create a Person object
perDict = {}
perDict['name'] = "%s %s" % (postDict['first'], postDict['last'])
perDict['email'] = postDict['email']
perDict['gender'] = postDict['gender']
perDict['favoriteURL'] = 'http://www.iFriends.org'
perDict['desc'] = 'New User'
perDict['userID'] = user.id
SaveForm = forms.form_for_model(Person)
pForm = SaveForm(perDict)
if pForm.is_valid():
try:
p = pForm.save()
return HttpResponseRedirect('/People/Info
/%d/' % p.id)
except:
message = 'Database Error.'
user.delete()
else:
message = 'Form Data Error'
user.delete()
except:
message = 'User creation Error'
return render_to_response('registration/create_user.html',{
'uForm': uForm,
'message': message })
(attrs={'size':'50'}))
sender = forms.EmailField(max_length=30,
widget=forms.TextInput
(attrs={'size':'30'}))
date = forms.DateTimeField()
text = forms.CharField(widget=forms.Textarea(
attrs={'rows':'6','cols':'75'}))
gender_list = (('M', 'Male'), ('F', 'Female' ))
class NewUserForm(forms.Form):
username = forms.CharField(max_length=30)
password = forms.CharField(max_length=20,
widget=forms.PasswordInput())
first = forms.CharField(max_length=20)
last = forms.CharField(max_length=20)
gender = forms.ChoiceField(choices=gender_list)
email = forms.EmailField(max_length=30)
def contact_view(request):
eForm = EmailForm()
return render_to_response('home/contact_form.html', { 'eForm'
:eForm })
def home_view(request):
quotes = Quote.objects.all()
pList = Person.objects.all()
bList = Blog.objects.all()
return render_to_response('home/homepage.html', {
'quotes': quotes,
'pList': pList,
'bList': bList})
def create_user(request):
message = 'Create New User'
uForm = NewUserForm()
if request.method == 'POST':
if request.POST['submit'] == 'Create':
postDict = request.POST.copy()
uForm = NewUserForm(postDict)
try:
#create User object
user = User.objects.create_user(postDict['username'],
postDict['email'],
postDict['password'])
user.last_name = postDict['last']
user.first_name = postDict['first']
user.save()
#Create a Person object
perDict = {}
perDict['name'] = "%s %s" % (postDict['first'],
postDict['last'])
perDict['email'] = postDict['email']
perDict['gender'] = postDict['gender']
perDict['favoriteURL'] = 'http://www.iFriends.org'
perDict['desc'] = 'New User'
perDict['userID'] = user.id
SaveForm = forms.form_for_model(Person)
pForm = SaveForm(perDict)
if pForm.is_valid():
try:
p = pForm.save()
return HttpResponseRedirect('/People/Info
/%d/' % p.id)
except:
message = 'Database Error.'
user.delete()
else:
message = 'Form Data Error'
user.delete()
except:
message = 'User creation Error'
return render_to_response('registration/create_user.html',{
'uForm': uForm,
'message': message })
Django provides a django.contrib.auth.models.Group object that can be added to the groups field of a User object. The Group object has two fields—name and permissions. When you set the permissions attribute of the Group object, the permissions flow to each User who is a member of the group.
You can create a Group object using the following code:
from django.contrib.auth.models import Group
newGroup = Group()
newGroup.name = 'New Group'
newGroup.save()
Group objects can be added to and removed from a User object using the add(), remove(), and clear() functions. The add() and remove() functions accept one or more groups and then either add them to or remove them from the User object. The clear() function removes all the groups from the User object. The following code shows an example of the add(), remove(), and clear() functions:
user.groups.add(groupA, groupB)
user.groups.remove(groupC, groupD)
user.groups.clear()
Group objects can also be assigned to User objects in the admin interface. The User object details page lists groups that exist in the site. If you select groups in the groups list, the Group objects are added to the User.
The Group objects that belong to a user can be accessed through the groups attribute of the User object, as shown in the following line of code:
userGroups = user.groups
Group objects are the best way to assign permissions to several users at the same time. They are also a great way to collect users under a single label.
Create a Group and Assign Users to It
In this section, you will create a new Group called iFriends and modify the create_user() view function to automatically assign new users who are created to that group. This allows you to quickly assign permissions to all users who register with the site.
Access the Django admin interface using the following URL:
http://127.0.0.1:8000/admin/
Click the Groups link to bring up the group list, as shown in Figure 14.4.
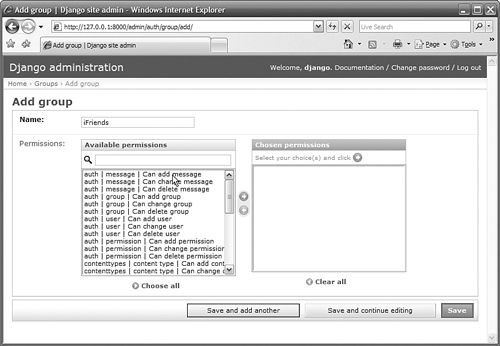
Click the Add group link, shown in Figure 14.4, to bring up the Add group window, shown in Figure 14.5.
Enter the name iFriends into the Name field, and click the Save button. The iFriends group should now appear in the group list.
Open the
iFriends/Home/views.pyfile in an editor.Modify the following
importstatement to include theGroupobject:from django.contrib.auth.models import User, Group
Add the following line of code before
user.save(), shown in Listing 14.2, to add theiFriends Groupobject to theUserobject before saving it:user.groups.add(Group.objects.get(name='iFriends')) user.save()
Save the
iFriends/Home/views.pyfile.Create a new
User, using the following URL, as discussed in the preceding “Try It Yourself” section:http://127.0.0.1:8000/NewUser/
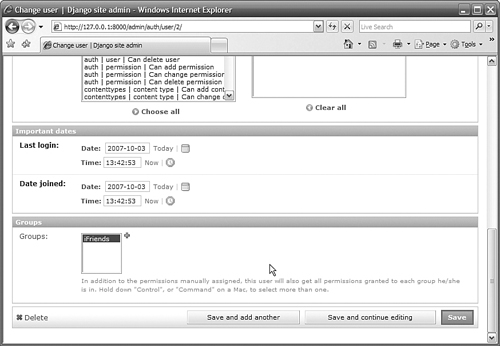
Access the
Userdetails in the admin interface, as discussed in the preceding section, and verify that the iFriends group is selected in the Groups list for theUserobject, as shown in Figure 14.6.

In Django, permissions are basically just a way to set flags for users and groups that either allow or inhibit them from performing certain actions. Permissions are created at the model object level and can be assigned to either a User or Group object.
Did you Know?
Permissions are set globally per object type. You cannot create permission to control a specific instance of the object. For example, you cannot add a permission that would apply only to objects that a specific user creates.
You will work with two different types of permissions. The first type is basic permissions that get assigned to objects automatically. The second type is custom permissions that you create yourself. The following sections discuss the different types of permissions.
Three types of basic permissions are automatically added to each model. The create, add, and delete permissions are added to the auth_permission table in the database for each model. These permissions limit access to the add, change, and delete forms for the model in the admin interface.
You create custom permissions in the model by adding them to the permissions attribute of the Meta class. To assign permissions, add them as a two-element list. The first element is the permission identifier, and the second is a textual name for the permission.
For example, the following code adds the custom permissions can_read and can_write to the Student model:
class Student(models.Model):
    . . .
    class Meta:
        permissions = (
            ('can_read', 'Reads Well'),
            ('can_write', 'Writes Well'),
        )
You can add permissions to User and Group objects in one of two ways—by using Python code in your views or by using the admin interface.
Permissions objects can also be assigned to User or Group objects in the admin interface. The User and Group object details page lists available user permissions that exist in the site. If you add permissions in the available permissions list to the chosen permissions list, the permissions are available to the user or group.
You can add or remove permissions to and from a User or Group object using the add(), remove(), and clear() functions. The add() and remove() functions accept one or more permissions and then either add them to or remove them from the User or Group object. The clear() function removes all permissions from the User object.
The following code shows an example of the add(), remove(), and clear() functions on a User object:
userOBJ.user_permissions.add(permissionA, permissionB)
userOBJ.user_permissions.remove(permissionC, permissionD)
userOBJ.user_permissions.clear()
The following code shows an example of the add(), remove(), and clear() functions on a Group object:
groupOBJ.permissions.add(permissionA, permissionB)
groupOBJ.permissions.remove(permissionC, permissionD)
groupOBJ.permissions.clear()
Create and Set Custom Permissions
In this section, you will add a custom permission, can_blog, to the Blog model that will control access to creating blog entries. Then you will assign the can_blog permission to the iFriends group.
Stop the development server.
Open the
iFriends/People/models.pyfile in an editor.Add the following class definition to the
Blogmodel, shown in Listing 14.3, to add theMetaclass and create thecan_blogpermission in the model:class Meta: permissions = ( ('can_blog', 'Allowed to Blog'), )Save the
iFriends/People/models.pyfile.From the root directory of the iFriends project, use the following command to synchronize the new permission to the database:
python manage.py syncdb
Start the development server.
Access
iFriends Groupobject detail page, shown in Figure 14.7, in the admin interface.Scroll through the list of user permissions until you find the
People | blog | Allowed to Blogpermission, and select it.Click the right arrow button to add the
Allowed to Blogpermission to the Chosen permissions list.Click the Save button to update the iFriends group.

Example 14.3. Blog Model Definition in the iFriends/People/models.py File
class Blog(models.Model):
title = models.CharField('Title', max_length=200)
text = models.TextField('Text', max_length=2048)
date = models.DateTimeField('Last Modified')
def __str__(self):
return '%s' % (self.title)
class Admin:
pass
class Meta:
    permissions = (
        ('can_blog', 'Allowed to Blog'),
    )
In this hour, we discussed User objects and how to create them using custom forms in a view. We also discussed how to create Group objects. You can assign Group objects to User objects either from the admin interface or from your views. As soon as you have User and Group objects in place, you can add custom permissions to your models and assign them to User and Group objects.
The workshop consists of a set of questions and answers designed to solidify your understanding of the material covered in this hour. Try answering the questions before looking at the answers.