
Hour 12. Handling Events
An event is basically a trigger that happens either by user interaction or by a process that is being run. As a developer, you can tie into an event to enable custom scripts to run, or to change the default behavior of an action or process. During this hour, we look at some of the different ways that you can use an event to extend your site when using jQuery Mobile.
Events for Page Initialization
When pages are initialized they go through three stages:
• Before page creation
• Page creation
• Page initialization
These stages all have an event that can be used to help you dynamically insert or manipulate code.
Let’s start at the first event you can use during the page initialization process.
Using the pagebeforecreate Event
The pagebeforecreate event is used when you have content that you want modified before jQuery Mobile has had a chance to lock in and write the data-roles and attributes of page elements to the DOM. Listing 12.1 shows the content of pagebeforecreate.html, which is a file that contains a list that will be modified during the pagebeforecreate event.
Listing 12.1 Using pagebeforecreate to Dynamically Add an Attribute
1: <!DOCTYPE html>
2: <html>
3: <head>
4: <title>Developing with jQuery Mobile</title>
5: <meta name="viewport" content="width=device-width, initial-scale=1">
6: <link rel="stylesheet" href="http://code.jquery.com/mobile/1.1.0/jquery.mobile-1.1.0.min.css" />
7: <script src="http://code.jquery.com/jquery-1.7.1.min.js"></script>
8: <script>
9: $(document).on('pagebeforecreate', function(event) {
10: $(".modify").attr('data-inset','true'),
11: });
12: </script>
13: <script src="http://code.jquery.com/mobile/1.1.0/jquery.mobile-1.1.0.min.js"></script>
14: </head>
15: <body>
16: <div data-role="page" id="home">
17: <div data-role="header"><h1>pagebeforecreate event</h1></div>
18: <div data-role="content">
19: <p>The following list will be inset during the pagebeforecreate event</p>
20: <ul class="modify" data-role="listview">
21: <li>A</li>
22: <li>B</li>
23: <li>C</li>
24: </ul>
25: </div>
26: </div>
27: </body>
28: </html>
The file starts out as a standard HTML file that uses jQuery Mobile, but on line 8 we see the start of a script element. Line 9 contains some jQuery code that is used to bind the pagebeforecreate event to the document. This is done by using the .on() function that is available when using jQuery 1.7+. Line 10 shows that when the pagebeforecreate event runs it searches for any elements that have an attribute of class="modify" and applies an attribute of data-inset="true" to any that are found by using the .attr() function. Line 11 ends the .on() function, and line 12 closes the script element.
Because the pagebeforecreate event runs before the page code is added to the DOM, jQuery Mobile sees the data-inset="true" attribute and styles it as an inset list. Figure 12.1 shows what the page looks like when loaded on a mobile browser.
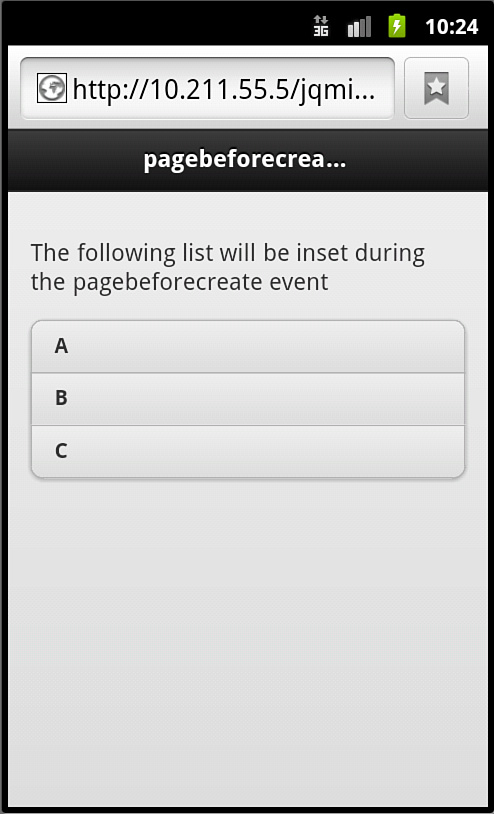
Figure 12.1 The list has been changed to an inset list during the beforepageload event.
If you want to see the list without the changes made on the beforepageload event, remove lines 8-12 and reload the page. The list will then be created as a standard list.
Let’s move on to the next stage in the page initialization stage, page creation.
Using the pagecreate Event
The pagecreate event can be used either to apply your own widgets or to use the built-in widget or plug-in controls that jQuery Mobile provides. Listing 12.2 shows the contents of pagecreate.html. This file uses the pagecreate event to apply the listview plug-in to style a list on the page.
Listing 12.2 Using the pagecreate Event in Conjunction with the listview Plug-In
1: <!DOCTYPE html>
2: <html>
3: <head>
4: <title>Developing with jQuery Mobile</title>
5: <meta name="viewport" content="width=device-width, initial-scale=1">
6: <link rel="stylesheet" href="http://code.jquery.com/mobile/1.1.0/jquery.mobile-1.1.0.min.css" />
7: <script src="http://code.jquery.com/jquery-1.7.1.min.js"></script>
8: <script>
9: $(document).on('pagecreate', function(event) {
10: $(".modify").attr('data-inset','true').listview();
11: });
12: </script>
13: <script src="http://code.jquery.com/mobile/1.1.0/jquery.mobile-1.1.0.min.js"></script>
14: </head>
15: <body>
16: <div data-role="page" id="home">
17: <div data-role="header"><h1>pagecreate event</h1></div>
18: <div data-role="content">
19: <p>The following list will be styled during the pagecreate event</p>
20: <ul class="modify">
21: <li>A</li>
22: <li>B</li>
23: <li>C</li>
24: </ul>
25: </div>
26: </div>
27: </body>
28: </html>
The code starts out as a standard page using jQuery Mobile, and on line 9 you can see that the .on() function is using the pagecreate event to run the code on line 10. The code on line 10 shows a selector that finds any element on the page that has a class="modify" attribute and then adds an attribute of data-inset="true". After that has been done you can see that a function called listview() is being run. This function is known as the listview plug-in and is used to apply the styles and markup for a list. Line 11 then closes the .on() function, which is the binding to the pagecreate event.
Looking down at line 20 we can see a ul element that contains only an attribute of class="modify". The data-role="listview" attribute is not present, and neither is the data-inset="true" attribute. Figure 12.2 shows that even with the missing attributes, the script that runs during the pagecreate event will apply the necessary styles to make the ul element an inset list.
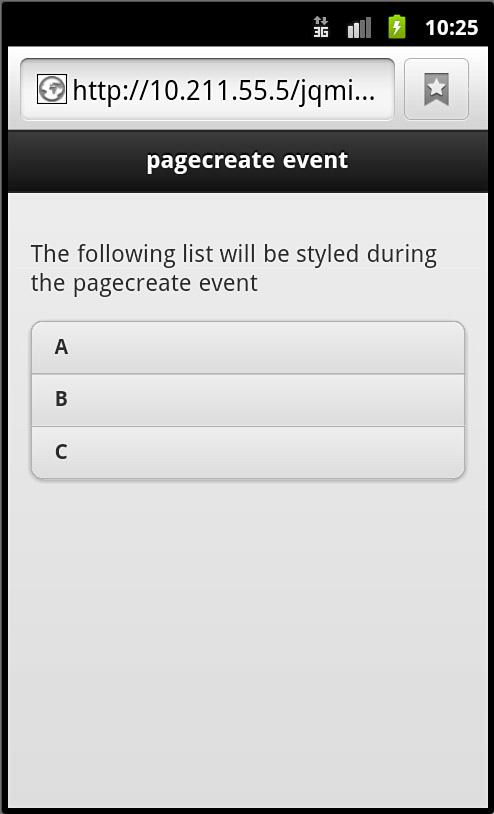
Figure 12.2 You may use widgets or plug-ins, such as the listview plug-in, during the pagecreate event.
It is important to note that the listview plug-in cannot be called during the pagebeforecreate event. It must be called after you have applied any data attributes or classes that you want parsed. If you call a widget or plug-in before you call the .attr() function or similar functions, the widget or plug-in will not parse the additional data and it will be skipped.
The next event during page initialization is pageinit.
Using the pageinit Event
The pageinit event is best described and used as you would use the $(document).ready() function of jQuery. This event is triggered after the DOM has been loaded and all widgets and plug-ins have been run. This event also is triggered whenever a page is loaded either directly or through the AJAX call of another page. This event is triggered only once when included in the DOM. Listing 12.3 shows the contents of pageinit.html, which gives an example of the pageinit event in action.
Listing 12.3 Using pageinit When Loading the Second Page
1: <!DOCTYPE html>
2: <html>
3: <head>
4: <title>Developing with jQuery Mobile</title>
5: <meta name="viewport" content="width=device-width, initial-scale=1">
6: <link rel="stylesheet" href="http://code.jquery.com/mobile/1.1.0/jquery.mobile-1.1.0.min.css" />
7: <script src="http://code.jquery.com/jquery-1.7.1.min.js"></script>
8: <script>
9: $(document).on('pageinit','#away' function(event) {
10: alert("The pageinit event has been run");
11: });
12: </script>
13: <script src="http://code.jquery.com/mobile/1.1.0/jquery.mobile-1.1.0.min.js"></script>
14: </head>
15: <body>
16: <div data-role="page" id="home">
17: <div data-role="header"><h1>pageinit event</h1></div>
18: <div data-role="content">
19: <p>I am the #home page</p>
20: <a href="#away" data-role="button">Go Away</a>
21: </div>
22: </div>
23: <div data-role="page" id="away">
24: <div data-role="header"><h1>pageinit event</h1></div>
25: <div data-role="content">
26: <p>
27: I am the #away page. The pageinit event runs on first page load.
28: </p>
29: <a href="#home" data-role="button">Go Back</a>
30: </div>
31: </div>
32: </body>
33: </html>
The initial page setup should be familiar by now. Starting at line 8 you can see the same method is employed to bind the pageinit event as was used to bind the pagebeforecreate and pagecreate events. The difference of course is on lines 9 and 10 where a selector for an element with an id="away" is used in the .on() function to bind an alert() function that will only run on the page with that selector when it is first loaded into the DOM.
Continuing down the code you can see that a page has been set up with a div element using the data-role="page" attribute on line 16. The page continues down to line 22. Another page has been set up on line 23 and continues down to line 31. Each of these pages has been given an id, and a button that uses the id to link to and load the other page.
When the button is clicked on the first page for the first time, the pageinit event will fire and launch the alert() function from line 10. When you use the button to go back to the first page and then click to return to the second, the event will not be triggered a second time. This is because it is still part of the DOM and has already been run. However, if you manually reload the second page, the pageinit event will also be triggered as soon as the page is loaded. The event will then not be triggered again until another manual page refresh.
Figure 12.3 is a screenshot of the alert() function running in a mobile browser when triggered for the first time during the pageinit event. Remember that when using the alert function, the way the alert is displayed is determined by the browser. If your alert message doesn’t look exactly like the one in Figure 12.3, it doesn’t necessarily mean that anything is broken, just that you are using a different browser or device.
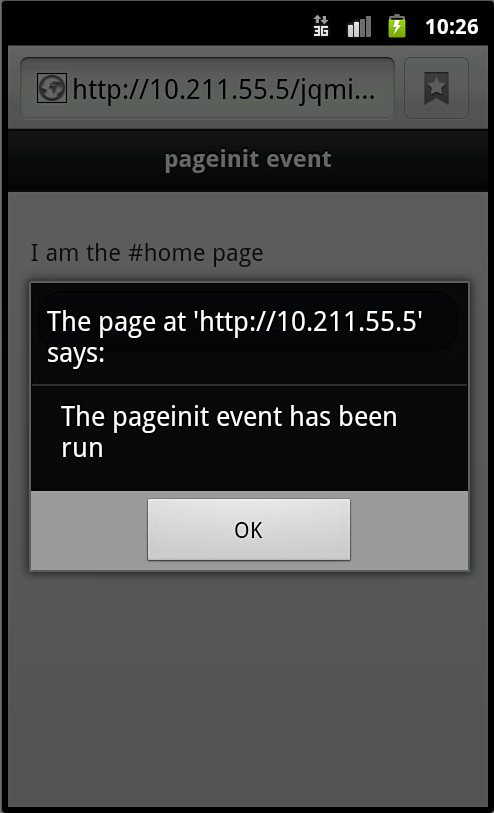
Figure 12.3 As seen on the stock browser of Android 2.3, the alert() function runs only once during the pagecreate event.
Brushing Up on Touch Events
Whenever users interact by touch with your site they are triggering touch events. You can tap (pardon the pun) into these events to run custom functions.
Using Tap Events
The main difference between a click and touchstart event is about 300ms. While that may not seem like a lot of time, an almost 1/3 of a second delay can make your mobile site or application feel slow and unresponsive. While the tap event is used by default on links, lists, and similar jQuery Mobile plug-ins and widgets, you can use the tap event to trigger custom functions on different elements on your page.
You can also use the taphold event on your pages. This event waits for almost an entire second before it is triggered. Listing 12.4 shows the contents of tap_events.html where both a tap and taphold event are being used on an image.
Listing 12.4 Using the tap and taphold Events
1: <!DOCTYPE html>
2: <html>
3: <head>
4: <title>Developing with jQuery Mobile</title>
5: <meta name="viewport" content="width=device-width, initial-scale=1">
6: <link rel="stylesheet" href="http://code.jquery.com/mobile/1.1.0/jquery.mobile-1.1.0.min.css" />
7: <script src="http://code.jquery.com/jquery-1.7.1.min.js"></script>
8: <script>
9: $(document).on("pageinit", function(){
10: $("#home").on('tap', '#image', function(event, ui) {
11: var tapCaption = $(this).data("tap");
12: $("#caption").addClass("comment").html(tapCaption);
13: });
14: $("#home").on('taphold','#caption', function(event, ui) {
15: var $this = $(this);
16: var tapholdCaption = $this.data("appTaphold");
17: $this.html(tapholdCaption);
18: });
19: });
20: </script>
21: <script src="http://code.jquery.com/mobile/1.1.0/jquery.mobile-1.1.0.min.js"></script>
22: <style type="text/css">
23: img {max-width: 100%}
24: .comment {background: #FFF;border-radius: 5px; border: 2px solid #000;padding: 5px}
25: </style>
26: </head>
27: <body>
28: <div data-role="page" id="home">
29: <div data-role="header"><h1>Tap Events</h1></div>
30: <div data-role="content">
31: <p>Tap or tap-and-hold the image below.</p>
32: <img id="image" src="river.jpg" alt="An image of a river" data-tap="You tapped the picture, try tap-and-holding on this caption" />
33: <div id="caption" data-app-taphold="This picture was taken during a flood.">Caption</div>
34: </div>
35: </div>
36: </body>
37: </html>
The tap and taphold events must be bound in either the document.ready() function or inside the pageinit event. Since we already know that using the document.ready() function is not recommended for use with jQuery Mobile, line 9 shows that we are binding the pageinit event using the .on() function. Inside the function on line 10, you can see the .on() function attaching the tap event to an element with an attribute of id="image". Lines 11 and 12 show the code that will run when the tap event is triggered. Line 11 shows a variable being created containing the value of what has been placed in the data-tap attribute of the element containing an attribute of id="image". This is done by using the $(this) selector, which refers to the value of the original selector that is used on line 10. The function .data("tap") is used to check for an attribute of “data-tap”. Line 12 shows a selector being used to find the element that contains an attribute of id="caption". This element will then be given another attribute of class="comment", and will also have the contents changed to the value of the tapCaption variable. Line 13 closes the .on() function.
Line 14 shows the use the .on() function to bind the taphold event to the element with a property of id="caption". Those using jQuery Mobile 1.0 or lower should know that the .live() function is not compatible with the taphold event, and the .bind() function must be used instead.
If you haven’t played with jQuery very much, line 15 may look a little odd. Every time a selector is used, it takes up extra space in memory, and jQuery is forced to parse the entire DOM to find the element. To save on both speed and memory, the selector we are currently using is set to a variable that can be reused.
Line 16 shows another variable being set up that contains the content of the data-app-taphold attribute. In general, it is a wise idea to stay away from using more than one dash in your code; however I’ve left an example of how to select data from a custom data attribute if there is absolutely no other way around it. Remember that when using the .data() function, anything after the first dash will be merged in CamelCase with the words before it. This means that the value of data-app-taphold is referenced by passing appTaphold to the .data() function. For more information on the .data() function visit http://api.jquery.com/data/.
On line 17 we set the contents of the element with an attribute of id="caption" (that is what is stored in the $this variable) to the value of the tapholdCaption variable. Line 18 then closes our .on() function to the taphold event, and line 19 closes the .on() function to the pageinit event.
Continuing down to lines 22-25 you can see that a style element has been set up and contains the styles for keeping the image scalable for mobile devices, as well as the styles that will be used with elements containing class="comment".
Moving into the code that contains our mobile page you can see on line 32 that the img element has been given the id="image" attribute. This is what will have the tap event bound to it. Line 33 shows a div element containing an attribute of id="caption". This element will have the taphold event bound to it, and will also have the contents changed during both tap and taphold events.
Figure 12.4 shows the page rendered in a browser after the tap event has been triggered.
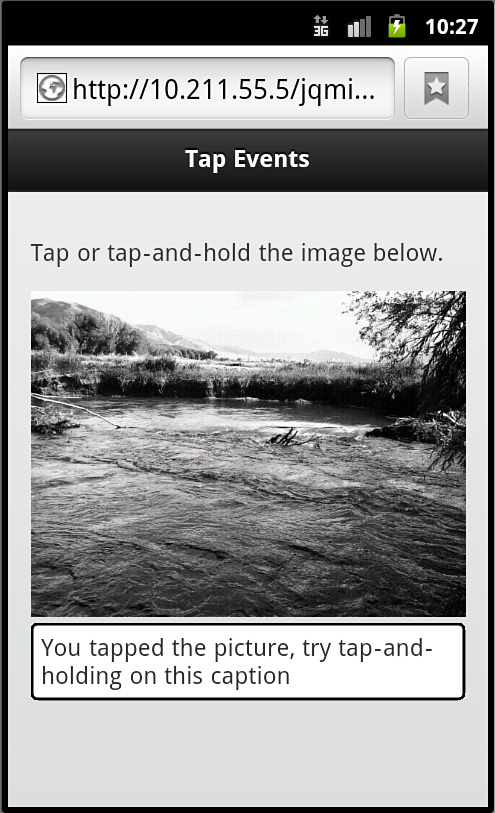
Figure 12.4 The tap event has been called changing the text and visual style of the caption.
Another series of events similar to tap events are swipe events. Let’s take a look at how to use them.
Using Swipe Events
Swiping at your mobile device is common when moving through image galleries, deleting email, bringing up contact information, and more. With jQuery Mobile you can tap into three swipe events: swipe, swipeleft, and swiperight. A swipe is similar to a click-and-drag action on a computer. For any of the swipe events to trigger, the touch must travel more than 30px horizontally and take less than 1 second to complete. It also may not move more than 20px vertically or the event trigger will be cancelled. Listing 12.5 shows the contents of the file swipe_events.html, which shows the use of the swipe, swipeleft, and the swiperight events.
Listing 12.5 Using the swipe, swipeleft, and swiperight Events
1: <!DOCTYPE html>
2: <html>
3: <head>
4: <title>Developing with jQuery Mobile</title>
5: <meta name="viewport" content="width=device-width, initial-scale=1">
6: <link rel="stylesheet" href="http://code.jquery.com/mobile/1.1.0/jquery.mobile-1.1.0.min.css" />
7: <script src="http://code.jquery.com/jquery-1.7.1.min.js"></script>
8: <script>
9: $(document).on('pageinit', function() {
10: $("#home").on('swipe','#swipe', function(event, ui) {
11: $("#caption").html("Swipe detected!");
12: });
13: $("#home").on('swipeleft','#swipe-box', function(event, ui) {
14: $("#caption").html("Swipe to the left detected!");
15: });
16: $("#home").on('swiperight','#swipe-box', function(event, ui) {
17: $("#caption").html("Swipe to the right detected!");
18: });
19: });
20: </script>
21: <script src="http://code.jquery.com/mobile/1.1.0/jquery.mobile-1.1.0.min.js"></script>
22: <style type="text/css">
23: #swipe-box {width: 200px;height: 200px;background: #FFF; border: 2px solid #000}
24: .comment {background: #FFF;border-radius: 5px;border: 2px solid #000; padding: 5px}
25: </style>
26: </head>
27: <body>
28: <div data-role="page" id="home">
29: <div data-role="header"><h1>Swipe Events</h1></div>
30: <div data-role="content">
31: <p id="swipe">Take a swipe this text or at the box below.</p>
32: <div id="swipe-box"></div>
33: <br />
34: <div id="caption" class="comment">Waiting for swipe...</div>
35: </div>
36: </div>
37: </body>
38: </html>
Starting at line 9 you can see that the pageinit event is being bound using the .on() function. On line 10 you can see the selector that finds the element on the page with id="swipe" as an attribute and then the binding of the swipe event to it. Line 11 shows what the swipe event will do when triggered. It finds the element with the id="caption" attribute and changes the text content of the element to "Swipe detected!".
Line 13 shows the swipeleft event being bound to an element with an attribute of id="swipe-box". Line 14 shows that when the swipeleft event is triggered, the element with an attribute of id="caption" will have its content changed to “Swipe to the left detected!”
Line 16 shows the swiperight event being bound to the same element that the swipeleft event was bound to. You can bind both of these events to the same element to trigger different functions based on user interaction. Line 17 shows that when the swiperight event is triggered, the content inside the element with the attribute of id="caption" will be changed to “Swipe to the right detected!”.
Note: Using swipe Versus swipeleft and swiperight
The swipe event works for swipes made in either direction; however, if the swipeleft and/or swiperight events are bound to the same object that the swipe event is, the swipe event will be overwritten and not run. Double-check your event bindings to make sure you are not overwriting your swipe events.
Lines 28-36 show the markup used to create the page. Line 31 shows the element that will have the swipe event bound to it. Line 32 shows the element that the swipeleft and swiperight events are bound to. Even though the element looks empty, it will be styled with CSS into a rather sizeable square that can be used for swiping. Figure 12.5 shows the page rendered on a mobile browser.
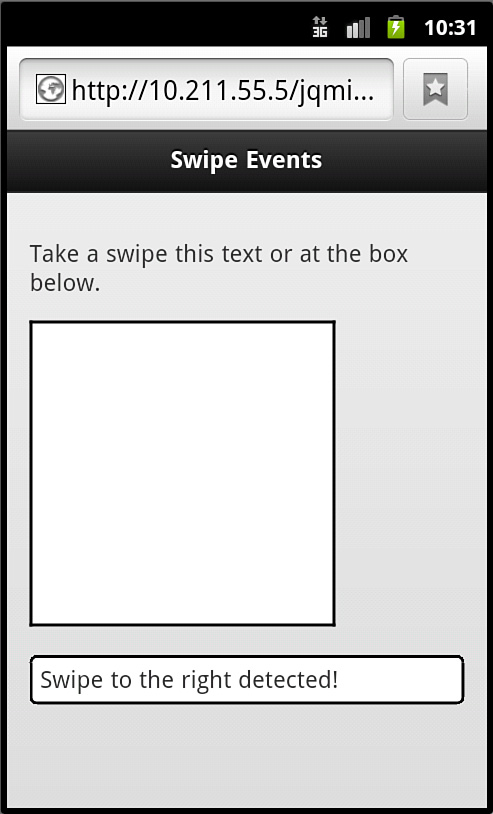
Figure 12.5 The swiperight event has been triggered changing the caption text.
Looking at Virtual Mouse Events
The virtual mouse events are an answer to compatibility problems between mobile and desktop browsers. For example, some mobile browsers support an event called touchstart, while other mobile browsers do not. Desktop browsers support the mousemove event and have support for hover through the use of the mouseover event while mobile devices have a hard time emulating or using the correct event. These problems are solved in jQuery Mobile by using virtual mouse events. When a page is loaded with jQuery Mobile, the browser is checked for event support. Events are then supported based on the virtual mouse events. While this happens in the background, you can bind virtual mouse events to run specific functions, or even to get data that can be used in other functions.
The virtual mouse events that are available are
• vmouseover
• vmousedown
• vmousemove
• vmouseup
• vclick
• vmousecancel
Listing 12.6 shows a snippet of code taken from vmouse_events.html. This snippet shows the vmousedown, vmousemove, and the vmouseover events being bound on a page.
Listing 12.6 Using the vmousedown, vmousemove, and vmouseover Events
1: <script>
2: $(document).on('pageinit', function() {
3: $(".sub-nav").hide();
4: $("#home").on('vmousedown','#hover-nav', function(e) {
5: $("#debug").prepend("vmousedown: x: "+e.pageX+" y: "+e.pageY+"<br />");
6: });
7: $("#home").on('vmousemove','#hover-nav', function(e) {
8: $("#debug").prepend("vmousemove: x: "+e.pageX+" y: "+e.pageY+"<br />");
9: });
10: $("#home").on('vmouseover','#hover-nav', function(e) {
11: $("#debug").prepend("vmouseover: x: "+e.pageX+" y: "+e.pageY+"<br />");
12: $(".sub-nav").show();
13: });
14: });
15: </script>
Just like swipe events, virtual mouse events need to run inside the pageinit event. Line 2 binds the pageinit event by using the .on() function. Line 3 is a line of jQuery script that searches the DOM for any element with an attribute of class="sub-nav" and removes it from view. Line 4 shows the vmousedown being bound to the element with an attribute of id="hover-nav", as well as passing the event object (shown as the variable e) through the anonymous function that is used as a callback. Line 5 shows the .prepend() function besing used on a selector for the element with an attribute of id="debug". Inside the .prepend() function is some text that details what is happening during the vmousedown event. Virtual mouse events carry data about where they are triggered; we are displaying that data by using .pageX and .pageY on the event object (variable e) that was passed through the anonymous function. Line 6 closes the .on() function that we are using to bind the vmousedown event.
Line 7-9 are similar to lines 4-6. On line 7, vmousemove is bound to the same element that vmousedown was bound to. Also just like the code for the vmousedown event found on line 4, the event object (shown as the variable e) being passed through the anonymous function which will allow the code on line 8 to run as a callback. Line 8 shows the same element with the attribute of id="debug" getting some text added to it by use of the .prepend() function. Line 9 closes out the .on() function that we are using to bind vmousemove.
Lines 10-13 are also similar to the previous lines. Line 10 shows that the same selector that was used for binding vmousedown and vmousemove is used again with the .on() function to bind vmouseover. Line 11 shows that once again the element with an attribute of id="debug" is going to get some text added to it by use of the .prepend() function. Line 12 shows a selector that will select any elements with an attribute of class="sub-nav" and make them visible by using the .show() function on them. Line 13 closes the .on() function that is being used to bind vmouseover, and line 14 closes out the .on() function that is used to bind pageinit to the page.
The code shown behaves a little differently on desktops than it does on a mobile device. On a mobile device, vmouseover is triggered when the area that has been bound to it is tapped. The vmousemove event is triggered when the screen is swiped (but before the swipe event is triggered). The mousedown event also is triggered whenever the screen is tapped.
Figure 12.6 shows the file vmouse_events.html being run in a mobile browser. A few events have been triggered so that you see the output from the code.
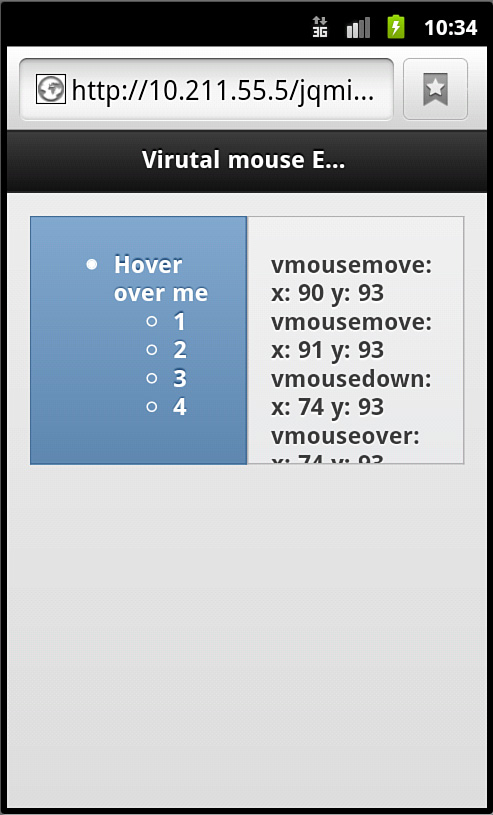
Figure 12.6 The area on the left has been bound to a few virtual mouse events. The area on the right displays the output of the events being triggered.
When using virtual mouse events, the jQuery Mobile team gives a warning about using the vclick event. While it does work, there are instances where the element or object clicked may shift, move, or be incorrectly calculated. This can cause frustration during development and especially for end users when they are interacting with it. It is suggested that you use a plain click event instead.
The vmouseup and vmousecancel events work in as close to the same manner as the mouseup and mousecancel events in JavaScript work. The differences are tied to the user tapping instead of clicking.
Adapting to the Orientation Event
When viewing a mobile device, there are two options or modes for screen orientation. When a page is viewed in portrait, it means that the height of the screen is greater than the width of the screen. When a page is viewed in landscape, the width of the screen is greater than the height of the screen.
Unless the device is locked into one viewing mode, the screen can be rotated and content shifted dynamically to make use of the extra space. While jQuery Mobile handles the resize of many of your elements, you may want to trigger a custom function whenever a screen change is detected.
Listing 12.7 shows a snippet of code used to bind the orientationchange event to a page and run code when it is triggered.
Listing 12.7 Using the orientationchange Event
1: $(document).on('pageinit', function() {
2: $(window).on('orientationchange', function(e) {
3: $("#mode").html('orientation is currently '+e.orientation);
4: });
5: });
The orientationchange event needs to run inside either the $(document).ready() function or the pageinit event. Line 1 shows that we are binding the pageinit event with the .on() function. Line 2 starts with a selector for the window object and uses the .on() function to attach the orientationchange event to the window. The event object (variable e) is passed to the anonymous function and contains a property called orientation that will pass back a value of either “landscape” or “portrait”. Line 3 gives an example of using the event object (variable e) and the orientation property by showing the value of it inside the element with an attribute of id="mode" when the event is triggered. Line 4 closes the .on() function for the orientationchange event, and line 5 closes the .on() function for the pageinit event.
As a failsafe, devices that do not support the use of window.orientation will instead fall back to the resize event. Some developers have reported a timing issue where the orientationchange event fires before the screen has actually rotated, causing incorrect values to appear or causing the event to not function as desired. To get around this you can either wrap the callback function you are using in the setTimeout() function, or you can try changing the settings of jQuery Mobile to not use the orientationchange event. This can be done with the following snippet:
$.mobile.orientationChangeEnabled = false;
Figures 12.7 and 12.8 show a page with the snippet of code from Listing 12.7 running in landscape and portrait modes.
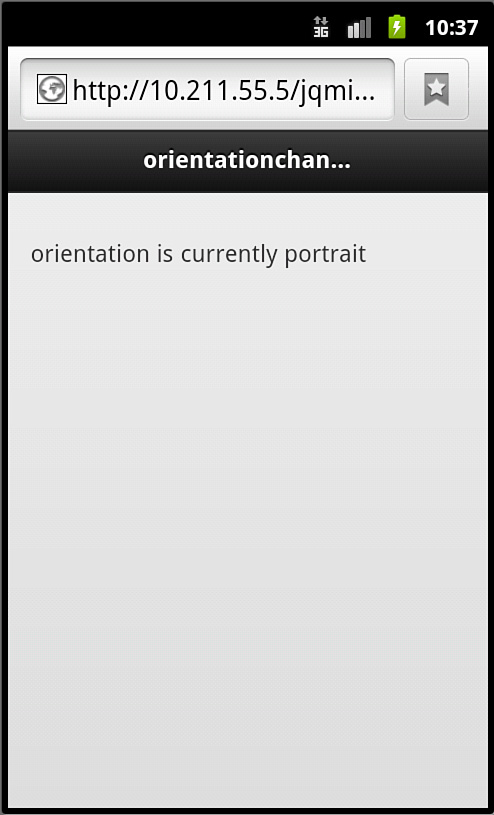
Figure 12.7 A mobile page using the orienationchange event in portrait
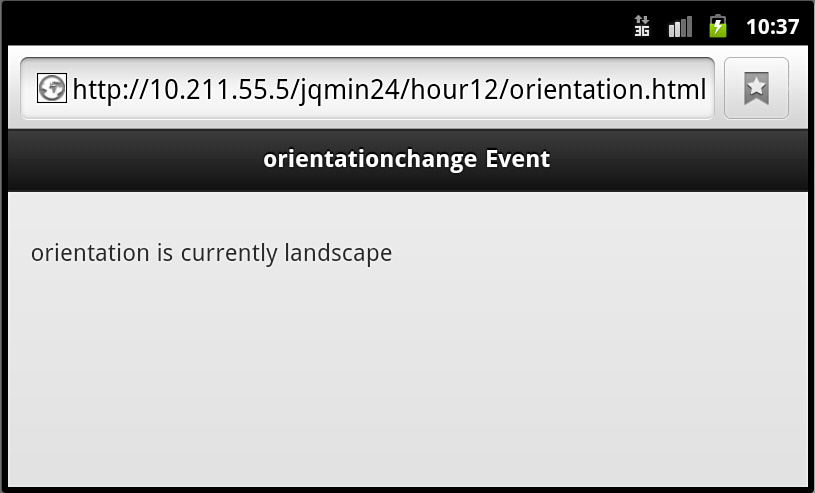
Figure 12.8 A mobile page using the orientationchange event in landscape
If you are using the orientationchange event to trigger a change in your styles, I suggest that you consider the use of CSS3 media queries instead.
Summary
This hour covered several of the events available when using jQuery Mobile. You should now have a good idea of how to tie into an event and when it will run. You saw that many events rely on the use of the pageinit event.
You learned about the use of touch events including tap, taphold, swipe, swipeleft, and swiperight. You also learned about the virtual mouse events and how they can be used to normalize event handling between desktop and mobile browsers.
Q&A
Q. Is it possible to use a hover on a mobile device?
A. Not exactly. Because a hover is similar to a mouseover event, it can be triggered. However, when your finger is removed from the screen the virtual mouse will also be removed making the code running in the mouseover event no longer function. You can create a pseudo-hover by attaching a vmouseover event to an element and then assigning another vmouseover event to every other element in the DOM that will close, cancel, or complete the code from the first vmouseover. This is an expensive and somewhat clumsy solution, but it is possible.
Q. So I can’t use the $(document).ready() or $(function() {}) on my mobile pages?
A. You can, but it’s not recommended. Remember that because jQuery Mobile runs your site through AJAX, the only page that will execute your $(document).ready() function will be the first page. If that is the behavior you are expecting, then go for it. Although you will be miles better off by planning ahead and using the pageinit event, especially if you plan on growing your application or site.
Q. Will the screen orientation work on a desktop browser?
A. Yes, it does actually work on the desktop. This is done through a calculation that runs during the resize event. When the screen is resized the current width and height are compared, and the event will trigger based on the window size.
Workshop
The workshop contains a quiz and some exercises to help you check your comprehension and understanding.
Quiz
1. During page initialization, what three stages does a page go through?
2. What is the time difference in processing between a touch and click event?
3. How do you bind the pageinit event to a specific page?
4. What virtual mouse events are available with jQuery Mobile?
5. True or False: The swipe event will be triggered for screen swipes to both the left and the right.
Answers
1. Before page creation, page creation, and page initialization.
2. There is roughly a 300ms difference between a click event and a touch event.
3. When you create your page container using data-role="page", you also need to make sure that it has an id attribute set. The .live() function is then used on the id through a selector to bind the pageinit event to it.
4. The virtual mouse events that are accessible are vmouseover, vmousedown, vmousemove, vmouseup, vclick, and vmousecancel.
5. True. You can use the swipeleft and swiperight events when you want to tie specific functions to a swipe in a specific direction.
Exercises
1. Using the example code for page events, try adding some new elements to your page. Explore adding them during different stages of the page load and see whether they were styled as expected.
2. Build a page that uses swipe events. Make two functions and trigger them with the swipeleft and swiperight events.
3. Build a function that runs during the orientationchange event. Try adding a function that changes the classes applied to elements on your page depending on what orientation the device is currently. Test it out on a desktop browser and a mobile browser.