
Start by trimming your carton to size. Measure 1 1/2″ from the back (the side opposite the pouring spout—see Figure 21-3) and make a dashed line down one side, around the bottom, and up the other side, roughly bisecting the carton along its length. Although it might seem like overkill, having the full line will make Step 2 much easier.
Use the utility knife to cut along the dotted line, then discard the front of the carton and set aside the remainder.
Next, prepare to build the main body of the flash boiler, a 1/2″ coil of copper tubing. Be forewarned that tubing—especially very narrow, thin-walled tubing like this—is prone to crimping when you bend it, especially if you do so freehand. Since water and steam need to flow unobstructed through the Putt-Putt Boat’s engine, a crimped flash boiler won’t do. There are several tricks to bending a pipe without crimping it. Many folks get good results by packing the tube with fine sand and taping up the ends; the sand functions as a mandrel, giving support to the inner walls of the tube, so that it bends without kinking. I prefer using a simple homemade jig, which immobilizes the bitter end (that is, the end you aren’t working) as you pull the working end around, thus preventing crimping. As you see in Figure 21-4, this jig can be as simple as a piece of hearty scrap wood and a couple of old angle brackets.
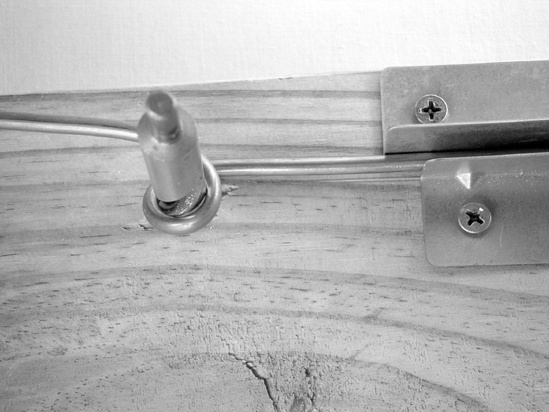
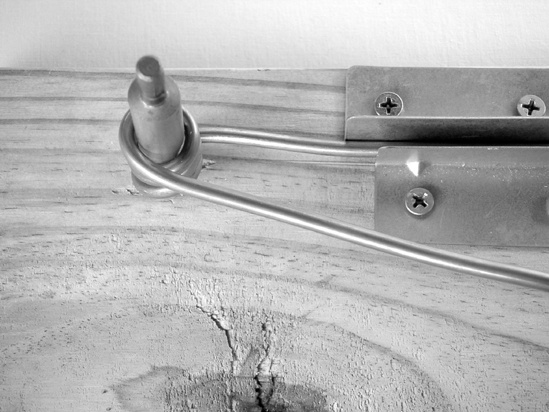
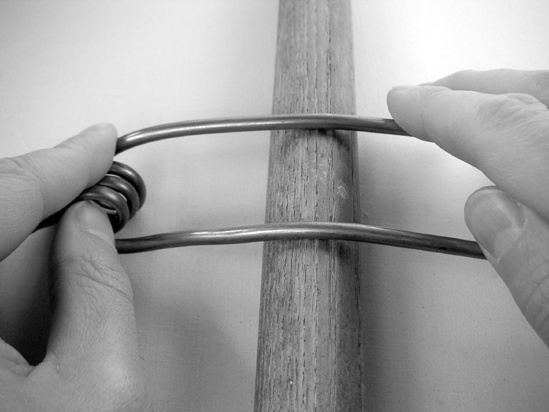
To make a jig, start by driving the 1/2″ bit into the wood and then removing it from the drill—this will serve as the bending guide for the 1/2″ coil. Lay your piece of straight copper tube next to the guide, parallel with the edge of the board, and trace one edge (Figure 21-5).
Remove the tube, install one angle bracket along the line, then replace the tube so that a little more than 6″ is below the bending guide (this is the tube’s bitter end). Carefully snug the other angle bracket into place, locking the tube to the board. Be careful not to crush the tube! You don’t need to worry about getting the brackets neatly lined up, as long as they run parallel to each other and immobilize the tube.
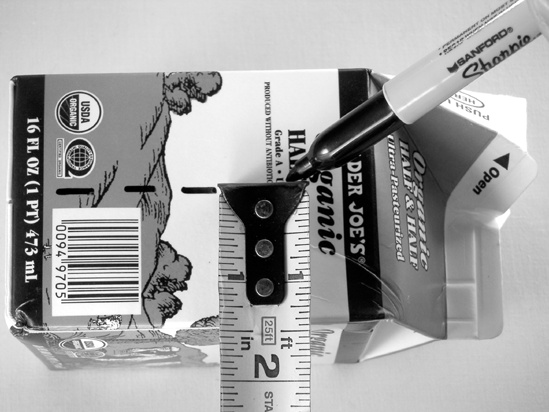
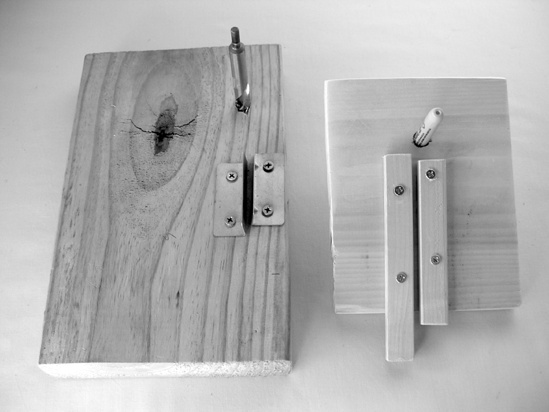
Figure 21-4. Here are two versions of the simple pipe-bending jig. The one on the left is made from a pair of shelf brackets and uses a 1/2″ drill bit as the bending guide; it makes a counterclockwise coil. The jig on the right is scrap wood, with a Sharpie marker slid through a 1/2″ hole in the board as a bending guide, and makes a clockwise coil. Both work great.
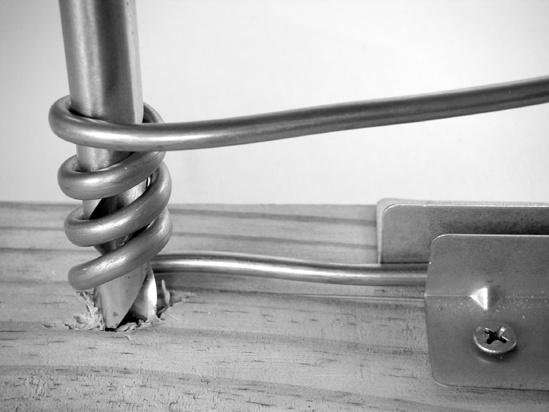
After checking to be sure that the bitter end of the tube is secured, slowly and firmly pull the working end around the guide. You want to add three full turns and then a half turn so that both the intake and exhaust are on the same side of the coil. It’s easiest if you let the turns coil up the guide and then press them all together to tighten the coil after you’ve made the last half turn (as shown at the bottom of Figure 21-6). To test the coil for obstructing crimps, take a sip of water into your mouth, then blow it through the tube; if you get squirted in the face, then all is well. Set the coil aside.
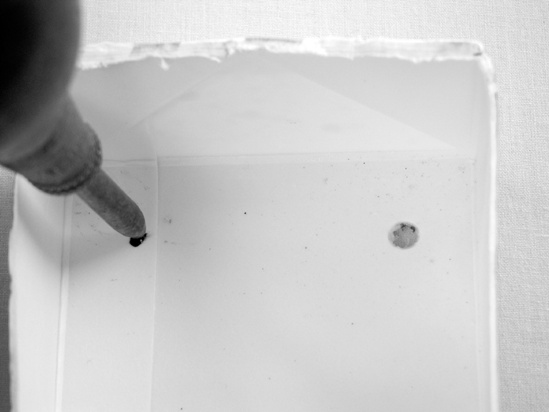
Take the halved carton (now the hull of the boat), and mark two points approximately 1/2″ from the rear of the hull and 1/2″ in from each side. If you have an awl, use it to pop two holes in the bottom of the boat roughly the same diameter as your exhaust and intake tailpipes (see Figure 21-7). Otherwise, use a sharp nail to start the holes and a sharpened pencil to enlarge them.
Check the fit of the boiler in your boat. The coils constitute the bulk of the boat’s weight, especially when the burner is in place under them. Usually, you’ll want about 3″ of tube (measured from the top of the coil) inside the boat, and you’ll want the coil centered in the hull. It’s okay if a lot of tube hangs out the back; we’ll trim that in Step 8. When you find a good fit, use a Sharpie to mark the tube where it meets the floor of the hull.
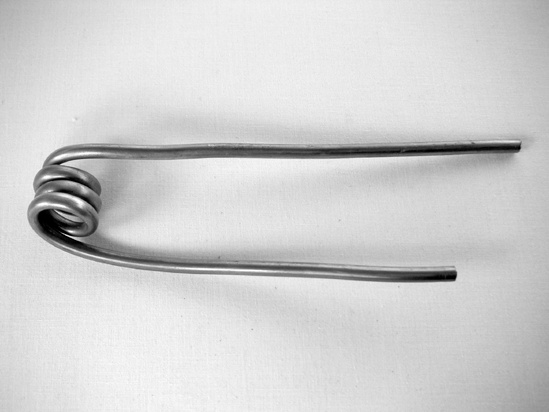
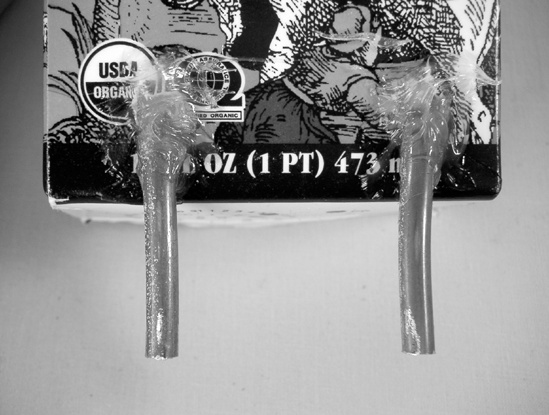
Now you’ll bend the tailpipes so that they can be secured to the bottom of the hull, keeping the coil above the burner and directly in the flame. Remove the coil from the hull of the boat, and lay the tailpipes over your sturdy curved surface. Slowly apply pressure so that they bend near your marks (see Figure 21-8; it’s pretty easy to avoid crimping at this stage, although it doesn’t hurt to blow another sip of water through the boiler after you’ve bent the tailpipes, just to be sure your tube remains unobstructed).
Reinstall the coil so that the bends in the tailpipes are at the holes in the hull and the tailpipes stick out the back of the boat. Measuring from the back of the boat, mark 1″ along each tailpipe (as shown in Figure 21-9). Remove the coil, and gently lock the tailpipe into the jig from Step 3 (or a modified version of it—you don’t have to worry about crimping at this stage, just make sure to secure the tube while you saw; if you own a table vise, that’s just as good). Carefully cut the tailpipe at the mark with a hacksaw. (Since the tube is so thin, you may be tempted to trim it with tin snips; don’t try it! It’s way too easy to crimp the tube closed with snips.) Repeat with the other tailpipe. Both cuts will be a little rough, so you will probably want to deburr each tailpipe using a rounded file (although skipping this step won’t impede the boat’s operation).
Finally, install the boiler coil. Again, thread the tailpipes through the holes in the bottom of the hull, making sure the bends are even with the holes. Flip the boat over, and glue the tailpipes to the bottom of the boat, making a point to smear a good bit of glue into the holes in the hull, sealing them (Figure 21-10). Let the glue dry overnight—a strip of masking tape or large rubber band around the hull and tailpipes will hold everything in place as it sets.
Once the glue is completely dry, you’re ready for your first voyage. As the bathtub is filling, prime the flash boiler. In order for the engine to work, it needs to start out completely filled with water. This can be accomplished by pouring water into the tube from a small cup (flexible plastic shot glass, like the kind that comes with a bottle of cough syrup, works okay), possibly facilitated with a tiny funnel. But the easiest way to prime the engine is to fill your mouth with water, hold the tube between your lips, and blow until water burbles out the other end. Once the engine is primed, set the boat in the tub without dumping the water out of the primed engine. Soak a cotton ball with rubbing alcohol, place the cotton ball in the metal dish, slide the dish under the coil, and light her up. In a few seconds, the boat will begin scooting around the tub.


Warning
It can be a touch tricky to blow out an alcohol-soaked cotton ball, so you might want to keep another metal dish handy to snuff the burner. Note that the burner’s metal base and the copper coil can easily get hot enough to brand you and that the water coming out of the boat’s exhaust is boiling. This is not a bath-time tub toy for baby!