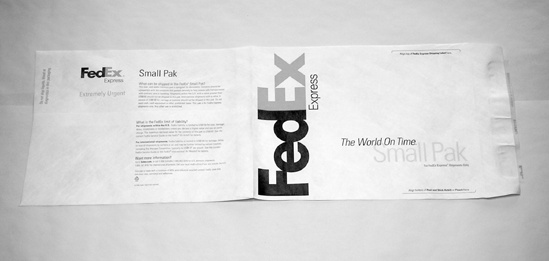
Once again, begin by constructing the sails. Split three 10″×13″ envelopes down both 13″ sides, resulting in three strips, each 10″ wide by 26″ long, plus the self-adhesive flaps (leave the flaps intact; see Figure 23-14).
Use the self-adhesive flaps to connect the three envelopes in a single 78″ long strip, as shown in Figure 23-15. Do the same with three more envelopes, and then set the two sails aside.
Now to build the frame, which is more complex than the Diamond Kite’s simple crossed spars. Select the four straightest pieces of bamboo. Cut each to 36″ long. These will be used for the long spars along the kite’s sides.
Next cut four 21″ pieces of bamboo to be used as cross braces.
Finally, cut eight 15″ lengths of bamboo; these will be used to frame the top and bottom sails of the kite. Set them aside for now.
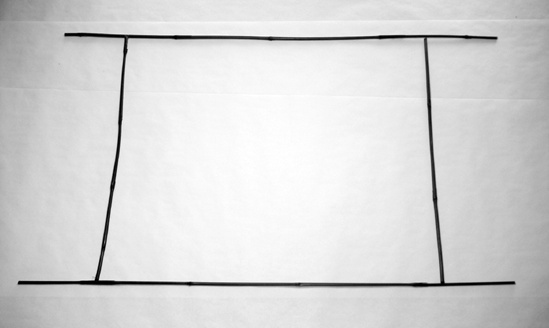
To build the frame, lay two of the 36″ long bamboo pieces parallel to each other on your work table, and set two of the 21″ cross braces 5″ from either end—see Figure 23-16. These are the kite’s spars and cross braces.
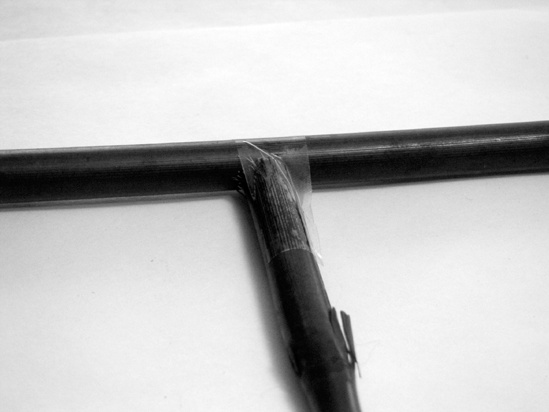
To create a taut sail, you’ll need to keep the cross braces from butting up against the long spars, rather than crossing them—this makes building the frame a bit tricky. Make sure that the cross braces are placed squarely 5″ from either end of the spar, and then use a 1/2″ wide strip of packing tape to secure them temporarily (Figure 23-17).
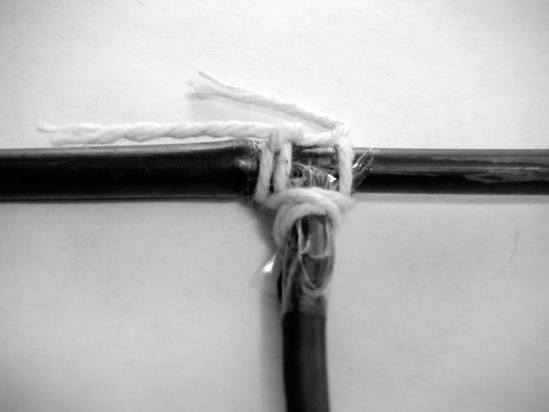
Using the thicker string (not the kite string), wrap each joint, as shown in Figure 23-18. (Don’t worry about exactly emulating the wrapping shown in the figure; anything stable will be fine).
When you’re finished, you’ll have a sturdy two-rung “ladder.” Build a second ladder with the other two 36″ spars and 21″ cross braces.
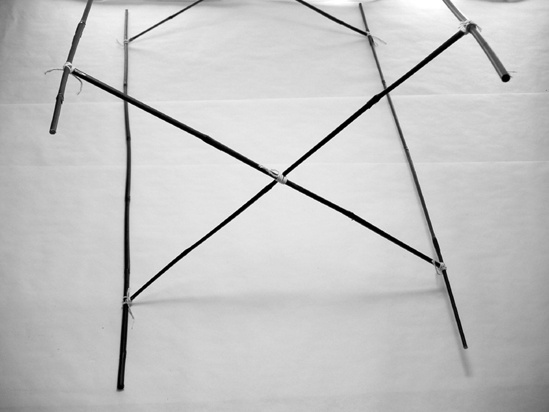
Thread one half of the frame into the other, as shown in Figure 23-19. (Don’t worry; the bamboo is flexible.) The 21″ braces of each ladder cross in the middle, as shown in the figure. Wrap the intersection with thick cotton string. Repeat this on the other end of the kite. You want these to be basically centered and perpendicular.
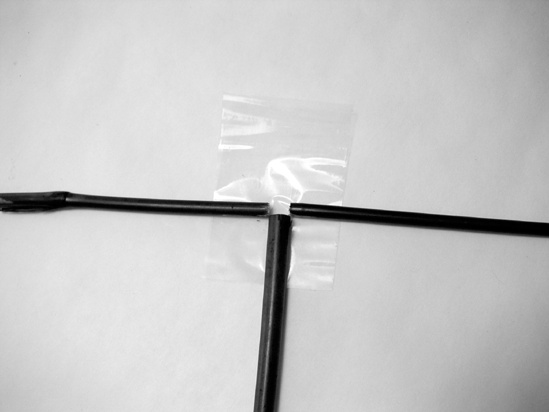
To finish the kite’s frame, use the 15″ pieces of bamboo to frame the four rectangular faces of the kite. The easiest way to accomplish this is shown in Figure 23-20. First lay out a strip of packing tape, sticky side up, and make a T on top of the tape using two 15″ cross bars as the horizontal arms and the long 36″ spar as the vertical (note the gap between the ends of the 15″ spars).
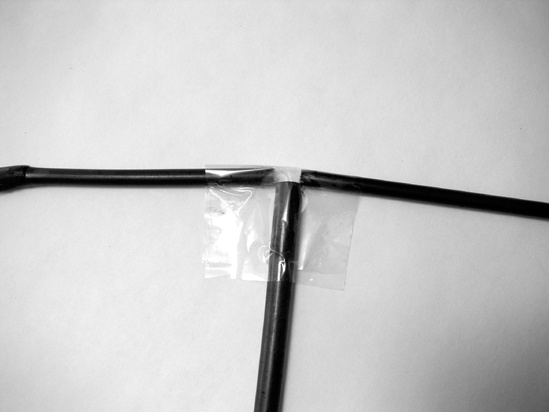
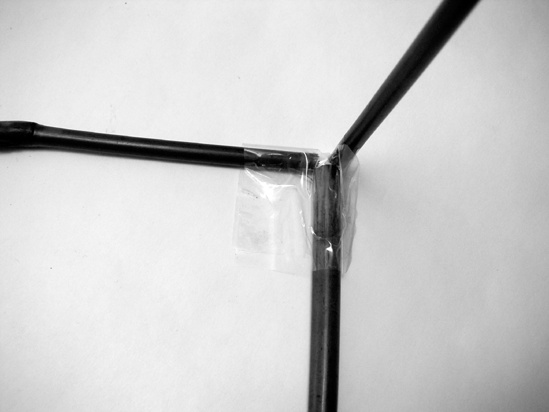
Fold the tape over the joint, and then bend the joint so the two 15″ cross bars are perpendicular to each other, as shown at the far right of Figure 23-20.
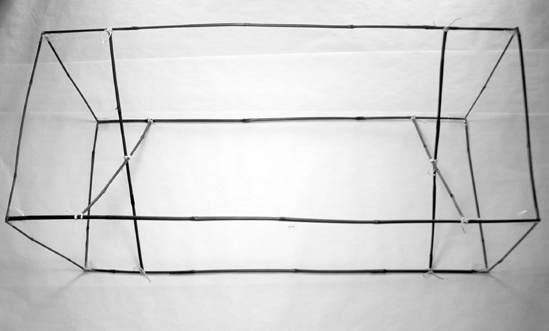
Repeat this on all four sides of the top and bottom of the kite. Figure 23-21 shows the finished frame.
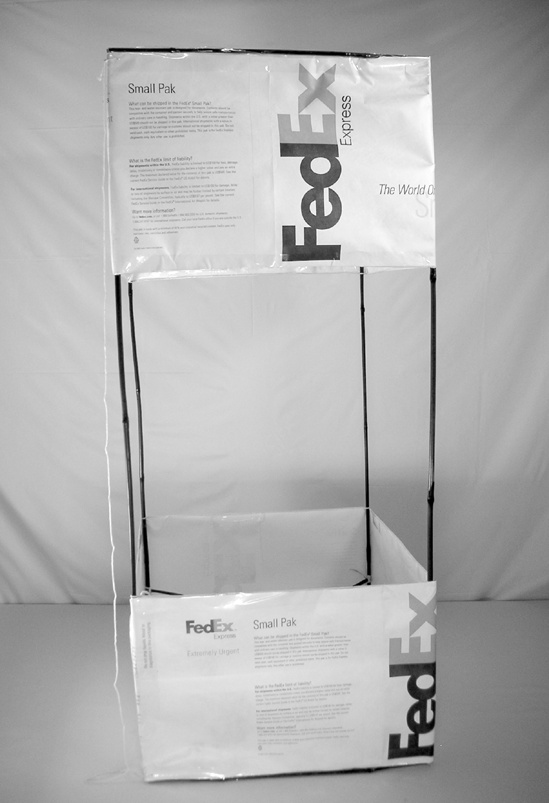
Now attach the sails. Stand the kite on its end and use the self-adhesive flap on one of the two long strips of Tyvek to secure it to one of the 36″ vertical spars. (You’ll need to snip a slit in the flap to accommodate the cross brace.)
Wrap the Tyvek around the kite so that one edge is flush with the bamboo cross bars. Trim off the excess sail, and use packing tape to secure the end.
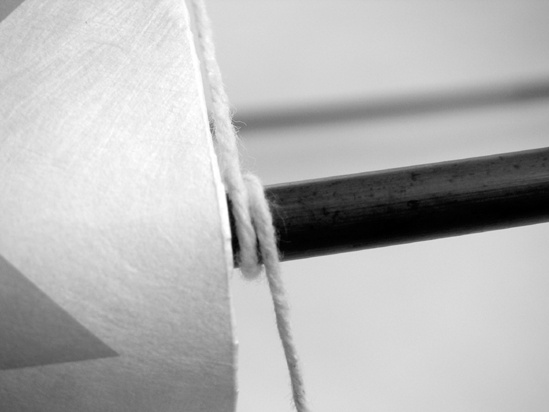
Run a length of string just inside the other edge of the Tyvek, looping the string around each vertical spar, as in Figure 23-22. Because this string is meant to reinforce the “inside” edge of the sail (preventing in-flight flapping), you need to make this line taut without deforming the kite.
Tie off the string. Use long strips of packing tape to secure the top edge of the sail to the bamboo cross bars and the bottom edge of the sail to the reinforcing string.
Flip the kite and repeat Steps 14–17 to attach the second sail to the kite.
Now connect the bridle. Attach a 48″ length of string to the top and bottom of one of the spars, as is shown in the kite anatomy diagram, Figure 23-1. You might need to poke a hole through some tape and the sail to attach the string; that’s okay.
(optional) Attach the bridle ring to the bridle. See Adding the Bridle Ring.
(optional) Box kites rarely need tails, but if you’re having trouble keeping the kite stable in flight, you can try attaching a small tail (4′ or 5′ long) to the bottom of the bridle, where it ties to the spar. (The box kite is symmetrical, so “bottom” is a little arbitrary; as Figure 23-1 illustrates, whichever end of the kite has the longer length of bridle will be lower in flight.)