Although we often think of kite flying seasons as the spring and summer, in most of North America autumn is the best time to fly: the winds are a consistent speed and tend not to change direction abruptly. The beach is a great place for kite flying all year long, since the wind is steady, strong, and doesn’t often change directions. Although the Diamond Kite can cope excellently with fickle breezes, the heavier Box Kite can be difficult to get up in gusty, intermittent winds.
The box kite was developed by skybound Australians, and a large box kite can produce a terrific amount of lift. A good gust, and a sturdy kite, can easily snap a lesser kite string (and thin cotton kite string can give you a nasty cut as it runs through your fingers). Consider wearing biking gloves when you’re flying in high winds and upgrading to a spool of 90-pound test nylon kite string.
After you’ve purchased a new spool of kite string, it’s a good idea to unwind the whole thing and make sure that the line is secured to the spool. The end of the string is often held in place with a scrap of tape or nothing at all; this can be a nasty surprise on an otherwise beautiful day. As you rewind the line, you can use a black marker to mark off every ten feet; once the kite is up and flying, you’re going to start to wonder how high it is.
You can tie the control line (your big spool of kite string) directly to the kite’s bridle, but this can make changing bridle angles a hassle—and bridle adjustments can be important, because you often need to fine-tune to accommodate various wind conditions. Even worse, string-on-string rubbing creates a lot of friction and can cut the line. Most kite makers elect to connect the control line to the bridle with a bridle ring (the optional 1/2″ split ring from the supplies list). To connect the bridle ring to the bridle (illustrated in Figure 23-23):
Pass a bit of bridle through the ring.
Loop the bridle over the ring.
Carefully tighten the loop so that it forms a cow hitch (also called a lark’s head) around the ring.
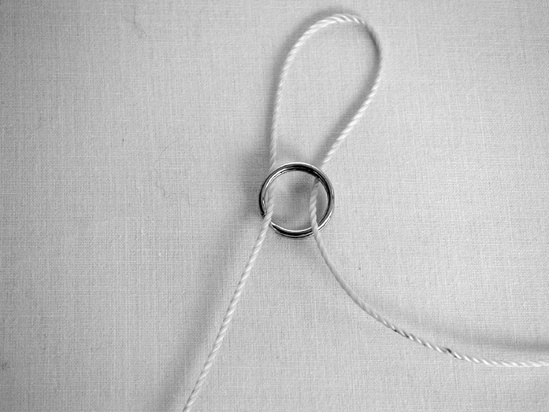


Figure 23-23. Three steps to connecting a bridle ring: (1) pass through the ring, (2) loop over, (3) tighten.
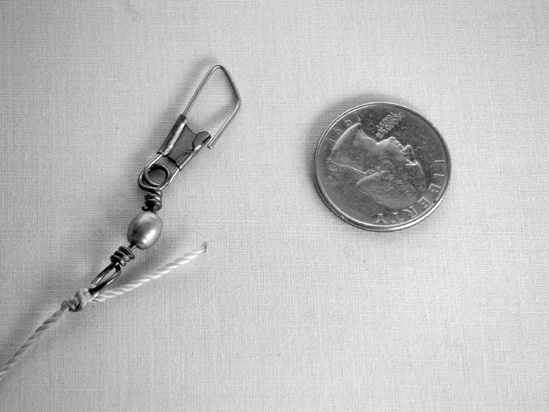
You can then connect the control line onto the bridle ring however you choose. Doing so with a large fishing swivel, like the one shown in Figure 23-24, will keep the line from twisting if the kite loops and also make it easier to switch kites in the field.
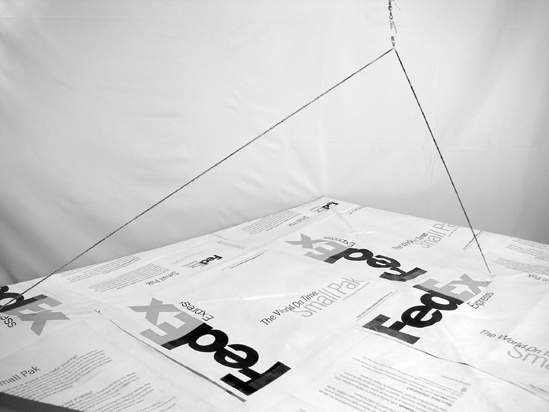
Before you launch either the Box or Diamond Kite, place the bridle ring about 14″ from the top of the bridle (the “top” being the point where the bridle connects to the top of the kite). If you dangle the kite by holding the bridle ring, you’ll see that the two halves of the bridle form a right triangle (more or less), with the kite as its hypotenuse (Figure 23-25).
Depending on wind conditions, you can slide the ring up or down. Sliding it up reduces the amount of sail the kite gives the wind; this is good in steady (if light) breezes, so the kite can climb quickly, skating “on top” of the breeze. Sliding the bridle ring down exposes more sail to the wind; the kite will stay low but will generate more (sometimes much more) lift.
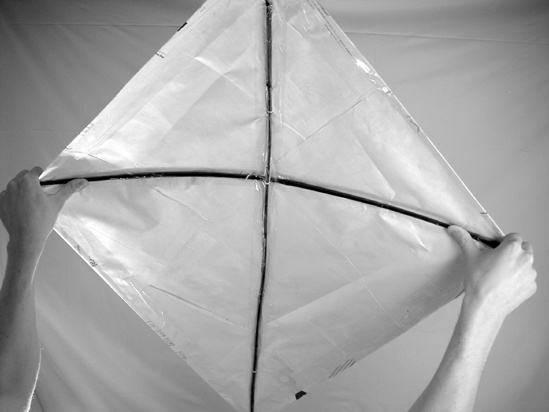
It pays to give the Diamond Kite’s cross bar a pre-flight bow, as in Figure 23-26. Don’t expect the bamboo to hold this bend; the goal is to limber up the center of the horizontal spar so that it will readily bend in the middle. A symmetrically curved surface will encourage air to spill evenly and smoothly off the face of the sail.